こんにちは @n0bisuke です。 #FITCに行ってきた帰り道で書いてます。
#tng19での会長の発表資料をNode.js Web Application Survey 2016 by Yosuke Furukawa眺めていて、初めて知ったフレームワークが気になったのでチュートリアル的に使ってみました。
(ちなみに#tng19は別イベントでいけなかった...)
メリットデメリットとか言えるくらい使い込んではないのであくまでレポートみたいな感じです。
公式: http://www.nodaljs.com/
GitHub: https://github.com/keithwhor/nodal
今回試した出来上がったもの: https://github.com/n0bisuke/nodal-sample
まだQiitaにも載ってないし、日本語記事ってもしかしたら無いのかも
PostgresSQLにアクセスしてJSONでデータを返すAPIサーバーを立てるところまでです。
Nodalについて
- フルスタックなフレームワーク
- PostgresSQL オンリー
- サーバータイプを選べる
- Branding Server
- API Server
- Application Server
今回の環境
- Mac OS 10.10
- Node.js 5.6.0
- PostgreSQL 9.5.1
はじめてみる
nodalのインストール
$ npm install nodal -g
nodalコマンドが使えるようになるので、アプリケーションを作りたいディレクトリで以下を実行
$ nodal new
対話式なインターフェイスになりNameとAuthorを聞かれるので、アプリケーション名と自分の名前を入力しましょう。
myapp / n0bisukeと入力しました。
Welcome to Nodal! v0.7.5

? Name myapp
? Author n0bisuke
Creating directory "myapp"...

Copying Nodal directory structure and files...

Copying cli...
Copying core...
Copying test...
Copying node_modules...
Copying package.json...

All done!

Your new Nodal project, myapp, is ready to go! :)

Have fun n0bisuke, and check out https://github.com/keithwhor/nodal for the most up-to-date Nodal information

Pro tip: You can try running your server right away with:

  cd myapp && nodal s
プロジェクトが作成されたみたいです。lsしてみるとmysqppという名前のフォルダができてます。
$ ls
myapp
フォルダの中はこんな感じでした。
$ ls myapp
Procfile     config       node_modules static
README.md    db           package.json tasks
app          initializers renderware   test
cluster.js   middleware   schedulers   worker.js
サーバーを起動してみる。
$ cd myapp && nodal s

> myapp@0.0.0 start /Users/sugawara_nobisuke/n0bisuke/lab/nodal-test/myapp
> NODE_ENV=development node cluster.js

[Nodal.Daemon] Startup: Initializing
Initializer Ready
[Nodal.Daemon] Startup: Spawning HTTP Workers
[Nodal.38669] Startup: Starting HTTP Worker
[Nodal.38665] Startup: Starting HTTP Worker
[Nodal.38670] Startup: Starting HTTP Worker
[Nodal.38665] Ready: HTTP Worker listening on port 3000
[Nodal.38669] Ready: HTTP Worker listening on port 3000
[Nodal.38670] Ready: HTTP Worker listening on port 3000
[Nodal.38667] Startup: Starting HTTP Worker
[Nodal.38667] Ready: HTTP Worker listening on port 3000
http://localhost:3000 にアクセスしてみます。
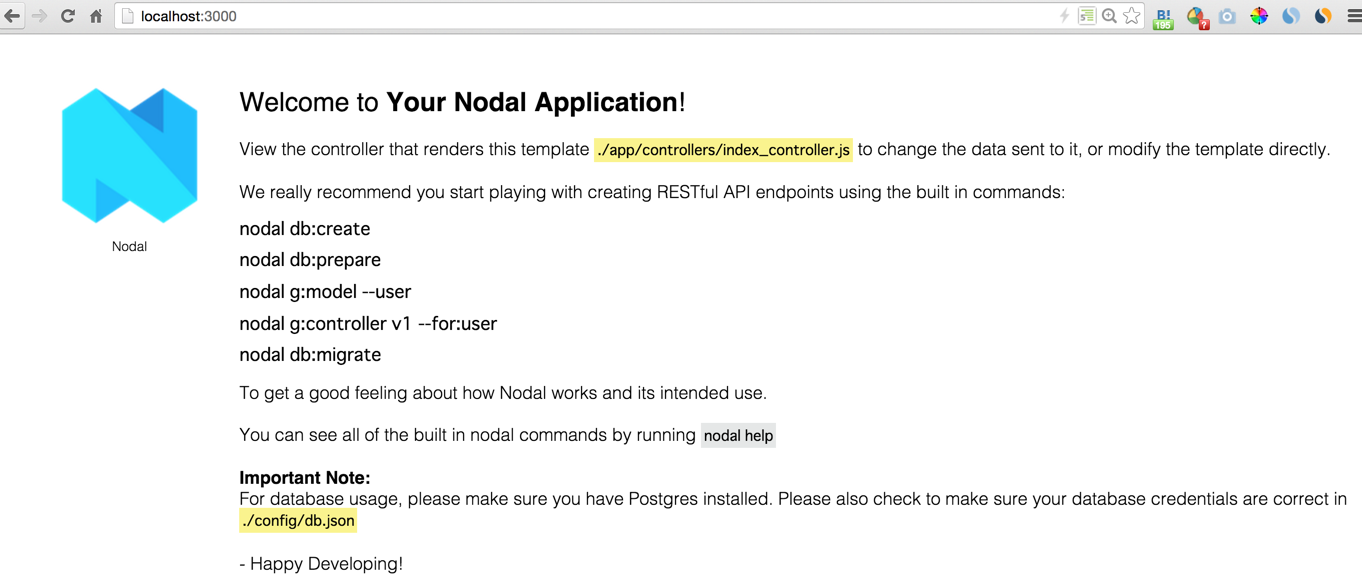
ページが表示されましたね!
データベースを使ってみる
NodalではPostgreSQLを使う仕様になっているみたいです。
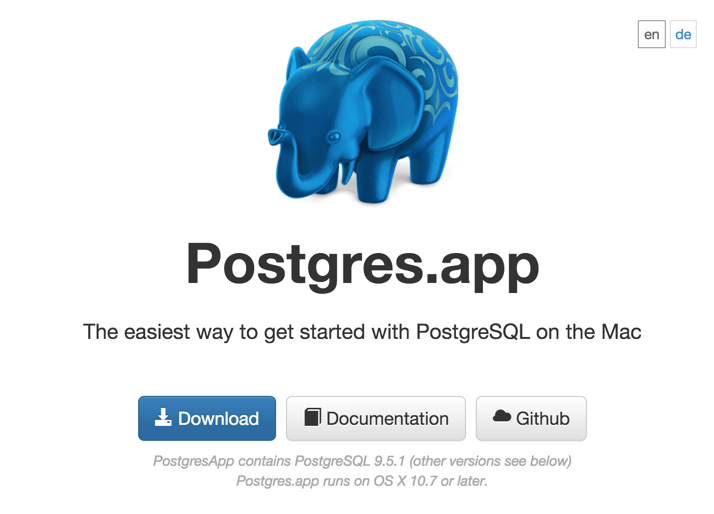
http://postgresapp.com/ ここからMac版のPostgresSQLのサーバーアプリケーションをダウンロードしましょう。
ダウンロードしたzipをkaitousurutoPostgresという名前のアプリケーションが出てくるのでMacのアプリケーションフォルダに移動させ、実行します。
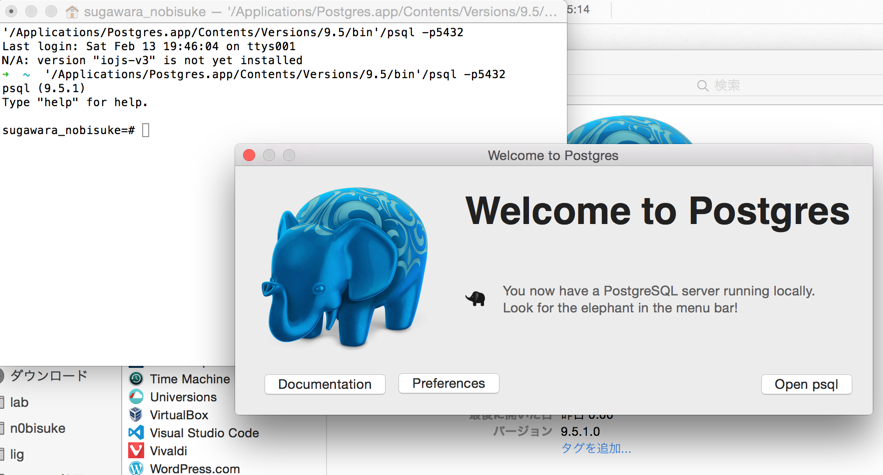
Open psqlを押すとターミナルが起動します。以下を実行しましょう。
createuser postgres -s

Postgresを利用する準備ができました。
あとは以下のコマンドを実行していきます。
nodal db:create
nodal db:prepare
nodal g:model --user
nodal g:controller v1 --for:user
nodal db:migrate
- データベース作成
$ nodal db:create

CREATE DATABASE "myapp_development"
[]
573ms

Database Info: Created empty database "myapp_development"
* データベース準備(?)
$ nodal db:prepare
Database Info: Transaction started...

DROP SCHEMA public CASCADE
[]


CREATE SCHEMA public
[]


CREATE TABLE "schema_migrations"("id" BIGINT NOT NULL,"schema" VARCHAR,CONSTRAINT "schema_migrations_id_pk" PRIMARY KEY("id"))
[]

Database Info: Commit started...
Database Info: Commit complete!
Database Info: Transaction complete!
Database Info: Prepared database "myapp_development" for migrations
- モデルの作成
--userオプションでNodal側で用意しているテンプレート的なuserモデルを作ってくれるっぽいです。
$ nodal g:model --user
Create: ./app/models/user.js
Create: ./db/migrations/2016021311305075__create_user.js
Installing additional packages in this directory...


> bcrypt@0.8.5 install /Users/sugawara_nobisuke/n0bisuke/lab/nodal-test/myapp/node_modules/bcrypt
> node-gyp rebuild

  CXX(target) Release/obj.target/bcrypt_lib/src/blowfish.o
  CXX(target) Release/obj.target/bcrypt_lib/src/bcrypt.o
  CXX(target) Release/obj.target/bcrypt_lib/src/bcrypt_node.o
  SOLINK_MODULE(target) Release/bcrypt_lib.node
myapp@0.0.0 /Users/sugawara_nobisuke/n0bisuke/lab/nodal-test/myapp
├─┬ bcrypt@0.8.5
│ ├── bindings@1.2.1
│ └── nan@2.0.5
└── nodal@0.7.5
- コントローラーの作成
--for:<modelname>でモデルを指定できます。
先ほど作ったuserモデルを指定しています。
$ nodal g:controller v1 --for:user
Create: ./app/controllers/v1/users_controller.js
Modify: ./app/router.js
自動的に./app/controllers/v1/users_controller.jsが作成され、./app/route.jsにルーティングの設定などが書き加えられます。
Yoeman使ってるときにと似てる
//省略

  /* generator: begin imports */

  const V1UsersController = Nodal.require('app/controllers/v1/users_controller.js');

  /* generator: end imports */

//省略
$ nodal db:migrate

SELECT ("schema_migrations"."id") AS "id" FROM schema_migrations AS "schema_migrations"
[]
22ms


SELECT "schema_migrations"."schema" FROM "schema_migrations" ORDER BY "id" DESC LIMIT 1
[]
9ms

Database Info: Transaction started...

CREATE TABLE "users"("id" BIGINT NOT NULL,"email" VARCHAR,"password" VARCHAR,"username" VARCHAR,"created_at" TIMESTAMP,"updated_at" TIMESTAMP,CONSTRAINT "users_id_pk" PRIMARY KEY("id"),CONSTRAINT "users_email_unique" UNIQUE("email"))
[]


CREATE SEQUENCE "users_id_seq" START 1 OWNED BY "users"."id"
[]


SELECT setval('"users_id_seq"', GREATEST(COALESCE(MAX("id"), 0), 0) + 1, false) FROM "users"
[]


ALTER TABLE "users" ALTER COLUMN "id" SET DEFAULT nextval('"users_id_seq"')
[]


INSERT INTO "schema_migrations"("id", "schema") VALUES(2016021311305075, '{

  "migration_id": 2016021311305075,

  "models": {

    "User": {

      "table": "users",

      "columns": [
        {"name": "id", "type": "serial", "properties": {"nullable":false,"primary_key":true,"auto_increment":true}},
        {"name": "email", "type": "string", "properties": {"unique":true}},
        {"name": "password", "type": "string", "properties": {}},
        {"name": "username", "type": "string", "properties": {}},
        {"name": "created_at", "type": "datetime", "properties": {}},
        {"name": "updated_at", "type": "datetime", "properties": {}}
      ]

    }

  }

}
')
[]

Database Info: Commit started...
Database Info: Commit complete!
Database Info: Transaction complete!
Migration complete!
PostgresSQLのコマンドとデータベースに値を入れるまで
PostgresSQLはほぼ使ったこと無いのでメモ的に残しつつuserテーブルにデータを追加します。
* データベース一覧を取得
\l
       Name        |       Owner       | Encoding |   Collate   |    Ctype    |   Access privileges
-------------------+-------------------+----------+-------------+-------------+-----------------------
 myapp_development | postgres          | UTF8     | en_US.UTF-8 | en_US.UTF-8 |
 postgres          | postgres          | UTF8     | en_US.UTF-8 | en_US.UTF-8 |
 sugawara_nobisuke | sugawara_nobisuke | UTF8     | en_US.UTF-8 | en_US.UTF-8 |
 template0         | postgres          | UTF8     | en_US.UTF-8 | en_US.UTF-8 | =c/postgres          +
                   |                   |          |             |             | postgres=CTc/postgres
 template1         | postgres          | UTF8     | en_US.UTF-8 | en_US.UTF-8 | =c/postgres          +
                   |                   |          |             |             | postgres=CTc/postgres
(5 rows)
一覧に先ほど作成されたmyapp_developmetというデータベースがありました。
- データベースに接続
\c データベース名
myapp_developmetを指定します。
\c myapp_development

You are now connected to database "myapp_development" as user "sugawara_nobisuke".
- テーブル一覧を取得
\d
myapp_development-# \d
                List of relations
 Schema |       Name        |   Type   |  Owner
--------+-------------------+----------+----------
 public | schema_migrations | table    | postgres
 public | users             | table    | postgres
 public | users_id_seq      | sequence | postgres
(3 rows)
先ほどuserモデルを作成した際にできたusersテーブルを発見。
- テーブルスキーマを確認
\d テーブル名
\d users
                                     Table "public.users"
   Column   |            Type             |                     Modifiers
------------+-----------------------------+----------------------------------------------------
 id         | bigint                      | not null default nextval('users_id_seq'::regclass)
 email      | character varying           |
 password   | character varying           |
 username   | character varying           |
 created_at | timestamp without time zone |
 updated_at | timestamp without time zone |
Indexes:
    "users_id_pk" PRIMARY KEY, btree (id)
    "users_email_unique" UNIQUE CONSTRAINT, btree (email)
これも先ほど作成した内容が表示されます。
* テーブルの中身を確認
MySQLと同じようにselect文でいけます。
myapp_development=# select * from users;
 id | email | password | username | created_at | updated_at
----+-------+----------+----------+------------+------------
(0 rows)
まだデータは入ってないです。
- データ追加
myapp_development=# INSERT INTO users VALUES (1, 'hoge@hoge.com', 'hogehoge', 'n0bisuke');
INSERT 0 1
これでidが1の行にn0bisukeユーザーが追加されました。
JSONが返ってくるのを確認する
先ほどのnodal g:controllerでコントローラーの作成をした際にrouter.jsに以下の内容も追記されています。
省略
/* generator: begin routes */

  router.route('/v1/users/{id}').use(V1UsersController);

  /* generator: end routes */

省略
http://localhost/v1/users/{id} にアクセスすることで指定したidのユーザーの情報を取得できるようにモデルとコントローラーが設定されています。
http://localhost/v1/users/1 にアクセスしてみましょう。

こんな感じで先ほどいれたデータがJSON形式で返ってきます。
まとめと感想など
こんな感じでチュートリアルっぽいことやってみました。
まだ全然機能を追えてないけど、controllerやmodel,routerあたりがしっかりしているあたりにフルスタックな匂いを感じてます。(expressは割と自分でしっかり書いてた気がした。)
Node.js5系を利用しようって指定があるのですが、constやclassといったES2015の記法をバリバリ使っているのが個人的には好きです。割と読みやすいし。
あとは、nodal sで起動したときに、ファイルの監視機能があって、ファイルを変更したら自動的に反映してくれるあたりが結構好きです。
Schedulerあたりの機能も使ってみたいなぁとこの辺を見ながら思ったり
http://www.nodaljs.com/static/docs/index.html#SchedulerEntry
他にも気になる機能があるので時間とれたらまた試してみたいとおもいます。
それでは!