LINEのエンジニアが教えてくれる、超・超・超初心者向けSwiftを始めてみよう勉強会 Vol3で勉強した内容の復習をしてみます。
ジェスチャーの追加
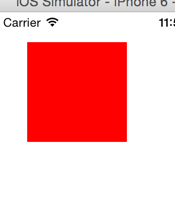
先に実行結果を載せます。
こんな感じで、四角い部分(ビュー)をタップすると色が変わるものを作ります。
手順
1. ViewControllerにViewを追加
x30, y30の場所に 縦100,横100のサイズの四角(Rect)view1として宣言して、色を赤に設定してViewControllerに追加します。
ViewControllr.swift
import UIKit

class ViewController: UIViewController {

    override func viewDidLoad() {

        super.viewDidLoad()

        var view1 = UIView(frame: CGRectMake(30, 30, 100, 100))
        view1.backgroundColor = .redColor()

        self.view.addSubview(view1)
    }

    override func didReceiveMemoryWarning() {
        super.didReceiveMemoryWarning()
        // Dispose of any resources that can be recreated.
    }

}
2. ジェスチャー時のアクションを追加
tapGesture()という関数を作成しました。
先ほど作ったView1の色を切り替える関数です。
ViewControllr.swift
import UIKit

class ViewController: UIViewController {

    override func viewDidLoad() {

        super.viewDidLoad()

        var view1 = UIView(frame: CGRectMake(30, 30, 100, 100))
        view1.backgroundColor = .redColor()

        self.view.addSubview(view1)
    }

    //追加
    func tapGesture(gestureRecognizer: UITapGestureRecognizer){
        // タップviewの色を変える (Red <=> Blue)
        if(view1.backgroundColor  == .redColor()) {
            view1.backgroundColor = .blueColor()
        }
        else {
            view1.backgroundColor = .redColor()
        }
    }


    override func didReceiveMemoryWarning() {
        super.didReceiveMemoryWarning()
        // Dispose of any resources that can be recreated.
    }

}
3. ジェスチャーイベントを追加する
2で作ったtapGesture()を発火するイベントを1で作ったview1に追加してあげます。
view1をtapGesture()関数内で参照したいため
view1の変数をグローバル宣言しておきます。4行目です
var view1: UIView!
また、今まではviewDidLoad()内でのみ使っていたので
var view1 = UIView(frame: CGRectMake(30, 30, 100, 100))
このように宣言していましたが、グローバル宣言してあるのでvarは削除しておきましょう。
↓
view1 = UIView(frame: CGRectMake(30, 30, 100, 100))
8~12行目でジェスチャーの生成->tapGestureとの関連付け->view1との関連付けを行っています。
ViewControllr.swift
import UIKit

class ViewController: UIViewController {
    var view1: UIView!

    override func viewDidLoad() {

        super.viewDidLoad()
        // Do any additional setup after loading the view, typically from a nib.

        // Playground - noun: a place where people can play
        self.view.backgroundColor = .whiteColor()

        // ビューの生成
        view1 = UIView(frame: CGRectMake(30, 30, 100, 100))
        view1.backgroundColor = .redColor()

        // ジェスチャーの生成
        var aSelector = Selector("tapGesture:")
        var tapRecognizer = UITapGestureRecognizer(target: self, action: aSelector)
        // ジェスチャーの追加
        view1.addGestureRecognizer(tapRecognizer)
        self.view.addSubview(view1)
    }


    func tapGesture(gestureRecognizer: UITapGestureRecognizer){
        // タップviewの色を変える (Red <=> Blue)
        if(view1.backgroundColor  == .redColor()) {
            view1.backgroundColor = .blueColor()
        }
        else {
            view1.backgroundColor = .redColor()
        }
    }

    override func didReceiveMemoryWarning() {
        super.didReceiveMemoryWarning()
        // Dispose of any resources that can be recreated.
    }

}
以上です。
実行するとこんなのができるはずです!
まとめ
久しぶりすぎて色々と勉強になりました!