MacからM5デバイスにメッセージ送信を行います。
ちなみに、M5Stackハッカソンの会場よりお送りしております。
MQTTのパブリッシュはHTTPリクエストでもええやんと思ったりもするので今回は排除。
PubNub
BaaSサービスですが、MQTTブローカーを持ってくれてます。(わかる人はMilkcocoa的なものだと思ってください。)
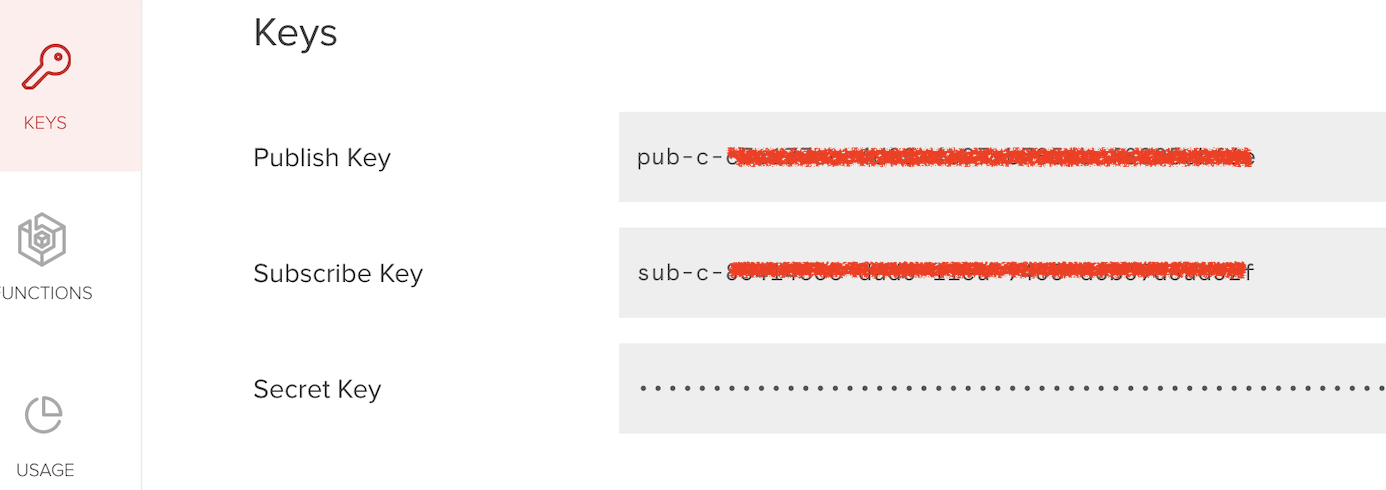
PubNubの鍵
Publish KeyとSubscribe Keyの二つのキーを使います。Secret Keyは今回使いません。
M5Atom(Arduino)側
事前準備
- ESP32に書き込めるように準備
- https://github.com/knolleary/pubsubclient をインストール
PubNubの設定
サブスクライブだけさせてます。
クライアントIDの箇所を書き換えますが、PUBLISH_KEY/SUBSCRIBE_KEY/CLIENT_IDという並びで作成します。
PUBLISH_KEYとSUBSCRIBE_KEYは先程の値ですが、CLIENT_IDは適当な文字列で大丈夫です。
実際には以下のような雰囲気の値を設定します。
pub-c-xxxxxxxxxxxxxxxxxxxxxxxxxxxx/sub-c-xxxxxxxxxxxxxxxxxxxxxxxxxxxxxxx/n0bisuke
ここまでが接続情報です。後はトピック名というチャットのルームID的なものを適当に指定すればOKです。
# include <WiFi.h>
# include <PubSubClient.h>

const char* ssid = ""; //Wi-FiのSSID
const char* password = ""; //Wi-Fiのパス
const char* mqttServer = "mqtt.pndsn.com";
const int mqttPort = 1883;

WiFiClient espClient;
PubSubClient client(espClient);

void callback(char* topic, byte* payload, unsigned int length){
  Serial.print("Message arrived in topic: ");
  Serial.println(topic);
  Serial.print("Message:");
  for (int i = 0; i < length; i++){
    Serial.print((char)payload[i]);
  }
  Serial.println();
  Serial.println("-----------------------");
}

void setup(){
  Serial.begin(115200);
  WiFi.begin(ssid, password);

  while (WiFi.status() != WL_CONNECTED){
    delay(500);
    Serial.println("Connecting to WiFi..");
  }

  Serial.println("Connected to the WiFi network");

  client.setServer(mqttServer, mqttPort);
  client.setCallback(callback);

  while (!client.connected()) {
    Serial.println("Connecting to MQTT...");
    if (client.connect("pub-c-xxxxxxxxxxxxxxxxxxxxxxxxxxxx/sub-c-xxxxxxxxxxxxxxxxxxxxxxxxxxxxxxx/n0bisuke")){ //クライアントID
      Serial.println("connected");
    }else{
      Serial.print("failed with state ");
      Serial.print(client.state());
      delay(2000);
    }
  }

  client.subscribe("m5topic"); //トピック名 適当でOK
}

void loop(){
  client.loop();
}
これで書き込み、M5Atomを起動させるとSubscribeして待機してくれます。
mosquittoのCLIでPublishを試す
ではM5Atomにメッセージを送ってみます。
インストールがまだの人はインストールから
$ brew install mosquitto
Publishしてみる
$ mosquitto_pub -h mqtt.pndsn.com \
-t 'PUBLISH_KEY/SUBSCRIVE_KEY/トピック名' \
-i 'PUBLISH_KEY/SUBSCRIVE_KEY/CLIENT_ID' \
-m '送りたいメッセージ'
という送り方になります。
実際にはPubNubの場合はこんな感じになります。
$ mosquitto_pub -h mqtt.pndsn.com \
-t 'pub-c-xxxxxxxxxxxxx/sub-c-xxxxxxxxxxxxxxx/m5topic' \
-i 'pub-c-xxxxxxxxxxxxx/sub-c-xxxxxxxxxxxxxxx/n0bisuke' \
-m 'ohayougozaimasu'
Macから送信し、M5Atomで受け取る形です。
Arduino IDEのシリアルモニタにこんな感じの表示がでれば成功です。
-----------------------
Message arrived in topic: m5topic
Message:"ohayougozaimasu"
-----------------------
所感
- PubNubけっこう使いやすくなってきてる
- M5Atomが二回に一回Wi-Fiをつかめないのでリスタートしてるけどなんだろうか
