先日書いた記事同様に会長の発表資料(Node.js Web Application Survey 2016 by Yosuke Furukawa)でhapiを知ったのでこちらも試してみます。
チュートリアルに書いてある内容を写経的にやってみます。
http://hapijs.com/tutorials
hapi
- 軽量なNode.jsフレームワーク
- 必要な際にプラグインを追加していく感じ
環境
- Mac OS X 10.10
- Node.js 5.6.0
準備
$ npm init --yes
$ npm install --save hapi
- コピペでサーバープログラム
'use strict';

const Hapi = require('hapi');

// Create a server with a host and port
const server = new Hapi.Server();
server.connection({
    host: 'localhost',
    port: 3000
});

// Add the route
server.route({
    method: 'GET',
    path:'/hello',
    handler: function (request, reply) {
        return reply('hello world');
    }
});

// Start the server
server.start((err) => {

    if (err) {
        throw err;
    }
    console.log('Server running at:', server.info.uri);
});
- 起動
$ node server.js

Server running at: http://localhost:3000
簡単に起動しましたね。
http://localhost:3000/hello にアクセスしてみます。
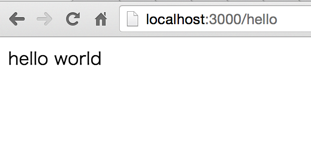
めちゃ簡単ですね。
ルーティング追加
これも簡単で、server.routeメソッドを追加で書いてあげるだけです。
省略

// Add the route
server.route({
    method: 'GET',
    path:'/hello',
    handler: function (request, reply) {
        return reply('hello world');
    }
});

//追記
server.route({
    method: 'GET',
    path:'/hey',
    handler: function (request, reply) {
        return reply('hey');
    }
});

省略
http://localhost:3000/hey にアクセスすると heyと表示されるとおもいます。
また、以下を追記すると
//追記
server.route({
    method: 'GET',
    path: '/{name}',
    handler: function (request, reply) {
        reply('Hello, ' + encodeURIComponent(request.params.name) + '!');
    }
});
path: '/{name}'この記述で http://localhost:3000/hoge など定義されていないURLにアクセスした際にルーティングしてくれます。この場合 Hello, hogeなどと表示してくれます。
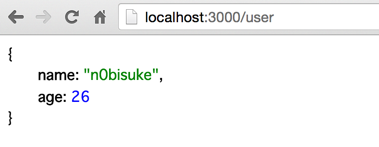
JSONを返す
replyメソッドに直接オブジェクトや配列を入れ込めばJSONを返すことができます。
省略

//追記
server.route({
    method: 'GET',
    path:'/user',
    handler: function (request, reply) {
      return reply({name: 'n0bisuke', age: 26});
    }
});

省略
htmlファイル
https://www.npmjs.com/package/inert を使います。
inertは静的ファイルを表示するためのhapi.jsのプラグインです。
- プラグインインストール
$ npm install --save inert
- 静的ファイル設置
<!DOCTYPE html>
<html>
  <head>
    <meta charset="utf-8">
    <title></title>
  </head>
  <body>
    hapi.js test
    <img src="https://i.gyazo.com/d3cb001a06e05d850a3228d4e405e7d6.png" alt="" />
  </body>
</html>
- server.jsに追記
省略

server.route({
    method: 'GET',
    path: '/{name}',
    handler: function (request, reply) {
        reply('Hello, ' + encodeURIComponent(request.params.name) + '!');
    }
});

//追記
server.register(require('inert'), (err) => {
    if (err) {
        throw err;
    }

    server.route({
        method: 'GET',
        path: '/static',
        handler: function (request, reply) {
            reply.file('./index.html');
        }
    });
});

省略
http://localhost:3000/static にアクセスしてみましょう。

goodとgood-consoleプラグインを使ってみる
hapiのモニタリングをいい感じにしてくれるっぽいです
- プラグインインストール
$ npm install --save good good-console
- 記述変更
const Good = require('good');
を追記siteserver.startの部分を入れ替えます。
'use strict';

const Hapi = require('hapi');
const Good = require('good');

// Create a server with a host and port
const server = new Hapi.Server();
server.connection({
    host: 'localhost',
    port: 3000
});

// Add the route
server.route({
    method: 'GET',
    path:'/hello',
    handler: function (request, reply) {
        return reply('hello world');
    }
});

server.route({
    method: 'GET',
    path:'/hey',
    handler: function (request, reply) {
      return reply('hello world');
    }
});

server.route({
    method: 'GET',
    path: '/{name}',
    handler: function (request, reply) {
        reply('Hello, ' + encodeURIComponent(request.params.name) + '!');
    }
});

server.route({
    method: 'GET',
    path:'/user',
    handler: function (request, reply) {
      return reply({name: 'n0bisuke', age: 26});
    }
});

server.register(require('inert'), (err) => {
    if (err) {
        throw err;
    }

    server.route({
        method: 'GET',
        path: '/static',
        handler: function (request, reply) {
            reply.file('./index.html');
        }
    });
});

//追記
server.register({
    register: Good,
    options: {
        reporters: [{
            reporter: require('good-console'),
            events: {
                response: '*',
                log: '*'
            }
        }]
    }
}, (err) => {
    if (err) {
        throw err; // something bad happened loading the plugin
    }

    server.start(() => {
        server.log('info', 'Server running at: ' + server.info.uri);
    });
});
- 起動してみる
アクセスしてみるとこんな感じでログが表示されるようになります。
$ node server.js
160214/085836.761, [log,info], data: Server running at: http://localhost:3000
160214/085844.028, [response], http://localhost:3000: get /static {} 304 (28ms)
160214/085858.335, [response], http://localhost:3000: get /aaa {} 200 (10ms)
160214/085905.980, [response], http://localhost:3000: get /hello {} 200 (7ms)
respons timeやpath, ステータスコードなども表示されるようになりましたね。
まとめと感想など
Nodalと比べるとだいぶ軽量だなという印象です。
インストールなどが手軽だし、必要に応じてプラグインを追加していくスタイルは好きです。
もしかしたらexpressよりもhapiの方が使い勝手いいかもしれないとか思ったのと、簡単なAPIサーバーを作るって話がけっこうあるので次はhapiを使ってみたいです。 (←執筆時点の感想です)