TableViewの各列にボタンやテキストフィールドを付けて、入力の総和で出力を変えたりしたかったのですが、なかなか苦労したので調べたことをまとめておきます。
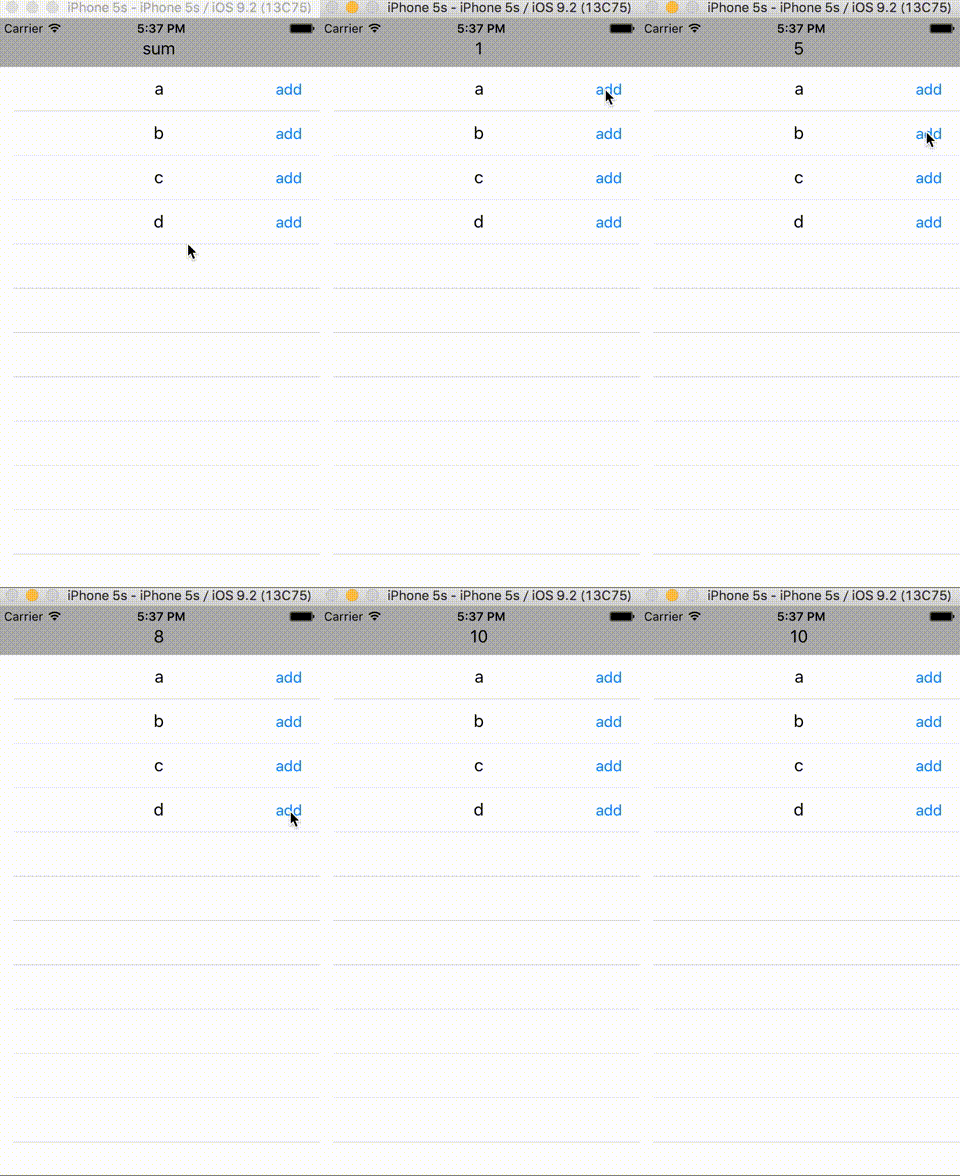
こういうのが目標。
作成手順
- セルに必要なデータのクラスを作成する
- UITableViewCellを継承したクラスを作成する
- storyboardにTableViewとTableViewCellを設置する
- TableViewCellのCustom Class、Identifierを設定する
- Outletを設定する
- TableViewを表示するようにViewController.swiftを書く
- ボタンのアクションをViewController.swiftに作成する
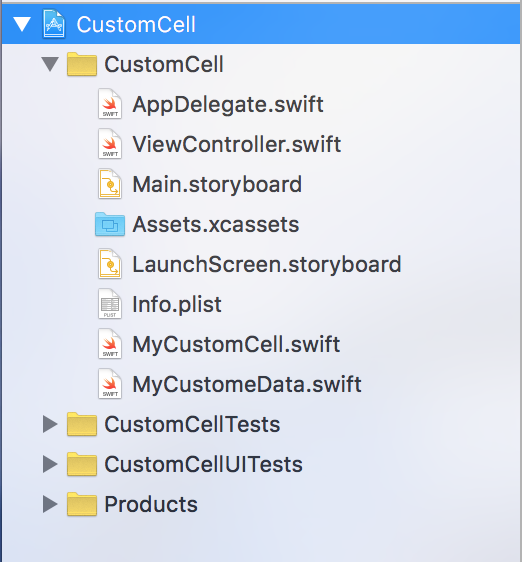
作り終わった後のファイル一覧を示します。
今回は、MyCustomData.swiftと、MyCustomeCell.swiftを追加しています。
セルに必要なデータのクラスを作成する
MyCustomeData.swift
import Foundation

class MyCustomeData: NSObject {

    var name:String

    init(name:String) {
        self.name = name
    }
}
UITableViewCellを継承したクラスを作成する
MyCustomCell.swift
import UIKit

class MyCustomCell: UITableViewCell {

}
storyboardにTableViewとTableViewCellを設置する
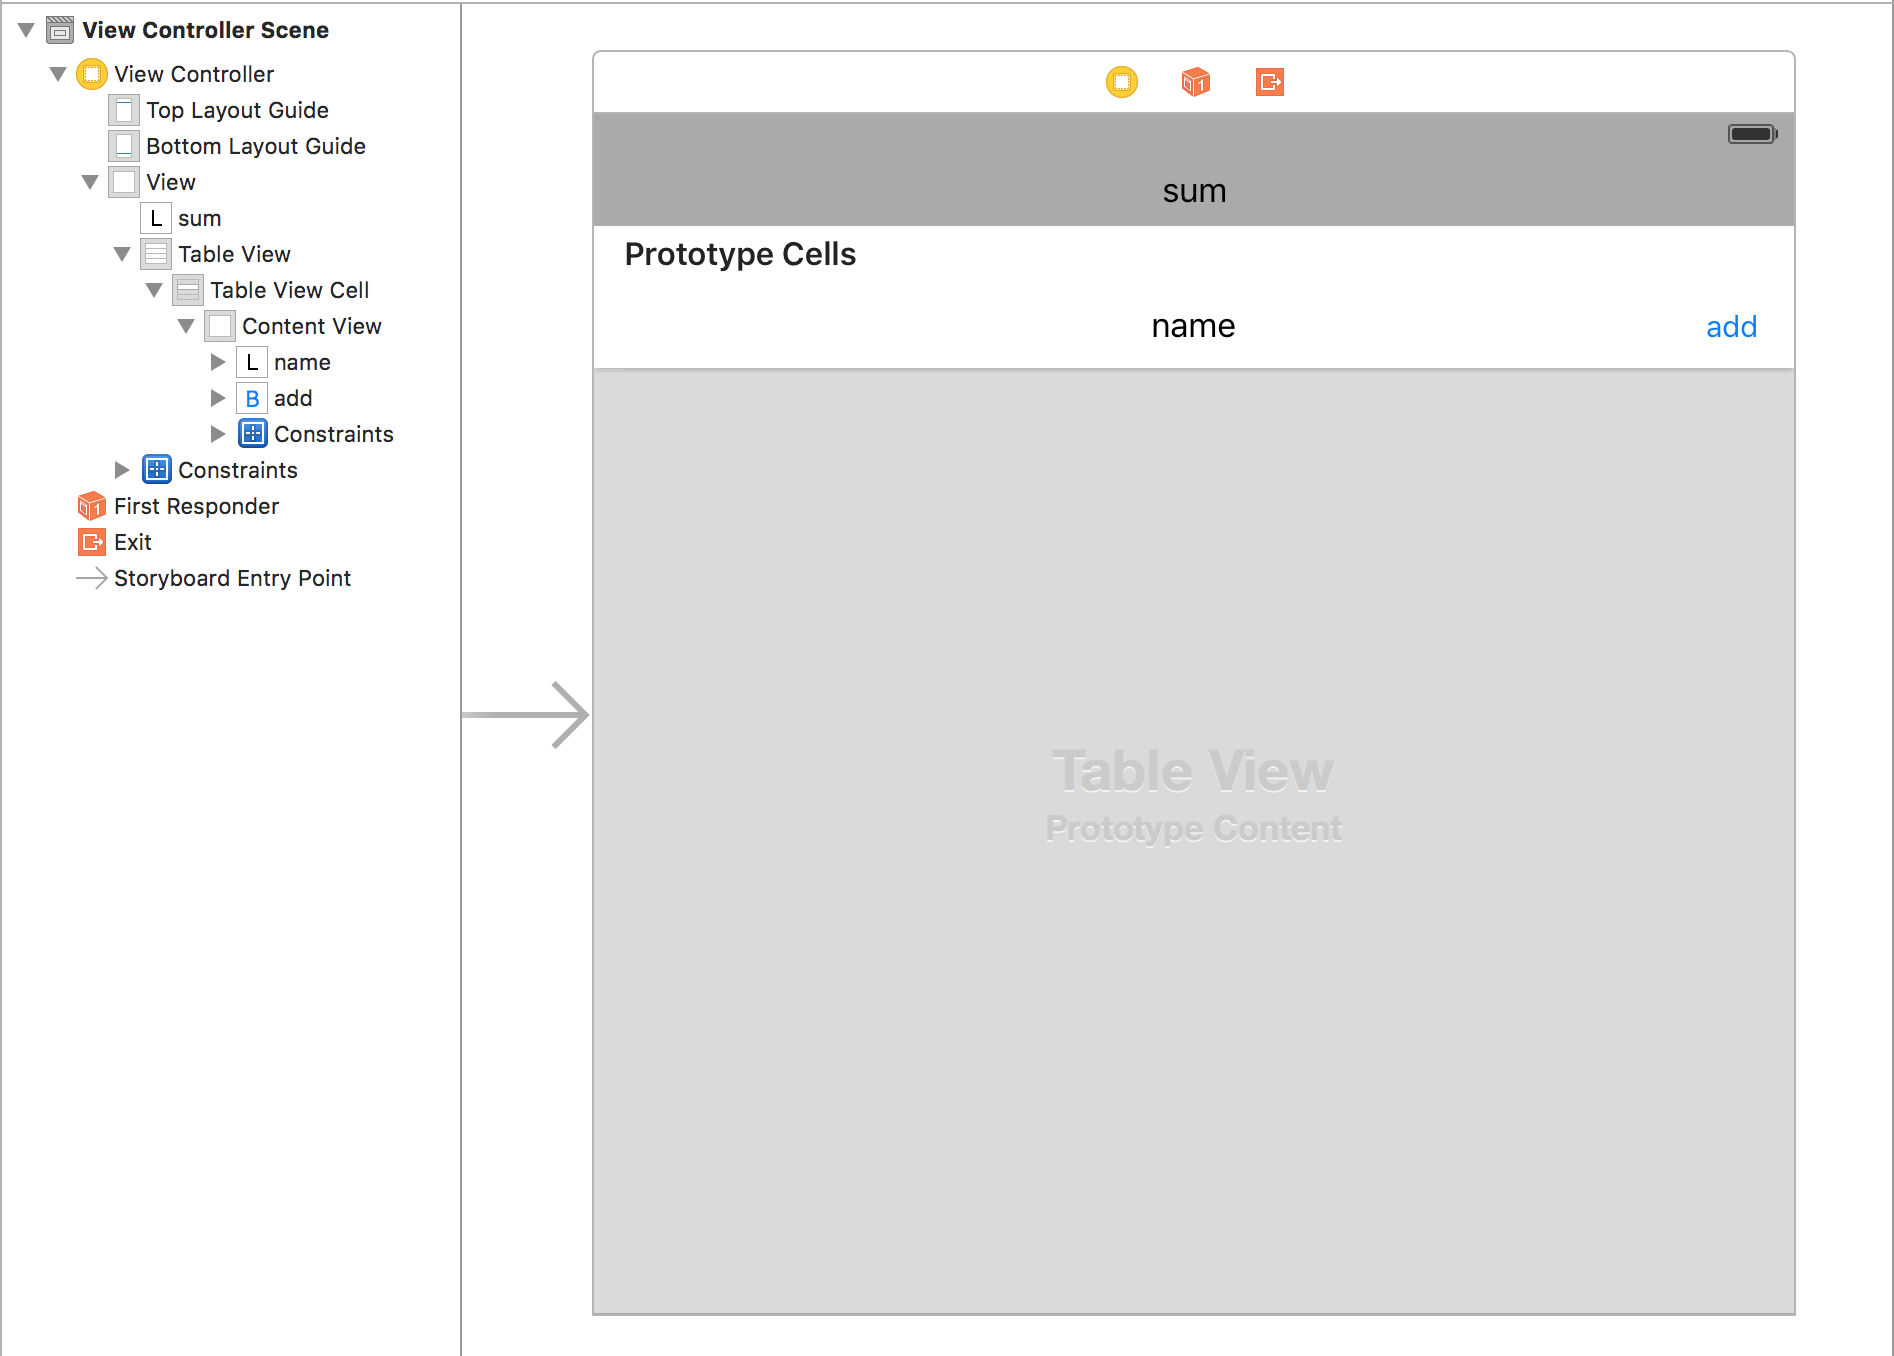
マウスで、ぽいぽいとやります。TableViewと区別つくようViewの背景をgrayにしています。
TableViewCellのCustom Class、Identifierを設定する
Custom Class
Identifier
Outletを設定する
MyCustomeCell.swift
import UIKit

class MyCustomCell: UITableViewCell {

    @IBOutlet weak var nameLabel: UILabel!

    @IBOutlet weak var addButton: UIButton!

    func setCell(myCustomData: MyCustomeData) {
        nameLabel.text = myCustomData.name
    }
}
TableViewを表示するように書く
いつもTableViewを使うように。
ViewController.swift
import UIKit

class ViewController: UIViewController, UITableViewDelegate, UITableViewDataSource {

    @IBOutlet weak var tableView: UITableView!
    @IBOutlet weak var sumLabel: UILabel!

    var myCustomDatas = [MyCustomeData]()

    override func viewDidLoad() {
        super.viewDidLoad()
        // Do any additional setup after loading the view, typically from a nib.
        setInitData()
        tableView.delegate = self
        tableView.dataSource = self
    }

    override func didReceiveMemoryWarning() {
        super.didReceiveMemoryWarning()
        // Dispose of any resources that can be recreated.
    }

    // カスタムセルの初期データはここで適当に与える
    func setInitData() {
        myCustomDatas.append(MyCustomeData(name: "a"))
        myCustomDatas.append(MyCustomeData(name: "b"))
        myCustomDatas.append(MyCustomeData(name: "c"))
        myCustomDatas.append(MyCustomeData(name: "d"))
    }

    func tableView(tableView: UITableView, numberOfRowsInSection section: Int) -> Int {
        return myCustomDatas.count
    }

    func tableView(tableView: UITableView, cellForRowAtIndexPath indexPath: NSIndexPath) -> UITableViewCell {
        // カスタムセルに設定したIdentifierを指定する
        let cell: MyCustomCell = tableView.dequeueReusableCellWithIdentifier("MyCustomCell") as! MyCustomCell
        cell.setCell(myCustomDatas[indexPath.row])
        return cell
    }
}
ボタンのアクションをViewController.swiftに作成する
ViewController.swift
    // 省略

    @IBAction func addAction(sender: AnyObject) {

        if let now = Int(sumLabel.text!) {
            sumLabel.text = String(now + 1)
        } else {
            sumLabel.text = String(1)
        }
    }
カスタムセルのViewにアクセスする
ViewControllerから作成したセルの情報にアクセスしたい場合は、以下のように書く。例えば、ボタンの名称を取得する。(こんな使い方はしないと思うけど...)
// 押されたボタンを取得
let botton = sender as! UIButton
let cell = botton.superview?.superview as! MyCustomCell

print(cell.addButton.titleLabel?.text)

// クリックされたcellの位置を取得
let row = tableView.indexPathForCell(cell)?.row

print(row)
次いつiOS触るか知らないけど、これで忘れても大丈夫。


