はじめに
ReorderableListView を SliverReorderableList に書き直した際、ListTile などの Material デザインウィジェットをドラッグしようとすると、以下のエラーが発生したため、その原因と解決方法について調べた内容を記事にしました。
既に知っている方もいらっしゃるかもしれませんが、少しでもお役に立てればと思います。
════════ Exception caught by widgets library ═══════════════════════════════════
The following assertion was thrown building ListTile(tileColor: Color(0x0d6750a4), dirty):
No Material widget found.
ListTile widgets require a Material widget ancestor within the closest LookupBoundary.
In Material Design, most widgets are conceptually "printed" on a sheet of material. In Flutter's material library, that material is represented by the Material widget. It is the Material widget that renders ink splashes, for instance. Because of this, many material library widgets require that there be a Material widget in the tree above them.
To introduce a Material widget, you can either directly include one, or use a widget that contains Material itself, such as a Card, Dialog, Drawer, or Scaffold.
環境
[✓] Flutter (Channel stable, 3.24.3, on macOS 14.2.1 23C71 darwin-arm64 (Rosetta), locale ja-JP)
[✓] Android toolchain - develop for Android devices (Android SDK version 34.0.0)
[✓] Xcode - develop for iOS and macOS (Xcode 15.3)
[✓] Chrome - develop for the web
[✓] Android Studio (version 2022.3)
[✓] VS Code (version 1.90.2)
[✓] Connected device (5 available)
[✓] Network resources

• No issues found!
まずは結論。
ReorderableListView では、ドラッグした際にデフォルトで proxyDecorator を使用し、ドラッグされたアイテムを Material ウィジェットでラップしています。
しかし、SliverReorderableList ではデフォルトで proxyDecorator が指定されていないため、ListTile などの Material デザインに依存するウィジェットを使用する場合は、明示的に Material ウィジェットでラップする必要があります。
以下詳しく見ていきます。
ReorderableListViewとSliverReorderableListの比較
ReorderableListView
まずはReorderableListViewになりますが、公式からほとんどサンプルコードのままです。
import 'package:flutter/material.dart';

class ReorderableExamplePage extends StatefulWidget {
  const ReorderableExamplePage({super.key});

  @override
  State<ReorderableExamplePage> createState() =>
      _ReorderableListViewExampleState();
}

class _ReorderableListViewExampleState extends State<ReorderableExamplePage> {
  final List<int> _items = List<int>.generate(50, (int index) => index);

  @override
  Widget build(BuildContext context) {
    final ColorScheme colorScheme = Theme.of(context).colorScheme;
    final Color oddItemColor = colorScheme.primary.withOpacity(0.05);
    final Color evenItemColor = colorScheme.primary.withOpacity(0.15);

    return Scaffold(
      appBar: AppBar(
        title: const Text('ReorderableExample'),
      ),
      body: ReorderableListView(
        children: <Widget>[
          for (int index = 0; index < _items.length; index += 1)
            ListTile(
              key: Key('$index'),
              tileColor: _items[index].isOdd ? oddItemColor : evenItemColor,
              title: Text('Item ${_items[index]}'),
            ),
        ],
        onReorder: (int oldIndex, int newIndex) {
          setState(() {
            if (oldIndex < newIndex) {
              newIndex -= 1;
            }
            final int item = _items.removeAt(oldIndex);
            _items.insert(newIndex, item);
          });
        },
      ),
    );
  }
}
SliverReorderableList
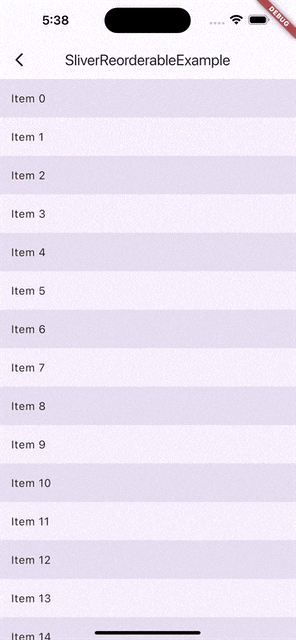
上記をSliverReorderableListに書き換えたものになります。
import 'package:flutter/material.dart';

class SliverReorderableExamplePage extends StatefulWidget {
  const SliverReorderableExamplePage({super.key});

  @override
  State<SliverReorderableExamplePage> createState() =>
      _ReorderableListViewExampleState();
}

class _ReorderableListViewExampleState
    extends State<SliverReorderableExamplePage> {
  final List<int> _items = List<int>.generate(50, (int index) => index);

  @override
  Widget build(BuildContext context) {
    final ColorScheme colorScheme = Theme.of(context).colorScheme;
    final Color oddItemColor = colorScheme.primary.withOpacity(0.05);
    final Color evenItemColor = colorScheme.primary.withOpacity(0.15);

    return Scaffold(
      appBar: AppBar(
        title: const Text('SliverReorderableExample'),
      ),
      body: CustomScrollView(
        slivers: [
          SliverReorderableList(
            itemBuilder: (context, index) =>
                ReorderableDelayedDragStartListener(
              key: Key('$index'),
              index: index,
              child: ListTile(
                tileColor: _items[index].isOdd ? oddItemColor : evenItemColor,
                title: Text('Item ${_items[index]}'),
              ),
            ),
            itemCount: _items.length,
            onReorder: (int oldIndex, int newIndex) {
              setState(() {
                if (oldIndex < newIndex) {
                  newIndex -= 1;
                }
                final int item = _items.removeAt(oldIndex);
                _items.insert(newIndex, item);
              });
            },
          ),
        ],
      ),
    );
  }
}
挙動の違い
ReorderableListView を SliverReorderableList に書き換えるだけで、ドラッグ中のアイテムの挙動が変わることに気付きました。下記の動画でその違いを確認してください。
| ReorderableListView | SliverReorderableList |
|---|---|
 |
 |
このように、ReorderableListView では正常に動作しているものの、SliverReorderableList では動作が異なることがわかります。
エラー内容
════════ Exception caught by widgets library ═══════════════════════════════════
The following assertion was thrown building ListTile(tileColor: Color(0x0d6750a4), dirty):
No Material widget found.
ListTile widgets require a Material widget ancestor within the closest LookupBoundary.
In Material Design, most widgets are conceptually "printed" on a sheet of material. In Flutter's material library, that material is represented by the Material widget. It is the Material widget that renders ink splashes, for instance. Because of this, many material library widgets require that there be a Material widget in the tree above them.
To introduce a Material widget, you can either directly include one, or use a widget that contains Material itself, such as a Card, Dialog, Drawer, or Scaffold.
このエラーは、ListTile ウィジェットが Material ウィジェットでラップしていないことが原因です。ListTile は背景色(tileColor など)やタップ時のエフェクトを表示するために、Material コンテキストが必要です。通常、これらは Scaffold や MaterialApp 内で自動的に提供されますが、SliverReorderableList の場合は明示的に Material でラップしないとエラーになります。
なぜReorderableListViewではエラーが起きない?
ReorderableListView の場合にエラーが発生しない理由は、ReorderableListView がデフォルトで proxyDecorator を使用し、ドラッグ中のアイテムを Material ウィジェットで自動的にラップしているためです(公式参考)。
ReorderableListViewの内部実装を見ていきます。
抜粋ですので内部実装のコードを全て見たい方はこちらを確認お願いします。
ListViewも内部はSliverで作られています。
/* 省略 */

/// While a drag is underway, the widget returned by the [ReorderableListView.proxyDecorator]
/// callback serves as a "proxy" (a substitute) for the item in the list. The proxy is
/// created with the original list item as its child.

/* 省略 */

class _ReorderableListViewState extends State<ReorderableListView> {

  /* 省略 */

  Widget _proxyDecorator(Widget child, int index, Animation<double> animation) {
    return AnimatedBuilder(
      animation: animation,
      builder: (BuildContext context, Widget? child) {
        final double animValue = Curves.easeInOut.transform(animation.value);
        final double elevation = lerpDouble(0, 6, animValue)!;
        return Material(
          elevation: elevation,
          child: child,
        );
      },
      child: child,
    );
  }

  @override
  Widget build(BuildContext context) {
    /* 省略 */
    return CustomScrollView(
    /* 省略 */
      slivers: <Widget>[
        if (widget.header != null)
          SliverPadding(
            padding: headerPadding,
            sliver: SliverToBoxAdapter(child: widget.header),
          ),
        SliverPadding(
          padding: listPadding,
          sliver: SliverReorderableList(
            itemBuilder: _itemBuilder,
            itemExtent: widget.itemExtent,
            itemExtentBuilder: widget.itemExtentBuilder,
            prototypeItem: widget.prototypeItem,
            itemCount: widget.itemCount,
            onReorder: widget.onReorder,
            onReorderStart: widget.onReorderStart,
            onReorderEnd: widget.onReorderEnd,
            proxyDecorator: widget.proxyDecorator ?? _proxyDecorator,
            autoScrollerVelocityScalar: widget.autoScrollerVelocityScalar,
          ),
        ),
        if (widget.footer != null)
          SliverPadding(
            padding: footerPadding,
            sliver: SliverToBoxAdapter(child: widget.footer),
          ),
      ],
    );
  }
}
proxyDecorator の基本的な役割
ReorderableListView では、アイテムをドラッグするときに、元のリストアイテムをそのまま残し、「代理(proxy)」として別のウィジェットが表示されます。
proxyDecorator は、この proxy アイテムの見た目をカスタマイズできるコールバックです。デフォルトでは、proxy は Material ウィジェットでラップされ、影やサイズの変化などが適用されます。proxyDecorator を使うと、ドラッグ中のスタイルをさらに自由に変更できます。
つまり、ReorderableListView はデフォルトで proxyDecorator を使用し、Material でアイテムをラップしているため、ListTile などの Material デザインに依存するウィジェットでもエラーが発生しなかったわけです。
SliverReorderableListの内部では?
SliverReorderableList の内部実装では、ReorderableListView とは異なり、デフォルトで proxyDecorator が使用されていません。そのため、ドラッグ中のアイテムをカスタマイズする場合は、明示的に proxyDecorator を指定する必要があります。
以下のコードは SliverReorderableList の一部ですが、proxyDecorator が指定されていないことがわかります。proxyDecorator が設定されていない場合、ドラッグ中のアイテムが Material でラップされず、ListTile のような Material に依存するウィジェットでエラーが発生する可能性があります。
全コードはこちらから確認お願いします。
class ReorderableListState extends State<ReorderableList> {
   /* 省略 */
  @override
  Widget build(BuildContext context) {
    return CustomScrollView(
      scrollDirection: widget.scrollDirection,
      reverse: widget.reverse,
      controller: widget.controller,
      primary: widget.primary,
      physics: widget.physics,
      shrinkWrap: widget.shrinkWrap,
      anchor: widget.anchor,
      cacheExtent: widget.cacheExtent,
      dragStartBehavior: widget.dragStartBehavior,
      keyboardDismissBehavior: widget.keyboardDismissBehavior,
      restorationId: widget.restorationId,
      clipBehavior: widget.clipBehavior,
      slivers: <Widget>[
        SliverPadding(
          padding: widget.padding ?? EdgeInsets.zero,
          sliver: SliverReorderableList(
            key: _sliverReorderableListKey,
            itemExtent: widget.itemExtent,
            prototypeItem: widget.prototypeItem,
            itemBuilder: widget.itemBuilder,
            itemCount: widget.itemCount,
            onReorder: widget.onReorder,
            onReorderStart: widget.onReorderStart,
            onReorderEnd: widget.onReorderEnd,
            proxyDecorator: widget.proxyDecorator,
            autoScrollerVelocityScalar: widget.autoScrollerVelocityScalar,
          ),
        ),
      ],
    );
  }
}
エラー解消方法
①Materialでラップする
最もシンプルな解決策は、ListTile を Material ウィジェットでラップすることです。これにより、Material に依存する ListTile が正しく描画されるようになります。以下はその例です。
   /* 省略 */

class _ReorderableListViewExampleState
    extends State<SliverReorderableExamplePage> {
      /* 省略 */
      body: CustomScrollView(
        slivers: [
          SliverReorderableList(
            itemBuilder: (context, index) =>
                ReorderableDelayedDragStartListener(
              key: Key('$index'),
              index: index,
-             child: ListTile(
-               tileColor: _items[index].isOdd ? oddItemColor : evenItemColor,
-               title: Text('Item ${_items[index]}'),
-             ),
+             child: Material(
+               child: ListTile(
+                 tileColor: _items[index].isOdd ? oddItemColor : evenItemColor,
+                 title: Text('Item ${_items[index]}'),
+               ),
+             ),
            ),
            /* 省略 */
          ),
        ],
      ),
    );
  }
}
②proxyDecoratorを設定する
Material でラップするだけでは、ReorderableListView のデフォルトで設定されている影やアニメーション(elevation など)が不足しています。これらの設定も同じように再現するか、カスタマイズするには、proxyDecorator を設定します。
以下のコードは、proxyDecorator を設定してドラッグ中のアイテムに影を付け、デフォルトの動作を再現しています。
import 'dart:ui';

import 'package:flutter/material.dart';

class SliverReorderableExamplePage extends StatefulWidget {
  const SliverReorderableExamplePage({super.key});

  @override
  State<SliverReorderableExamplePage> createState() =>
      _ReorderableListViewExampleState();
}

class _ReorderableListViewExampleState
    extends State<SliverReorderableExamplePage> {
      /* 省略 */
      body: CustomScrollView(
        slivers: [
          SliverReorderableList(
            itemBuilder: (context, index) =>
                ReorderableDelayedDragStartListener(
              key: Key('$index'),
              index: index,
              child: ListTile(
                tileColor: _items[index].isOdd ? oddItemColor : evenItemColor,
                title: Text('Item ${_items[index]}'),
              ),
            ),
            itemCount: _items.length,
            onReorder: (int oldIndex, int newIndex) {
              setState(() {
                if (oldIndex < newIndex) {
                  newIndex -= 1;
                }
                final int item = _items.removeAt(oldIndex);
                _items.insert(newIndex, item);
              });
            },
+           proxyDecorator: _proxyDecorator,
          ),
        ],
      ),
    );
  }
}

+ Widget _proxyDecorator(Widget child, int index, Animation<double> animation) {
+ return AnimatedBuilder(
+   animation: animation,
+   builder: (BuildContext context, Widget? child) {
+     final double animValue = Curves.easeInOut.transform(animation.value);
+     final double elevation = lerpDouble(0, 6, animValue)!;
+     return Material(
+       elevation: elevation,
+       child: child,
+     );
+   },
+   child: child,
+ );
+}

最後に
Sliver についてもっと詳しく知りたい方は、以下の記事がとても参考になります。
https://zenn.dev/3ta/articles/5a439a8f0c4b62