はじめに
Android Studioのウィザードで選べるMaster Detailレイアウトはスマホやタブレットにあわせて柔軟にレイアウトを表示してくれて便利ですが、使い方を説明したサイトがあまり見つからなかったので自分のためのメモです。アダプタとか面倒なところは考えずにとりあえず自分のデータが表示できれば良いという人向けです。内容はTechotopiaを参考にしました。
使い方
-
まず新規プロジェクト作成ウィザードでMaster/Detail Flowレイアウトを選択します。

今回はブックマークのようなイメージでWebsiteのURLをWebViewで開くことを想定してますので、Object Kindは「Website」とします。

-
デフォルトの状態では「dummy」というフォルダの下にDummyContentというクラスがあり、そこにダミーデータが登録されていますのでこれを編集します。下の方に「DymmyItem」というクラスがあるので下記のように修正します。
DummyContent.java
public static class DummyItem {
	public String id;
	public String website_name;
	public String website_url;

	public DummyItem(String id, String website_name,
             String website_url)
	{
		this.id = id;
		this.website_name = website_name;
		this.website_url = website_url;
	}

	@Override
	public String toString() {
		return website_name;
	}
}
- さらにコードの前半をみてみると、ループ文で25個のアイテムを生成してることがわかりますが、今回は3つのWebサイトを表示するようにしたいので下記のように変更します。
DummyContent.java
    public static final Map<String, DummyItem> ITEM_MAP = new HashMap<String, DummyItem>();

static {
	// Add 3 sample items.
        addItem(new DummyItem("1", "eBookFrenzy",
                "http://www.ebookfrenzy.com"));
        addItem(new DummyItem("2", "Amazon",
                "http://www.amazon.com"));
       addItem(new DummyItem("3", "New York Times",
                "http://www.nytimes.com"));
}

/*    private static final int COUNT = 25;

    static {
        // Add some sample items.
        for (int i = 1; i <= COUNT; i++) {
            addItem(createDummyItem(i));
        }
    }*/

    private static void addItem(DummyItem item) {
        ITEMS.add(item);
        ITEM_MAP.put(item.id, item);
    }

/*    private static DummyItem createDummyItem(int position) {
        return new DummyItem(String.valueOf(position), "Item " + position, makeDetails(position));
    }

    private static String makeDetails(int position) {
        StringBuilder builder = new StringBuilder();
        builder.append("Details about Item: ").append(position);
        for (int i = 0; i < position; i++) {
            builder.append("\nMore details information here.");
        }
        return builder.toString();
    }  */
- レイアウトファイルをWebViewに変更します。
website_detail.xml
<WebView xmlns:android="http://schemas.android.com/apk/res/android"
    xmlns:tools="http://schemas.android.com/tools"
    android:layout_width="match_parent"
    android:layout_height="match_parent"
    android:id="@+id/website_detail"
    tools:context=
        "com.ebookfrenzy.masterdetailflow.WebsiteDetailFragment">
</WebView>
- AppBarタイトルにWebサイト名を表示したいので、WebsiteDetailFragment.javaを下記のように変更します。
WebsiteDetailFragment.java
public class WebSiteDetailFragment extends Fragment {
.
.
.
    public void onCreate(Bundle savedInstanceState) {
        super.onCreate(savedInstanceState);

        if (getArguments().containsKey(ARG_ITEM_ID)) {
            // Load the dummy content specified by the fragment
            // arguments. In a real-world scenario, use a Loader
            // to load content from a content provider.
            mItem = DummyContent.ITEM_MAP.get(getArguments().getString(ARG_ITEM_ID));

            Activity activity = this.getActivity();
            CollapsingToolbarLayout appBarLayout = (CollapsingToolbarLayout) activity.findViewById(R.id.toolbar_layout);
            if (appBarLayout != null) {
                appBarLayout.setTitle(mItem.website_name);
            }
        }
    }

    @Override
    public View onCreateView(LayoutInflater inflater,
		ViewGroup container, Bundle savedInstanceState) {
        View rootView = inflater.inflate(
             R.layout.fragment_website_detail, container, false);

        // Show the dummy content as text in a TextView.
        if (mItem != null) {
            ((WebView) rootView.findViewById(R.id.website_detail))
                    .loadUrl(mItem.website_url);
        }

        return rootView;
    }
}
- マスターリストにもWebサイト名を表示するように変更します。
WebsiteListActivity.java
public void onBindViewHolder(final ViewHolder holder, int position) {
    holder.mItem = mValues.get(position);
    holder.mIdView.setText(mValues.get(position).id);
    holder.mContentView.setText(mValues.get(position).website_name);
.
.
.
}
- WebViewを使うのでAndroidマニフェストに権限追加しておきましょう。
AndroidManifest.xml
<?xml version="1.0" encoding="utf-8"?>
<manifest xmlns:android="http://schemas.android.com/apk/res/android"
    package="com.example.masterdetailflow.masterdetailflow" >

    <uses-permission android:name="android.permission.INTERNET" />

    <application
        android:allowBackup="true"
        android:icon="@mipmap/ic_launcher"
        android:label="@string/app_name"
        android:theme="@style/AppTheme" >.
       :
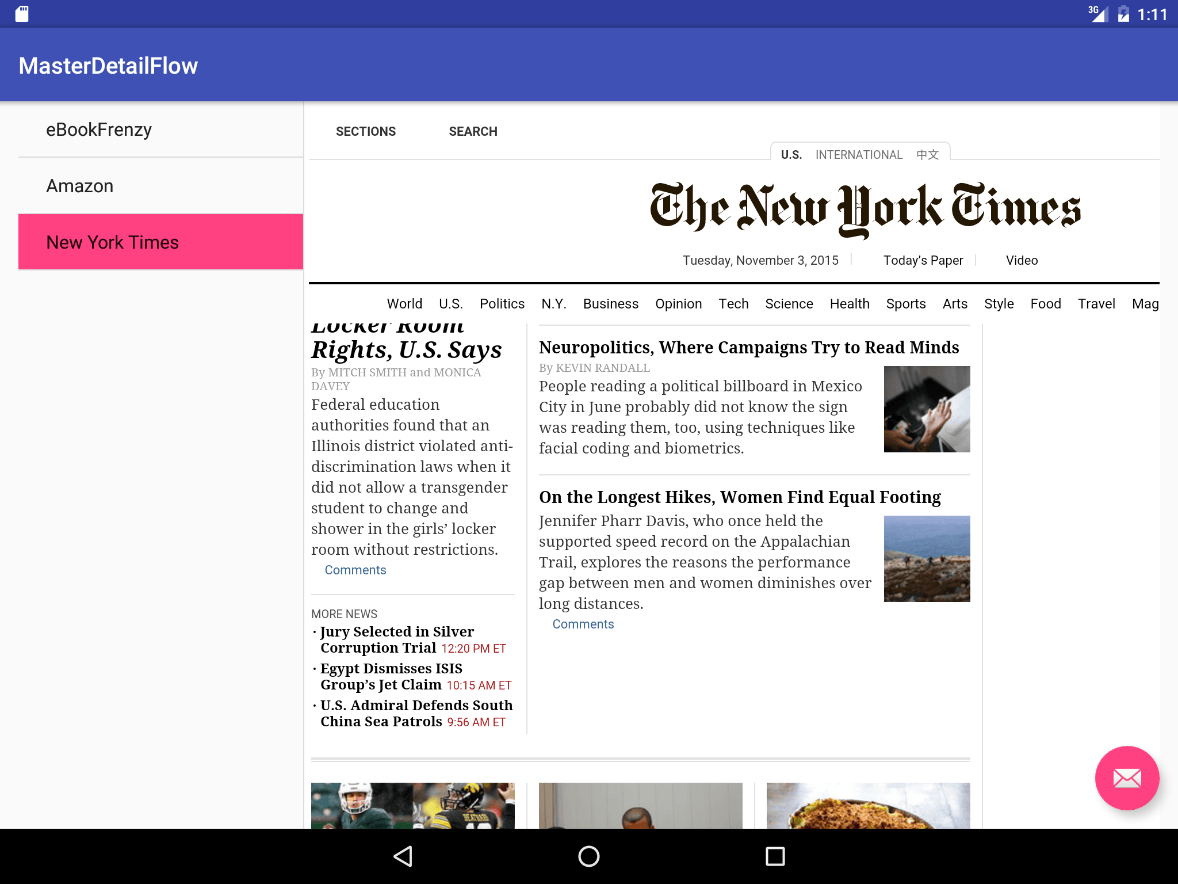
これで完成です。アプリを起動してみるとタイトルに対応したサイトがWebViewに表示されていることがわかります。
2016/3/21
実際にアプリで導入する際は、DummyItemをこちらのサイトの方法でnon-staticにする方が良いと思います。