前回の記事に続き、顔解析結果を活用した処理を書いてみます。要点は以下。
- TCCLI のかわりに Tencent Cloud Python SDKを使って実装
- URL指定ではなく、実データを指定しAPIリクエスト
- APIレスポンスを元に顔のマスキング処理を実現する
python環境準備
$ python3 -m venv venv
$ source venv/bin/activate

(venv) $ pip install --upgrade pip
(venv) $ pip install tencentcloud-sdk-python-intl-en
まずは、前回処理と同じ動きをする実装を書いてみます。
from tencentcloud.common import credential
from tencentcloud.common.exception.tencent_cloud_sdk_exception import TencentCloudSDKException
from tencentcloud.iai.v20200303 import iai_client, models as iai_models

import json
from pprint import pprint

def main():
  apiKey = 'xxx'
  apiSecret = 'xxx'
  region = 'ap-singapore'
  imageUrl = "https://mynet.co.jp/assets/uploads/sites/2/2017/05/c7252e9ab2c39d35379de17646d163c5.jpg"

  cred = credential.Credential(apiKey, apiSecret)
  try:
    client = iai_client.IaiClient(cred, region)
    req = iai_models.DetectFaceRequest()
    params = {
      "Url": imageUrl
    }
    req.from_json_string(json.dumps(params))
    resp = client.DetectFace(req)
  except TencentCloudSDKException as err:
    print(err)
    return

  pprint(resp)


if __name__ == "__main__":
  main()
それっぽい出力が得られればよいので、pprintで出力しています。
実行結果がこちら。
(venv) $ python main.py
{"ImageWidth": 920, "ImageHeight": 800, "FaceInfos": [{"X": 371, "Y": 103, "Width": 209, "Height": 272, "FaceAttributesInfo": {"Gender": 0, "Age": 0, "Expression": 0, "Glass": false, "Pitch": 0, "Yaw": 0, "Roll": 0, "Beauty": 0, "Hat": false, "Mask": false, "Hair": {"Length": 0, "Bang": 0, "Color": 0}, "EyeOpen": false}, "FaceQualityInfo": {"Score": 0, "Sharpness": 0, "Brightness": 0, "Completeness": {"Eyebrow": 0, "Eye": 0, "Nose": 0, "Cheek": 0, "Mouth": 0, "Chin": 0}}}], "FaceModelVersion": "3.0", "RequestId": "df8f5bda-f7d7-469f-a916-d0555cfcb953"}
前回と同様のレスポンスが得られました。
画像データをUrlからImageに変更
今回のPython実装の趣旨である、Url指定ではなく、実体をBase64変換したものをパラメタとして渡してみます。
from tencentcloud.common import credential
from tencentcloud.common.exception.tencent_cloud_sdk_exception import TencentCloudSDKException
from tencentcloud.iai.v20200303 import iai_client, models as iai_models

import json
from pprint import pprint
import urllib.request
import urllib.error
import base64

(中略)

  # 画像取得
  try:
    with urllib.request.urlopen(imageUrl) as f:
      bin = f.read()
  except urllib.error.URLError as err:
    print(err)
    return
  imageBase64 = base64.b64encode(bin).decode("utf-8")

  cred = credential.Credential(apiKey, apiSecret)
  try:
    client = iai_client.IaiClient(cred, region)
    req = iai_models.DetectFaceRequest()
    params = {
      "Image": imageBase64
    }
    req.from_json_string(json.dumps(params))
    resp = client.DetectFace(req)
  except TencentCloudSDKException as err:
    print(err)
    return

  pprint(resp)

(後略)
実行結果がこちら。
(venv) $ python main.py
{"ImageWidth": 920, "ImageHeight": 800, "FaceInfos": [{"X": 371, "Y": 103, "Width": 209, "Height": 272, "FaceAttributesInfo": {"Gender": 0, "Age": 0, "Expression": 0, "Glass": false, "Pitch": 0, "Yaw": 0, "Roll": 0, "Beauty": 0, "Hat": false, "Mask": false, "Hair": {"Length": 0, "Bang": 0, "Color": 0}, "EyeOpen": false}, "FaceQualityInfo": {"Score": 0, "Sharpness": 0, "Brightness": 0, "Completeness": {"Eyebrow": 0, "Eye": 0, "Nose": 0, "Cheek": 0, "Mouth": 0, "Chin": 0}}}], "FaceModelVersion": "3.0", "RequestId": "5e0328d9-a564-4496-85a6-b7ec4d558c22"}
無事、同じ結果を得ることができました。
元ファイルを処理中にURLから取ってきてるので蛇足感ありますが、同じ実体を使用していることを示す意味も兼ねているため、ご容赦ください。
顔の位置に画像を合成する(マスキング処理)
顔の情報が取れたので、マスキングよろしく画像を合成してみましょう。
合成自体にあまり高機能を要求しないので、Pillowで実装します。
(venv) $ pip install Pillow
Pythonで画像処理を書いたことないので、まずは指定領域を塗りつぶしてみます。
def fillRect(img, x, y, width, height):
  # 塗りつぶし処理
  draw = ImageDraw.Draw(img)
  draw.rectangle((x, y, x+width, y+height), fill=(12, 12, 12))

  return img
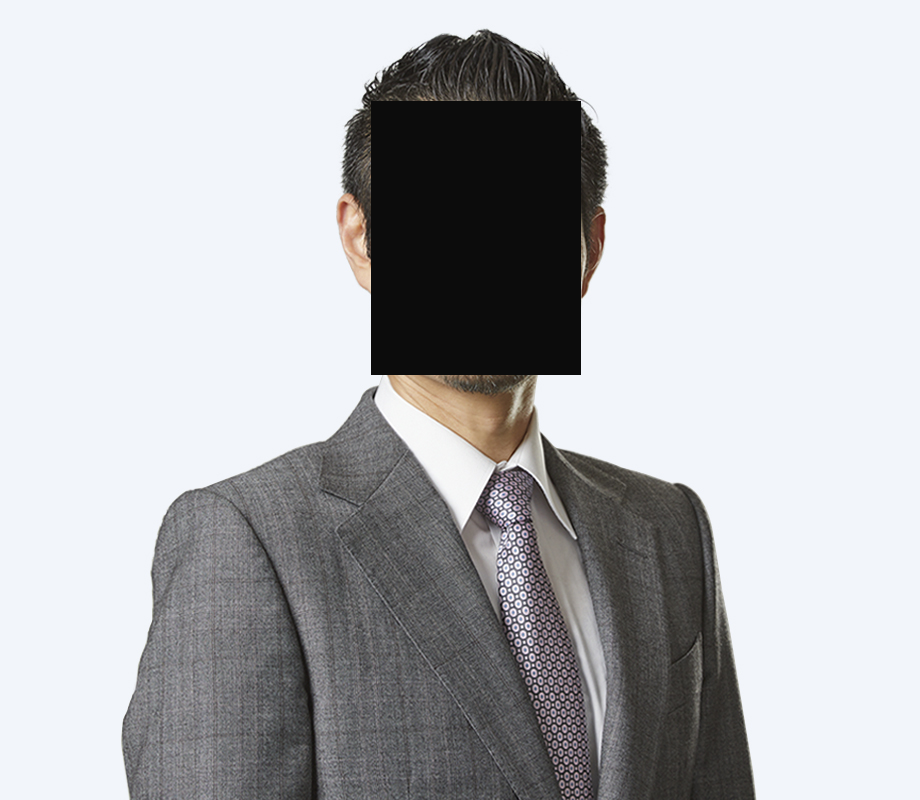
いい感じに塗りつぶせました。
次は画像を被せてみるとして、顔のマスキング処理といえば、攻殻機動隊SACの例のマークが有名ですね。有名ですかね。
Paul Nicholson氏のロゴ、何もかもがクールでステキです。大好きです。
とはいえ、勝手に画像拝借するわけにもいかないな…と悩むこと数秒。
「弊社のロゴ丸いじゃん。」
結論に辿り着いてしまいました。早速やっていきましょう。
def maskImage(img, x, y, width, height):
  circle = Image.open('./mncircle.png')

  # リサイズ
  # 横幅をWidthの倍率にあわせる
  outerDia = 215 # ロゴ直径
  innerDia = 98 # 中抜きの直径
  ratio = width / innerDia  # 倍率

  circle = circle.resize((int(circle.width * ratio), int(circle.height * ratio)))

  adjustedX = x - int((outerDia - innerDia) * ratio / 2)
  diffY = 18 # 目線に軸を調整するための差分
  adjustedY = y - int((outerDia - innerDia) * ratio / 2 - diffY * ratio)

  # マスク処理
  im = Image.new("RGBA", img.size)
  im.paste(img)
  im.alpha_composite(circle, (adjustedX, adjustedY))

  return im
せっかくなので、検出した顔領域の大きさに合わせ、拡縮と位置を対応させてみました。うまく動くといいな。
そして、生まれたものがこちら。
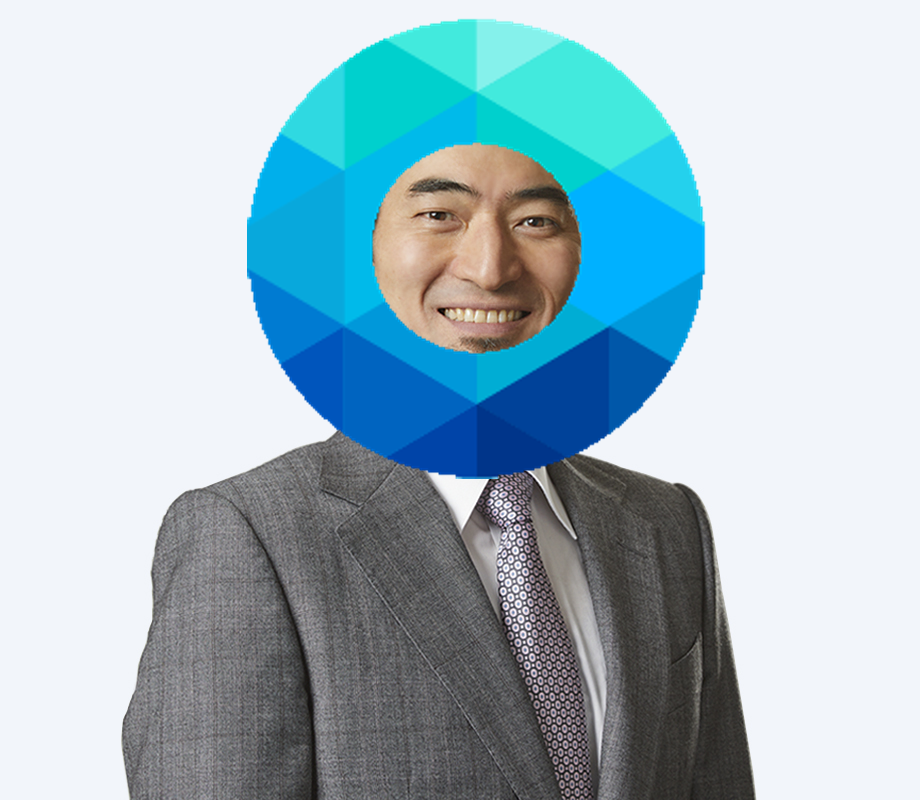
思ってたより攻撃力の高い仕上がりになりましたが、概ね意図したマスキング処理が完成しました。
次のステップ
今回、新規のTencentCloud製品に触れていないので、次回はServerless Cloud Functionsを利用して、サービスのインターフェースを実装してみようと思います。
おわりに
株式会社マイネットでは一緒に働く仲間を募集しています!
弊社では様々なゲームタイトルをより長く、安定して運営していくために、インフラ最適化にも積極的に取り組んでいます。興味のある方、ご応募お待ちしております!
https://mynet.co.jp/recruitment/