前提
Electronで作ったアプリをMac App Store公開する方法は、Qiitaにも記事がありますが
情報が古いのか、自分の環境が悪いのかうまくできなかったので、この記事を公開しています
環境
- MacOS Mojave 10.15.3
- Electron 6.1.7
- 使用ライブラリ
- electron-vue
- electron-vueを使っていなくても手順には変わりないと思います
- electron-vue
注意点
Electronのバージョン7,8はMacOSのPrivateAPIを使用しているので、審査でRejectされます(2020/2/15現在)
Electronのバージョン5以上でない場合もRejectされるので、使用できるのはバージョン5,6の最新版です。(2020/2/15現在)
現在Issueが立てられているので、時間が経てば修正されると思います。https://github.com/electron/electron/issues/20027
1. 証明書を取得する
Apple Developer Program に登録していなければ登録してください。(年会費がかかります)
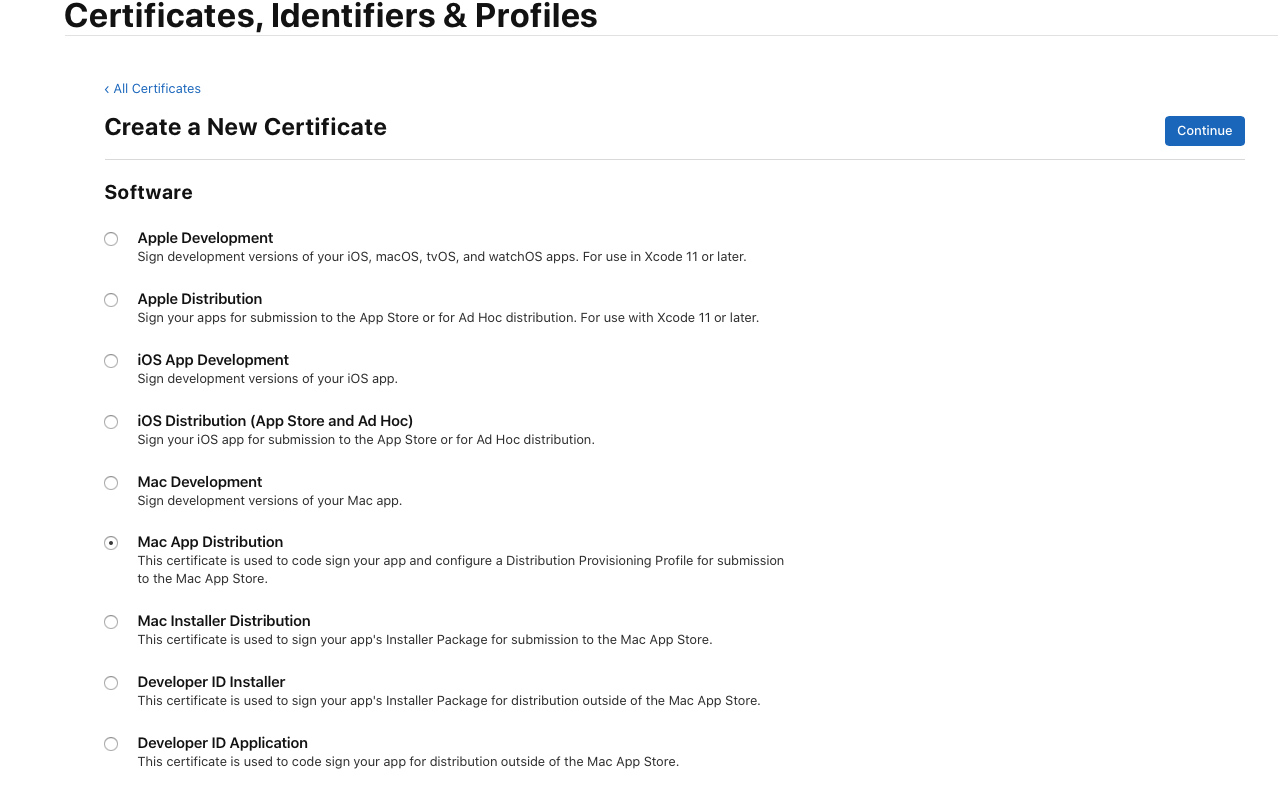
証明書を取得します。
証明書は2つ必要になります。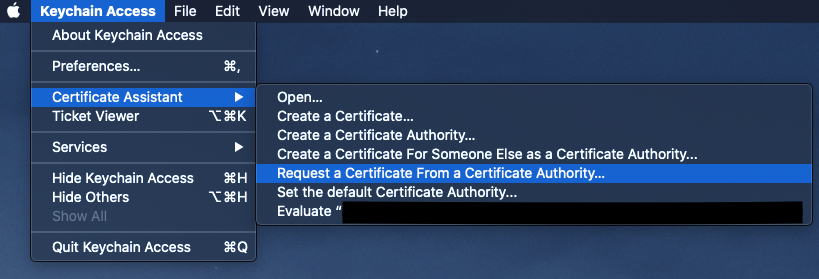
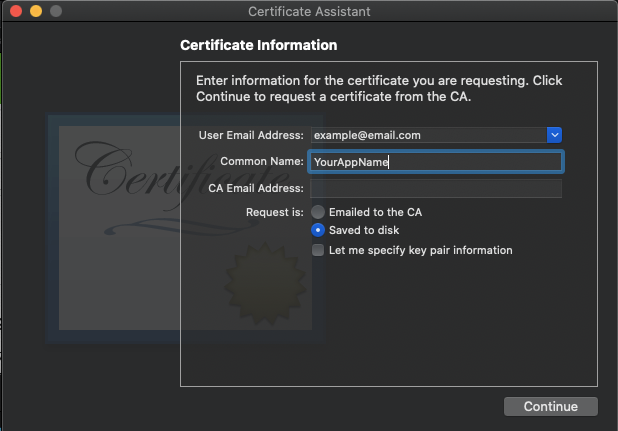
適当な場所に保存します。
Apple Developerにサインインします。
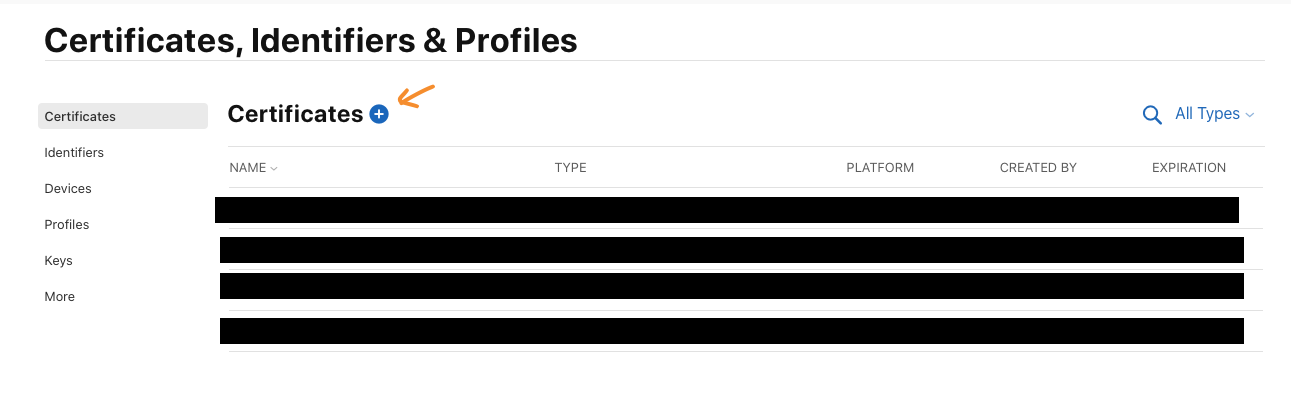
歯車のアイコンをクリックします。
Mac App Distribution を選択します
作ったファイルを選択します

次の画面でダウンロードできるので、ダウンロードします。
ダウンロードしたファイルをダブルクリックで開いてKeyChainに登録します。
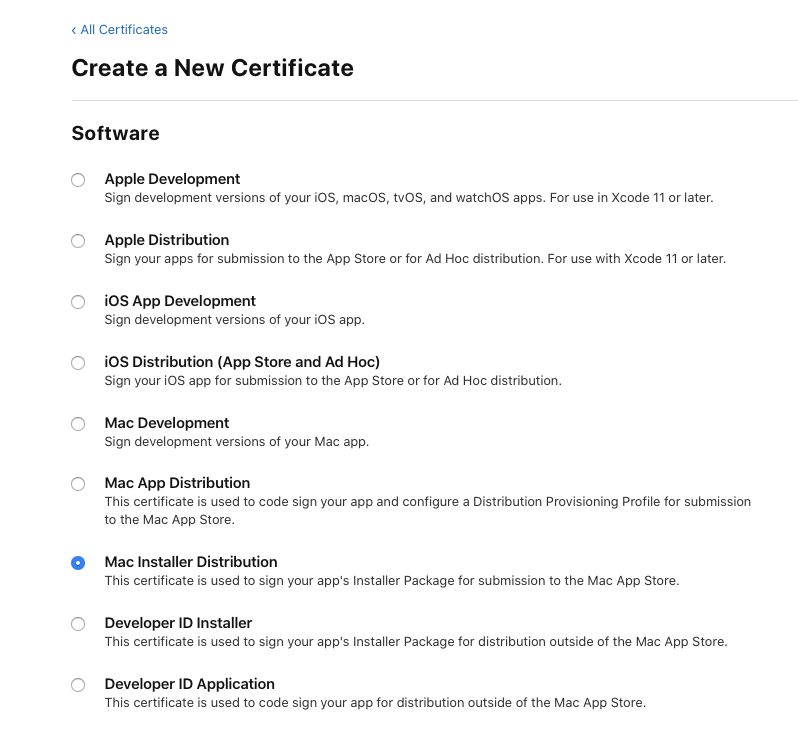
もう一度同じ手順で証明書を作ります。
先ほどは、Mac App Distributionでしたが、次は Mac Installer Distribution を選択します。
終わったらKeyChainに同じく登録します。
以下のように2つが登録されていればOKです。

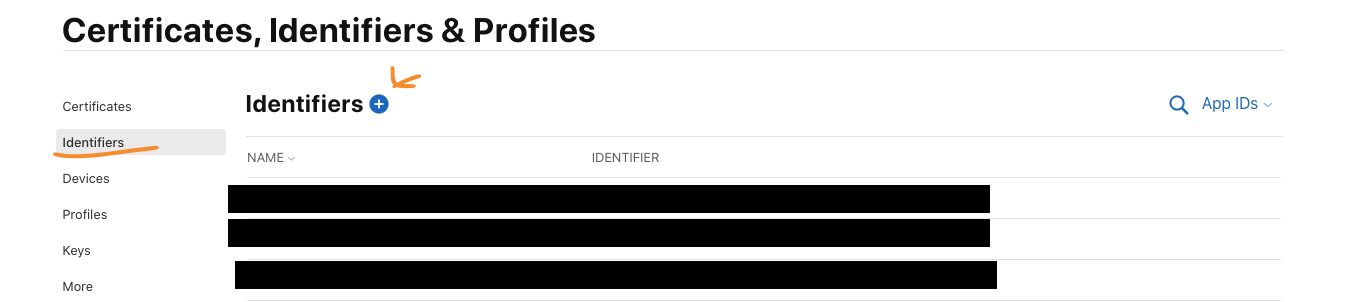
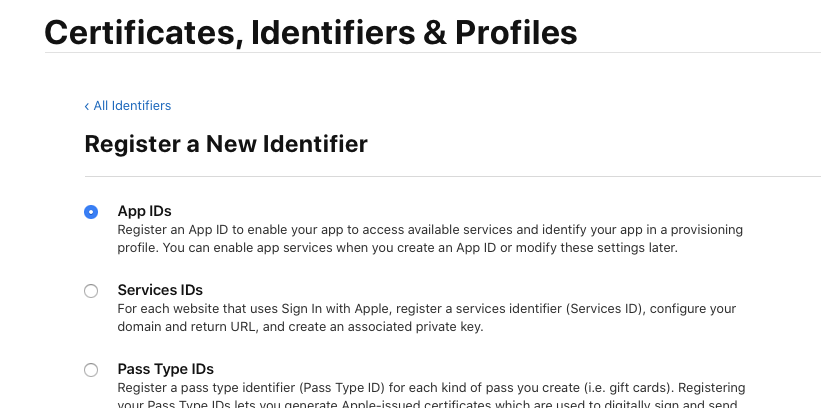
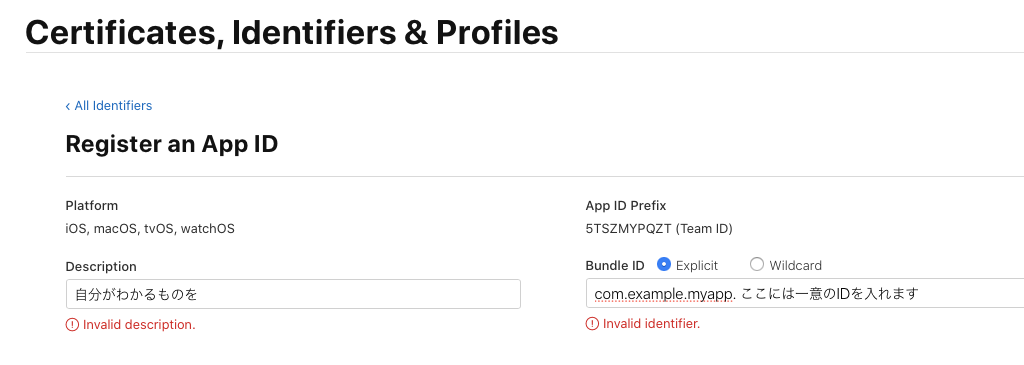
2. AppIDを設定する
アプリケーションのIDを設定します。
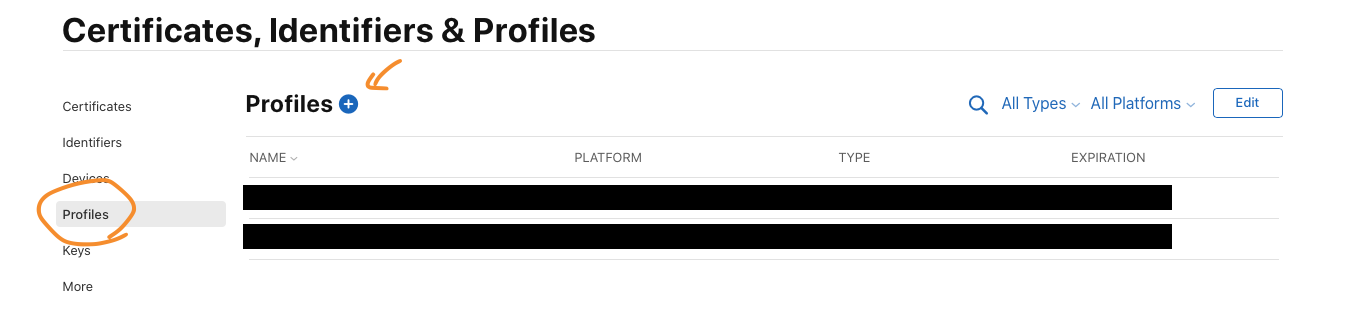
3. Profileを作成する
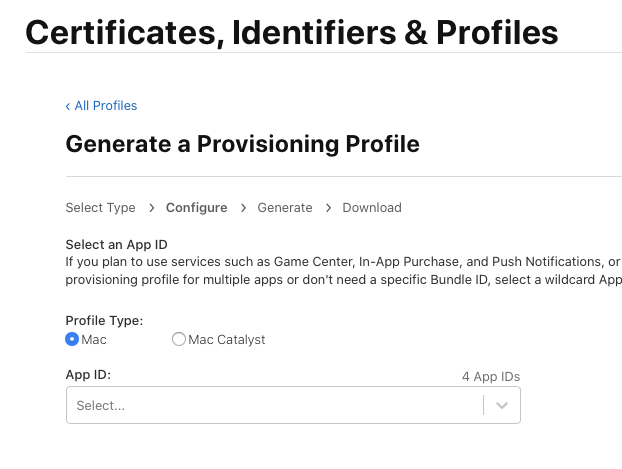
証明書を取得したページからProfileも取得します。

先ほど作ったAppIDを選択します。
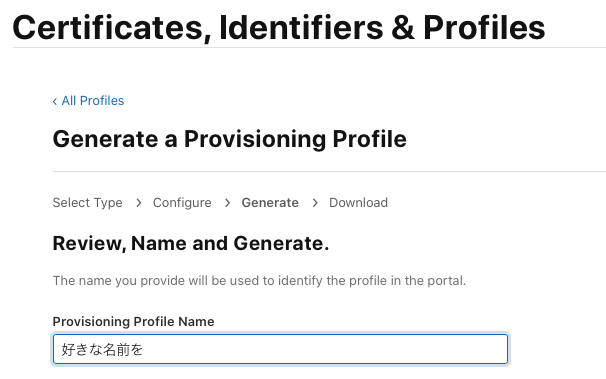
名前を好きなようにつけて、ダウンロードします
4. electron-builderをインストール
npmを使って、electron-builderをインストールします。
npm i -D electron-builder
5. 必要なファイルを作る
<?xml version="1.0" encoding="UTF-8"?>
<!DOCTYPE plist PUBLIC "-//Apple//DTD PLIST 1.0//EN" "http://www.apple.com/DTDs/PropertyList-1.0.dtd">
<plist version="1.0">
  <dict>
    <key>com.apple.security.app-sandbox</key>
    <true/>
    <key>com.apple.security.application-groups</key>
    <array>
      <string>TEAM_ID.appID</string>
    </array>
  </dict>
</plist>
TEAM_ID はapple developerのアカウントのMembershipページにあります。
AppIDは先ほど登録したAppIDを入れます。
作ったアプリケーションがネットワーク通信をするなら
<key>com.apple.security.network.client</key>
<true/>
を追加します。他にも、いくつかの機能を使うには新たにキーを追加する必要があります。
詳細はAppleのページを参照してください。
https://developer.apple.com/library/archive/documentation/Miscellaneous/Reference/EntitlementKeyReference/Chapters/EnablingAppSandbox.html
<?xml version="1.0" encoding="UTF-8"?>
<!DOCTYPE plist PUBLIC "-//Apple//DTD PLIST 1.0//EN" "http://www.apple.com/DTDs/PropertyList-1.0.dtd">
<plist version="1.0">
  <dict>
    <key>com.apple.security.app-sandbox</key>
    <true/>
    <key>com.apple.security.inherit</key>
    <true/>
  </dict>
</plist>
{
  "name": "myApp",
  "version": "1.0.0",
  "build": {
    "productName": "myApp",
    "appId": "com.example.myapp",
    "directories": {
      "output": "build"
    },
    "mac": {
      "icon": "path to icons file",
      "target": "mas"
    },
    "mas": {
      "provisioningProfile": "path to profile",
      "entitlementsInherit": "path to child.plist",
      "entitlements": "path to parent.plist",
      "type": "distribution"
    }
}
name, version, productName は自由に入れてください
appIdには作ったappIDを
icon には icnsのパスを、provisioningProfileには作ったProfileのパスを
entitlementsInheritにはChild.plistのパスを
entitlementsにはParent.plistのパスを入れます
アプリケーションをビルドしてAppStoreに登録する
アプリをビルドします。
node electron-builder
pkg ができたら、TransporterというアプリをAppStoreからダウンロードします。
Transporterを開いて、サインインしてドラックアンドドロップでpkgファイルをサーバーに送信します。
あとは、AppStoreConnectでアプリを作って審査に通れば、MacAppStoreに登録完了です。