1.はじめに
新たに6つのAndroidStudio&Flutter&Firebase記事を書いている。以下は内容、
- 【Flutter/Dart】Firebaseを使おう
https://qiita.com/my_programming/private/7b3251701183ff59b97c - 【Flutter/Dart】Firebase Authenticationを使って認証アプリを作ろう
https://qiita.com/my_programming/private/2d81229942bc0d61da6b - 【Flutter/Dart】Firebase/Firestoreを使ったチャットアプリを作ろう
https://qiita.com/my_programming/private/ad0f7a5f7637a1a37842 - 【Flutter/Dart】Firebase/Firestoreを使ったToDoアプリを作ろう
https://qiita.com/my_programming/private/2da77f3a36bf120761c5 - 【Flutter/Dart】Firebase/HostingでWebアプリを外部公開しよう
- 【Flutter/Dart】Firebase/Firestoreを使ったBlogアプリを作ろう
https://qiita.com/my_programming/private/6f8515dca825e55d0f07
Flutterで作成したアプリをモバイルだけでなくWebでデプロイ(外部公開)する方法を学ぶ。
2.Webアプリを外部公開しよう
認証アプリのために作ったFirebaseのプロジェクトは過去記事で作成したものを流用する。
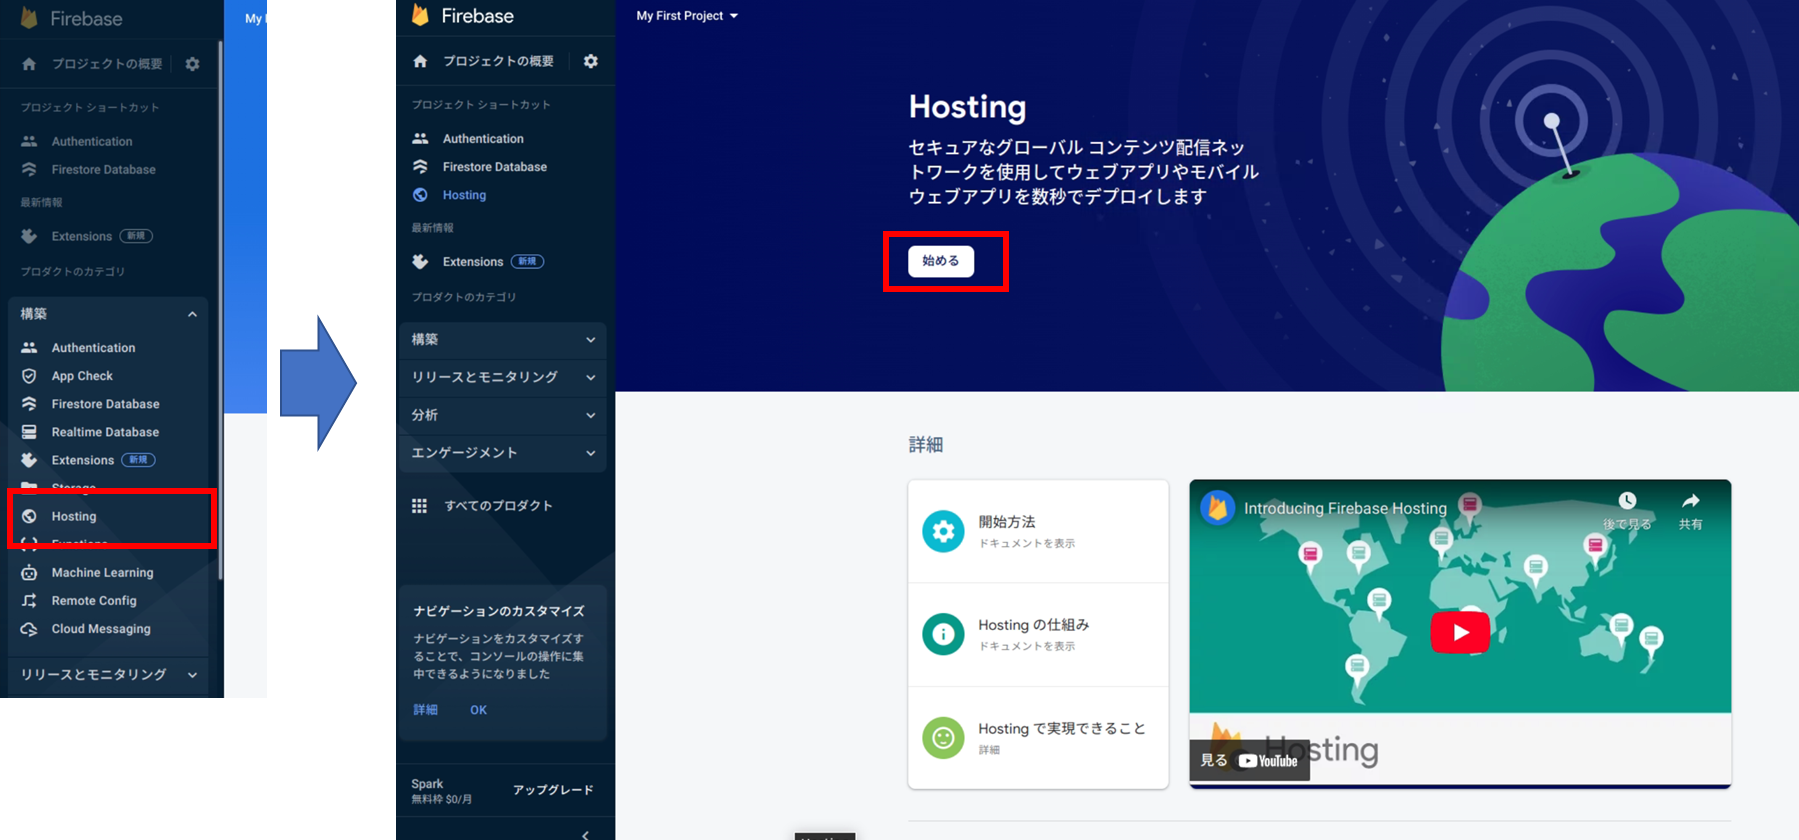
・Hostingの機能を有効化する。サイドナビの構築からHostingを選択した後、始めるを選択。
・コマンドラインツールをインストールするために、ターミナルで以下を実行。
※windowsではこちら参考
curl -sL firebase.tools | bash

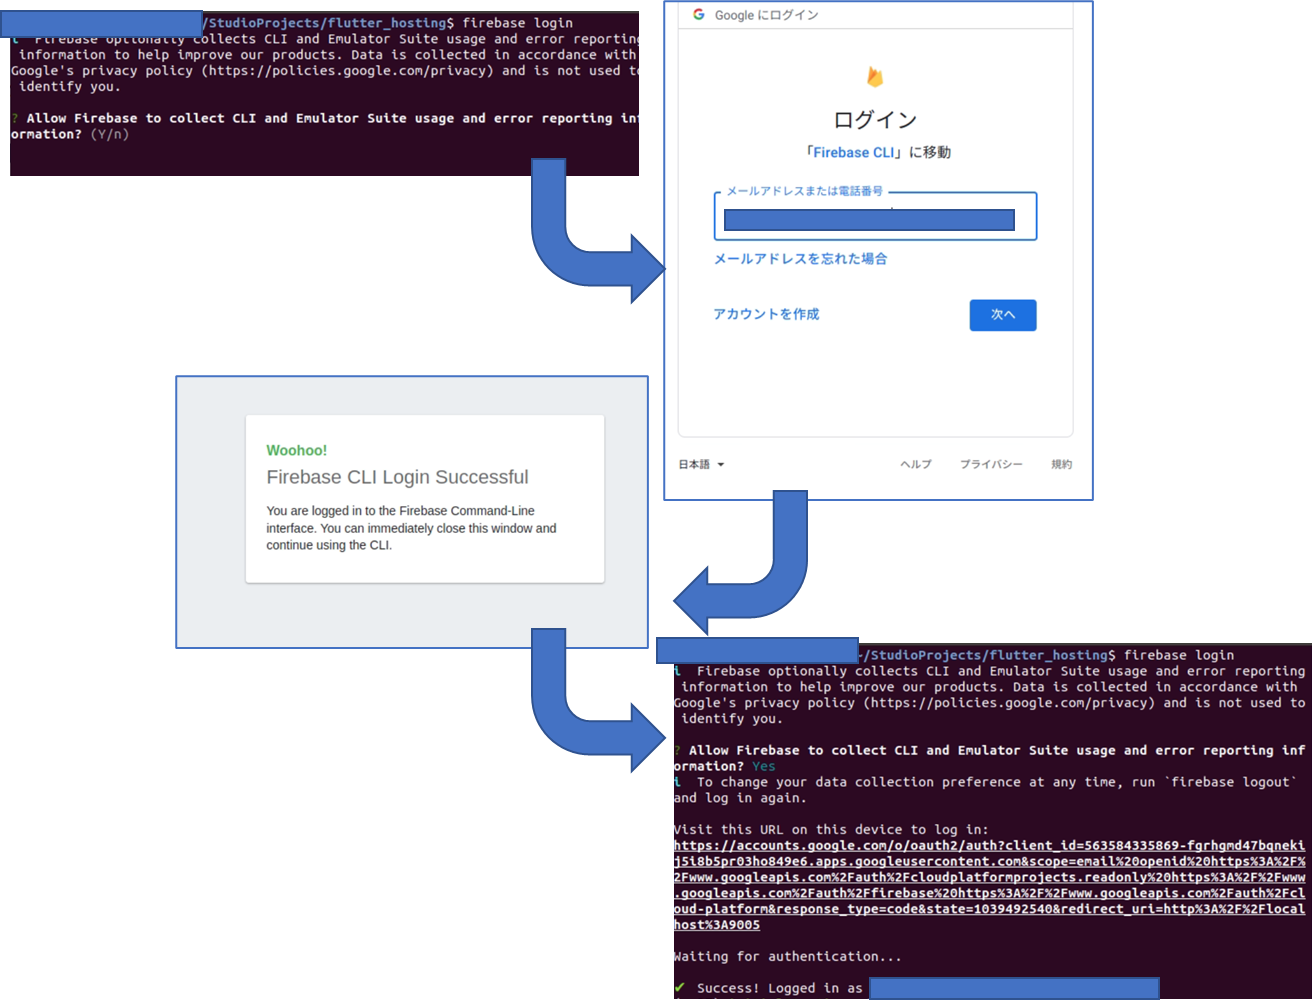
・コマンドラインツールを使ってプロジェクトの初期設定を行う。firebase loginをターミナルで実行するとブラウザに認証画面が表示されるので、アカウントを選択しログイン。
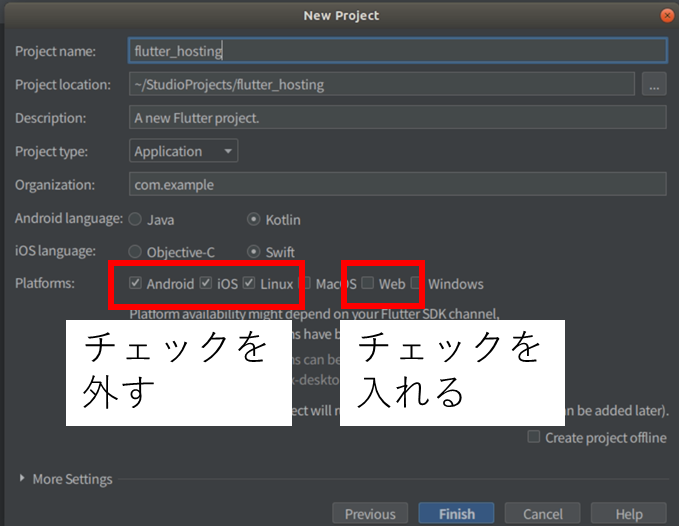
・ここまできたら、Flutterのプロジェクトを作成し開発できる状態にする。今回はflutter_hostingという名前のflutterプロジェクトを作成する。android/iosのチェックを外し、逆にwebのチェックを入れておく。
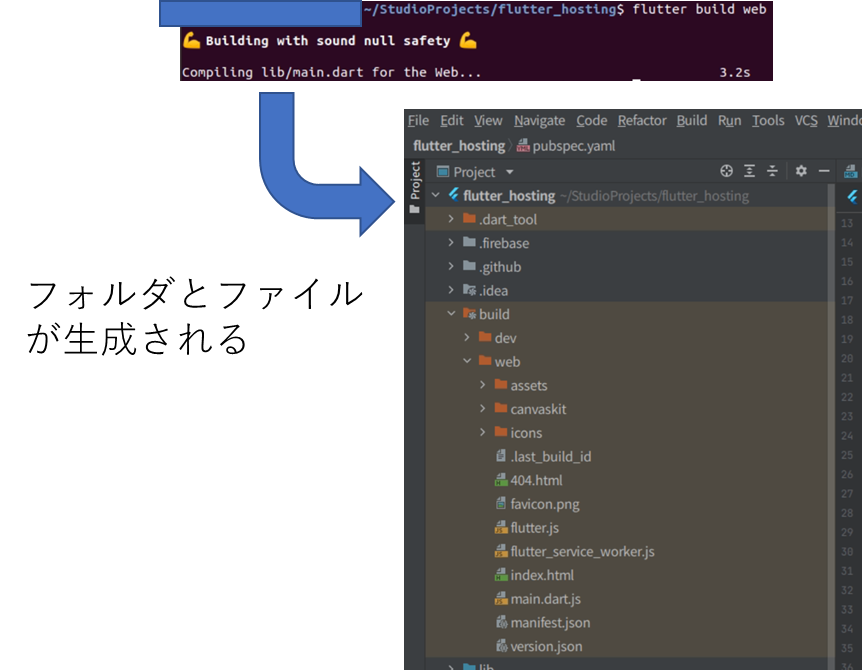
・ターミナルでflutter build webを実行。build/webフォルダ内にindex.htmlが作成されていることを確認する。
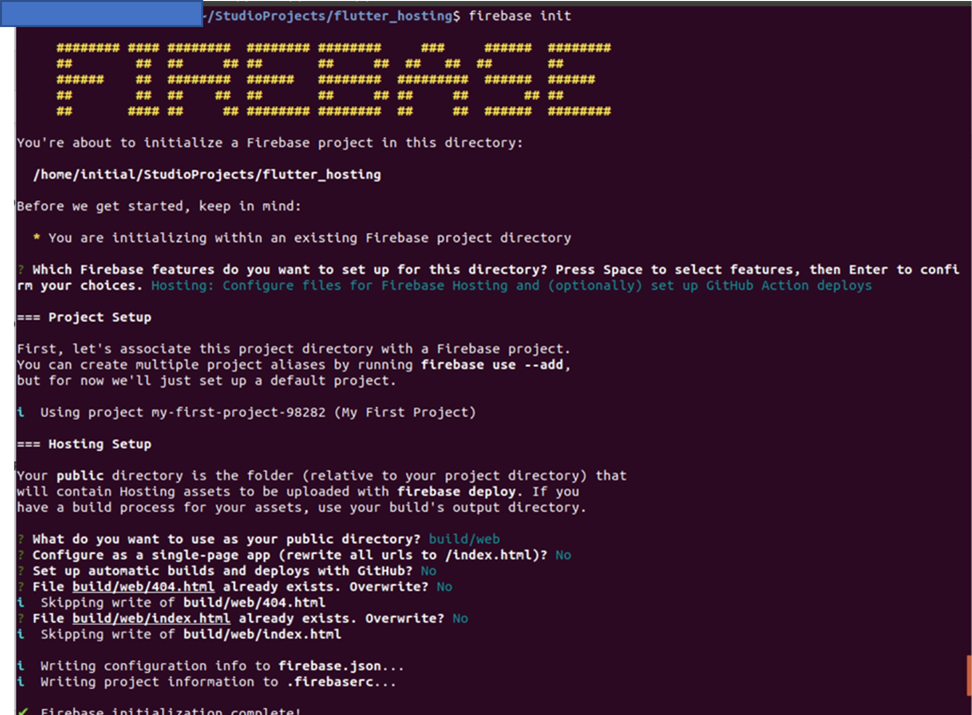
・ターミナルのカレントフォルダがflutter_hostingのルートであることを確認したのち、ターミナルでfirebase initを実行。
? Which Firebase features do you want to set up for this directory? Press Space to select features, then Enter to confirm your choices.
と聞かれたら以下を選択。選択肢の移動は上下の矢印キー、選択そのものスペースボタン、決定はエンターキー。
Hosting: Configure files for Firebase Hosting and (optionally) set up GitHub Action deploys
以下の質問を聞かれたら、
? Please select an option: (Use arrow keys)
Use an existing projectを選択。
以下の質問を聞かれたら、
? Select a default Firebase project for this directory: (Use arrow keys)
現在firebase上で選択しているデータベースのあるプロジェクト名を選択。
その他の設定は以下の通り。
? What do you want to use as your public directory? build/web
? Configure as a single-page app (rewrite all urls to /index.html)? No
? Set up automatic builds and deploys with GitHub? No
? File build/web/404.html already exists. Overwrite? No
i  Skipping write of build/web/404.html
? File build/web/index.html already exists. Overwrite? No
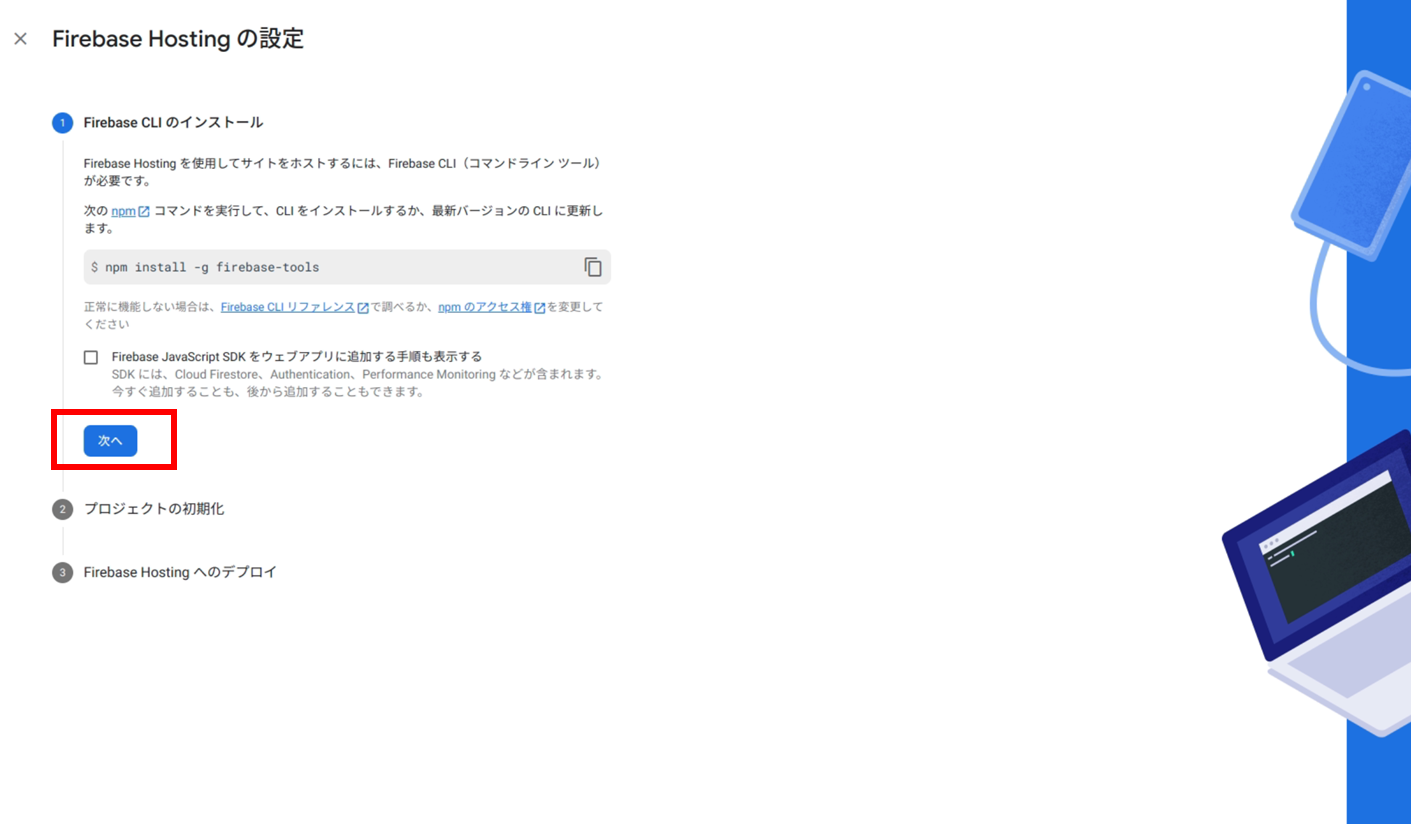
・ブラウザに戻って、プロジェクトの初期化の画面では何もせずに「次へ」を選択。次のFirebase Hostingへのデプロイの画面では何もせずに「コンソールに進む」を選択。
・ターミナルに戻ってからfirebase deployを実行。以下が表示されていれば成功。
=== Deploying to 'my-first-project-98282'...

i  deploying hosting
i  hosting[my-first-project-98282]: beginning deploy...
i  hosting[my-first-project-98282]: found 22 files in build/web
✔  hosting[my-first-project-98282]: file upload complete
i  hosting[my-first-project-98282]: finalizing version...
✔  hosting[my-first-project-98282]: version finalized
i  hosting[my-first-project-98282]: releasing new version...
✔  hosting[my-first-project-98282]: release complete

✔  Deploy complete!

Project Console: https://console.firebase.google.com/project/my-first-project-98282/overview
Hosting URL: https://my-first-project-98282.web.app
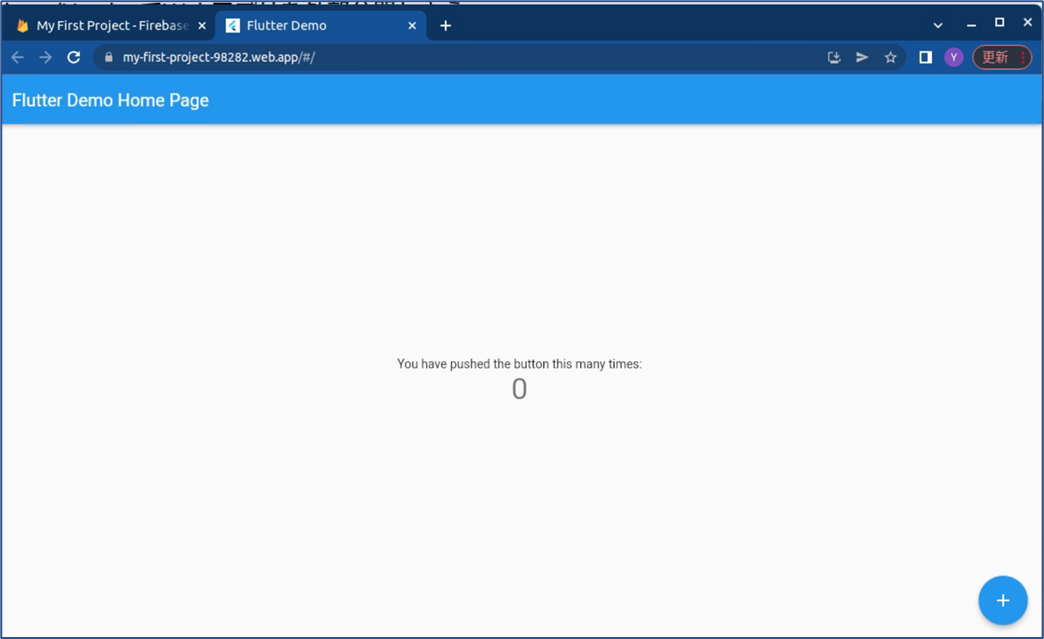
・https://my-first-project-98282.web.appをブラウザに貼り付けてEnterを押すとブラウザにWebアプリが表示される。ここでWebアプリが表示されない場合、flutter build webで作成されたbuild/webを「? What do you want to use as your public directory?」で選択できていないか、「? Configure as a single-page app (rewrite all urls to /index.html)?」で「Y」を選択してindex.htmlの内容を書き換えてしまっていることが原因になっている可能性がある。
3.まとめ
Webアプリを外部公開する方法を学んだ。
