はじめに
WildFlyのホットデプロイ機能が便利すぎて涙が出てきたため、自分への備忘録として残します。
ホットデプロイって
ホットデプロイとは、WebアプリケーションやWebサービス(に加えた変更)を運用環境に適用する際、システムの一時停止と再起動を伴わずに適用することである。ここから抜粋
すごくザックリいうと・・・
ソースコードの修正→サーバーの再起動→反映の確認
という面倒な手順をせずに済むようになる。
今回試した環境
WildFly10
Eclipse Oxygen (画面ショットで使われているEclipseのバージョンです。設定自体には関係ないです)
設定方法
現在の状態を確認する
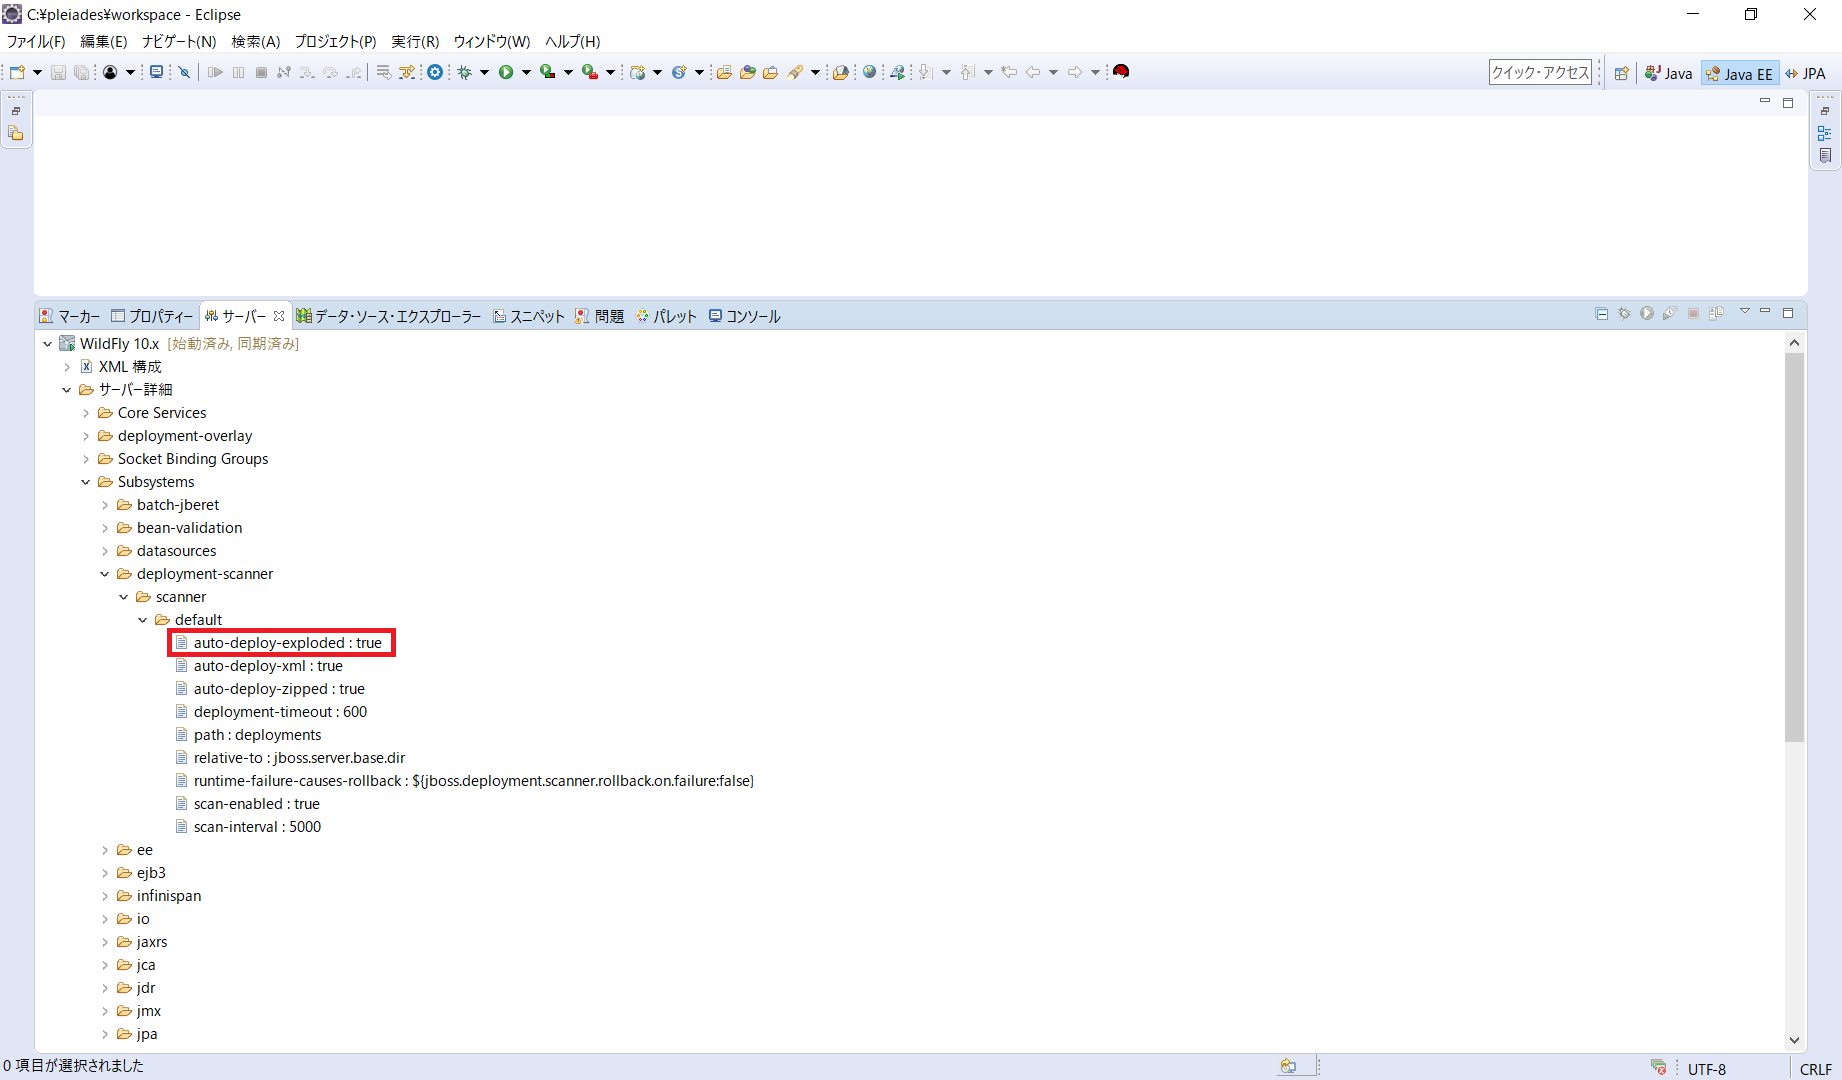
EclipseからWildFlyを起動後、サーバーのウィンドウ(ビュー)から
WildFly10.x>サーバー詳細>Subsystems>deployment-scanner>scanner>default と開いていき
default内のauto-deploy-exploded属性を確認する。
trueの時はホットデプロイ機能が有効、falseの時は無効になっている。
画像は有効に設定済みのためtrueになっている。
「auto-deploy-exploded」をtrueにする
現在のauto-deploy-explodedの状態を確認した後、サーバーを停止させる。
設定の変更をするためにはstandalone.xmlを編集する必要がある。
wildfly-10.0.0.Final\standalone\configuration\standalone.xml を開く。
「deployment-scanner」タグを探す。
以下「deployment-scanner」タグ部分を抜粋
<deployment-scanner path="deployments" relative-to="jboss.server.base.dir" scan-interval="5000" auto-deploy-exploded="true" runtime-failure-causes-rollback="${jboss.deployment.scanner.rollback.on.failure:false}"/>
「auto-deploy-exploded」について何も書かれていない状態だとfalseになるため、上記のように「auto-deploy-exploded="true"」を追記し保存する。
設定の反映を確認する
standalone.xmlの編集が終わったあと、再度Eclipseからサーバーを起動させ「auto-deploy-exploded」属性がtrueになっていることを確認出来たら、設定は完了!
あとはその便利さを体感してください。