ubilinux - edisonをアクセスポイント化しよう その2
Overview
・ubilinux上でedisonをwifiアクセスポイント化する.
・アクセスポイント化には「hostapd」を利用する.
・ただし,既存のhostapdではedisonに対応していないので,testing版に更新する.
ubilinuxにはすでにhostapdがインストールされています.
が,動作しません. ←ココ重要
なんでも,すでにインストールされているものはedisonには対応していないとのこと.
最新のhostapd(testing)を再インストールすることで解決するみたいですので(参考[1]),その手法をまとめます.
root@ubilinux:~# hostapd -v
hostapd v1.0
User space daemon for IEEE 802.11 AP management,
IEEE 802.1X/WPA/WPA2/EAP/RADIUS Authenticator
Copyright (c) 2002-2012, Jouni Malinen <j@w1.fi> and contributors
注意!!
- wifiアクセスポイント化するため,必ずUSB経由で行ってください.
(でないと,設定ミスでedisonの無線設定が吹き飛んだ時に悲惨なことになります.) - ただし,apt-getを使用しますので,Step1はインターネットに接続する必要があります.
Step 1 : hostapdのインストール
Step 1-1 : リポジトリサイトの登録
edisonに対応するhostapdを取得するために,リポジトリサイトを登録します.
まず復元用に,現在のリポジトリリストのバックアップを取ります.
# cp /etc/apt/sources.list /etc/apt/sources.list.bak
次に,リポジトリサイトをリストに登録します.
# echo deb http://ftp.us.debian.org/debian testing main contrib non-free >> /etc/apt/sources.list
# apt-get update
Step 1-2 : hostapdのインストール
hostapdを先ほど登録したリポジトリサイトから取得・インストールします.
# apt-get -t testing install hostapd
インストール中に以下の画面が出ますが,<Yes>を選択します.
Package configuration

 lqqqqqqqqqqqqqqqqqqqqqqqqu Configuring libc6:i386 tqqqqqqqqqqqqqqqqqqqqqqqqqk
 x                                                                           x
 x There are services installed on your system which need to be restarted    x
 x when certain libraries, such as libpam, libc, and libssl, are upgraded.   x
 x Since these restarts may cause interruptions of service for the system,   x
 x you will normally be prompted on each upgrade for the list of services    x
 x you wish to restart.  You can choose this option to avoid being           x
 x prompted; instead, all necessary restarts will be done for you            x
 x automatically so you can avoid being asked questions on each library      x
 x upgrade.                                                                  x
 x                                                                           x
 x Restart services during package upgrades without asking?                  x
 x                                                                           x
 x                    <Yes>                       <No>                       x
 x                                                                           x
 mqqqqqqqqqqqqqqqqqqqqqqqqqqqqqqqqqqqqqqqqqqqqqqqqqqqqqqqqqqqqqqqqqqqqqqqqqqqj
インストール中に以下のメッセージが表示された際は,エンターキーを入力してください.
Configuration file `/etc/init.d/hostapd'
 ==> Modified (by you or by a script) since installation.
 ==> Package distributor has shipped an updated version.
   What would you like to do about it ?  Your options are:
    Y or I  : install the package maintainer's version
    N or O  : keep your currently-installed version
      D     : show the differences between the versions
      Z     : start a shell to examine the situation
 The default action is to keep your current version.
*** hostapd (Y/I/N/O/D/Z) [default=N] ? [enter]
バージョンを確認すると,正常にhostapdがアップデートされていることが確認できます.
root@ubilinux:~# hostapd -v
hostapd v2.3
User space daemon for IEEE 802.11 AP management,
IEEE 802.1X/WPA/WPA2/EAP/RADIUS Authenticator
Copyright (c) 2002-2014, Jouni Malinen <j@w1.fi> and contributors
Step 1-3 : 追加したリポジトリサイトの削除
先ほど追加したリポジトリサイトはもう不必要なので削除します.
(これを怠ると,今後のapt-getに悪影響を与えかねないので.)
Step 1-1冒頭で作成したバックアップファイルを復元します.
# mv -f /etc/apt/sources.list.bak /etc/apt/sources.list
Step 2 : hostapdの設定
正常にインストールされたら,次にhostapdの設定を行います.
まず,すでにある設定ファイルをバックアップとして残し,新しくhostapd.confを作り直します.
# mv /etc/hostapd/hostapd.conf /etc/hostapd/hostapd.conf.org
新しく設定ファイルを作成します(ssid,channel,wpa_passphraseはお好みで).
interface=wlan0
driver=nl80211
ssid=edison-ap
hw_mode=g
channel=2
macaddr_acl=0
auth_algs=1
ignore_broadcast_ssid=0
wpa=2
wpa_passphrase=edison-apap
wpa_key_mgmt=WPA-PSK
wpa_pairwise=TKIP
rsn_pairwise=CCMP
最後に,以下のファイルを作成(or 変更)します.
DAEMON_CONF="/etc/hostapd/hostapd.conf"
Step 3 : ネットワークの再設定
注意!! : ここからwifiの設定を変更していきます.無線lan設定している方はお気をつけて.
まず,WPASupplicantを無効にしておきます.
(ファイルを消すか,以下のように別ディレクトリに移行するかしてください.)
# mv /usr/share/dbus-1/system-services/fi.epitest.hostap.WPASupplicant.service ~/
次に,ネットワークの設定を行います.
wlan0 (wifi)に対して,固定IPアドレスを振ります.
(IPアドレスは何でもいいですが,dhcpサーバ化するのであればxxx.xxx.xxx.1にするのが無難です.)
~~~ 中略 ~~~
# auto wlan0 (コメントアウト)
# iface wlan0 inet dhcp (コメントアウト)
    #wpa-ssid xxxxxxxxxxxxxxx (コメントアウト)
    #wpa-psk xxxxxxxxxxxxxxxx (コメントアウト)
~~~ 中略 ~~~
# And the following 4 lines are for when using hostapd...
# auto wlan0
allow-hotplug wlan0
iface wlan0 inet static
    address 192.168.42.1
    netmask 255.255.255.0
ネットワークを再起動します.
# service networking restart
Step 4 : hostapdの起動
hostapdを起動します.
# service hostapd start
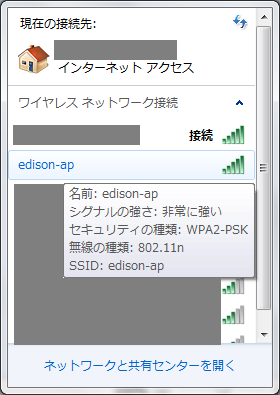
コマンド実行後,"edison-ap"というSSIDの無線が飛んでいることが確認できるかと思います.
(飛んでいれば成功です!!)
/etc/hostapd/hostapd.confで設定したパスワード**"edison-apap"**というパスワードで接続できます.
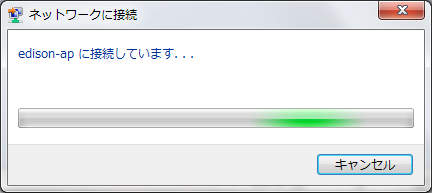
...が,このままではedisonからIPアドレスが振られないので,自分でIPアドレス・サブネットマスクを設定する必要があります.
(でないと,ずっと「接続中」になってるかと思います.)
それを解決する方法は「dhcpサーバ化」することですが,それについてはその2に記載します.
ubilinux - edisonをアクセスポイント化しよう その2

参考
[1] https://communities.intel.com/message/284453
[2] http://d.hatena.ne.jp/penkoba/20130806/1375742819