はじめに
Railsで作ったサービスに簡単にログイン認証機能を導入できるdeviseの使い方を簡単に解説します。(説明とかいいからログイン認証機能さっさと導入したいという方のお役にも立てると思います。)
deviseとは
deviseはRailsで作ったアプリに簡単にログイン認証機能を導入できるgemです。
(ログインしていない人にはこのページみせない、、とかログイン何回かミスったらアカウントをロックしたりとかの機能導入できます。)
deviseを導入する
まずRailsプロジェクトを作成していきます。
$ rails new devise-sample-app
$ cd devise-sample-app
Gemfileに以下を記述してインストールします。
Gemfile
# devise
gem 'devise'
terminal
$ bundle install
次に下記コマンドを実行します。
terminal
$ rails g devise:install
するとdeviseのセットアップ方法が表示されます。
terminal
Some setup you must do manually if you haven't yet:

  1. Ensure you have defined default url options in your environments files. Here
     is an example of default_url_options appropriate for a development environment
     in config/environments/development.rb:

       config.action_mailer.default_url_options = { host: 'localhost', port: 3000 }

     In production, :host should be set to the actual host of your application.

  2. Ensure you have defined root_url to *something* in your config/routes.rb.
     For example:

       root to: "home#index"

  3. Ensure you have flash messages in app/views/layouts/application.html.erb.
     For example:

       <p class="notice"><%= notice %></p>
       <p class="alert"><%= alert %></p>

  4. You can copy Devise views (for customization) to your app by running:

       rails g devise:views

===============================================================================
簡単に説明すると、
- 本登録メールに記載されるURLの指定を行ってください。
- route.rbでrootのURLの設定をしてください。
- エラーメッセージを表示するHTMLをapplication.html.erbに追加してください。
- deviseで生成されるデフォルトのログイン画面などをカスタマイズしたい場合、下記のコマンドを実行してください。
のような意味ですが今ここでは設定しなくて大丈夫です。
次に下記コマンドを実行します。
terminal
$ rails g devise User
上記コマンド実行後に
terminal
$ rails db:migrate
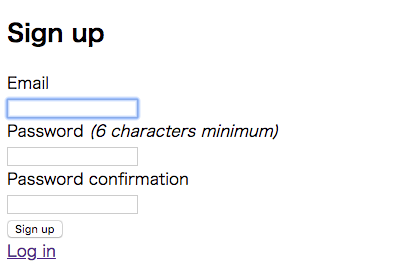
で、「localhost:3000/users/sign_up」にアクセスすると会員登録画面ができています。
ログイン認証を設定する
これでログイン機能ができたので、次はログインが必要なページとログインなしで閲覧できるページを作成します。
terminal
$ rails g controller home index mypage
上記コマンドでhomeコントローラーとログインが必要なmypage、ログイン不要なindexを作成します。
次にhome_controller.rbにbefore_actionを追記します。
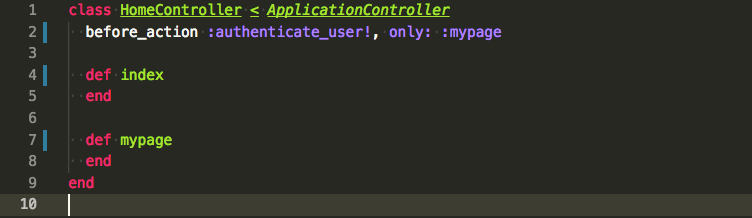
これでmypageにアクセスするとログインを要求され、indexにアクセスするとそのまま閲覧できるかと思います。