CafeSnapにPush Notificationsを追加するにあたり、対応&実装した手順です。
おおまかな流れ
- member centerでAppIDごとの設定からpush通知を有効化
- macのキーチェーンアクセスで証明証を発行
- member centerでAPNsの証明証を発行
- amazon snsに証明証を登録
- クライアントサイドに通知を受け取るコードを実装
- いったんテスト
- サーバーサイドにプッシュ通知を送信する処理を実装
- 完成
手順
member centerでアプリのプッシュ通知の設定を追加する
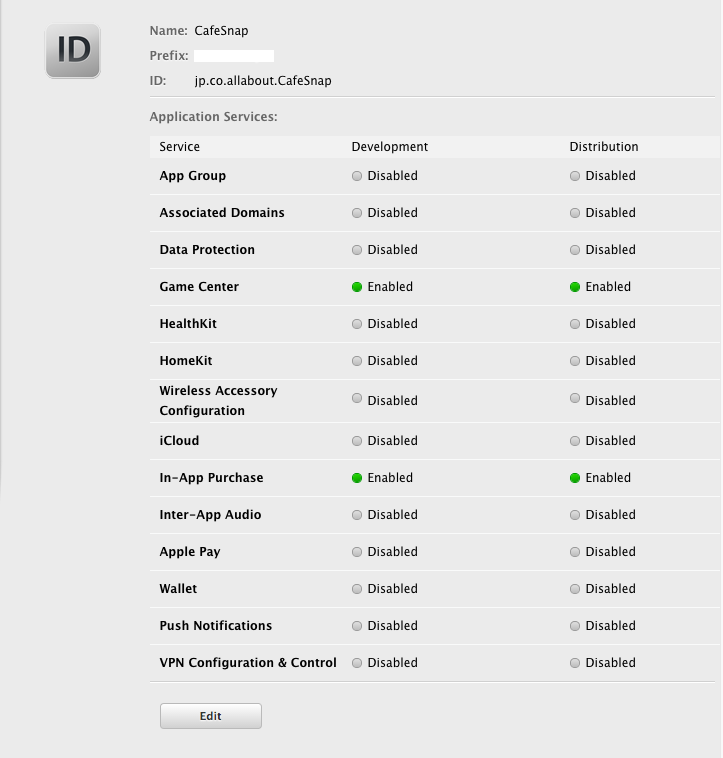
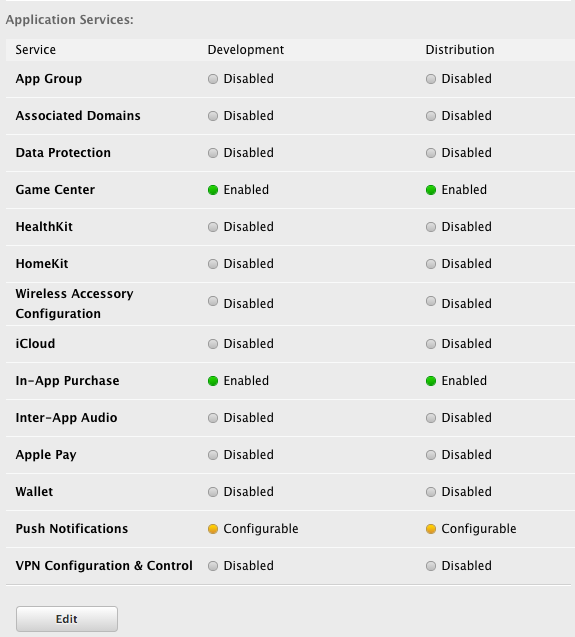
下記の通りPush NotificationsがDisabledになっています。
Edit画面に移動し、Push Notificationsにチェックを入れます
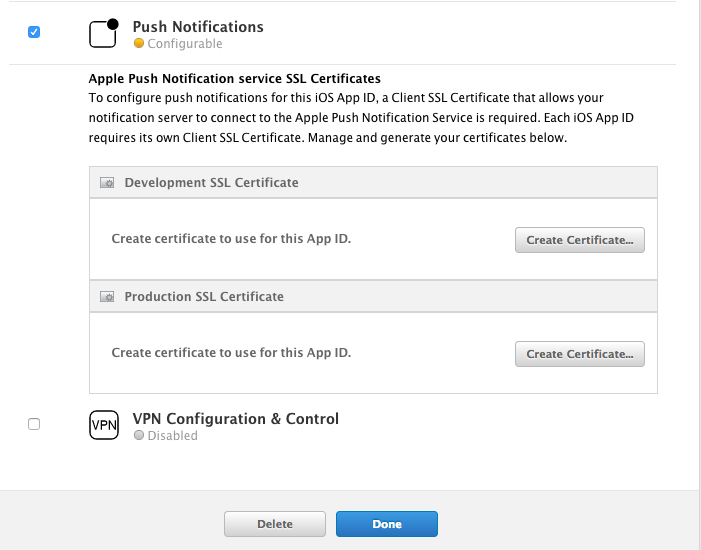
上記画面でチェックしてdoneを押すと、一覧画面では下記のようになります
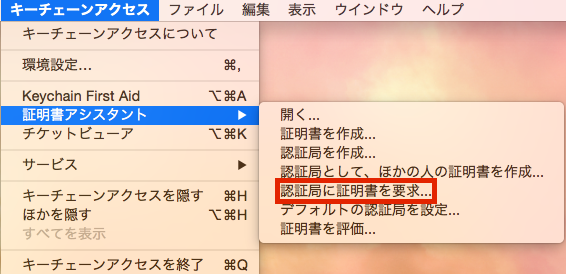
macで証明証を要求
キーチェーンappを起動して証明証を要求
※ここで発行する証明証は使いまわさず、DevとDistribution別々に作成してください。プッシュ通知が届かずハマります。。
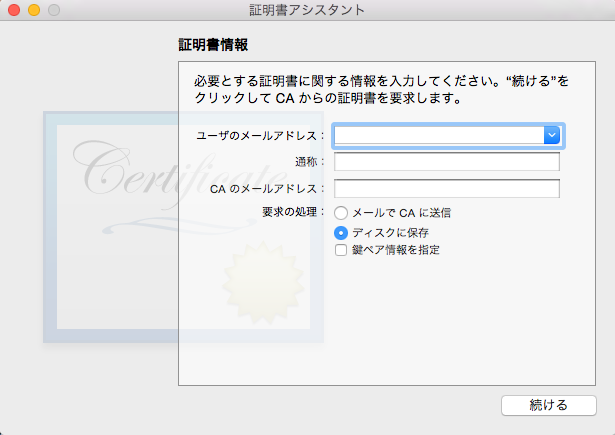
開発者のメールアドレスを入力(CAのアドレスやその後に聞かれるパスワードは空でOK)。進むとファイルができます。
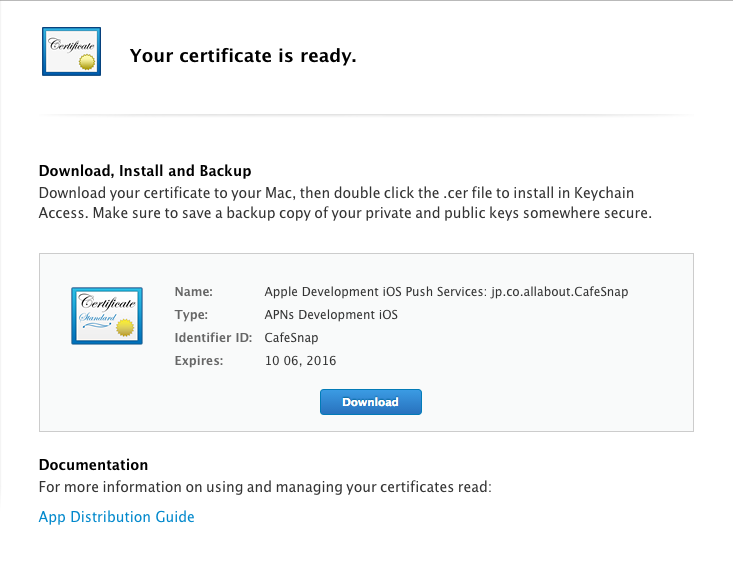
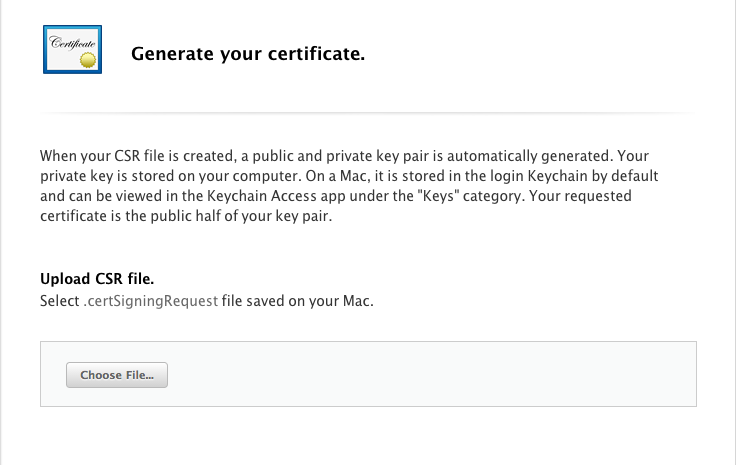
member centerでもう一度下記画面を表示してcreate certificateを行います

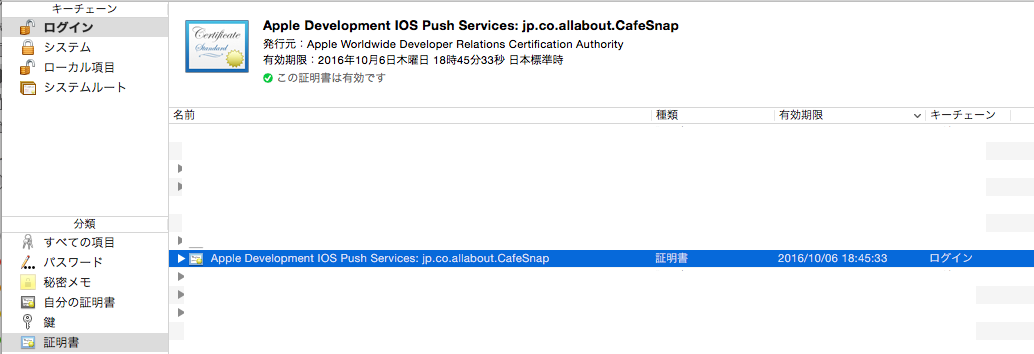
Choose Fileをクリックして、先ほどディスクに保存した証明書をアップロードします
上記が終了したら、ProvisioningProfileがinvalidになっているはずなので、edit→generateを行って下さい。
※上記はdev/pro両方行う必要があります。
Amazon SNSの設定をする
下記作業の前に、SNS用のIAMユーザーを作成しておきます。
アプリケーションを作成。名前は特に決まりは無いですが、developmentとproductionが区別できる名前がよいです。
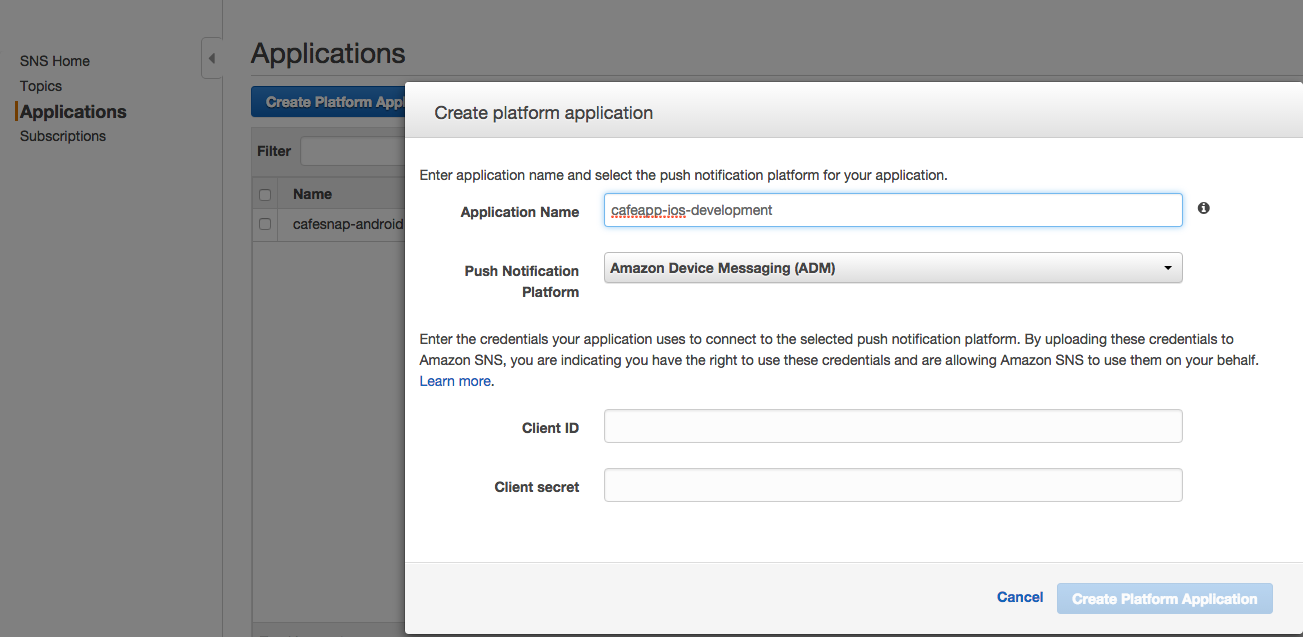
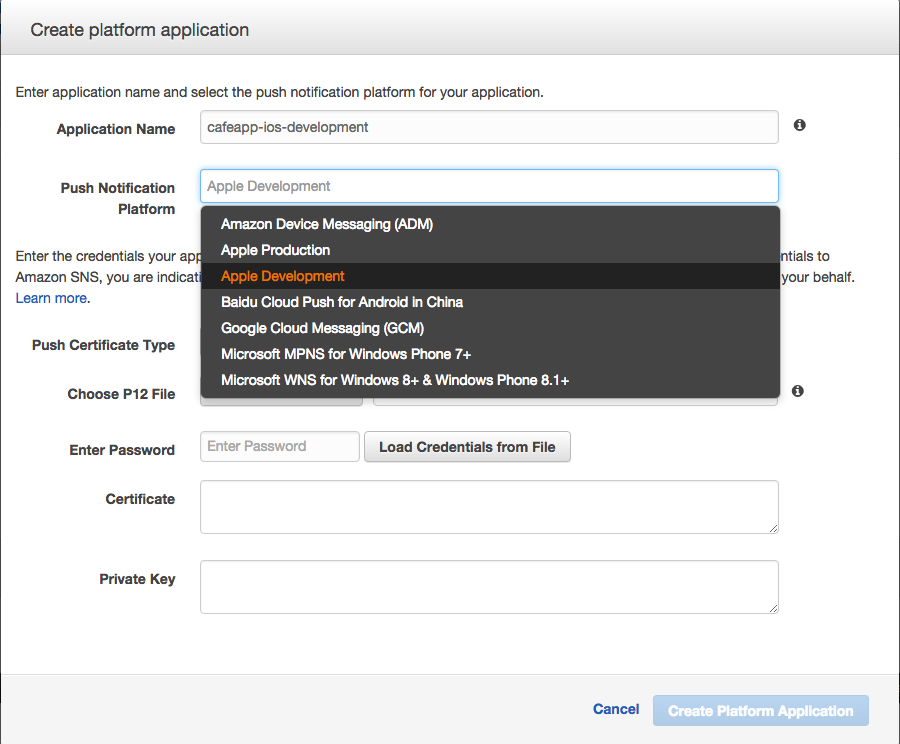
Apple Developmentを選択し、先ほどのp12ファイルをアップロードします。作成時にパスワード指定した場合は入力します。
実装
流れとしては、
- 端末でAPNsのデバイストークン取得
- 自前のAPIサーバーにデバイストークンを送信
- APIサーバーからAmazon SNSにデバイストークンを登録
- プッシュ通知を送信
iOS
今回はiOS8以降を想定
- (BOOL)application:(UIApplication *)application didFinishLaunchingWithOptions:(NSDictionary *)launchOptions
{
	...
	// プッシュ通知
    UIUserNotificationType types =
    UIUserNotificationTypeBadge|
    UIUserNotificationTypeSound|
    UIUserNotificationTypeAlert;
    UIUserNotificationSettings *settings = [UIUserNotificationSettings settingsForTypes:types categories:nil];
    [application registerUserNotificationSettings:settings];
	...
}

- (void)application:(UIApplication *)application didRegisterUserNotificationSettings:(UIUserNotificationSettings *)notificationSettings
{
    [application registerForRemoteNotifications];
}

- (void)application:(UIApplication *)application didRegisterForRemoteNotificationsWithDeviceToken:(nonnull NSData *)deviceToken
{
    // スペースが入っているのでdeviceTokenを整形
    NSString *deviceTokenString = [[[NSString stringWithFormat:@"%@", deviceToken]
                                    stringByTrimmingCharactersInSet:[NSCharacterSet characterSetWithCharactersInString:@"<>"]]
                                   stringByReplacingOccurrencesOfString:@" " withString:@""];

    // デバイストークンはUDに保存し、変更があったらサーバーに送信する
    NSLog(@"%@", deviceTokenString);
}

- (void)application:(UIApplication *)application didFailToRegisterForRemoteNotificationsWithError:(nonnull NSError *)error
{
    NSLog(@"%@", error);
}

- (void)application:(UIApplication *)application didReceiveRemoteNotification:(NSDictionary *)userInfo fetchCompletionHandler:(void (^)(UIBackgroundFetchResult))completionHandler
{
    NSLog(@"%@", userInfo);
}
とりあえずここまでできたらAWSのマネジメントコンソール上からテストでメッセージを送信してみます。
Endpointを選択し、Publish to Endpointを押す
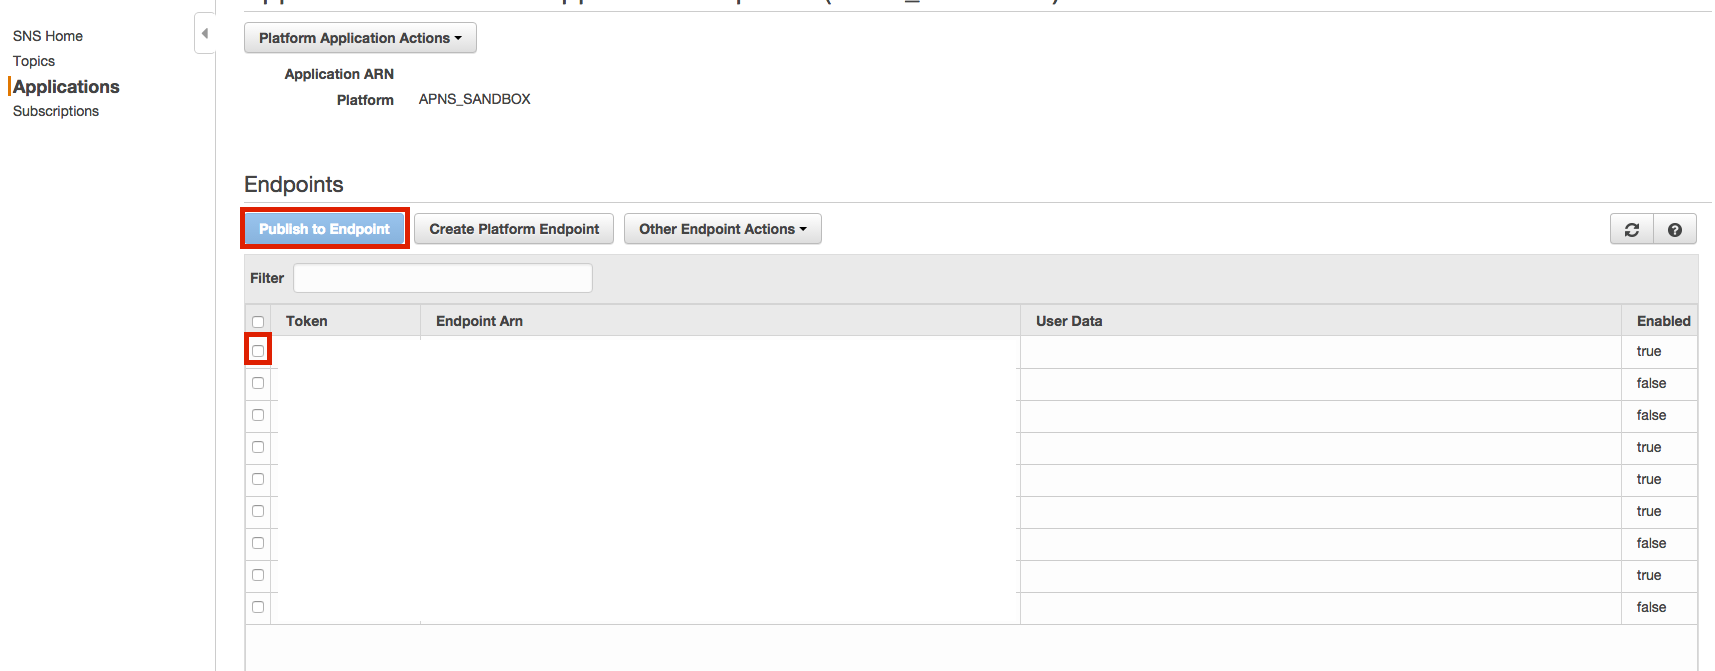
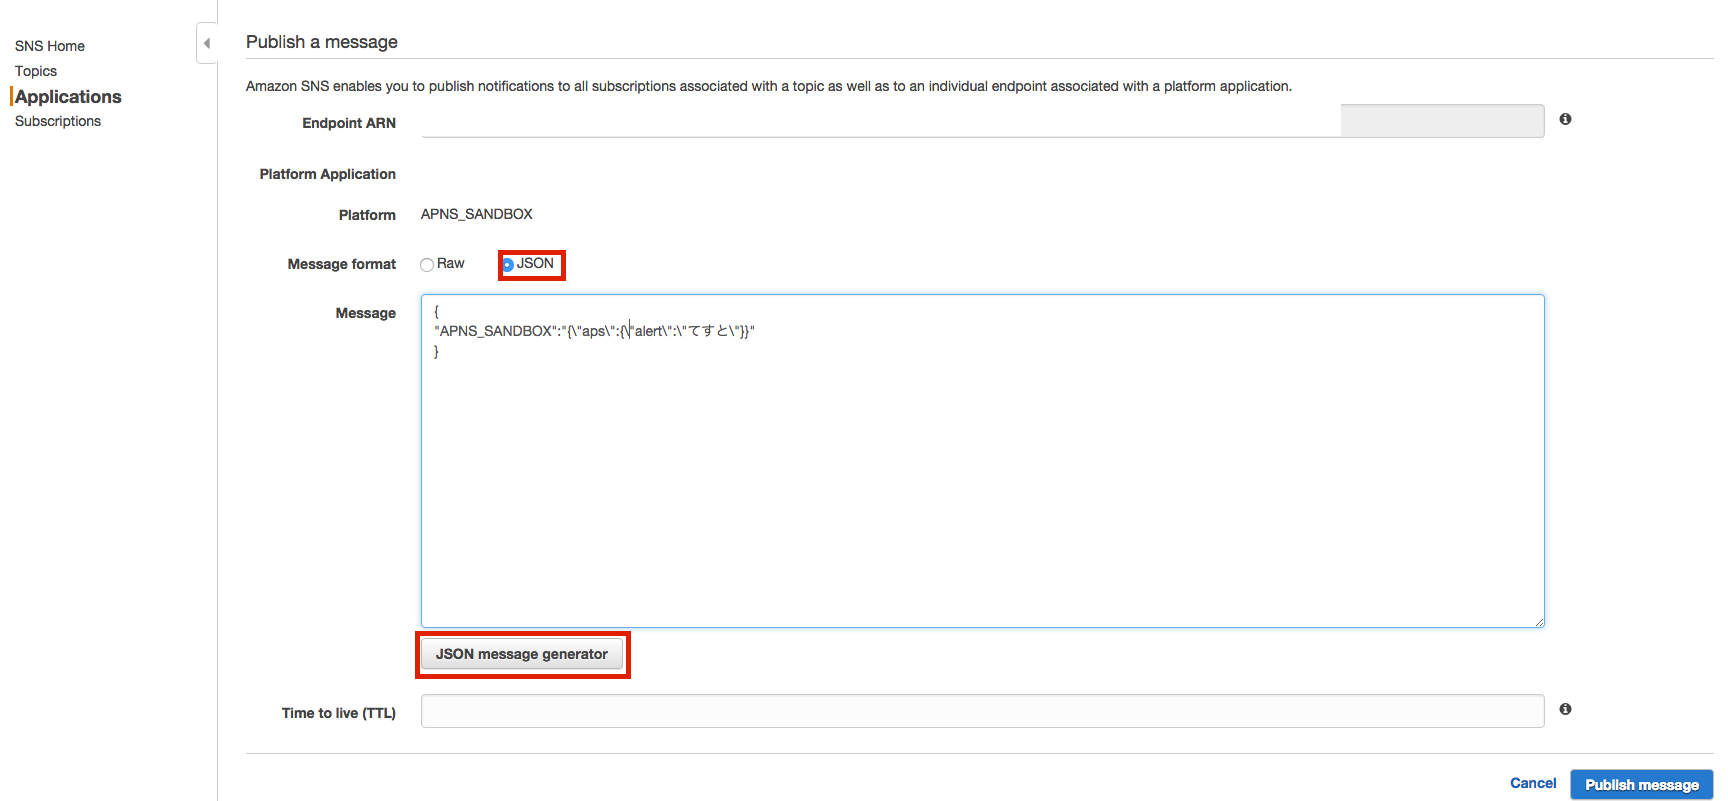
Jsonを選択し、Json message generatorを開いてテストメッセージを作成し、送信すると端末に届けば成功。
サーバーサイド
エンドポイントの登録とメッセージ送信用の最低限のメソッドのみ。エラー処理は共通のtry/catchで処理するようにしています。
※PHP+Laravel+aws-sdk-php-laravelを使用。
class NotificationHelper
{
    protected static function getAWSInstance()
    {
        return AWS::factory([
            'key' => 'hogehoge',
            'secret' => 'hogehoge',
            'region' => 'hogehoge'
        ])->get('sns');
    }

    /**
     * amazon snsにデバイスを登録する
     *
     * @param string デバイストークン
     * @return string AWSから返ってきたエンドポイントのAmazonリソースネーム
     */
    public static function registerDevice($device_token, $platform_arn)
    {
        $result = static::getAWSInstance()->createPlatformEndpoint([
            // PlatformApplicationArn is required
            'PlatformApplicationArn' => $platform_arn,
            // Token is required
            'Token' => $device_token
        ]);

        return $result['EndpointArn'];
    }

    /**
     * 通知を送信する
     *
     * @param string メッセージ
     * @param User   通知対象のユーザーオブジェクト
     * @return なし
     *
     */
    public static function publishMessage($message, $arn)
    {
        // 個人に紐づく各デバイスに通知を送信する
        if (!empty($arn) && static::checkEndpointAttributes($arn)) {
            static::getAWSInstance()->publish([
                'Message' => $message,
                'TargetArn' => $arn
            ]);
        }
    }

    /**
     * arnが有効かどうかをチェックする
     *
     * @param string メッセージ
     * @param string ARN
     * @return string/bool deviceToken/false
     *
     */
    public static function checkEndpointAttributes($endpoint_arn)
	{
        // Exceptionが発生せず、EnableがTrueであればデバイスは有効とみなす
        try {
            $result = static::getAWSInstance()->getEndpointAttributes([
                'EndpointArn' => $endpoint_arn
            ]);
            return ($result['Attributes']['Enabled']) ? $result['Attributes']['Token'] : false;
        } catch (Aws\Sns\Exception\SnsException $e) {
            return false;
        }
	}
}
複数端末にまとめてpushしたい場合
登録されている端末一つ一つにお知らせを送ると膨大な時間がかかってしまいます。
そこで、Amazon SNSにはTopicsという機能があるので、それを使用して一斉pushを行います。
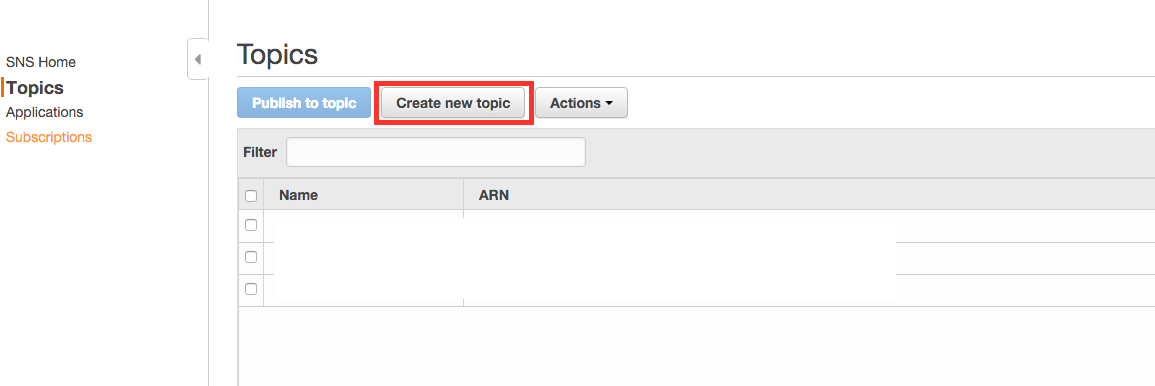
コンソール上でTopicsを作成
作成するとTopicのARNが発行されるのでメモっておきます。
API側にTopicの購読処理を追加する
おそらく先ほど紹介した、エンドポイントの登録のタイミングで下記の処理を行うとよいかと思います。
public static function registerDevice($device_token, $platform_arn)
{
    $sns = static::getAWSInstance();

    // デバイス登録
    $result = $sns->createPlatformEndpoint([
        'PlatformApplicationArn' => $platform_arn,
        'Token' => $device_token
    ]);

    // 一斉push用にtopicを購読しておく
    $sns->subscribe([
        'TopicArn' => 'TopicのARN',
        'Protocol' => 'application',
        'Endpoint' => $result['EndpointArn']
    ]);

    return $result['EndpointArn'];
}
Topicを購読しているエンドポイントにpush通知する
public static function publishMessageToTopic($message)
{
    static::getAWSInstance()->publish([
        'Message' => $message,
        'TopicArn' => 'TopicのARN'
    ]);
}
メモ
- Provisioningを作成し直すのを忘れていてしばらくハマった
- Sandbox環境だとちょこちょこDeviceTokenが無効になる
- シミュレータで仮のデバイストークンが発行されるライブラリとかもあるが、最初から実機でやるのをオススメする
- 本番環境でテストを行いたい場合は、TestFlightでアプリを配信すると本番用のAPNSに接続される
参考
http://www.lancork.net/2013/08/how-to-ios-push-first/
http://docs.aws.amazon.com/ja_jp/sns/latest/dg/mobile-push-apns.html
