はじめに
前々からCloudformationをやろうやろう思っていたのですが、!Refの正体がいまいち理解できずにあと伸ばししていました。
先日幸いにも、有識者の方と会話する機会があり、!Refについて整理できましたので、まとめてみたいと思います。
今回使用するテンプレートの説明
以下のようなテンプレートを使用していきます。
あくまでVPCとサブネットを作成するだけです。EC2関連は別途記事にできればと思っております。
Description:  This template deploys a VPC, with a pair of public and private subnets spread
  across two Availability Zones. It deploys an internet gateway, with a default
  route on the public subnets. It deploys a pair of NAT gateways (one in each AZ),
  and default routes for them in the private subnets.

Parameters:
  EnvironmentName:
    Description: An environment name that is prefixed to resource names
    Type: String

  VpcCIDR:
    Description: Please enter the IP range (CIDR notation) for this VPC
    Type: String
    Default: 10.192.0.0/16

  PublicSubnet1CIDR:
    Description: Please enter the IP range (CIDR notation) for the public subnet in the first Availability Zone
    Type: String
    Default: 10.192.10.0/24

  PublicSubnet2CIDR:
    Description: Please enter the IP range (CIDR notation) for the public subnet in the second Availability Zone
    Type: String
    Default: 10.192.11.0/24


  PublicSubnet3CIDR:
    Description: Please enter the IP range (CIDR notation) for the public subnet in the second Availability Zone
    Type: String
    Default: 10.192.12.0/24


  PrivateSubnet1CIDR:
    Description: Please enter the IP range (CIDR notation) for the private subnet in the first Availability Zone
    Type: String
    Default: 10.192.20.0/24

  PrivateSubnet2CIDR:
    Description: Please enter the IP range (CIDR notation) for the private subnet in the second Availability Zone
    Type: String
    Default: 10.192.21.0/24


  PrivateSubnet3CIDR:
    Description: Please enter the IP range (CIDR notation) for the private subnet in the second Availability Zone
    Type: String
    Default: 10.192.22.0/24


Resources:
  VPC:
    Type: AWS::EC2::VPC
    Properties:
      CidrBlock: !Ref VpcCIDR
      EnableDnsSupport: true
      EnableDnsHostnames: true
      Tags:
        - Key: Name
          Value: !Sub ${EnvironmentName}-ane1-vpc-vpc01


  PublicSubnet1:
    Type: AWS::EC2::Subnet
    Properties:
      VpcId: !Ref VPC
      AvailabilityZone: !Select [ 0, !GetAZs '' ]
      CidrBlock: !Ref PublicSubnet1CIDR
      MapPublicIpOnLaunch: true
      Tags:
        - Key: Name
          Value: !Sub ${EnvironmentName} Public Subnet (AZ1)

  PublicSubnet2:
    Type: AWS::EC2::Subnet
    Properties:
      VpcId: !Ref VPC
      AvailabilityZone: !Select [ 1, !GetAZs  '' ]
      CidrBlock: !Ref PublicSubnet2CIDR
      MapPublicIpOnLaunch: true
      Tags:
        - Key: Name
          Value: !Sub ${EnvironmentName} Public Subnet (AZ2)

  PrivateSubnet1:
    Type: AWS::EC2::Subnet
    Properties:
      VpcId: !Ref VPC
      AvailabilityZone: !Select [ 0, !GetAZs  '' ]
      CidrBlock: !Ref PrivateSubnet1CIDR
      MapPublicIpOnLaunch: false
      Tags:
        - Key: Name
          Value: !Sub ${EnvironmentName} Private Subnet (AZ1)

  PrivateSubnet2:
    Type: AWS::EC2::Subnet
    Properties:
      VpcId: !Ref VPC
      AvailabilityZone: !Select [ 1, !GetAZs  '' ]
      CidrBlock: !Ref PrivateSubnet2CIDR
      MapPublicIpOnLaunch: false
      Tags:
        - Key: Name
          Value: !Sub ${EnvironmentName} Private Subnet (AZ2)


Outputs:
  VPC:
    Description: A reference to the created VPC
    Value: !Ref VPC

  PublicSubnets:
    Description: A list of the public subnets
    Value: !Join [ ",", [ !Ref PublicSubnet1, !Ref PublicSubnet2 ]]

  PrivateSubnets:
    Description: A list of the private subnets
    Value: !Join [ ",", [ !Ref PrivateSubnet1, !Ref PrivateSubnet2 ]]

  PublicSubnet1:
    Description: A reference to the public subnet in the 1st Availability Zone
    Value: !Ref PublicSubnet1

  PublicSubnet2:
    Description: A reference to the public subnet in the 2nd Availability Zone
    Value: !Ref PublicSubnet2

  PrivateSubnet1:
    Description: A reference to the private subnet in the 1st Availability Zone
    Value: !Ref PrivateSubnet1

  PrivateSubnet2:
    Description: A reference to the private subnet in the 2nd Availability Zone
    Value: !Ref PrivateSubnet2
parameterとは?
要するに、変数定義しています。
Parameters:
  EnvironmentName:
    Description: An environment name that is prefixed to resource names
    Type: String

  VpcCIDR:
    Description: Please enter the IP range (CIDR notation) for this VPC
    Type: String
    Default: 10.192.0.0/16

  PublicSubnet1CIDR:
    Description: Please enter the IP range (CIDR notation) for the public subnet in the first Availability Zone
    Type: String
    Default: 10.192.10.0/24
YAMLファイルですので、コロンの後にスペースを入れて値を入れることになります。
EnviromentNameに関しては、値が空白となっていますので、変数には何も値が入りません。
その下のVpcCIDRに関しては、値は空白ですが、Defaultに値が入っています。これは、値が空白だったら、Defaultを入れてねということなので、VpcCIDRという変数には10.192.0.0/16の値が定義されていることになります。
ここで定義した変数は、このYAMLファイル内では好きに使うことが出来ます。
Resourcesとは?
実際に作成するAWSリソースのことを指します。
今回は以下のAWSリソースを作成します。
・VPC
・PublicSubnet1~2
・PrivateSubnet1~2
Resources:
  VPC:
    Type: AWS::EC2::VPC
    Properties:
      CidrBlock: !Ref VpcCIDR
      EnableDnsSupport: true
      EnableDnsHostnames: true
      Tags:
        - Key: Name
          Value: !Sub ${EnvironmentName}-ane1-vpc-vpc01


  PublicSubnet1:
    Type: AWS::EC2::Subnet
    Properties:
      VpcId: !Ref VPC
      AvailabilityZone: !Select [ 0, !GetAZs '' ]
      CidrBlock: !Ref PublicSubnet1CIDR
      MapPublicIpOnLaunch: true
      Tags:
        - Key: Name
          Value: !Sub ${EnvironmentName} Public Subnet (AZ1)

  PublicSubnet2:
    Type: AWS::EC2::Subnet
    Properties:
      VpcId: !Ref VPC
      AvailabilityZone: !Select [ 1, !GetAZs  '' ]
      CidrBlock: !Ref PublicSubnet2CIDR
      MapPublicIpOnLaunch: true
      Tags:
        - Key: Name
          Value: !Sub ${EnvironmentName} Public Subnet (AZ2)

  PrivateSubnet1:
    Type: AWS::EC2::Subnet
    Properties:
      VpcId: !Ref VPC
      AvailabilityZone: !Select [ 0, !GetAZs  '' ]
      CidrBlock: !Ref PrivateSubnet1CIDR
      MapPublicIpOnLaunch: false
      Tags:
        - Key: Name
          Value: !Sub ${EnvironmentName} Private Subnet (AZ1)

  PrivateSubnet2:
    Type: AWS::EC2::Subnet
    Properties:
      VpcId: !Ref VPC
      AvailabilityZone: !Select [ 1, !GetAZs  '' ]
      CidrBlock: !Ref PrivateSubnet2CIDR
      MapPublicIpOnLaunch: false
      Tags:
        - Key: Name
          Value: !Sub ${EnvironmentName} Private Subnet (AZ2)
VPCについての記載を見ると、!Refがいます。
これは、さっきParameterで定義した変数を持ってきてねという意味になりますので、
このVPCのCiderBlockは10.192.0.0/16になるよと読み解くことが出来ます。
  VpcCIDR:
    Description: Please enter the IP range (CIDR notation) for this VPC
    Type: String
    Default: 10.192.0.0/16
また、!Sub という記号もあります。
こちらも基本的には!Refと同じなのですが、!Subの場合は文字列と組み合わせることが出来るのが特徴です。
つまり以下のValueにはEnvironmentNameで定義した文字列-ane1-vpc-vcp01がはいることになります。
      Tags:
        - Key: Name
          Value: !Sub ${EnvironmentName}-ane1-vpc-vpc01
こちら公式の参考です。
注意が必要なのは、以下の!Refの使い方だと思っています。
  PublicSubnet1:
    Type: AWS::EC2::Subnet
    Properties:
      VpcId: !Ref VPC
      AvailabilityZone: !Select [ 0, !GetAZs '' ]
      CidrBlock: !Ref PublicSubnet1CIDR
      MapPublicIpOnLaunch: true
      Tags:
        - Key: Name
          Value: !Sub ${EnvironmentName} Public Subnet (AZ1)
VpcIDの値が !Ref VPC となっています。しかしVPCという変数は明示的に定義していません。
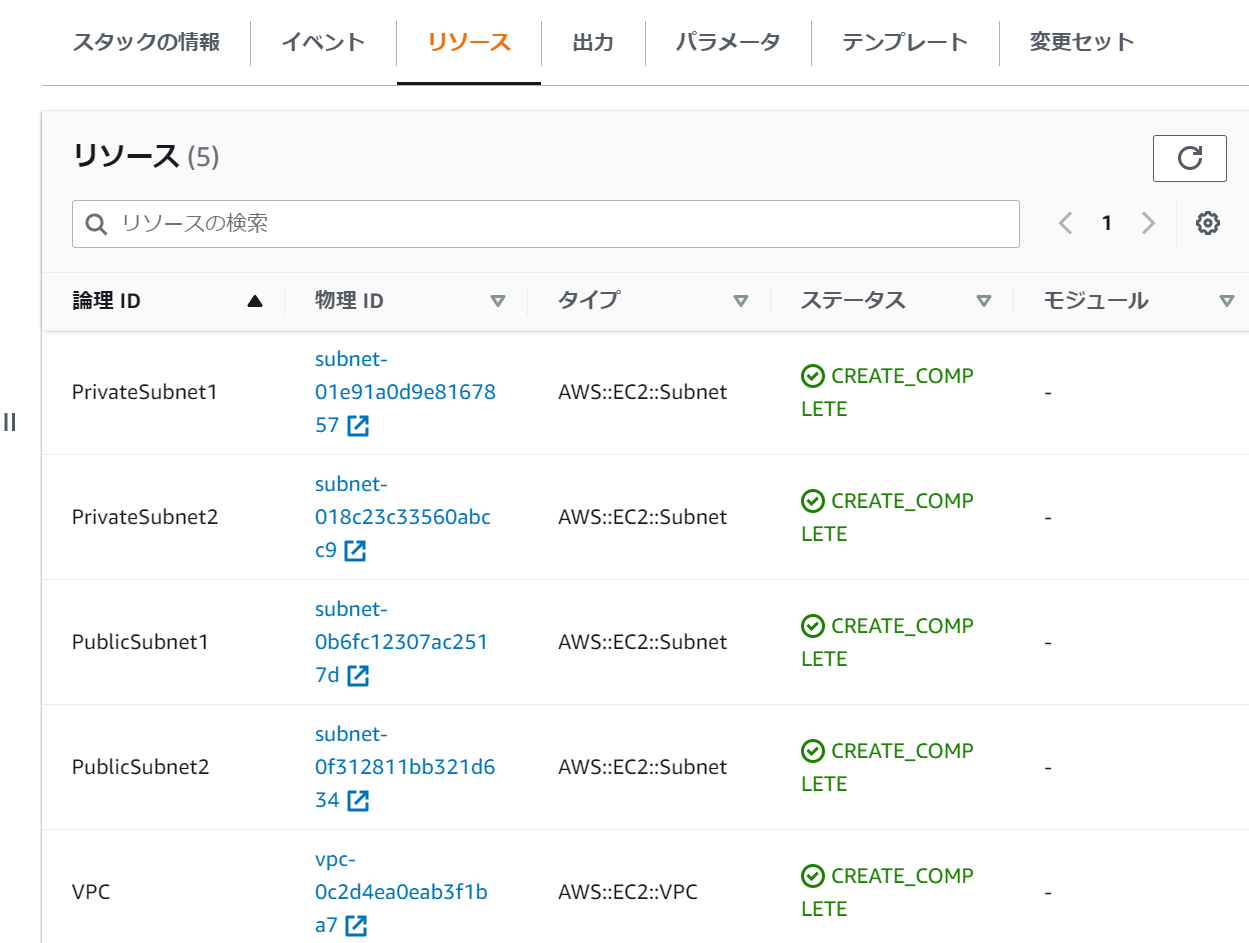
実はこの!Ref VPCはVPCのIDを指します。!Ref リソース名 だとそのリソースのIDを取得することが多いですね。
AWSには、今回のようなユーザが定義しなくても使用できる関数がいくらかあります。
以下参考です。
Outputsとは?
Outputs:
  VPC:
    Description: A reference to the created VPC
    Value: !Ref VPC

  PublicSubnets:
    Description: A list of the public subnets
    Value: !Join [ ",", [ !Ref PublicSubnet1, !Ref PublicSubnet2 ]]

  PrivateSubnets:
    Description: A list of the private subnets
    Value: !Join [ ",", [ !Ref PrivateSubnet1, !Ref PrivateSubnet2 ]]

  PublicSubnet1:
    Description: A reference to the public subnet in the 1st Availability Zone
    Value: !Ref PublicSubnet1

  PublicSubnet2:
    Description: A reference to the public subnet in the 2nd Availability Zone
    Value: !Ref PublicSubnet2

  PrivateSubnet1:
    Description: A reference to the private subnet in the 1st Availability Zone
    Value: !Ref PrivateSubnet1

  PrivateSubnet2:
    Description: A reference to the private subnet in the 2nd Availability Zone
    Value: !Ref PrivateSubnet2
作成したリソースのIDなどが、まとまって確認出来たら便利ですよね。
Outputsを設定すると、コンソール上から確認することが出来ます。

こちら参考です。
ベストプラクティス
AWSでは、一つのスタックにすべてのリソースのまとめるのではなく、リソースのカテゴリー(ネットワーク/アプリケーション/DB など)で分けることが推奨されています。
その際に必要なのがクロススタックという考え方でFn::ImportValue関数が使用されます。
これは、YAMLファイル内で定義した変数を複数のYAMLファイルで使用することを指します。
こちらについては別途記事に出来れば思いますので、詳細は以下をご確認ください。
CLIを使った作成のコツ
Cloudformatoinのテンプレート作成は、なかなか時間がかかります。
そこで
①コンソール上で実際に作成したいリソースを作成
➁CLIを使用して、必要な値を確認する
③CLIで取得した値をもとに、テンプレートを作成する
くらいの気持ちでやると、サクサク進むのではないでしょうか。
終わりに
かなり雑でしたが、個人的に理解に時間がかかった!Refについて深堀しました。
今後のリソース作成も、徐々にコンソールからCloudformatoinへと切り替えていければと思います。