Reactをコンポーネント単位でexportして、既存のページにコンポーネント単位で埋め込む方法をまとめました
はじめに
1年以上前、従来型のWebページにReactのコンポーネントを埋め込む方法を調べたことがありまます
この時はcreate-react-appを使って環境を作成後、rollup.jsでビルドをしましたが、少々古い情報になってきました(rollup.jsのビルド設定も大変でした)
そこでViteを使って環境を作成後、(Viteの)ライブラリモードを利用してビルドを行う手順をまとめました(設定も少なくとても簡単です)
環境について
- node.jsはインストール済の想定(LTSで確認)
- bashを利用(git-bashを使ってます)
手順について
- ViteでReactの環境を作成する
- 簡単なコンポーネント(Counter)を作成する
- コンポーネントが動作することをVite環境で確認する
- ライブラリモードの設定を行い、コンポーネントをビルドしてjsファイルを作成する
- WebページにReactのコンポーネントを埋め込んで、動作することを確認する
1. ViteでReactの環境を作成する
適当なディレクトリでReact+TypeScriptの環境を作成します
$ npm create vite@latest vite-react-component-lib -- --template react-swc-ts
$ cd vite-react-component-lib
$ npm install
2. 簡単なコンポーネント(Counter)を作成する
import React, { useState } from 'react';
import './Counter.css'; // Import the CSS file for styling

interface CounterProps {
  initialCount?: number;
}

const Counter: React.FC<CounterProps> = ({ initialCount = 0 }) => {
  const [count, setCount] = useState(initialCount);

  const increment = () => {
    setCount(count + 1);
  };

  return (
    <div className="counter-container">
      <p>Count: {count}</p>
      <button onClick={increment}>Increment</button>
    </div>
  );
};

export default Counter;
.counter-container {
    border: 1px solid black;
    border-radius: 8px;
    padding: 16px;
    display: inline-block;
    text-align: center;
}

button {
    margin-top: 8px;
    padding: 8px 16px;
    border: none;
    background-color: #007bff;
    color: white;
    border-radius: 4px;
    cursor: pointer;
}

button:hover {
    background-color: #0056b3;
}
3. コンポーネントが動作することをVite環境で確認する
App.tsxファイルでCounterコンポーネントを表示します
import Counter from './Counter';

function App() {
  return (
    <>
      <Counter />
    </>
  )
}

export default App;
あとsrc/main.tsxのスタイルをコメントアウトしておきます(背景色が変わってしまうので)
-import './index.css'
+//import './index.css'
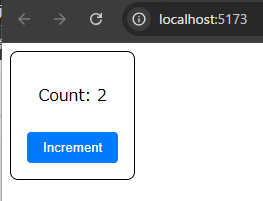
Viteで開発サーバ―を起動して、Counterコンポーネントが動作することを確認します
$ npm run dev

> vite-react-component-lib@0.0.0 dev
> vite

  VITE v6.0.6  ready in 283 ms

  ➜  Local:   http://localhost:5173/
  ➜  Network: use --host to expose
  ➜  press h + enter to show help
カウンターが正常に動作することを確認します
4. ライブラリモードの設定を行い、コンポーネントをビルドしてjsファイルを作成する
まず、ビルドのエントリーポイントとなるファイルを作成し、必要なコンポーネント、ライブラリをエクスポートします
Webページに埋め込む際、Reactも必要なためexportします
export { default as React } from 'react';
export { default as ReactDOM } from 'react-dom';
export { default as ReactDOMClient } from 'react-dom/client';

// Component
export { default as Counter} from './Counter';
vite.config.tsにビルド設定build: {~}を追加します
設定項目
- entry: ビルドを行うためのエントリポイントとなるファイルを指定
- filename: 生成するファイルのファイル名を指定
- formats: 生成するモジュール形式を指定(デフォルト設定ではumd形式も作成されるのでesのみに変更)
- define: 実行時エラーが発生するため、定義を固定値に書き換える
import { defineConfig } from 'vite'
import react from '@vitejs/plugin-react-swc'

// https://vite.dev/config/
export default defineConfig({
  plugins: [react()],
+  build: {
+   lib: {
+       // https://ja.vitejs.dev/config/build-options.html#build-lib
+       entry: 'src/lib.ts', // エントリポイント
+       fileName: 'bundle', // 生成するファイルのファイル名を指定
+       formats: ['es'], // 生成するモジュール形式を指定。デフォルト['es', 'umd']
+     },
+ },
+ define: {
+   'process.env.NODE_ENV': JSON.stringify('production'), // 実行時エラーが発生するため、定義を固定値に書き換え
+ },
})
ビルドを行います
$ npm run build

> vite-react-component-lib@0.0.0 build
> tsc -b && vite build

vite v6.0.6 building for production...
✓ 26 modules transformed.
dist/bundle.css    0.27 kB │ gzip:  0.19 kB
dist/bundle.js   213.12 kB │ gzip: 53.02 kB
✓ built in 703ms
dist/bundle.jsとdist/bundle.cssが作成されます
5. WebページにReactのコンポーネントを埋め込んで、動作することを確認する
動作確認のためhtmlファイルを作成します。webrootフォルダをルート直下に作成しその中に保存します
$ mkdir webroot
$ touch webroot/counter-test.html
<div id="root"></div>の部分に、Reactコンポーネント(Counter)を描画するコードを記載します
<!DOCTYPE html>
<html>
  <head>
    <meta charset="UTF-8" />
    <link rel="stylesheet" crossorigin href="/dist/bundle.css">
    <script type="module">
      import {ReactDOMClient, React, Counter} from '/dist/bundle.js';
      const container = document.getElementById('root');
      const root = ReactDOMClient.createRoot(container);
      root.render(React.createElement(Counter));
    </script>
  </head>
  <body>
    <h2>Webページの一部にReactコンポーネントを表示する</h2>
    <div id="root"></div>
  </body>
</html>
動作確認のためにWebサーバーを起動します
$ npx http-server .
/webroot/counter-test.htmlをブラウザで開くと、Counterコンポーネントが表示されていることを確認できます

