はじめに
Visual Studio Enterpriseや、AxoCoverを利用するとカバレッジ測定を行うことができます。しかし、ユニットテストを実行した結果のカバレッジを測定する前提となっているため、気軽に使うことができません。
ちょっと工夫をすることで、画面を表示して手動テストのカバレッジ測定を行うことが可能です。
概要
- ユニットテスト内でフォームを起動し、それを手動テストするだけです。
手順
①テスト対象として下記のようなフォームを作成します。
using System;
using System.Windows.Forms;

namespace TestTargetExeForm
{
    public partial class TestTargetForm : Form
    {
        public TestTargetForm()
        {
            InitializeComponent();
        }
    // 以下省略
②ソリューションにテストプロジェクトを新規追加し、フォームを起動するだけのテストケースを作成します
namespace ManualTest
{
    [TestClass]
    public class UnitTest1
    {
        [TestMethod]
        public void ManualTest()
        {
            // Show form, and test manualy
            TestTargetExeForm.Program.Main();
        }
    }
}
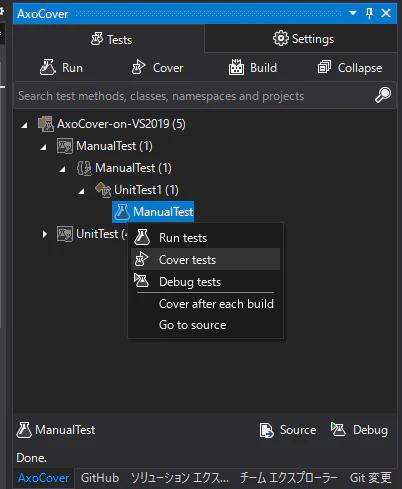
③テストエクスプローラーからフォームを起動するテストケースを実行します(AxoCoverを使っています)
-
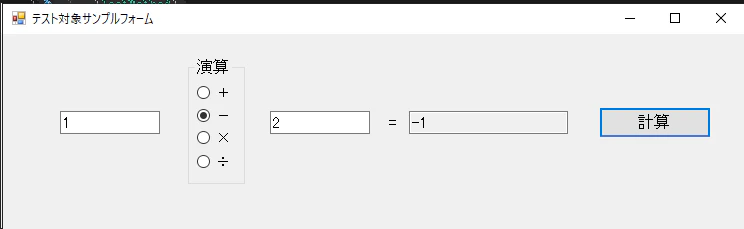
プログラムが起動するので、手動でテストを行います。
- 数値にそれぞれ「1」と「2」を入力
- + - × ÷ を1回ずつ選択してから計算ボタンを押す
- 操作終了後、プログラムを閉じる
③カバレッジ測定結果
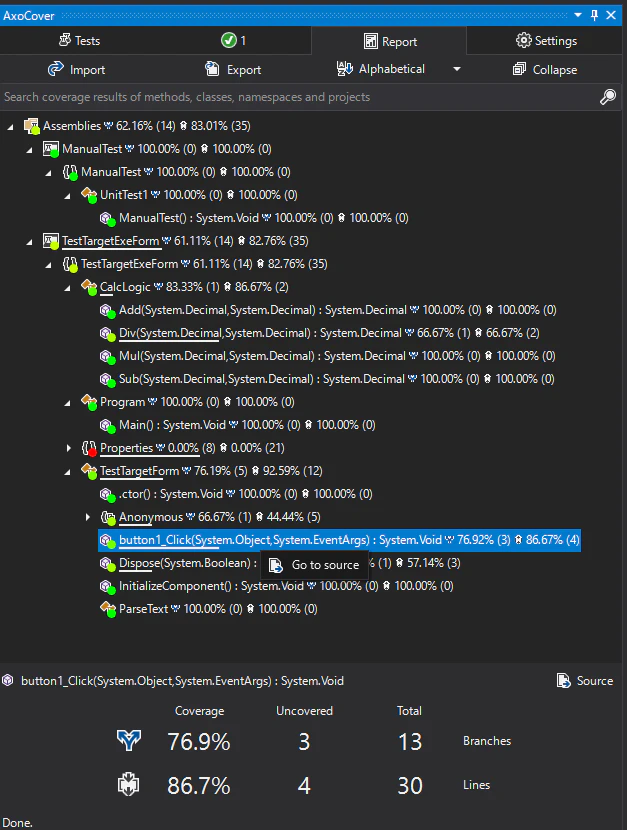
プログラムが終了すると自動的にカバレッジ測定結果が収集されます。
- テストランナー(AxoCover)での結果表示
メソッド毎のカバレッジ率が測定されます。計算ボタン(button1_Click)の分岐網羅率は76.92%でした。
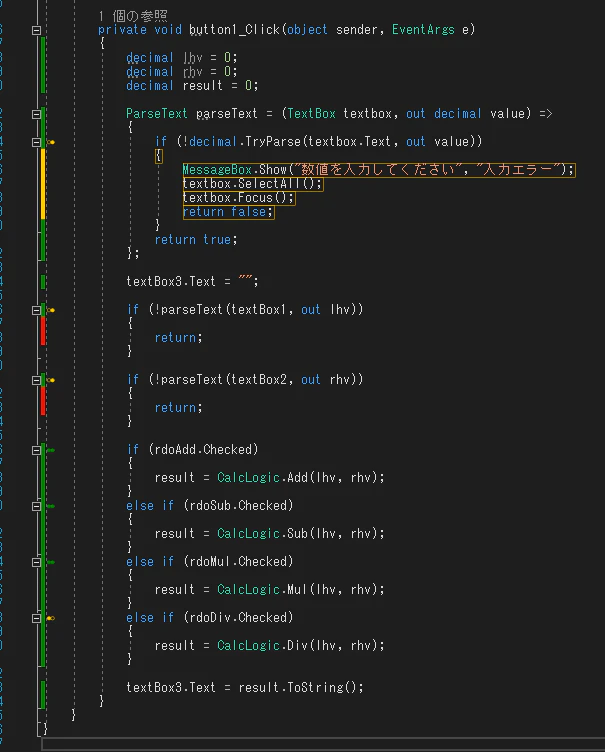
ソースコードレベルでのカバレッジを確認するため、右クリックしてソースを確認します。
赤色、黄色になっている行が分岐を網羅できていないコードです。
- 数値の空白チェックコードが実行されていないことが一目瞭然です