1:目的と概要
目的
- ローカルで完結するSAML-IdP認証サンプルプログラムが見つからなかったため作成しました。
- とりあえず動くことを目的としてます。
※SAML認証とは?参考リンク
更新履歴
- 2023/03/06
「Passport.js v0.6.0」にするとsessionの仕様変更により動かなくなるという情報をいただいたので、各ライブラリを最新にして動くように変更しました(@kino15さん、ありがとうございます)
- ライブラリ変更点(最新版に入れ替え)
  "dependencies": {
-    "cookie-parser": "~1.4.4",
-    "debug": "~2.6.9",
-    "ejs": "~2.6.1",
-    "express": "~4.16.1",
-    "express-session": "^1.17.1",
-    "http-errors": "~1.6.3",
-    "morgan": "~1.9.1",
-    "passport": "^0.4.1",
+    "cookie-parser": "~1.4.6",
+    "debug": "~4.3.4",
+    "ejs": "~3.1.8",
+    "express": "~4.18.2",
+    "express-session": "^1.17.3",
+    "http-errors": "~2.0.0",
+    "morgan": "~1.10.0",
+    "passport": "^0.6.0",
    "passport-saml": "^2.2.0",
-    "ts-node": "^9.1.1"
+    "ts-node": "^10.9.1"
  },
  "devDependencies": {
-    "@types/cookie-parser": "^1.4.2",
-    "@types/express": "^4.17.11",
-    "@types/passport": "^1.0.6",
-    "nodemon": "^2.0.7",
+    "@types/cookie-parser": "^1.4.3",
+    "@types/express": "^4.17.17",
+    "@types/passport": "^1.0.12",
+    "nodemon": "^2.0.21",
    "saml-idp": "^1.2.1",
-    "typescript": "^4.2.4"
+    "typescript": "^4.9.5"
  }
(主な)ソース変更点(auth.ts)
- 流入元のURLをsessionで引き継げるようにするため、ログイン後もsessionIDを引き継ぐように指定
const router = express.Router();
- const authModule = passport.authenticate('saml', { failureRedirect: '/login/fail' });
+ const authModule = passport.authenticate('saml', { failureRedirect: '/login/fail', keepSessionInfo: true });
- session有無チェックの条件を変更(
requestUrlも含める)
router.post('/login/callback', authModule, (req, res) => {
  console.log('/login/callback', req.user);
-  if ((req as any).session) {
+  if ((req as any).session?.requestUrl) {
    res.redirect((req as any).session.requestUrl);
    delete (req as any).session.requestUrl;
  } else {
    res.redirect('/');
  }
});
- ログアウト後の処理をcallback関数内に移動(passportの仕様変更に追随)
-router.get('/logout', (req, res) => {
-  req.logout();
-  res.redirect('/');
+router.get('/logout', (req, res, next) => {
+  req.logout(function (err) {
+    if (err) {
+      return next(err);
+    }
+    res.redirect('/');
+  });
});
こちらのページも参照(不具合指摘をいただいたページ)
概要
-
機能概要
- テスト用IdPをローカルで起動し、saml認証動作確認プログラムを動かします。
- トップページは認証不要、認証が必要ページに遷移する場合にログイン(IdP側が表示)します。
- ログイン、ログアウト機能を持ちます。
- ソースはgithubのsimple-saml-authにあります
-
実装上の特徴
- express-generatorでひな形を作成
- ts-nodeを利用してtypescript化(ビルド不要)
2:express-generatorでひな形作成
- express
- express-generator でカレントフォルダにひな形を生成します
npx express-generator --view=ejs --git ./
下記ファイルが生成されます
/
│  app.js
│  package.json
│  .gitignore
├─bin
│      www
├─public
│  ├─images
│  ├─javascripts
│  └─stylesheets
│          style.css
├─routes
│      index.js
│      users.js
└─views
       error.ejs
       index.ejs
- package.jsonに記載されたモジュールをインストールします。
npm install
- 動作確認のため、ターミナルで下記を実行し「localhost:3000」を開きます。
ブラウザで開き「Welcome to Express」と表示されたら成功です。
npm run start
3:利用モジュールのインストール
TypeScriptと型定義があった方が、後々役立つので合わせてインストールします。
- saml認証で必要なモジュール(と型定義)をインストールします
npm i -D typescript nodemon @types/cookie-parser @types/express
npm i ts-node express-session
- passportとpassport-samlを追加(nodeの認証用モジュール)
npm i passport passport-saml
npm i -D @types/passport
- インストール後のpackage.json (概ねこのようなファイルになっていると思います)
{
  "name": "simple-saml-auth",
  "version": "0.0.0",
  "private": true,
  "scripts": {
    "start": "node ./bin/www"
  },
  "dependencies": {
    "cookie-parser": "~1.4.6",
    "debug": "~4.3.4",
    "ejs": "~3.1.8",
    "express": "~4.18.2",
    "express-session": "^1.17.3",
    "http-errors": "~2.0.0",
    "morgan": "~1.10.0",
    "passport": "^0.6.0",
    "passport-saml": "^2.2.0",
    "ts-node": "^10.9.1"
  },
  "devDependencies": {
    "@types/cookie-parser": "^1.4.3",
    "@types/express": "^4.17.17",
    "@types/passport": "^1.0.12",
    "nodemon": "^2.0.21",
    "saml-idp": "^1.2.1",
    "typescript": "^4.9.5"
  }
}
4:TypeScript化
ts-nodeを使うため、事前コンパイルやトランスパイル後のdistフォルダなど面倒な設定は不要です。
- Typescriptの設定ファイルを作成します(tsconfig.json)
npx tsc --init
- 生成されたjsファイルの拡張子を全て「ts」に変更します
mv app.js app.ts
mv ./routes/index.js ./routes/index.ts
mv ./routes/users.js ./routes/users.ts
mv ./bin/www ./bin/www.ts
- ./bin フォルダに「www.js」を追加し下記の内容を追記します。
ここがミソです。.jsファイル内でrequire('ts-node')することで、tsファイルを読み込んで利用することができるようになります。
touch ./bin/www.js
echo -e "require('ts-node').register({transpileOnly: true});\nrequire('./www.ts');" > ./bin/www.js
「{transpileOnly: true}」は、起動を高速化するため(型チェックを行いません)
⇒型チェックはエディタ側に任せて、トランスパイルに専念させます。
- tsconfig.json 下記行のコメントを1行外しfalseに変更します。
元々のソースがjsで型指定は一切ありません。any変数を許可してコンパイルエラーを回避します。
trueに戻して適切に型を付けると安全性が向上します(がこの記事の目的とは異なるため行いません。
"noImplicitAny": false,
- typescript化したexpressアプリケーションが起動することを確認します。
npm run start
- 現時点(require()での読み込み)では、型推論が行われません。必要時に応じ、Importに変更することで型チェック、オートコンプリートが行われるようになります。
- require() ⇒ import
- module.exports ⇒ export default
変更例(index.ts)
// var express = require('express');  // comment out
import express from 'express';  // importに変更
var router = express.Router();

/* GET home page. */
router.get('/', function(req, res, next) {
  res.render('index', { title: 'Express' });
});

// importでもrequire()でも読み込めるようにmodule.exportを残しておきます
module.exports = router;
export default router;
5:テスト用ページ作成
viewsフォルダのファイルを追加、修正します。
認証不要のトップページ「index.ejs」と、認証が必要な「page1.ejs」を用意します。
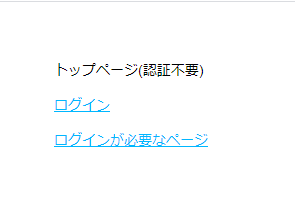
- トップページ(認証不要) 「index.ejs」 を修正。
- ログイン時、ユーザ名、ログアウト認証が必要なページ(page1)への表示
- 未ログイン時、ログイン、認証が必要なページ(page1)へのリンク
<!DOCTYPE html>
<html>
  <head>
    <title>トップページ(認証不要)</title>
    <link rel='stylesheet' href='/stylesheets/style.css' />
  </head>
  <body>
    <div>
      トップページ(認証不要)
      <p>
      <% if (uid) { %>
        ユーザ名[<%= uid %>] <a href='/logout'>ログアウト</a>
      <% } else { %>
        <a href='/login'>ログイン</a>
      <% } %>
      </p>
    </div>
    <div>
       <p><a href='/page1'>ログインが必要なページ</a></p>
    </div>
  </body>
</html>
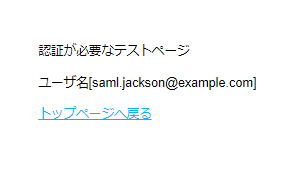
- 認証が必要なページ 「page1.ejs」 を新規追加。
- ユーザ名の表示、トップページへのリンク
<!DOCTYPE html>
<html>
  <head>
    <title>認証が必要なテストページ</title>
    <link rel='stylesheet' href='/stylesheets/style.css' />
  </head>
  <body>
    <div>
      認証が必要なテストページ
      <p>ユーザ名[<%= uid %>]</p>
    </div>
    <div>
       <p><a href='/'>トップページへ戻る</a></p>
    </div>
  </body>
</html>
6:passport-samlの設定
- auth.ts追加
touch ./routes/auth.ts
- ユーザーのシリアライズ、デシリアライズ処理
// sessionへのシリアライズ、デシリアライズ処理
// saml認証で受け取った値をそのままセットしている
// idだけをセッションに保存し、デシリアライズ時にDBから復元するなどの処理を行う
passport.serializeUser<any>((user, done) => {
  done(null, user);
});

passport.deserializeUser<any>((user, done) => {
  done(null, user);
});
- saml認証用のStrategy設定
// saml認証用の設定
const samlStrategy = new Strategy(
  {
    // URL that goes from the Identity Provider -> Service Provider
    callbackUrl: 'http://localhost:3000/login/callback',
    // URL that goes from the Service Provider -> Identity Provider
    entryPoint: 'http://localhost:7000/saml/sso',

    issuer: 'saml_test_issuer',
    identifierFormat: undefined, // urn:oasis:names:tc:SAML:1.1:nameid-format:emailAddress

    // Identity Providerのサーバ証明書
    cert: fs.readFileSync('idp-public-cert.pem', 'utf8'),
    validateInResponseTo: false,
    disableRequestedAuthnContext: true,
  },
  (profile, done) => done(null, profile)
);
passport.use(samlStrategy);
- ログイン処理
   router.get('/login', authModule, (req, res) => {
   res.redirect('/');
 });
- ログイン処理
 /**
  * idpで認証後のコールバックURL
  * ・この時点で、認証されたユーザ情報が「req.user」にセットされる
  * ・リクエスト時のURLにリダイレクトする
  */
router.post('/login/callback', authModule, (req, res) => {
  console.log('/login/callback', req.user);
  if ((req as any).session?.requestUrl) {
    res.redirect((req as any).session.requestUrl);
    delete (req as any).session.requestUrl;
  } else {
    res.redirect('/');
  }
});
- ログイン失敗時の処理
router.get('/login/fail', (req, res) => {
  res.status(401).send('Login failed');
});
- ログアウト
/**
* ログアウト
* ・'/'にアクセスしても、認証情報がないため再度認証画面へ飛ばされる。
*/
router.get('/logout', (req, res) => {
  req.logout(function (err) {
    if (err) {
      return next(err);
    }
    res.redirect('/');
  });
});
- 認証チェック
// 認証無しで許可するパス(チェックは手抜きです。適切に書き換えてください)
const allowPaths = ['/stylesheets', '/images', '/javascript', '/favicon.ico'];

/**
* 認証チェック
* ・全てのReact側からの通信に対して、認証チェックを行う
*   ⇒認証されていない場合は、saml認証を行う
*/
router.all(['/*'], (req, res, next) => {
  if (req.isAuthenticated()) {
    console.log(`Authenticated:${JSON.stringify(req.user)}`);
    return next();
  }

  if (req.url === '/' ) {
    // topページは認証不要
    return next();
  }

  if (allowPaths.some((path) => req.url.startsWith(path))) {
    // 許可するパス
    return next();
  }

  console.log(`${req.url} Not authenticated. Redirect to /login`);
  // リクエストされたurlをセッションに保存してから、idpへ認証を依頼
  (req as any).session.requestUrl = req.url;
  return authModule(req, res, next);
});
- app.tsに組み込み
ページ表示時、認証が先に行われるようにするため「認証モジュールの組み込み」を先に行います。
// samlによる認証処理
app.use(session({secret: 'paosiduf'}));
app.use(samlPassport.initialize());
app.use(samlPassport.session());
app.use(samlAuth);

// 認証モジュールの後にルートを追加する(先に認証チェックを行うため)
app.use('/', indexRouter);
app.use('/users', usersRouter);
app.use('/page1', page1);
7:テスト用IdP(saml-idp)の設定
- saml-idpをpackage.jsonへ追加 (https://www.npmjs.com/package/saml-idp)
コマンドラインから起動できるテスト用のIdP(Identity Provider)です。
npm i -D saml-idp
- IdP用証明書ファイル作成
- 作成したファイルをプロジェクトルートに配置します。(ルートディレクトリでコマンドを実行すれば、コピーする必要はありません)
openssl req -x509 -new -newkey rsa:2048 -nodes  -keyout idp-private-key.pem -out idp-public-cert.pem -days 7300
Generating a RSA private key
- Country Name(国名), State or Province Name(県名), Locality Name(都市名)などは、テスト用途なので適当に入力してください。
- 出力するファイル名(idp-public-cert.pem)は、saml-idpのデフォルト名を指定しています。変更する場合は、起動時のコマンドライン指定を修正する必要があります。
作成コマンドサンプル
$ openssl req -x509 -new -newkey rsa:2048 -nodes  -keyout idp-private-key.pem -out idp-public-cert.pem -days 7300
Generating a RSA private key
.....+++++
......+++++
writing new private key to 'idp-private-key.pem'
-----
You are about to be asked to enter information that will be incorporated
into your certificate request.
What you are about to enter is what is called a Distinguished Name or a DN.
There are quite a few fields but you can leave some blank
For some fields there will be a default value,
If you enter '.', the field will be left blank.
-----
Country Name (2 letter code) [AU]:JP
State or Province Name (full name) [Some-State]:Aichi
Locality Name (eg, city) []:Nagoya
Organization Name (eg, company) [Internet Widgits Pty Ltd]:
Organizational Unit Name (eg, section) []:
Common Name (e.g. server FQDN or YOUR name) []:Test Identity Provider
Email Address []:test@example.com
- 起動用スクリプト登録
- package.jsonの"scripts"に、テスト用IdP起動スクリプトを追加します。
"saml-idp": "saml-idp --acs http://localhost:7000/auth/saml --aud mock-audience"
8:動作確認
- テスト用Idpサーバ(saml-idp)を起動します
$ npm run saml-idp

> simple-saml-auth@0.0.0 saml-idp C:\Users\t_nii\Documents\git\auth\simple-saml-auth
> saml-idp --acs http://localhost:7000/auth/saml --aud mock-audience

Listener Port:
  localhost:7000
HTTPS Enabled:
  false

[Identity Provider]

Issuer URI:
  urn:example:idp
Sign Response Message:
  true
Encrypt Assertion:
  false
Authentication Context Class Reference:
  urn:oasis:names:tc:SAML:2.0:ac:classes:PasswordProtectedTransport
Authentication Context Declaration:
  None
Default RelayState:
  None

[Service Provider]

Issuer URI:
  None
Audience URI:
  mock-audience
ACS URL:
  http://localhost:7000/auth/saml
SLO URL:
  None
Trust ACS URL in Request:
  true

Starting IdP server on port localhost:7000...

IdP Metadata URL:
  http://localhost:7000/metadata

SSO Bindings:
  urn:oasis:names:tc:SAML:2.0:bindings:HTTP-POST
    => http://localhost:7000/saml/sso
  urn:oasis:names:tc:SAML:2.0:bindings:HTTP-Redirect
    => http://localhost:7000/saml/sso

IdP server ready at
  http://localhost:7000
- プログラムを起動します
npm run start
動作確認
-
トップページを表示(localhost:3000)
- 認証不要のため、ログイン画面は表示されません
- 認証不要のため、ログイン画面は表示されません
-
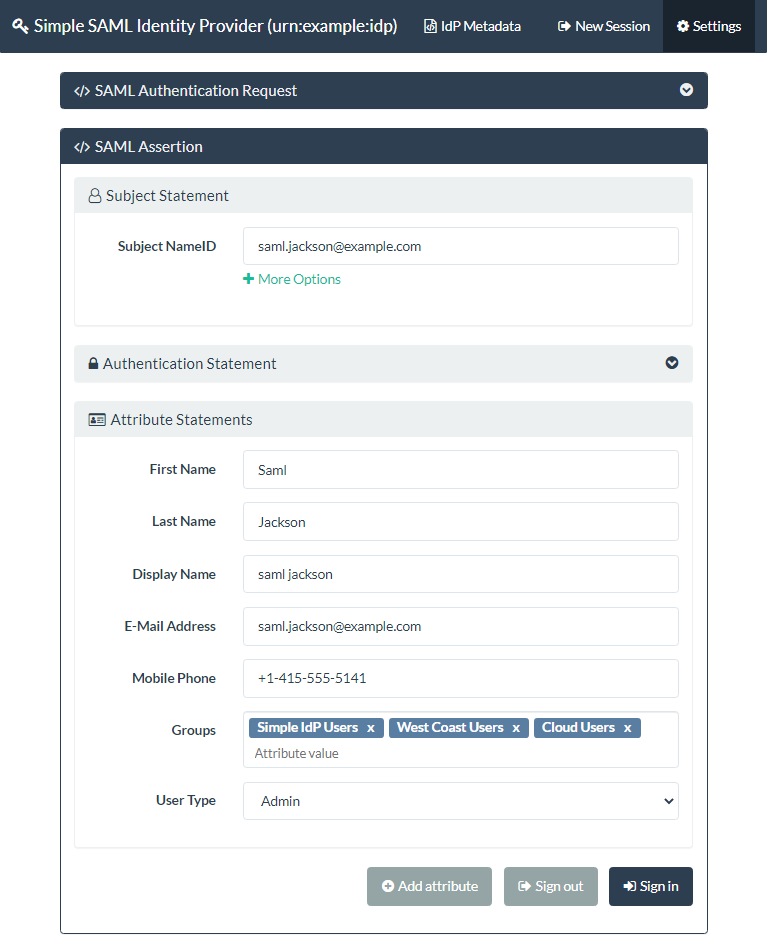
ログインが必要なページを表示(localhost:3000/page1)
- ログイン画面が表示される。「Sign in」を押下すると「/page1」にダイレクトし、ユーザ名が表示される。
- ログイン画面が表示される。「Sign in」を押下すると「/page1」にダイレクトし、ユーザ名が表示される。
-
一度ログインした後はログイン画面が表示されない。(トップページにユーザ名とログアウトリンクが表示される)
-
トップページから「ログアウト(localhost:3000/logout)」すると、再度ログインが必要となる。
ソース一式