はじめに
本記事はタイトルの通りvirutalboxにRHEL9を構築後、podmanを起動させる手順を記載します。
なお、virutalboxはインストール済みの想定です。
※virutalboxのインストールはこちらから
https://www.virtualbox.org/
使用及び構築する環境は以下の通り
Virtualbox:7.0.10
Red Hat Enterprise Linux:9.4
Podman:4.9.4
Podmanとは
Podman (POD マネージャー) は、Linux® システム上でコンテナを開発、管理、実行するための オープンソースツールです。Red Hat® のエンジニアがオープンソース・コミュニティと共に開発した Podman は、libpod ライブラリを使用してコンテナエコシステム全体を管理します。
アーキテクチャがデーモンレスで包括的であることから、Podman はコンテナ管理の選択肢として、より安全で利用しやすいものとなっています。また、開発者は Buildah や Skopeo などの付属のツールと機能を使用して、コンテナ環境をニーズに合わせてカスタマイズすることができます。
RHELのダウンロード
以下のURLにアクセスしてisoファイルをダウンロードする

仮想マシン作成
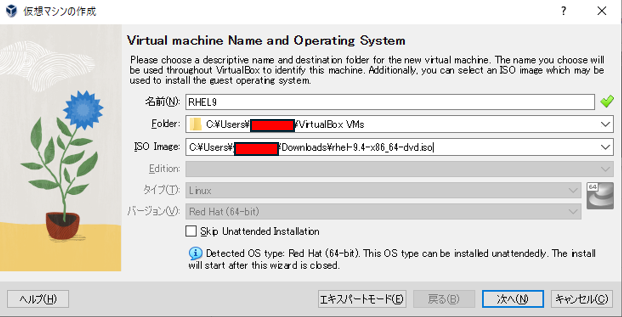
virualboxから「新規」をクリック

仮想マシン名:RHEL #こんかいはRHEL9
先ほどダウンロードしたRHELのisoを選択し「次へ」をクリック
ここはなにも選択せずに「次へ」をクリック

Podmanの最低要件を満たす値を設定し「次へ」をクリック


ストレージの容量も最低要件を満たす値を設定し「次へ」をクリック

設定に誤りがないことを確認して「完了」をクリック

仮想マシンが作成されたら「設定」をクリック

「ネットワーク」⇒「アダプター2」を順にクリックし
ネットワークアダプターを有効化にチェックを入れる
割り当てを「ブリッジアダプター」に変更し「OK」をクリックする
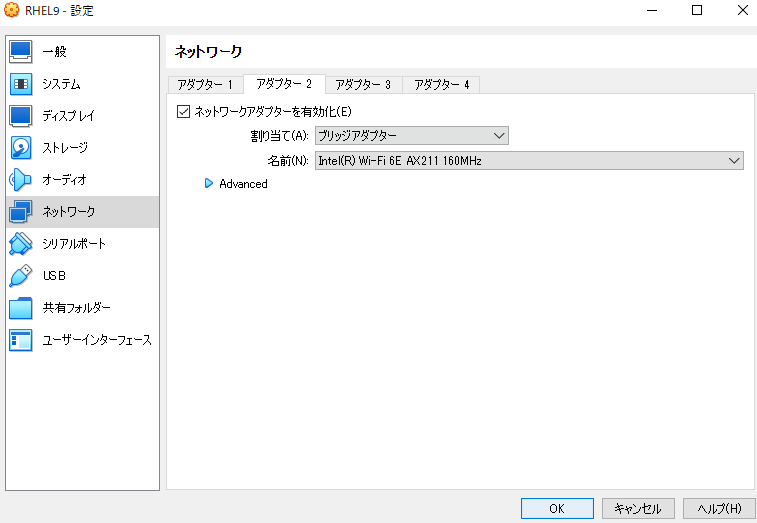
ここまでで仮想マシンの設定はOK
RHEL9のインストール
事前準備として仮想マシンに設定するIPアドレス情報を採取する
コマンドプロンプトで以下コマンドを実施
ipconfig /all
筆者の場合はWiFiで接続しており、192.168.3.0/24のネットワークアドレス帯を使用しており
仮想マシンに設定するアドレスは192.168.3.150とする

「RHEL9」⇒「起動」⇒「通常起動」の順にクリックする

デフォルトで「Test this media & install Red Hat Enterprise Linux 9.4」が選択されているため
上矢印キーで[Install Red Hat Enterprise Linux 9.4]に移動してエンター
※マウスポインタをvirutalboxの外に移動させる際は「Ctrl」キーを押下する

「日本語」を選択して「続行」をクリック

インストール概要に関しては以下の項目に関して設定していきます。
①インストール先
②ソフトウェアの選択
③ネットワークとホスト名
④rootパスワード

①インストール先は変更せずに「完了」をクリック

②ソフトウェアの選択は「最小限のインストール」を選択してクリック

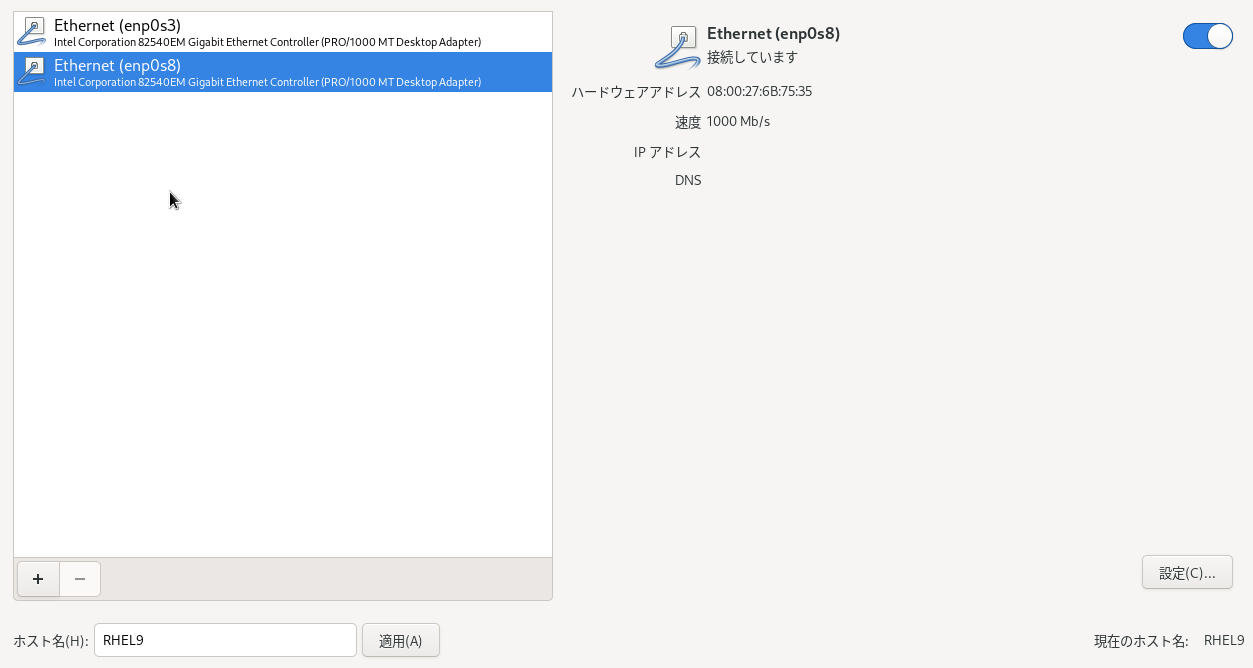
③ネットワークとホスト名
ホスト名に「RHEL9」と入力して「適用」をクリック

enp0s8を選択して有効化後「設定」をクリック
「IPv4」タグをクリックしてメソッドを「手動」に変更
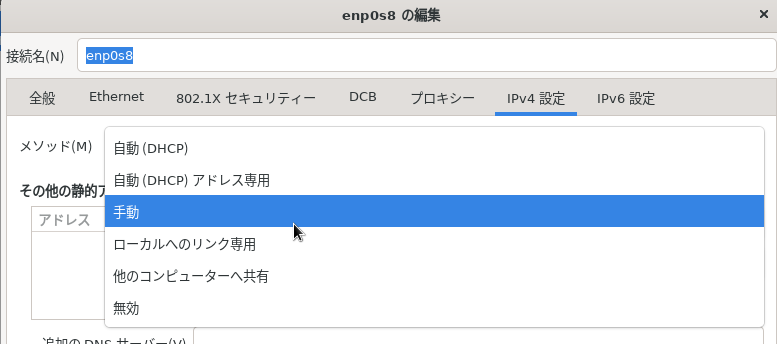
「追加」をクリック後アドレス部位を入力する
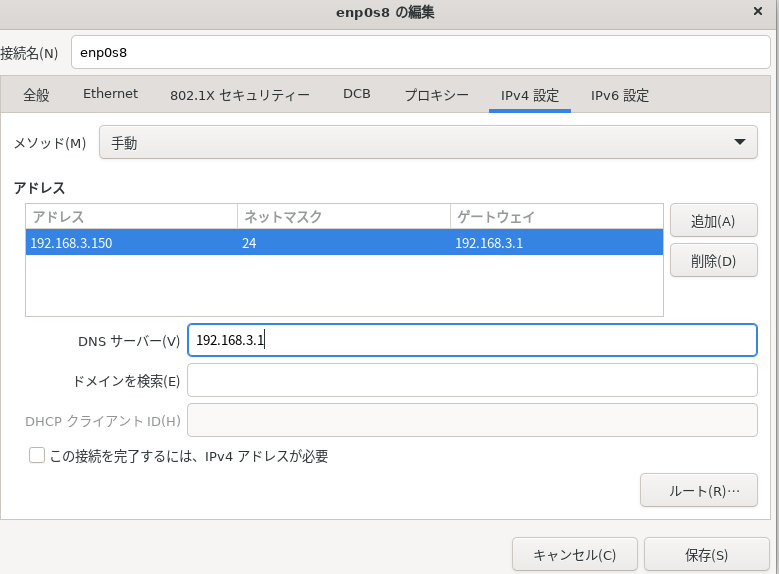
上記設定が反映されていることを確認して「完了」をクリック

④rootパスワードを入力、「パスワードによるroot SSHログインを許可」にチェック後「完了」をクリック

「インストールの開始」をクリック

「システムの再起動」をクリック
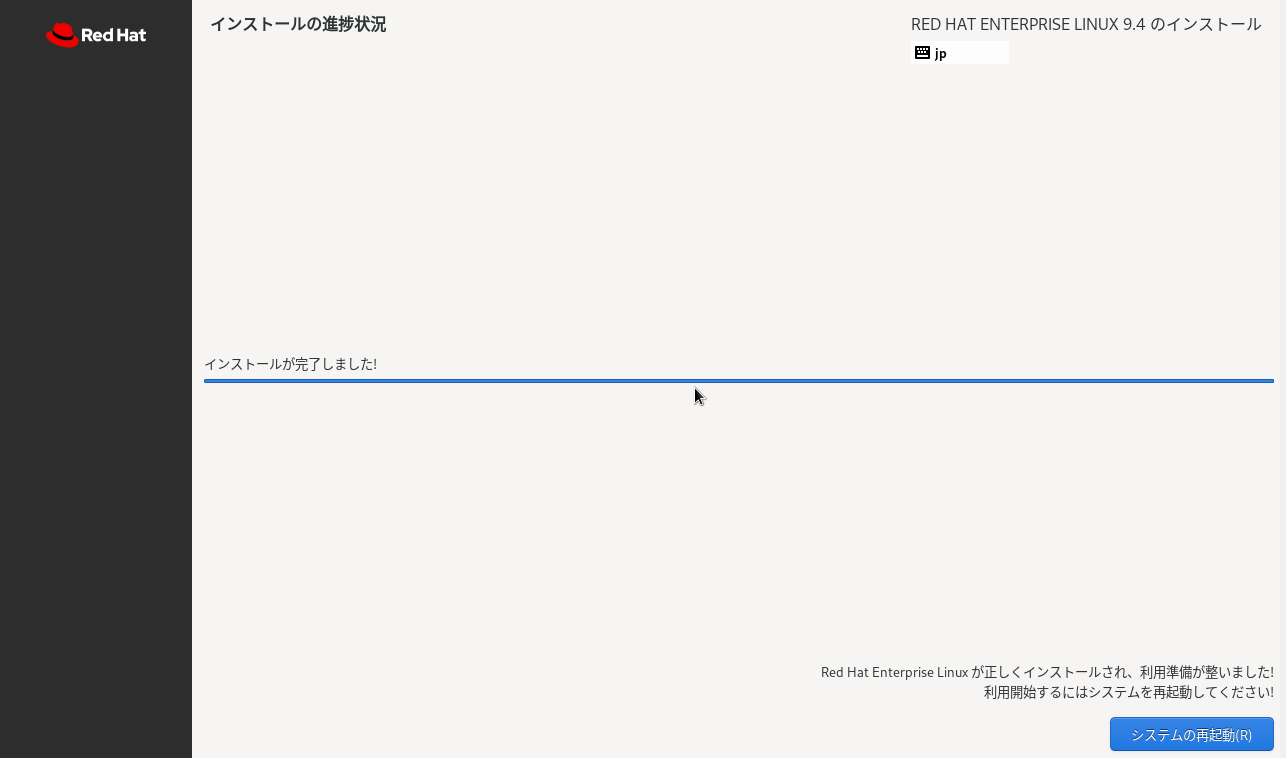
これにてRHEL9のインストールは完了です

Podmanインストールの事前準備
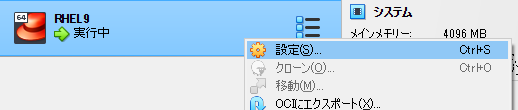
RHEL9のisoをマウントする
RHEL9の「設定」をクリック
「ストレージ」⇒「コントローラー:IDE、空」⇒「ディスクマーク」⇒「rhel-9.4-x86_64-dvd.iso」を選択
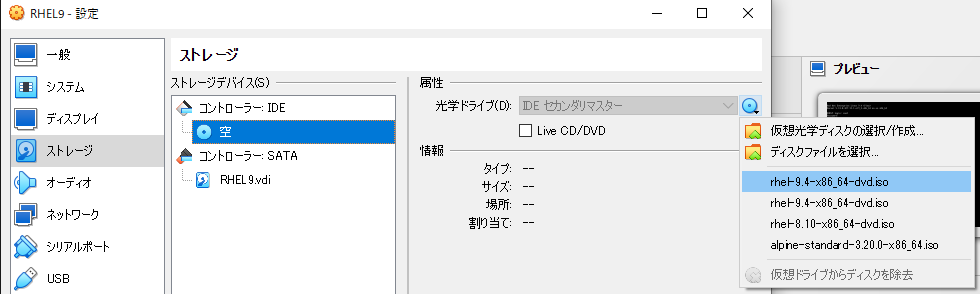
「OK」をクリック

teratermにて先ほど構築した仮想マシンに接続する


isoイメージマウント用のディレクトリ作成
[root@RHEL9 ~]# mkdir /mnt/rhiso;ls -ld /mnt/rhiso
drwxr-xr-x. 2 root root 6  7月 10 16:31 /mnt/rhiso
isoイメージをマウント
[root@RHEL9 ~]# mount -o loop /dev/sr0 /mnt/rhiso/ ;ls -l  /mnt/rhiso
合計 44
drwxr-xr-x. 1 root root  2048  4月 19 16:55 AppStream
drwxr-xr-x. 1 root root  2048  4月 19 16:55 BaseOS
drwxrwxr-x. 1 root root  2048  4月 12 12:32 EFI
-r--r--r--. 1 root root  8154  4月 19 16:39 EULA
-r--r--r--. 1 root root 18092  4月 19 16:39 GPL
-r--r--r--. 1 root root  1669  4月 19 16:39 RPM-GPG-KEY-redhat-beta
-r--r--r--. 1 root root  3682  4月 19 16:39 RPM-GPG-KEY-redhat-release
-r--r--r--. 1 root root  1455  4月 19 17:11 extra_files.json
drwxrwxr-x. 1 root root  2048  4月 12 12:32 images
drwxrwxr-x. 1 root root  2048  4月 12 12:32 isolinux
-r--r--r--. 1 root root   103  4月 19 16:55 media.repo
リポジトリをマウントしたisoに変更
cat <<EOF > /etc/yum.repos.d/rhel9.repo
[local-BaseOS]
name=BaseOS Packages Red Hat Enterprise Linux 9
metadata_expire=-1
gpgcheck=1
enabled=1
baseurl=file:///mnt/rhiso/BaseOS/
gpgkey=file:///etc/pki/rpm-gpg/RPM-GPG-KEY-redhat-release

[local-AppStream]
name=AppStream Packages Red Hat Enterprise Linux 9
metadata_expire=-1
gpgcheck=1
enabled=1
baseurl=file:///mnt/rhiso/AppStream/
gpgkey=file:///etc/pki/rpm-gpg/RPM-GPG-KEY-redhat-release
EOF
キャッシュクリア
[root@RHEL9 ~]# dnf clean all
サブスクリプション管理リポジトリーを更新しています。
コンシューマー識別子を読み込めません

This system is not registered with an entitlement server. You can use "rhc" or "subscription-manager" to register.

0 ファイルが削除されました
Linux便利ツール諸々インストール
[root@RHEL9 ~]#dnf install -y net-tools traceroute tcpdump zip jq bash-completion container-tools
サブスクリプション管理リポジトリーを更新しています。
コンシューマー識別子を読み込めません
~~~~中略~~~~
インストール済み:
  bash-completion-1:2.11-5.el9.noarch           libibverbs-48.0-1.el9.x86_64                        libpcap-14:1.10.0-4.el9.x86_64
  libpkgconf-1.7.3-10.el9.x86_64                net-tools-2.0-0.62.20160912git.el9.x86_64           pkgconf-1.7.3-10.el9.x86_64
  pkgconf-m4-1.7.3-10.el9.noarch                pkgconf-pkg-config-1.7.3-10.el9.x86_64              tcpdump-14:4.99.0-9.el9.x86_64
  traceroute-3:2.1.0-18.el9.x86_64              unzip-6.0-56.el9.x86_64                             zip-3.0-35.el9.x86_64

完了しました!
Podmanインストール
[root@RHEL9 ~]#dnf install podman -y
サブスクリプション管理リポジトリーを更新しています。
コンシューマー識別子を読み込めません

This system is not registered with an entitlement server. You can use "rhc" or "subscription-manager" to register.

BaseOS Packages Red Hat Enterprise Linux 9                                                                    21 MB/s | 2.1 MB     00:00
AppStream Packages Red Hat Enterprise Linux 9                                                                 44 MB/s | 7.0 MB     00:00
依存関係が解決しました。
~~~~中略~~~~
インストール済み:
  aardvark-dns-2:1.9.0-1.el9.x86_64           conmon-2:2.1.10-1.el9.x86_64                  container-selinux-3:2.229.0-1.el9.noarch
  containers-common-2:1-61.el9.x86_64         criu-3.19-1.el9.x86_64                        criu-libs-3.19-1.el9.x86_64
  crun-1.14.3-1.el9.x86_64                    fuse-common-3.10.2-8.el9.x86_64               fuse-overlayfs-1.13-1.el9.x86_64
  fuse3-3.10.2-8.el9.x86_64                   fuse3-libs-3.10.2-8.el9.x86_64                libnet-1.2-6.el9.x86_64
  libslirp-4.4.0-7.el9.x86_64                 netavark-2:1.10.3-1.el9.x86_64                podman-2:4.9.4-0.1.el9.x86_64
  protobuf-c-1.3.3-13.el9.x86_64              shadow-utils-subid-2:4.9-8.el9.x86_64         slirp4netns-1.2.3-1.el9.x86_64
  yajl-2.1.0-22.el9.x86_64

完了しました!
Podmanのインストールは上記で完了
[root@RHEL9 ~]# podman version
Client:       Podman Engine
Version:      4.9.4-dev
API Version:  4.9.4-dev
Go Version:   go1.21.7 (Red Hat 1.21.7-1.el9)
Built:        Tue Feb 20 18:41:16 2024
OS/Arch:      linux/amd64
[root@RHEL9 ~]# podman image ls
REPOSITORY  TAG         IMAGE ID    CREATED     SIZE
動作検証
[root@RHEL9 ~]# podman run docker.io/hello-world:latest
Trying to pull docker.io/library/hello-world:latest...
Getting image source signatures
Copying blob c1ec31eb5944 done   |
Copying config d2c94e258d done   |
Writing manifest to image destination

Hello from Docker!
This message shows that your installation appears to be working correctly.

To generate this message, Docker took the following steps:
 1. The Docker client contacted the Docker daemon.
 2. The Docker daemon pulled the "hello-world" image from the Docker Hub.
    (amd64)
 3. The Docker daemon created a new container from that image which runs the
    executable that produces the output you are currently reading.
 4. The Docker daemon streamed that output to the Docker client, which sent it
    to your terminal.

To try something more ambitious, you can run an Ubuntu container with:
 $ docker run -it ubuntu bash

Share images, automate workflows, and more with a free Docker ID:
 https://hub.docker.com/

For more examples and ideas, visit:
 https://docs.docker.com/get-started/

 [root@RHEL9 ~]# podman ps -a
CONTAINER ID  IMAGE                                 COMMAND     CREATED         STATUS                     PORTS       NAMES
b71713d855b5  docker.io/library/hello-world:latest  /hello      58 seconds ago  Exited (0) 58 seconds ago              eloquent_mcclintock
[root@RHEL9 ~]#
[root@RHEL9 ~]# podman image ls
REPOSITORY                     TAG         IMAGE ID      CREATED        SIZE
docker.io/library/hello-world  latest      d2c94e258dcb  14 months ago  28.5 kB
[root@RHEL9 ~]#
以上です。お疲れ様でした。
ーーー
本投稿は、執筆者の個人的な意見や知識に基づいて提供されています。技術情報は慎重に取り扱っていますが、正確性や完全性を保証するものではありません。従って、本投稿の内容を利用することによって生じたいかなる損害やトラブルに対しても、執筆者および運営者は一切の責任を負いません。各自の判断と責任においてご利用ください。
特に、プログラムの実行やシステムの変更を行う際には、事前にバックアップを取るなどの安全対策を講じることを強くお勧めします。また、公式のドキュメントや信頼できる情報源を併せてご参照ください。
ーーー