Proxmox8 にアップグレード
2023/6 に Proxmox8 がリリースされたとのことで早々にアップグレードしてみました。
※2024/4/9 リンク切れやコマンドが間違っていたようなので修正しました
サーバ側:InfluxDB2 のインストール
Dockerで構築するのが楽だとは思いますが、折角 Proxmox8 を使用しているので コンテナにて構築していきたいと思います。もちろん AlmaLinux9 で!
とりあえず公式サイトのやり方で、influxdb リポジトリを 追加します。
cat <<EOF | sudo tee /etc/yum.repos.d/influxdata.repo
[influxdata]
name = InfluxData Repository - Stable
baseurl = https://repos.influxdata.com/stable/\$basearch/main
enabled = 1
gpgcheck = 1
gpgkey = https://repos.influxdata.com/influxdata-archive_compat.key
EOF
sudo dnf repolist コマンドを実行し influxdb リポジトリが追加されていることを確認します。
そのあと InfluxDB2 をインストールしサービス起動などを設定します。
$ sudo yum install influxdb2
$ systemctl enable influxdb
$ systemctl start influxdb
サーバ側:Influxdb2 CLI のインストール
2系になってからは、InfluxDB2 の初期設定を適切にする必要があります。
GUI 画面からでも設定できますがコマンドが用意されているので今回はこちらを使用します。
上記で設定したレポジトリ内からインストールすることができるため、下記コマンドを実施し有効化する。
$ sudo dnf install influxdb2-cli
$ sudo influx completion bash > /etc/bash_completion.d/influx.sh
$ sudo chmod +x /etc/bash_completion.d/influx.sh
さらに 2系では、database という表現が bucket に変更されています。通信経路を HTTPS にするとか色々とありますが、とりあえず最低限動くところを確認したいだけですので下記コマンドを実施します(iw/pw など適宜修正してください)。
sudo influx setup -f \
  --name default \
  --username influx \
  --password influxpw \
  --token influxtoken \
  --org influx \
  --bucket intdash \
  --retention 0
サーバ/エージェント側:Telegraf のインストールと初期設定
influxdb リポジトリが設定されていることを前提とします。まず telegraf をインストールします。
$ sudo dnf install telegraf
そして InfluxDB2 に接続するため /etc/telegraf/telegraf.conf を編集します。
[[outputs.influxdb_v2]]
 urls = ["http://127.0.0.1:8086"]
 token = "influxtoken"
 organization = "influx"
 bucket = "intdash"
 timeout = "5s"
 user_agent = "telegraf"

[[inputs.socket_listener]]
 service_address = "udp://:8094"
サービスを起動して・・・っと
$ sudo systemctl enable telegraf
$ sudo systemctl start telegraf
$ sudo systemctl status telegraf
サーバ側:InfluxDB2 の GUIにアクセス
InfluxDB2 が正常にインストール&サービス起動しているか
http://localhost:8086 にアクセスします。
下記画面が表示されるので CLI で定義した id/pw を入力して先に進みます。

くるかな・・・

きたーーー
サーバ側:Chronograf のインストール
Chronograf をインストールします。
$ sudo dnf install chronograf
$ sudo systemctl enable --now chronograf
$ sudo systemctl status chronograf
Chronograf を起動してみる。 8888 ポートにアクセスね。
日本語に対応していないで拒否感あるけどここは、頑張ろう。
InfluxDB との接続設定を行う。
注意点として "Telgraf Database Name" には、Influxdb2 CLI で設定した bucket の値を設定する。どうやら InfluxDB2 になってからここらの言い方が変わったらしい。

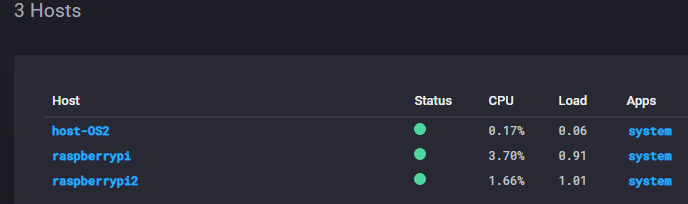
Telegraf エージェントが動いていれば、下記のように表示されていると思う。
つかってみて
ダッシュボードカスタムができるのでカッコいい感じにできるがいいですね。アラート設定とかも細かくできるのがいい!!
こういうの好きなんですが、会社で運用とか見据えたときを考えるとやっぱり Zabbix がいいのだろうか・・・。
参考にさせて頂いたサイト様