やったこと
案件を立ち上げる際に毎回マネージメントコンソールよりCloudSearchのIndexingを登録していて、時間と手間がかかるので今回を機にShellScriptにて実行できるようにする。
あくまでもIndexingだけをsh化する。
事前準備
1. aws-cliのインストール
Amazon Linuxの場合、Defaultでインストールされているはずです。
$ sudo pip install awscli
2. インストール確認
$ aws --version

 ↓ バージョンが確認できればOK

aws-cli/1.11.83 Python/2.7.12 Linux/4.9.77-31.58.amzn1.x86_64 botocore/1.5.46
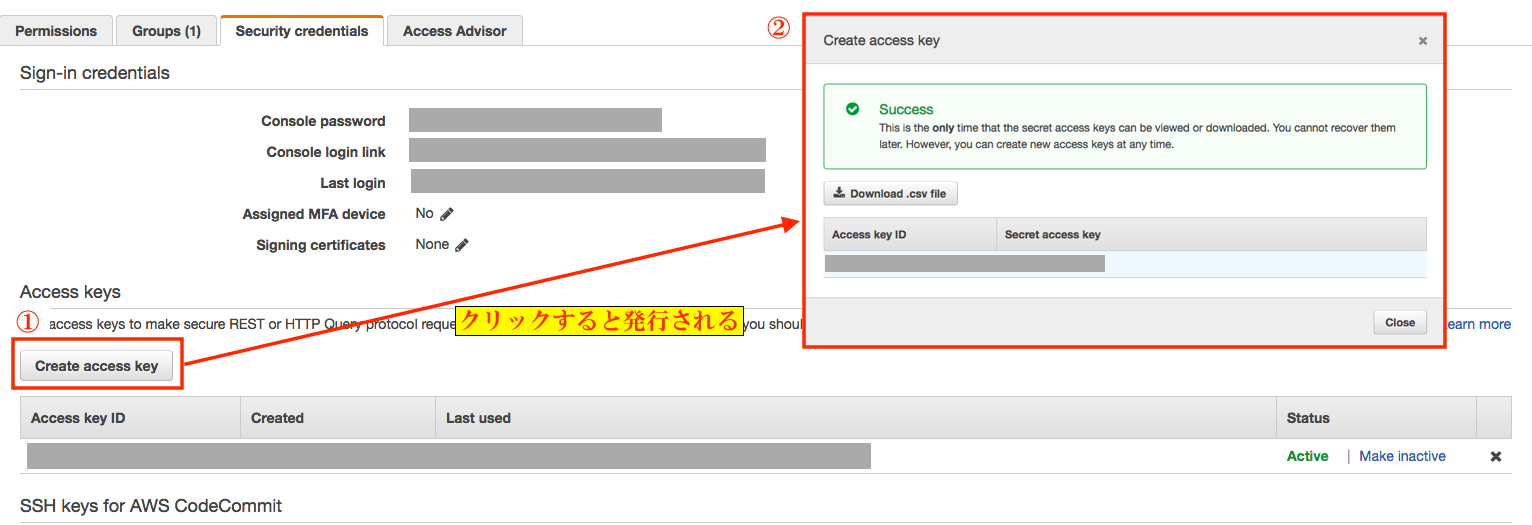
3. Access Key, Secret Keyの発行
マネージメントコンソールのIAMよりAccess Key, Secret Keyを発行する
4. aws configure設定
コマンドラインよりAWSにアクセスするための、アカウントの認証情報を登録する
$ aws configure
AWS Access Key ID [None]: アクセスキー
AWS Secret Access Key [None]: シークレットキー
Default region name [None]: リージョン ※Tokyoリージョンの場合は「ap-northeast-1」
Default output format [None]: json ※今回はjsonを指定 textなども設定可
5. CloudSearch構築
マネージメントコンソールより箱のみを作成する。
検索カラムなどの設定は不要。
次へ次へと進むのみでOK。
ココからが本題
ようやくコマンドラインよりAWSへのアクセスができるようになりましたので、これからIndexingするためのShellScriptと実行する際に必要なjsonファイルを作っていきます。
ShellScript作成&jsonファイル作成
import.sh作成
Indexingしたい項目の設定が記載されているjsonファイルを読み込み、ファイル数分ループ処理を行う。
1ファイルでも良かったが、案件によってIndexingしたい項目、外したい項目、増やしたい項目がある可能性があるため1ファイルずつとした。
また案件毎にDomain Nameが異なるため、毎回ShellScriptの中身を編集するのも手間なので引数でIndexingを行う対象Domain Nameを指定できるようにする。
import.sh
CMDNAME=`basename $0`
DIRNAME=`cd $(dirname $0) && pwd`

files=$DIRNAME"/jsons/*"
for filepath in $files; do
  aws cloudsearch define-index-field --domain-name $1 --cli-input-json file://$filepath
done
aws cloudsearch index-documents --domain-name $1
jsonファイル(サンプル)
サンプルとして投稿データを検索対象とするために、タイトル(caption)、掲載ステータス(status)をIndexingするためのjsonファイルを作る。
caption.json
{
    "IndexField": {
        "TextOptions": {
            "SortEnabled": true,
            "HighlightEnabled": true,
            "ReturnEnabled": true,
            "AnalysisScheme": "_ja_default_"
        },
        "IndexFieldType": "text",
        "IndexFieldName": "caption"
    }
}
status.json
{
    "IndexField": {
        "IntOptions": {
            "FacetEnabled": true,
            "SortEnabled": true,
            "SearchEnabled": true,
            "ReturnEnabled": true
        },
        "IndexFieldType": "int",
        "IndexFieldName": "status"
    }
}
実行
コマンドラインよりShellScriptを実行する。
実行後はjsonファイルの中身が出力され、エラーが無ければOK。
$ /bin/bash /var/www/[docroot]/aws/cloudsearch/indexing/import.sh [domain name]

{
    "IndexField": {
        "TextOptions": {
            "SortEnabled": true,
            "HighlightEnabled": true,
            "ReturnEnabled": true,
            "AnalysisScheme": "_ja_default_"
        },
        "IndexFieldType": "text",
        "IndexFieldName": "caption"
    }
}

{
    "IndexField": {
        "IntOptions": {
            "FacetEnabled": true,
            "SortEnabled": true,
            "SearchEnabled": true,
            "ReturnEnabled": true
        },
        "IndexFieldType": "int",
        "IndexFieldName": "status"
    }
}
確認
マネージメントコンソールよりIndexingの確認をする。
jsonファイル内で記載した「IndexFieldType」「IndexFieldName」などが反映されていることを確認
まとめ
今回サンプルとして2カラムのみのIndexingとしましたが、本来は20~30カラムぐらいあり、それを毎回手動で登録していたことを考えると、「作業効率は格段によくなりました!」
ShellScriptはIndexingする項目のjsonファイルをループで読み込んでいるため、追加したいものがあればjsonファイル追加するだけで、ShellScript自体の修正は不要です。
今回できなかったこと
本当であればCloudSearchの箱を構築するところから全てShellScriptで実施したかったのですが、CloudSearchの箱を構築する際に使用できるまで10〜20分ぐらい待たないとならない点や、その時間をShellScriptで待機させる点などを調べる時間がなく断念。
今後はCloudSearchの構築をイチから全てできるようにしていきたい(時代はElasticsearchですかねw?)
また別件ですが、**CloudFrontのBehaviorも同じようにsh化すること!**をやっていきたい。
少しでも参考になれば嬉しいです!
ありがとうございました!!

