はじめに
この記事は、EV3にev3devをインストールし、SSH接続できている状態であることを前提にしています。環境構築ができていない方はこちらの記事を参考にしてください。
mindstorm-EV3をLinuxで制御しよう! ev3dev OSのインストールとSSH接続
概要
RPyC (Remote Python Call) はリモートからPythonを呼び出すプロトコルです。
RPyCを使えばEV3にインストールされたPythonを、手元のデスクトップPC上(クライアント側)のPythonプログラムから簡単に呼び出して使うことが可能になります。
これまではSSH接続してリモート上でPythonプログラムを編集、実行する必要がありましたが、RPyCを使えば、EV3上でRPyCサーバーを立てておくだけで、クライアント上で自由に開発することができるのです。
環境構築
RPyCのインストール
まずはリモート側(EV3)とクライアント側(デスクトップPC等)にPythonのRPyCライブラリをインストールします。
robot@ev3dev:~$ sudo easy_install rpyc
Searching for rpyc
Reading https://pypi.python.org/simple/rpyc/
Best match: rpyc 3.3.0
Downloading https://pypi.python.org/packages/c5/b0/5425118bf8f209ebc863425acb37f49f71c7577dffbfaeaf0d80722e57c5/rpyc-3.3.0.zip#md5=f60bb91b46851be45363cd72e078e6ba
Processing rpyc-3.3.0.zip
Writing /tmp/easy_install-MDBKzw/rpyc-3.3.0/setup.cfg
Running rpyc-3.3.0/setup.py -q bdist_egg --dist-dir /tmp/easy_install-MDBKzw/rpyc-3.3.0/egg-dist-tmp-_uJbLx
Adding rpyc 3.3.0 to easy-install.pth file
Installing rpyc_registry.py script to /usr/local/bin
Installing rpyc_classic.py script to /usr/local/bin

Installed /usr/local/lib/python2.7/dist-packages/rpyc-3.3.0-py2.7.egg
Processing dependencies for rpyc
Searching for plumbum
Reading https://pypi.python.org/simple/plumbum/
Best match: plumbum 1.6.3
Downloading https://pypi.python.org/packages/50/15/f26f60e1bb82aabed7ff86f3fd2976784047f9a291c63ac9019086a69559/plumbum-1.6.3.tar.gz#md5=e0c588ba9271711fae3beb8c0511e8a9
Processing plumbum-1.6.3.tar.gz
Writing /tmp/easy_install-hcpumS/plumbum-1.6.3/setup.cfg
Running plumbum-1.6.3/setup.py -q bdist_egg --dist-dir /tmp/easy_install-hcpumS/plumbum-1.6.3/egg-dist-tmp-GirT6d
zip_safe flag not set; analyzing archive contents...
plumbum.__init__: module references __file__
plumbum.__init__: module references __path__
Adding plumbum 1.6.3 to easy-install.pth file

Installed /usr/local/lib/python2.7/dist-packages/plumbum-1.6.3-py2.7.egg
Finished processing dependencies for rpyc
EV3でRPyCサーバーを起動させる
まずは下のシェルスクリプトファイルを作成して下さい
# !/bin/bash
python `which rpyc_classic.py`
実行権限をつけます
robot@ev3dev:~$ chmod +x rpyc_server.sh
サーバー起動
robot@ev3dev:~$ ./rpyc_server.sh
INFO:SLAVE/18812:server started on [0.0.0.0]:18812
あとはクライアント側で自由に開発できます。
クライアントでの開発
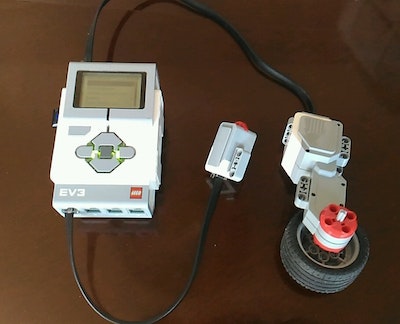
例としてタッチセンサーを押している間、モーターが回転するというプログラムを作ってみましょう。モーターをポートAに、タッチセンサーをポート1に接続します。

クライアント側で次のプログラムを作成して下さい。
import rpyc
conn = rpyc.classic.connect('ev3dev') # EV3のホストネームかIPアドレスを指定
ev3 = conn.modules['ev3dev.ev3'] # リモートのev3dev.ev3をインポート
m = ev3.LargeMotor('outA')
ts = ev3.TouchSensor('in1')

m.run_forever(speed_sp=300)

#  タッチセンサーが押下されている間モーターを回転
while True:
  if ts.value() == 0:
    m.stop(stop_action="hold")
  else:
    m.run_forever(speed_sp=300)
このようにrpycライブラリを使うことでリモート側のモジュールをクライアント側から操作することが可能になります。
実行してみましょう。
client@user:~$ python rpyc_client.py
リモート側にはこのようなログが表示されます。
robot@ev3dev:~$ ./rpyc_server.sh
INFO:SLAVE/18812:server started on [0.0.0.0]:18812
INFO:SLAVE/18812:accepted 192.168.2.209:56985
INFO:SLAVE/18812:welcome [192.168.2.209]:56985
192.168.2.209がクライアント側のIPアドレスです。正しく接続できていることがわかります。
タッチセンサーを押下するとモーターも回転しました。
まとめ
RPyCプロトコルはかなり軽量で通信のラグもあまりないという印象でした。
プログラムをローカルで開発できるのはかなり楽ですね。