はじめに
EV3で動くLinux環境ev3devを使って開発します。この記事は、EV3にev3devをインストールし、SSH接続できている状態であることを前提にしています。
環境構築ができていない方はこちらの記事を参考にしてください。
mindstorm-EV3をLinuxで制御しよう! ev3dev OSのインストールととSSH接続
必要なもの
- WEBカメラ
Microsoft Corp. LifeCam HD-3000
- USBハブ
つくるもの
ev3devとWEBカメラを使って簡単なカメラを作ります。
撮影した写真をブラウザから確認、保存できるようにします。
側をしっかり作っていないので分かり辛いですが、シャッター(タッチセンサー)を押すと、カメラが画像を取得して、PCのブラウザに表示するという仕組みです。
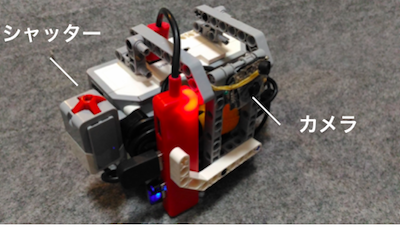
シャッターを押すと..
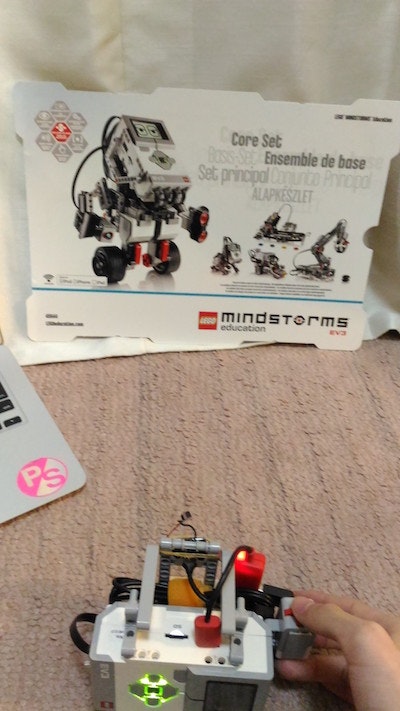
リアルタイムにPCのブラウザに画像が表示されます。

環境構築
WEBカメラから画像を取得するにはfswebcamというコマンドを利用します。
また、今回利用するプログラムをGitHubからクローンします。
# fswebcamのインストール
robot@ev3dev:~$ sudo apt-get install fswebcam
# プログラムのダウンロード
robot@ev3dev:~$ git clone https://github.com/muro-tani/ev3Cam.git
robot@ev3dev:~$ cd ev3Cam
robot@ev3dev:~/ev3Cam$ npm install
実行
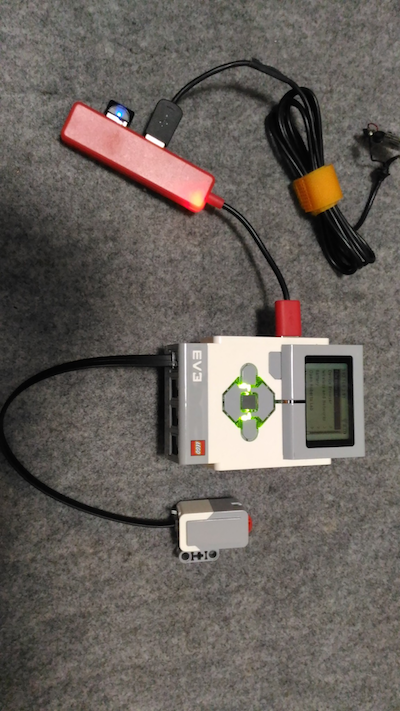
EV3インテリジェントブロックにUSBハブを接続し、そこにUSBドングルとWEBカメラを接続します。
次に、EV3インテリジェントブロックの1番ポートにタッチセンサーを接続します。
その後、プログラムを起動させます。
robot@ev3dev:~/ev3Cam$ node index.js
http://ev3dev.local:1337にアクセスすれば完了です。
タッチセンサーを押して離すと、カメラが取得した画像がブラウザをに表示されます。
WEBカメラの認識
lsusbコマンドで確認します。
robot@ev3dev:~$ lsusb
Bus 001 Device 004: ID 045e:0779 Microsoft Corp. LifeCam HD-3000
Bus 001 Device 003: ID 0411:01ee BUFFALO INC. (formerly MelCo., Inc.) WLI-UC-GNM2 Wireless LAN Adapter [Ralink RT3070]
Bus 001 Device 002: ID 1a40:0101 Terminus Technology Inc. 4-Port HUB
Bus 001 Device 001: ID 1d6b:0001 Linux Foundation 1.1 root hub
WEBカメラから画像を取得
fswebcamコマンドを実行してみましょう。第一引数に保存先のファイル名を指定します。
robot@ev3dev:~$ fswebcam test.jpg
--- Opening /dev/video0...
Trying source module v4l2...
/dev/video0 opened.
No input was specified, using the first.
Adjusting resolution from 384x288 to 352x288.
--- Capturing frame...
Captured frame in 0.00 seconds.
--- Processing captured image...
Writing JPEG image to 'test.jpg'.
詳しいオプションはこちらの通りです。
robot@ev3dev:~$ fswebcam -h
Usage: fswebcam [<options>] <filename> [[<options>] <filename> ... ]

 Options:

 -?, --help                   Display this help page and exit.
 -c, --config <filename>      Load configuration from file.
 -q, --quiet                  Hides all messages except for errors.
 -v, --verbose                Displays extra messages while capturing
     --version                Displays the version and exits.
 -l, --loop <seconds>         Run in loop mode.
 -b, --background             Run in the background.
 -o, --output <filename>      Output the log to a file.
 -d, --device <name>          Sets the source to use.
 -i, --input <number/name>    Selects the input to use.
 -t, --tuner <number>         Selects the tuner to use.
 -f, --frequency <number>     Selects the frequency use.
 -p, --palette <name>         Selects the palette format to use.
 -D, --delay <number>         Sets the pre-capture delay time. (seconds)
 -r, --resolution <size>      Sets the capture resolution.
     --fps <framerate>        Sets the capture frame rate.
 -F, --frames <number>        Sets the number of frames to capture.
 -S, --skip <number>          Sets the number of frames to skip.
     --dumpframe <filename>   Dump a raw frame to file.
 -s, --set <name>=<value>     Sets a control value.
     --revert                 Restores original captured image.
     --flip <direction>       Flips the image. (h, v)
     --crop <size>[,<offset>] Crop a part of the image.
     --scale <size>           Scales the image.
     --rotate <angle>         Rotates the image in right angles.
     --deinterlace            Reduces interlace artifacts.
     --invert                 Inverts the images colours.
     --greyscale              Removes colour from the image.
     --swapchannels <c1c2>    Swap channels c1 and c2.
     --no-banner              Hides the banner.
     --top-banner             Puts the banner at the top.
     --bottom-banner          Puts the banner at the bottom. (Default)
     --banner-colour <colour> Sets the banner colour. (#AARRGGBB)
     --line-colour <colour>   Sets the banner line colour.
     --text-colour <colour>   Sets the text colour.
     --font <[name][:size]>   Sets the font and/or size.
     --no-shadow              Disables the text shadow.
     --shadow                 Enables the text shadow.
     --title <text>           Sets the main title. (top left)
     --no-title               Clears the main title.
     --subtitle <text>        Sets the sub-title. (bottom left)
     --no-subtitle            Clears the sub-title.
     --timestamp <format>     Sets the timestamp format. (top right)
     --no-timestamp           Clears the timestamp.
     --gmt                    Use GMT instead of local timezone.
     --info <text>            Sets the info text. (bottom right)
     --no-info                Clears the info text.
     --underlay <PNG image>   Sets the underlay image.
     --no-underlay            Clears the underlay.
     --overlay <PNG image>    Sets the overlay image.
     --no-overlay             Clears the overlay.
     --jpeg <factor>          Outputs a JPEG image. (-1, 0 - 95)
     --png <factor>           Outputs a PNG image. (-1, 0 - 10)
     --save <filename>        Save image to file.
     --exec <command>         Execute a command and wait for it to complete.