Nuxt.jsのプロジェクトに、Firebase Authenticationによるユーザー認証を導入する方法を紹介します。
Firebaseでプロジェクトを作成
Firebase consoleから、プロジェクトを作成します。
Firebase Authenticationでログイン方法を設定
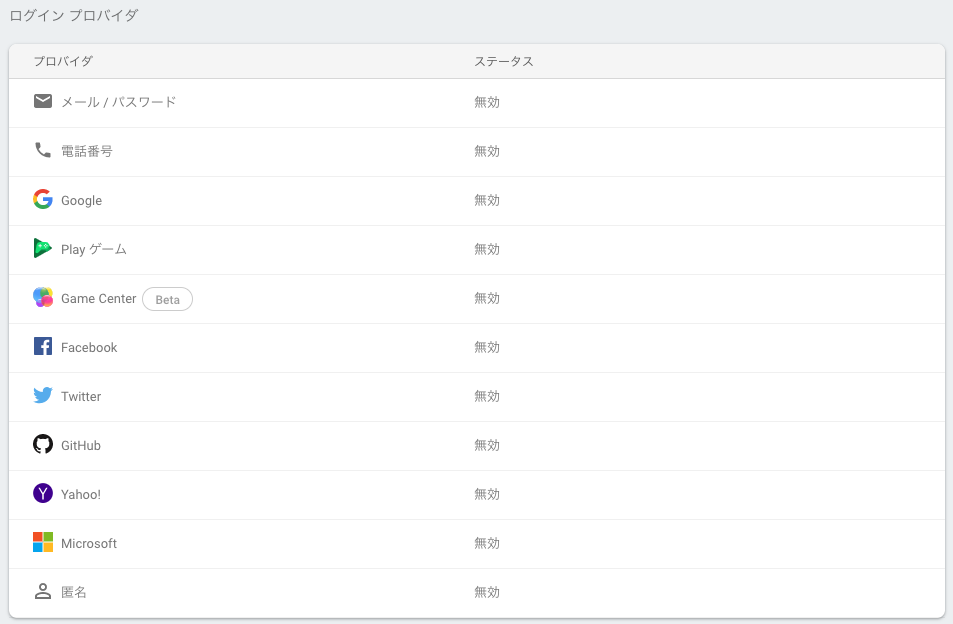
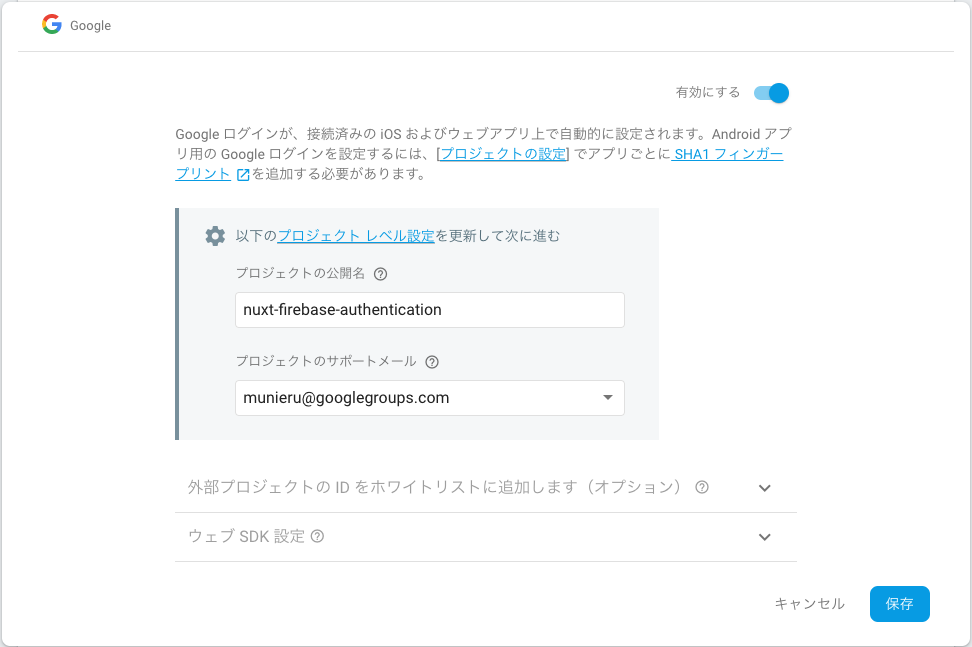
プロジェクトのAuthenticationから、ログイン方法を設定します。
Firebase Authenticationでは、メールアドレスや電話番号などの基本的なものにくわえ、Google、Twitter、Facebookなど様々な認証方法が使用できます。
ここでは、申請がいらず手軽に利用できるGoogleアカウントによる認証を設定します。
パッケージをインストール
firebaseパッケージをインストールします。
$ npm i -D firebase
Firebaseの設定ファイルを作成
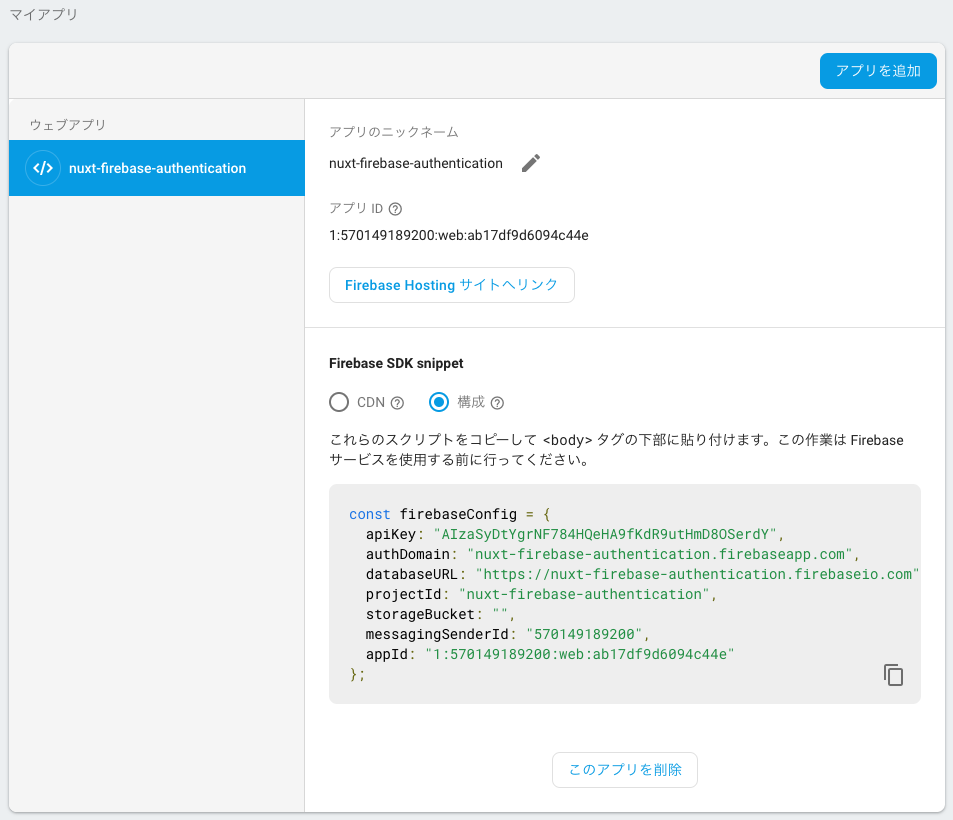
Firebaseの設定ファイルを作成します。
使用する場所に直接記述してもいいのですが、それなりに長いので別ファイルに切り出します。
例:
export default {
  apiKey: 'AIzaSyDtYgrNF784HQeHA9fKdR9utHmD8OSerdY',
  authDomain: 'nuxt-firebase-authentication.firebaseapp.com',
  databaseURL: 'https://nuxt-firebase-authentication.firebaseio.com',
  projectId: 'nuxt-firebase-authentication',
  storageBucket: '',
  messagingSenderId: '570149189200',
  appId: '1:570149189200:web:ab17df9d6094c44e'
}
これらの値は、プロジェクトの設定画面から確認できます。
APIキーなど一見公開しないほうがよさそうなものも含まれていますが、登録したドメイン以外からは使用できないようになっているので問題ありません。1
Firebaseの初期化用モジュールを作成
Firebaseの初期化を行なうためのモジュールを作成します。
配置するディレクトリはどこでもいいのですが、僕はJavaScriptのモジュールはmodulesというディレクトリに配置することが多いです(Nuxt.jsの「モジュール」とは関係ありません)。
import firebase from 'firebase/app'
import 'firebase/auth'
import config from '../firebase.config'

if (!firebase.apps.length) {
  firebase.initializeApp(config)
}

const auth = firebase.auth

export default firebase
export { auth }
!firebase.apps.lengthという条件のときのみfirebase.initializeApp(config)を実行しているのは、インスタンスが重複して生成されるのを防ぐためです。
ページを作成
Googleアカウントを使用してログイン・ログアウトをするだけのシンプルなページをつくってみましょう。
<template>
  <div v-if="isLoading">
    <span>Now loading...</span>
  </div>
  <div v-else>
    <div v-if="isSignedIn">
      <div>
        <span>You are signed in as {{ user.displayName }} ({{ user.email }}).</span>
      </div>
      <div>
        <button
          :disabled="isLoading"
          @click="signOut"
        >
          Sign out
        </button>
      </div>
    </div>
    <div v-else>
      <div>
        <span>You are not signed in.</span>
      </div>
      <div>
        <button
          :disabled="isLoading"
          @click="signIn"
        >
          Sign in with Google
        </button>
      </div>
    </div>
  </div>
</template>

<script>
import { auth } from '~/modules/firebase'

export default {
  asyncData () {
    return {
      isLoading: true,
      isSignedIn: false,
      user: {}
    }
  },
  mounted () {
    auth().onAuthStateChanged((user) => {
      this.isLoading = false
      if (user) {
        this.isSignedIn = true
        this.user = user
      } else {
        this.isSignedIn = false
        this.user = {}
      }
    })
  },
  methods: {
    signIn () {
      const provider = new auth.GoogleAuthProvider()
      auth().signInWithRedirect(provider)
    },
    signOut () {
      auth().signOut()
    }
  }
}
</script>
v-ifディレクティブで、ログイン状態によって表示する内容を切り替えています。
実際には、それぞれコンポーネント化したり、ルーティングで切り分けたりすべきでしょう。
ログインしていないとき
ログインしているとき
Firebase Authenticationで承認済みドメインを追加
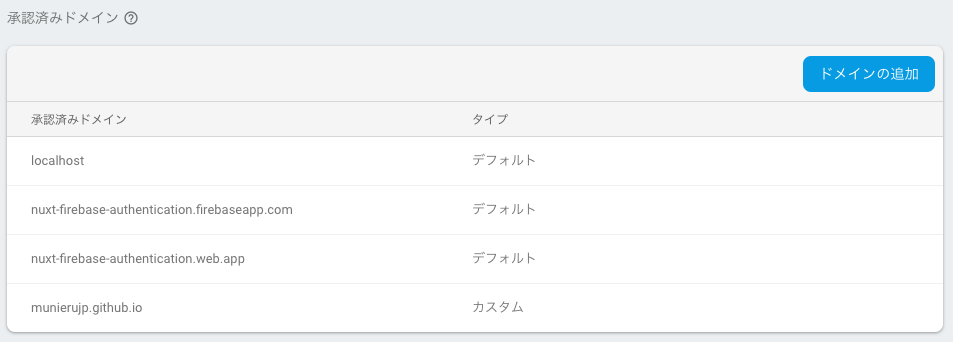
デフォルトでは、localhostとFirebaseのドメインのみが承認済みドメインに登録されています。
GitHub PagesやNetlifyなど、Firebase以外のサービスにデプロイする場合は、そのドメインを承認済みドメインに追加する必要があります。
例
参考リンク
- Using Firebase Auth With Nuxt.js - David Royer - Full Stack Developer
- Nuxt.jsとFirebaseでユーザー認証機能の実装( パスワード, Facebook,Google ) - Qiita


