設定環境
・Windows10
・Eclipse Neon(4.6.0)
STSプラグイン インストール済み
・Java 1.8.0_92
プロジェクトの作成
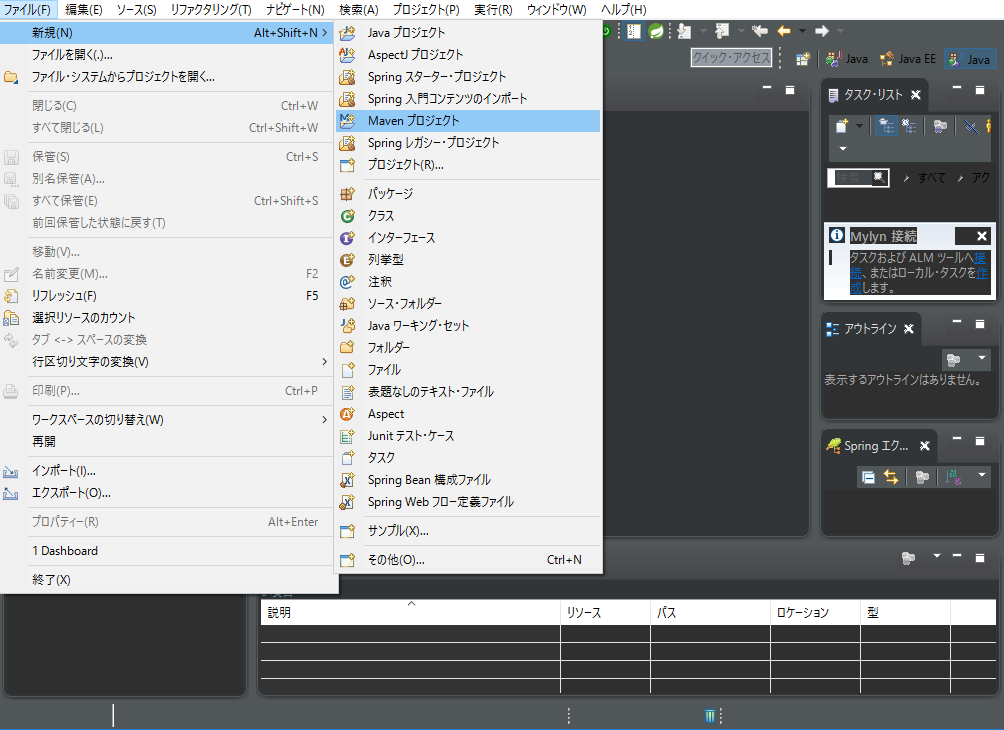
MavenプロジェクトのグループId、アーティファクトId、バージョン、パッケージングを適当に設定し、「完了」

Mavenにより、プロジェクトが自動更新されるので、しばらく待つ。(右下のステータス情報で進捗確認)
完了後は以下のような構成のプロジェクトが作成される。
pom.xmlファイル編集
pom.xmlに以下の内容を追記する。
・spring-boot-starter-parent
Spring Bootの基本パッケージ
Spring Bootの利用宣言と、バージョンを指定
・spring-boot-starter-web
Spring BootのWeb基本パッケージ
・spring-boot-maven-plugin
MavenでSpringBootを扱えるようにするためのプラグイン (今回は入れなくても動く)
・java.version
Javaのバージョン指定
<project xmlns="http://maven.apache.org/POM/4.0.0" xmlns:xsi="http://www.w3.org/2001/XMLSchema-instance"
	xsi:schemaLocation="http://maven.apache.org/POM/4.0.0 http://maven.apache.org/xsd/maven-4.0.0.xsd">
	<modelVersion>4.0.0</modelVersion>
	<groupId>jp.sample.spboot</groupId>
	<artifactId>BootApp</artifactId>
	<version>0.0.1-SNAPSHOT</version>
	<packaging>war</packaging>

	<!-- Spring Boot の利用を宣言し、バージョンを指定【追加】 -->
	<parent>
		<groupId>org.springframework.boot</groupId>
		<artifactId>spring-boot-starter-parent</artifactId>
		<version>1.4.0.RELEASE</version>
	</parent>

	<dependencies>
		<dependency>
			<!-- Spring Boot の Web アプリケーションライブラリの利用を指定【追加】 -->
			<groupId>org.springframework.boot</groupId>
			<artifactId>spring-boot-starter-web</artifactId>
		</dependency>
	</dependencies>

	<build>
		<plugins>
			<!-- Spring Boot の ビルド用 Maven プラグイン【追加】 -->
			<plugin>
				<groupId>org.springframework.boot</groupId>
				<artifactId>spring-boot-maven-plugin</artifactId>
			</plugin>
		</plugins>
	</build>
	<properties>
		<!-- Java バージョン指定【追加】 -->
		<java.version>1.8</java.version>
	</properties>

</project>
pom.xmlを元に必要なライブラリのダウンロードが行われるので、暫く待機。
ダウンロードが終われば、前準備は完了。

実行クラスを作成
・src/main/javaに新規Controllerクラス(SampleController.java)作成
SampleController.javaを以下のように編集
import java.util.ArrayList;
import java.util.List;

import org.springframework.boot.autoconfigure.EnableAutoConfiguration;
import org.springframework.web.bind.annotation.RequestMapping;
import org.springframework.web.bind.annotation.RequestParam;
import org.springframework.web.bind.annotation.ResponseBody;
import org.springframework.web.bind.annotation.RestController;

@RestController                // Webアプリのリクエストを受け付けるクラスであることの指定
@EnableAutoConfiguration       // 様々な設定を自動的に有効化
public class SampleController {

	@RequestMapping("/")       // URLのパスの指定
	@ResponseBody
	public List<String> top(@RequestParam(value = "name", required = false) String name) { // リクエストを受け付けるメソッド
		List<String> list = new ArrayList<String>();
		list.add("SpringBootの最小アプリケーション");
		if (name == "hoge") {
			list.add("(パラメータにhoge指定)");
		} else {
			list.add("(パラメータ指定無し)");
		}
		return list;
	}
}
@RestController・・・Rest(API)コントローラであることをSpring Bootに通知
@EnableAutoConfiguration・・・各種設定を自動的に有効にする(面倒な設定は、SpringBoot側にお任せします!!という宣言)
@RequestMapping・・・どこのパスを辿ればこのクラス(メソッド)がリクエストを処理するのかをSprignBootに通知
※※@RequestMapping("/mainApp")とした場合、「localhost:8080/mainApp」のURLが対応する
@ResponseBody・・・JSON形式が含まれることをSpringBootに通知 (JSONを返す!!という宣言)
@RequestParam・・・メソッド内で簡単にパラメータを扱うことが可能(詳細わかってないので、保留)
・src/main/javaにmainメソッド(Main.java)作成
import org.springframework.boot.SpringApplication;

public class Main {

	public static void main(String[] args) {
		// Spring Bootによるアプリケーションを起動するための処理
		SpringApplication.run(SampleController.class, args);
	}
}
実行
プロジェクトを選択し右クリック → 実行 → SpringBootアプリケーションを選択

コンソールにSpringBootのロゴや、ログが表示される。
最後に、Started Main in 5.247 seconds (JVM running for 6.204)みたいなのが出たら成功。

http://locahohost:8080にアクセスし、以下のような結果が表示されれば成功。

追記 STSを使用したWebアプリケーション作成
STS(Spring Tool Suite)を使用した方法を追記しておく。
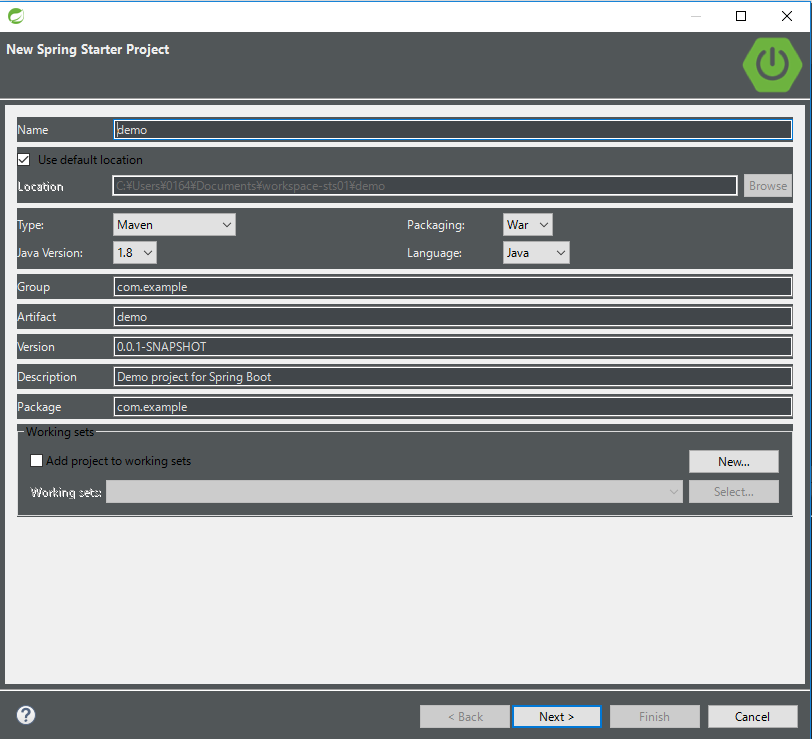
New Spring Starter Projectが開くので、適当に設定して「Next」

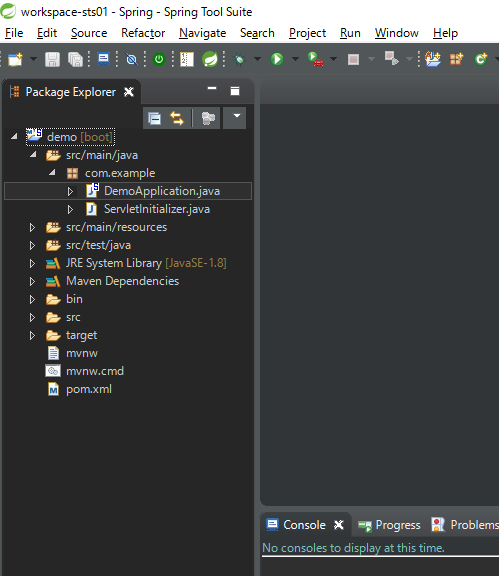
プロジェクトが作成される。
この時点でpom.xmlには、SpringBootに必要な定義情報が設定済み

あとは、Eclipse版で作成した時と同じように、Controllerクラスと、それを呼び出すmainメソッドを用意し、
実行 → SpringBootアプリケーションで実行すると、同様の結果が得られる。
pom.xmlの設定が不要になるから、こっちのほうが効率的かな。
(なんかよく分からんmvnw、mvnw.cmdとかが作成されるけど。。)
※ちなみにEclipseのSTSプラグインで作成したSpringBootプロジェクトだと実行時に"メインクラスが見つからない"のエラーとなる。。。(Why>)
参考にしたサイト
Spring Bootで作る簡単WebAPI
http://niwaka.hateblo.jp/entry/2015/03/31/215844
SpringBootをはじめてみるよ (Mavenコマンド編)
http://hiranoon.hatenablog.com/


