IBMのAIHWKIT (https://github.com/IBM/aihwkit) を試してみる。これはアナログAIハードウェアのシュミレーターです。
環境
- Mac Studio (M1 MAX, Apple Silicon)
- OSX Ventura 13.6
- Python 3.9.6
- PyTorch
インストール
Python環境がすでにセットアップ済みとして
PyTorchのインストール
PyTorchをインストール。最新版はApple SiliconmのGPUに対応している。
time pip3 install torch torchvision torchaudio
AIHWKITのインストール
cmake, ninjya, OpenBLASが必要なようなのでインストールしておく。
OpenBLASのインストールパスを環境変数にセットしておく。
brew install cmake ninja openblas
export OpenBLAS_HOME=/opt/homebrew/opt/openblas/
Python関係では pybind11、matplotlib をインストールしておく。
pip install pybind11 matplotlib
ひとまずこれで、aihwkit がインストール可能なはず。
pip install aihwkit
実行
ひとまずサンプルがあるのでそれを実行してみる。
git clone https://github.com/IBM/aihwkit.git
cd aihwkit/example
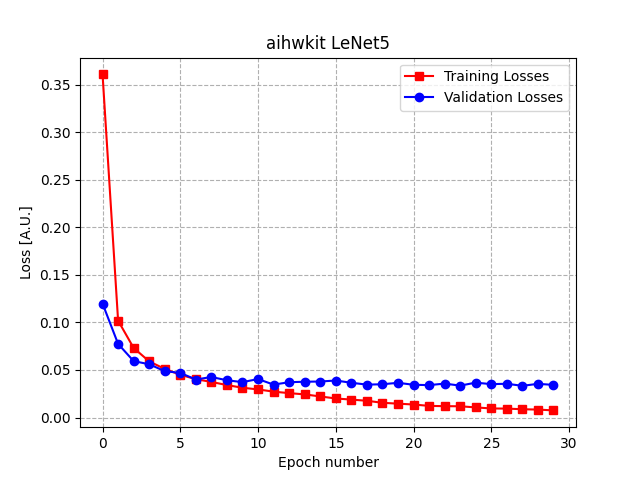
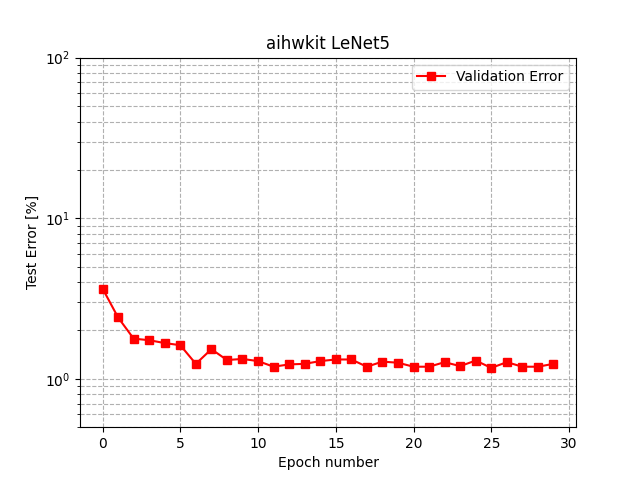
たくさんあるが、04がLeNet5でグラフまで生成してくれるので実行、CPUだと約3時間ほどかかる。
time python 04_lenet5_training.py
AppleSillicon
AIHWKITはcudaをサポートするが、Apple Silisonの mps(Metal Performance Shaders)はサポートしません。