はじめに
別アプリのテーブルを使う方法について調べるのに少し時間がかかったので記事にしておきます。
解決方法
やり方は大きく二つあります。
1.使用したいテーブルのmodelをimportして使用する
今回解説するのはこちらの方法。
2.アプリを統合してしまう
テーブルを共有したいアプリ同士を一つのアプリとして統合してしまいます。
Djangoの基本思想である「各アプリ同士は依存関係を持つべきではない」というルールに則るとこちらが正攻法です。
簡単に説明すると、アプリA、Bがあった時、Aのアプリ上で定義されたテーブルをBが使用するということは、BはAが存在することで初めて成り立つアプリになる=**「BはAに依存している」**ということだからです。
とは言っても既に本番環境で動いているシステムに対してアプリを統合する大改造ができない時もあると思います。この記事ではそんな時に使える逃げ道を紹介します。
※まだ開発中の場合や修正が手遅れでない場合方法2を強くオススメします。
ポイント
PyCharm、またはVSCodeを使用する場合エラーのインスペクションが表示されますが(他のIDE,エディタでもおそらく表示されます)無視してください。
Pythonはimport元は同階層か下の階層にある必要があるというルールがあるのですが、掟破りな方法でなんとかimportする手法です。
解説
実際にアプリAとアプリBを作り、BからAのテーブルを見に行きます。
※前提としてPythonはインストール済みであるとします。
以下コマンドでDjangoアプリ作成
> mkdir django-model-test
> cd django-model-test
django-model-test> python -m venv venv
django-model-test> venv\Scripts\activate  # Windowsの場合
django-model-test> source venv/bin/activate  # Mac,Linuxの場合
(venv) django-model-test> pip install django
(venv) django-model-test> mkdir Src
(venv) django-model-test> cd Src
(venv) django-model-test\Src> django-admin startproject config .
(venv) django-model-test\Src> python manage.py runserver
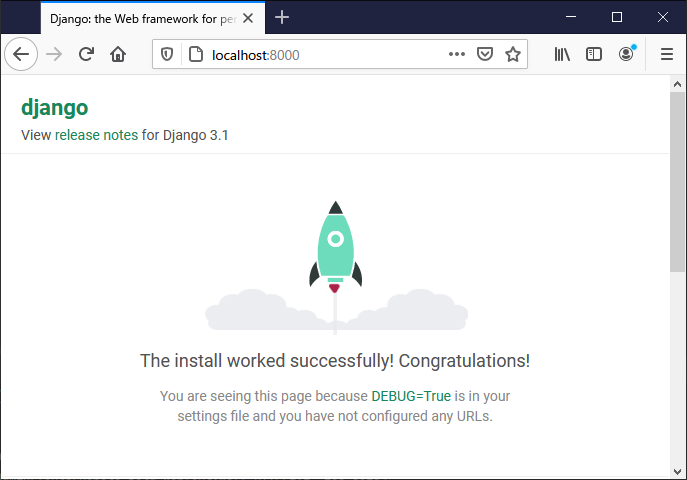
localhost:8000にアクセスしてDjangoのデモ画面が表示されたらここまでOKです。

Ctrl+Cでテストサーバーを終了して引き続き進めていきます。
以下コマンド実行
django-model-test\Src> python manage.py startapp appA
django-model-test\Src> python manage.py startapp appB
settings.pyのINSTALLED_APPSに追記
INSTALLED_APPS = [
    'django.contrib.admin',
    'django.contrib.auth',
    'django.contrib.contenttypes',
    'django.contrib.sessions',
    'django.contrib.messages',
    'django.contrib.staticfiles',
    # 追記
    'appA.apps.AppaConfig',
    'appB.apps.AppbConfig'
]
urls.pyを設定
from django.contrib import admin
from django.urls import include, path

urlpatterns = [
    path('admin/', admin.site.urls),
    path('appB/', include('appB.urls', namespace='appB'))
]
from django.urls import path
from . import views

app_name = 'appB'
urlpatterns = [
    path('', views.top_page, name='top_page'),
    ]
]
index.html(と保存先のディレクトリ)を作成
<!DOCTYPE html>
<html lang="en">
<head>
    <meta charset="UTF-8">
    <title>Title</title>
</head>
<body>
    参照成功!
</body>
</html>
appAのmodels.pyにテスト用テーブルを作成
from django.db import models


class AppATable(models.Model):

    sample = models.TextField()
ターミナルからmigrate実行
django-model-test\Src> python manage.py makemigrations
django-model-test\Src> python manage.py migrate
最後に肝心のViews.pyを作成!おそらく3行目が参照解決できなくてエラーになりますが無視してください。
※必ずmigrateしてから作成してください
from django.shortcuts import render
from django.views.generic import View
from appA.models import AppATable


class TopPageView(View):
    def get(self, request, *args, **kwargs):

        appATable_data = AppATable.objects.all()
        print(appATable_data.values())

        return render(request, 'appB/index.html')


top_page = TopPageView.as_view()
DBにテスト用のデータを仕込みます。
今回はIDEからやりましたがツールが無い方はDjango管理サイトから入れても大丈夫です。

以上で準備完了です。
テスト用サーバーを起動して[localhost:8000/appB]にアクセスしてみましょう。
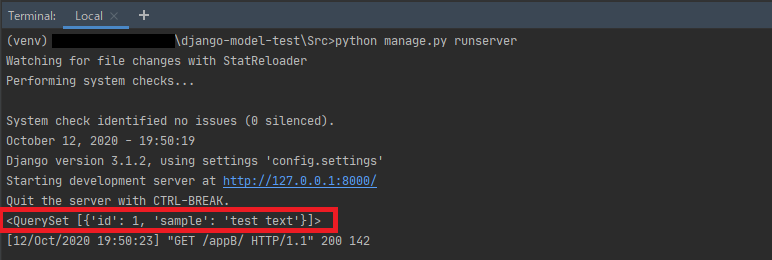
ブラウザに「参照成功!」の文字が表示され、ターミナルからprint文の結果(appATableの中身)が表示されていればOKです。


以上で終了です。
お疲れ様でした![]()