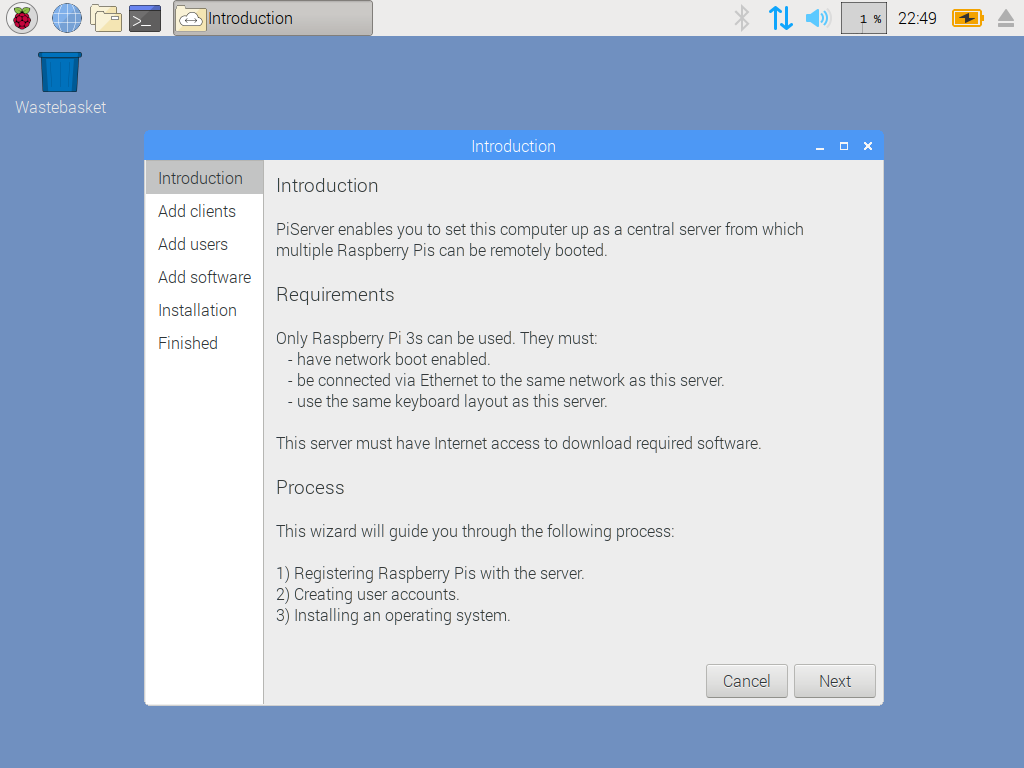
- Raspberry Pi 3のネットワーク起動の機能を利用して、複数のラズパイを管理できるPiServerというのを使ってみた。
- SDカードは必要なし(設定後は...)
-
公式ページよりイメージ
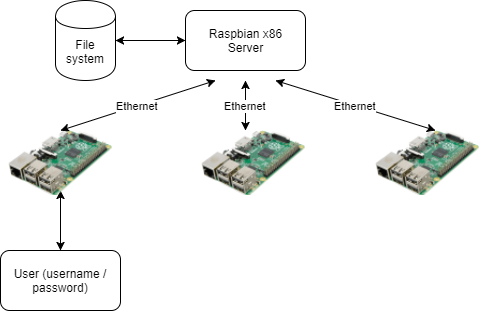
概要
-
PiServerをVitrualBoxに入れたRaspbian-x86から使ってみた。
-
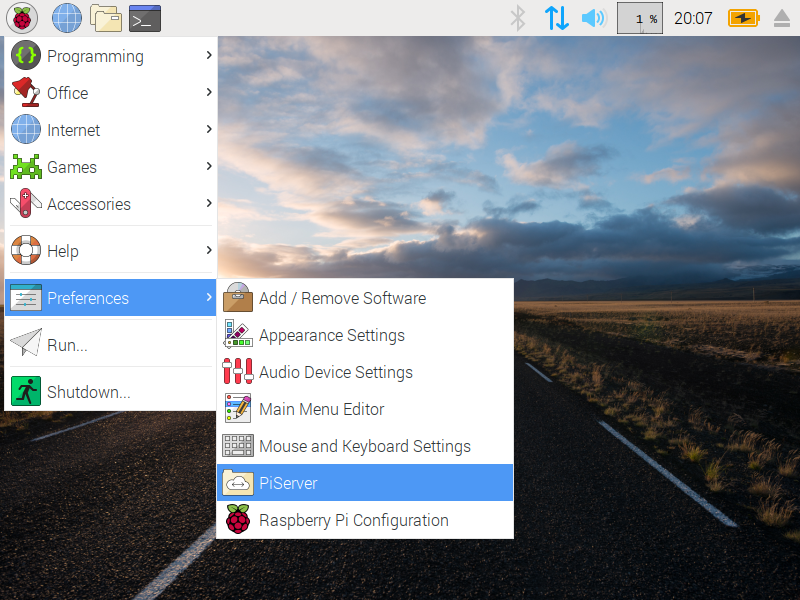
Stretch版のRPD-x86を入れたときに、メニューに "PiServer"というのがあって、なんだろう、と思ってたんだけど、最近、その説明を見つけたので、試してみた。
-
とりあえず、2台つないで、起動はできた。
-
設定方法は、そのうち追記するカモ.
関連リンク
RaspberryPi Blogやら、MagPiあたりでの説明。
環境
-
ホストPC
- Windows 10 x64
- Wifi にて、インターネット接続
- 有線LANは、ネットワークハブにつないで、インターネットにはつながない。
-
仮想マシン
- VirtualBox v5.2.4
- Raspberry Pi Desktop x86 (2017-11-16-rpd-x86-stretch)
-
RaspberryPi 3 (クライアント) x 1台以上
-
ネットワークハブ/スイッチ
ネットワーク図
- のちほど..
手順
RaspberryPi側の準備
ネットワーク起動可能にする
-
いつも通り、Raspbian LiteをmicroSDに焼く。(
2017-11-29-raspbian-stretch-lite) -
BOOTパーティション内の
config.txtの最後に、program_usb_boot_mode=1を追記する。 -
BOOTパーティション内に、
sshというファイルを作る。 -
できあがったmicroSDを、RaspberyPiに挿して、起動
-
sudo vcgencmd otp_dump | grep 17:を実行して、17:3020000aというのが、でれば、準備OK。実行例
pi@raspberrypi:~$ sudo vcgencmd otp_dump | grep 17:
17:3020000a
6. シャットダウン: `sudo shutdown -h now`
6. microSDはもう使わないので、<font color='red'>抜いておく</font>。
## サーバの準備
### 仮想機作成
とりあえず、↓に従って、VirtualBoxへ、RPD-x86をインストール。
> [[メモ] VirtualBoxにて、Raspberry Pi Desktop(2017-11-16-rpd-x86-stretch版)](https://qiita.com/mt08/items/8c5fc9c754b5eeee447c)
### VirtualBoxの仮想機設定
有線アダプタをブリッジ接続として、VMで使用する。
1. 仮想機をシャットダウンしておく。
2. 仮想機の設定を開く。
1. Networkの設定を選択
2. Adapter 2のタブを選択
3. Enavle Network Adapterにチェックを入れる
4. `Bridged Adapter`を選択
5. ホストの有線アダプターを選択
6. OKを押す。

### 仮想機内のネットワーク設定
有線ネットワーク(`eth1`)を固定IPにする。
```txt:/etc/dhcpcd.confの最後に追記する。
...
...
# 192.168.52.1に固定
interface eth1
static ip_address=192.168.52.1/24
static routers=192.168.52.1
- 再起動
pi@raspberry:~ $ ip a
1: lo: <LOOPBACK,UP,LOWER_UP> mtu 65536 qdisc noqueue state UNKNOWN group default qlen 1
    link/loopback 00:00:00:00:00:00 brd 00:00:00:00:00:00
    inet 127.0.0.1/8 scope host lo
       valid_lft forever preferred_lft forever
    inet6 ::1/128 scope host
       valid_lft forever preferred_lft forever
2: eth0: <BROADCAST,MULTICAST,UP,LOWER_UP> mtu 1500 qdisc pfifo_fast state UP group default qlen 1000
    link/ether 08:00:27:95:cb:73 brd ff:ff:ff:ff:ff:ff
    inet 10.0.2.15/24 brd 10.0.2.255 scope global eth0
       valid_lft forever preferred_lft forever
    inet6 fe80::305f:bdde:9937:23c3/64 scope link
       valid_lft forever preferred_lft forever
3: eth1: <BROADCAST,MULTICAST,UP,LOWER_UP> mtu 1500 qdisc pfifo_fast state UP group default qlen 1000
    link/ether 08:00:27:1e:58:87 brd ff:ff:ff:ff:ff:ff
    inet 192.168.52.1/24 brd 192.168.52.255 scope global eth1
       valid_lft forever preferred_lft forever
    inet6 fe80::765:54ba:a5ea:95c1/64 scope link
       valid_lft forever preferred_lft forever
pi@raspberry:~ $
PiServer 初回起動
-
ここで、Raspberry Pi 3の有線LANをつないで、電源を入れる
-
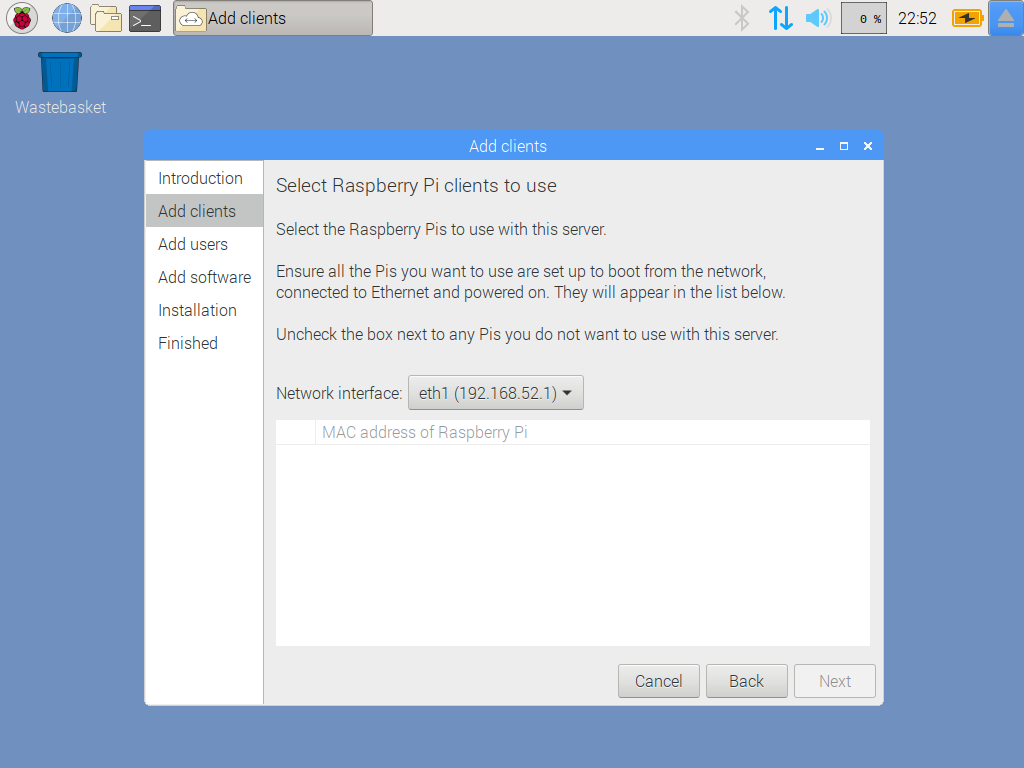
ちょっと待つと、MACアドレスが表示される
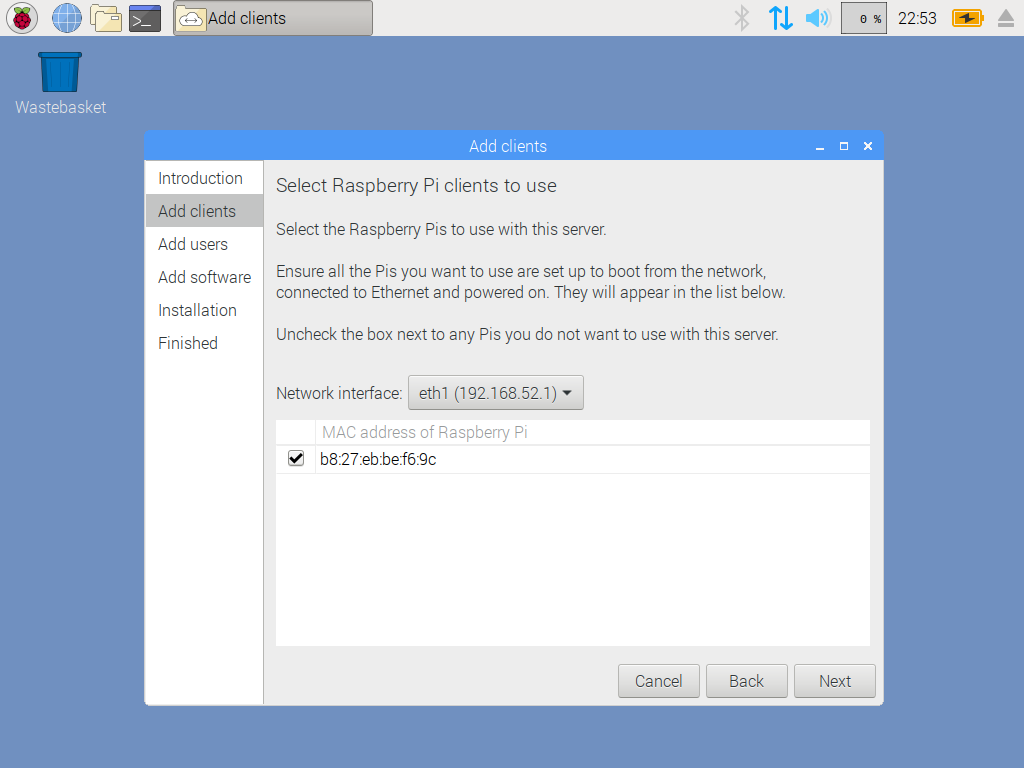
表示されないときは、eth0を選んで、eth1を選び直したり、Back押して前のページに戻ったり、ハブの電源を入れ直して、ラズパイの電源を入れてみる。 -
- http://downloads.raspberrypi.org/piserver.json にアクセスすると、デフォルトのダウンロード先が分かるので、そこから、ファイルを取得しておけば、install operating system from local fileで、ローカルインストールできる。
-
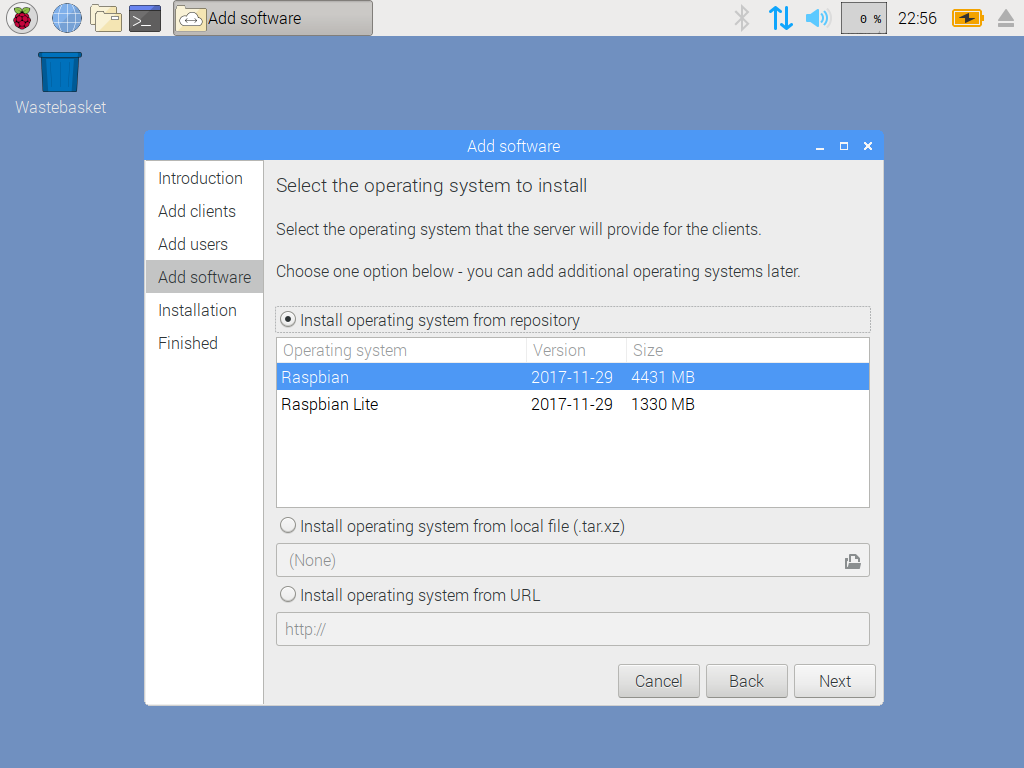
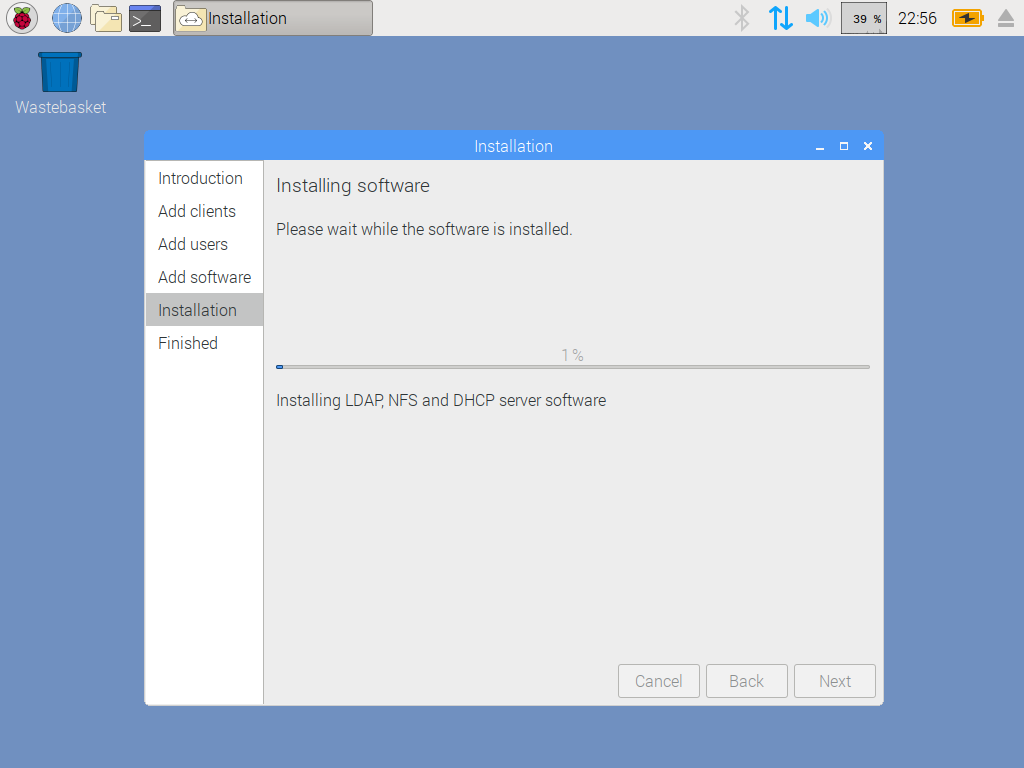
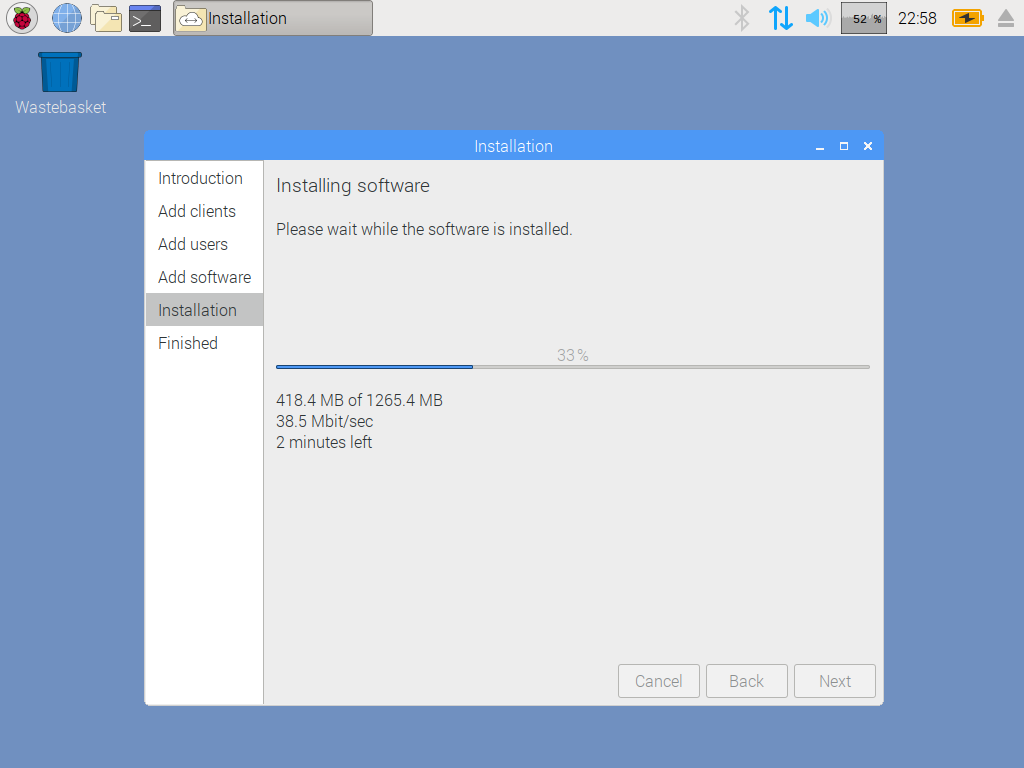
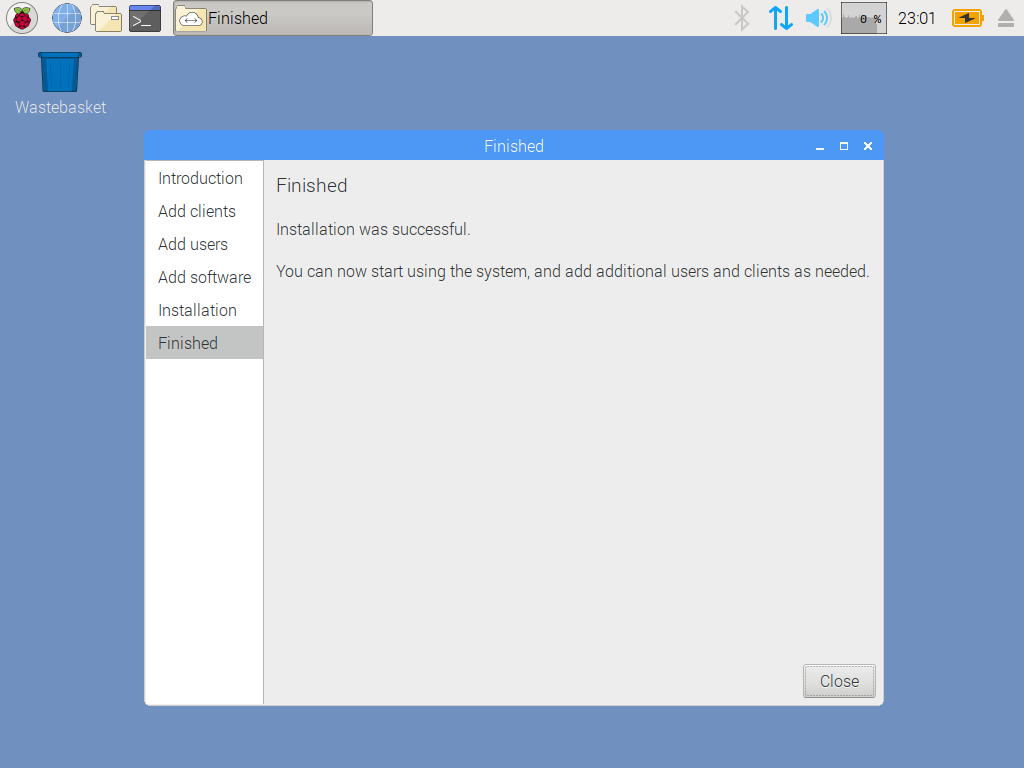
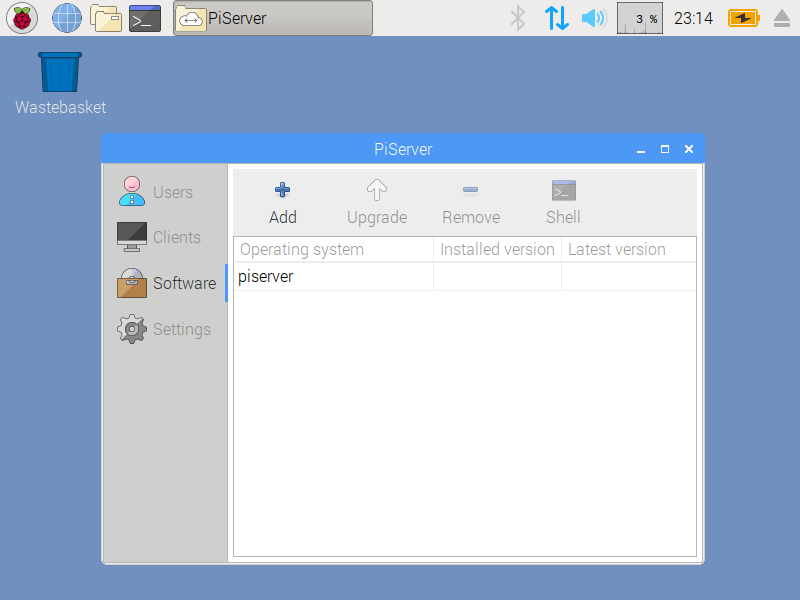
PiServerの設定が起動する。
PiServer
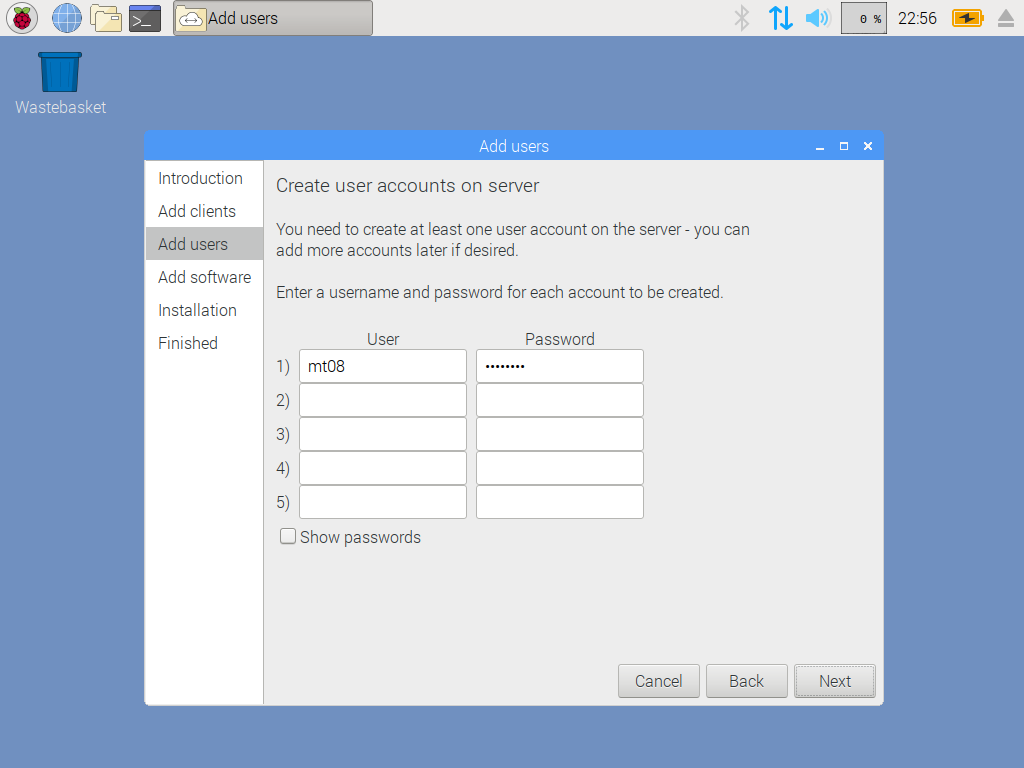
- Users

- Clients

- Software
インストールしたRaspbianを選んで、右上のShellをクリックすると、chrootされたShellが開くので、アップデートとか設定とかできる。
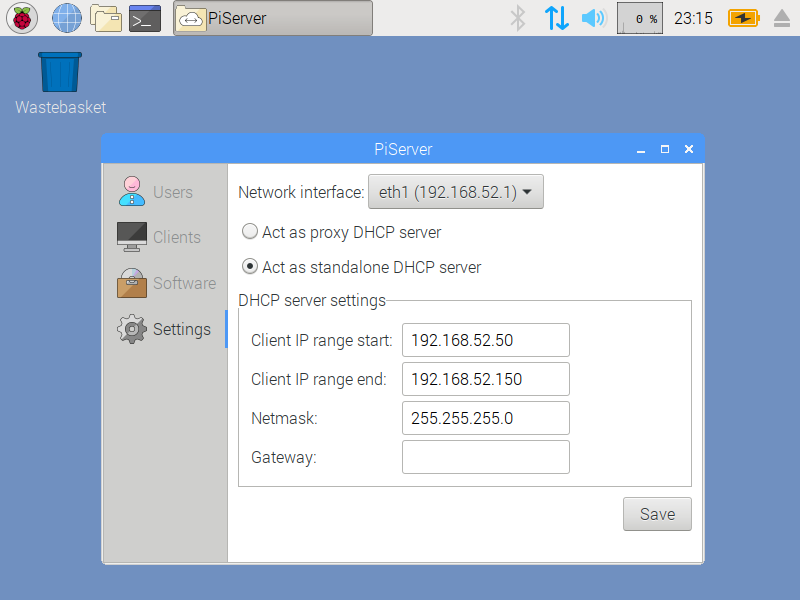
- Settings
Act as standalone DHCP server を選択して、[Save]を押す。

Raspberry Pi 起動
- 上記の設定が済んだら、Raspberry Piの電源をいれる。
- しばらく待つと、ネットワークブートする。
その他
-
Raspberry Pi をインターネットにつなぎたい。
Stretch x86 にて、ip forwarding する/etc/sysctl.conf#コメントをはずす net.ipv4.ip_forward=1いかこぴぺsudo sh -c "echo 1 > /proc/sys/net/ipv4/ip_forward" # sudo iptables -t nat -A POSTROUTING -o eth0 -j MASQUERADE sudo iptables -A FORWARD -i eth0 -o eth1 -m state --state RELATED,ESTABLISHED -j ACCEPT sudo iptables -A FORWARD -i eth1 -o eth0 -j ACCEPT # sudo sh -c "iptables-save > /etc/iptables.ipv4.nat"/lib/dhcpcd/dhcpcd-hooks/70-ipv4-natiptables-restore < /etc/iptables.ipv4.nat再起動時にうまく反映されない... そのときは、手動で。(
sudo iptables-restore < /etc/iptables.ipv4.nat) -
ラズパイのUSBに何か刺さってると起動しないかも?
