Although Node-RED on a PC allows for wired serial communication using the Serial-In and Serial-Out nodes, the current version of Node-RED MCU doesn't provide nodes specifically for serial communication. While there may be official support for such nodes from the main Node-RED MCU project in the future, I wanted to explore a temporary solution using Function nodes. This article outlines my experiment to achieve simple serial communication through Function nodes despite the limited functionality.
- This article is the English version of the following article.
- この記事の日本語版は以下にあります。
Accomplished Tasks:
Using Function nodes, I created 'mcu serial in' and 'mcu serial out' to send and receive String commands between the MCU device and the PC. This allowed me to control an LED attached to the MCU device from the PC by turning it ON/OFF.
While the setup is simplified and has various limitations, such as handling port configurations within the Function node itself, I found that the usage of these Function nodes closely resembles the Serial In/Out nodes available in Node-RED on a PC.
Please refer to this link for more information on the Node-RED MCU Edition that I used for this experiment.
Connection and Components Used:
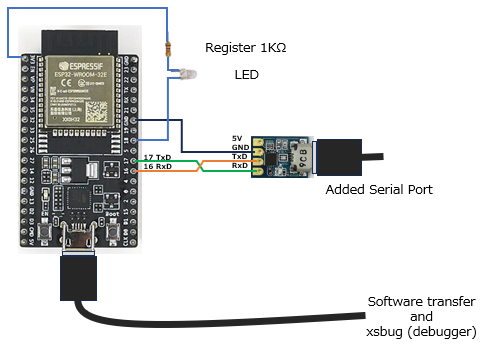
When using the Node-RED MCU plugin, the default Port 0 assigned to the ESP32's USB terminal is occupied for transfer program and interfacing with the debugger, xsbug. Therefore, we utilize an available other serial port on the ESP32 for this setup.
In this example, I've utilized pins 16 and 17 as Port 2, connecting them to the PC via a serial-to-USB converter module.
This module operates on power supplied through the connected USB cable, so the 5V terminal remains open. Since it's a module using the FT234X, while the power operates at 5V, the TxD and RxD operate at 3.3V. These signal lines can be directly connected to the ESP32, which also operates at 3.3V. The ground line is also wired accordingly.
From the perspective of the PC, the connections are as follows in this example:
COM5: For programming and xsbug (debugger)
COM7: For serial communication
Additionally, for confirmation of GPIO port control, an LED is connected to pin 18.
Sorry, please find a place where you can get equivalent items as the link is from a supplier in Japan:
ESP32 Devkit v4 board

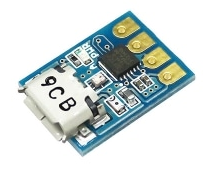
serial-to-USB converter module
Flow for MCU Device:
Using the serial port set up for this experiment, the 'mcu serial in' node receives GPIO control commands from the PC. These commands are then separated into 'on' and 'off' using a switch node, and the 'Digital out' node is used to turn the LED on/off. Simultaneously, the 'mcu serial out' node is employed to send the LED's status back to the PC.
The challenge in this setup is to utilize the Moddable SDK's features on the ESP32 side after building with Node-RED MCU using Function nodes. While the flow does not function correctly on the PC side, it operates properly once it enters the ESP32.
Within this port configuration, the 'device.io.Serial' from the Moddable SDK, which is only available on the MCU side, is referenced. This causes a red triangle symbol to appear in the PC's Node-RED flow editor nodes when there's a configuration issue. However, if built for the MCU using 'node-red-mcu', it will function correctly on the MCU device, so it is left as is.

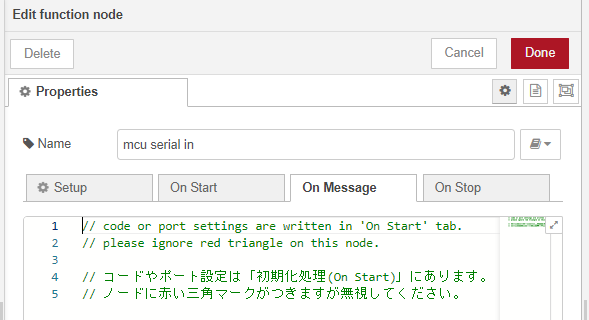
mcu serial in:
This node is used for configuring and receiving data from the serial port.
the 'On Message' tab, which is typically used in the 'Function' node, is empty, and the 'On Start' tab is utilized for processing here.
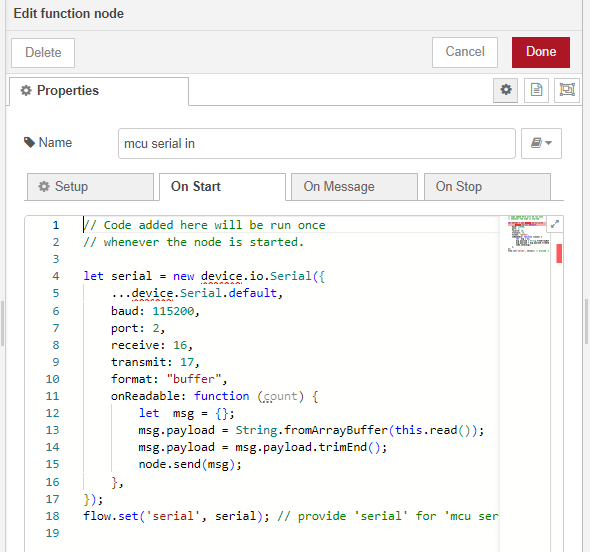
Settings for the communication speed and port of the serial communication are configured here. The processing when receiving data is also handled here, where the delimiter ('\n') is removed before transmitting.
// Code added here will be run once
// whenever the node is started.

let serial = new device.io.Serial({
    ...device.Serial.default,
    baud: 115200,
    port: 2,
    receive: 16,
    transmit: 17,
    format: "buffer",
    onReadable: function (count) {
        let  msg = {};
        msg.payload = String.fromArrayBuffer(this.read());
        msg.payload = msg.payload.trimEnd();
        node.send(msg);
    },
});
flow.set('serial', serial); // provide 'serial' for 'mcu serial out' node.
mcu serial out:
In this node, upon receiving a message, it sends the message using the port configured in the 'mcu serial in' node.
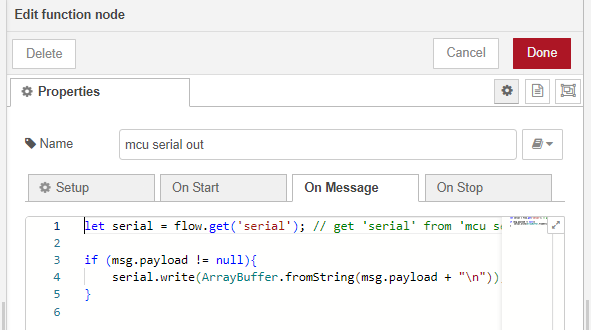
let serial = flow.get('serial'); // get 'serial' from 'mcu serial in'

if (msg.payload != null){
    serial.write(ArrayBuffer.fromString(msg.payload + "\n"));
}
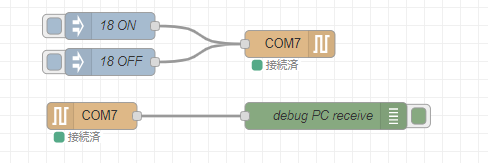
PC Flow:
On the PC side, I've set up two flows: one to turn the LED on/off on the MCU device and another to receive feedback on the LED's status.
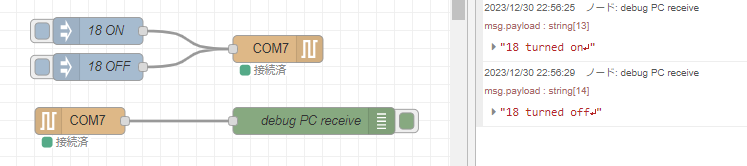
Operation Verification:
The tested flow is published on GitHub and can be downloaded from here.
With this setup, pressing the button on the '18 ON' inject node will illuminate the LED on the MCU device, and the debug window will display '18 turned on'.
Similarly, pressing the button on the '18 OFF' inject node will turn off the LED on the MCU device, and the debug window will show '18 turned off'.
What I thought with this experiment:
I initially tried this node as a simple experiment after hearing about the immediate need of serial ports with node-red-mcu. I anticipate that official 'serial in/out' nodes will eventually be provided by the main project. Nevertheless, this experiment was beneficial for me to understand the mechanisms of the Moddable SDK and Node-RED.
Node-RED is a fantastic tool for visual programming, allowing for no-code/low-code development. I personally enjoy assembling various processes without using the 'Function' node. While there are those aspects, I also believe that the use of the 'Function' node offers additional conveniences.
With the 'Function' node available, both those who prefer to write JavaScript code ('coding enthusiasts') and those who want to create various things without code ('no-code enthusiasts') can collaborate harmoniously within the same Node-RED environment. I find this to be a wonderful environment where both can collaborate effectively.
Thank you for reading,