Contenfulの一番安いプランは無料ですがスペースを複数作ろうとしたりすると UDS $489/M (毎月8万円弱)かかります。
そこまでヘッドレスCMSにコストをかけたくないのでオープンソースStrapiを使いAWS Lightsailで格安運用をします。AWS Lightsailで稼働させた手順書です。
- Lightsailインスタンスで Strapi/Nginx/PostgreSQL すべてを稼働させます
- メディアファイルはS3で管理します
- $5プランで動作させているので爆安で使えます
Lightsail インスタンス作成
Lightsail > Create Instance
設定
Select a platform: LINUX
Select a blueprint: Apps + OS & Nginx
Enable Automatic Snapshots: Yes
Choose a time of day when you'd like us to attempt your snapshot: 03:00 + JST(GMT+9)
Select networking type: Dual Stack
Select a size: $10 USD per month(2 GB Memory, 2 vCPUs Processing, 60 GB SSD Storage, 3 TB Transfer)
Identify your instance: 適当な名前を
Pending -> Running になるのを待機してください
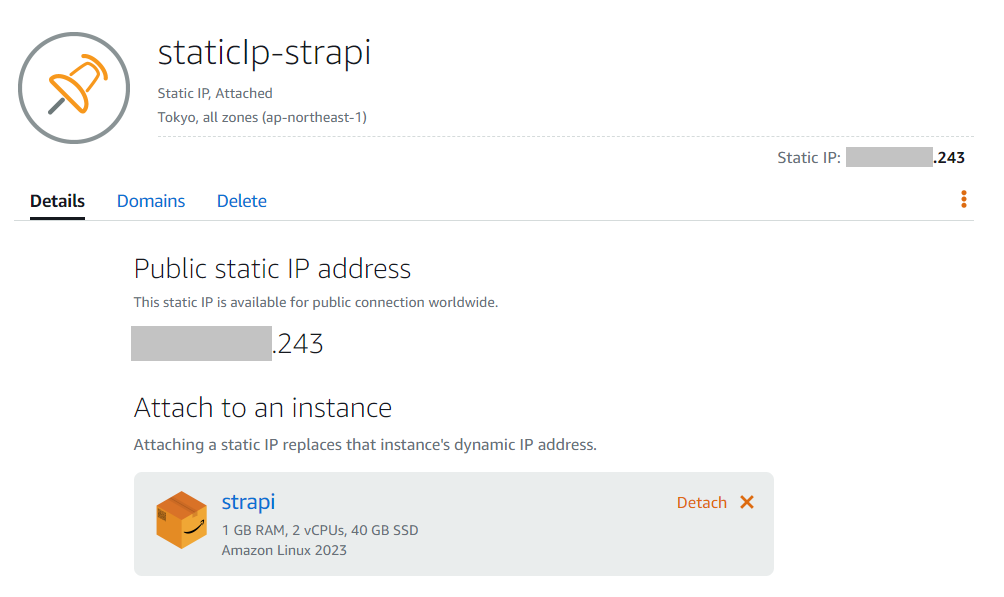
Networking設定 > StaticIPの設定
Attach static IP を選択する
適当なIP名 をつけて Create and attach
DNSの設定
Route53にStrapi用のAレコードを作成して先ほどのStaticIPを設定してください
$ sudo apt update
$ sudo apt upgrade
$ sudo /opt/bitnami/bncert-tool
Warning: Support for the nginx web server is limited. This tool will only be
able to generate HTTPS certificates and configure certificate renewal. It will
not enable/disable redirections or apply other types of server configurations.
Press [Enter] to continue:
----------------------------------------------------------------------------
Welcome to the Bitnami HTTPS Configuration tool.

----------------------------------------------------------------------------
Domains

Please provide a valid space-separated list of domains for which you wish to

configure your web server.
Domain list []: *****.com

The following domains were not included: www.*****.com. Do you want to add them
? [Y/n]: n

----------------------------------------------------------------------------
Changes to perform

The following changes will be performed to your Bitnami installation:

1. Stop web server
2. Configure web server to use a free Let's Encrypt certificate for the domains:
*****.com
3. Configure a cron job to automatically renew the certificate each month
4. Start web server once all changes have been performed

Do you agree to these changes? [Y/n]: Y

----------------------------------------------------------------------------
Create a free HTTPS certificate with Let's Encrypt

Please provide a valid e-mail address for which to associate your Let's Encrypt
certificate.

Domain list: *****.com
Server name: *****.com
E-mail address []: ***@******.com

The Let's Encrypt Subscriber Agreement can be found at:
https://letsencrypt.org/documents/LE-SA-v1.3-September-21-2022.pdf
Do you agree to the Let's Encrypt Subscriber Agreement? [Y/n]: Y

----------------------------------------------------------------------------
Performing changes to your installation

The Bitnami HTTPS Configuration Tool will perform any necessary actions to your
Bitnami installation. This may take some time, please be patient.

The Bitnami HTTPS Configuration Tool will perform any necessary actions to your
Bitnami installation. This may take some time, please be patient.

----------------------------------------------------------------------------
Success

The Bitnami HTTPS Configuration Tool succeeded in modifying your installation.

The configuration report is shown below.

Backup files:
* /opt/bitnami/nginx/conf/nginx.conf.back.202404280317
* /opt/bitnami/nginx/conf/server_blocks/default-https-server-block.conf.back.202404
280317

Find more details in the log file:

/tmp/bncert-202404280317.log

If you find any issues, please check Bitnami Support forums at:

https://github.com/bitnami/vms

Press [Enter] to continue:
mysql動作確認
$ cat ~/bitnami_application_password
$ sudo /opt/bitnami/mariadb/bin/mariadb -u root -p
MariaDB [(none)]> CREATE USER 'strapi'@'localhost' IDENTIFIED BY '***';
MariaDB [(none)]> CREATE DATABASE strapi;
MariaDB [(none)]> GRANT ALL ON strapi.* TO `strapi`@`127.0.0.1`;
node導入
$ curl -fsSL https://deb.nodesource.com/setup_lts.x | sudo -E bash -
$ sudo apt install -y nodejs
リポジトリ初期化
$ cd /home
$ sudo mkdir strapi
$ sudo chown bitnami:bitnami strapi
$ cd strapi
$ git init
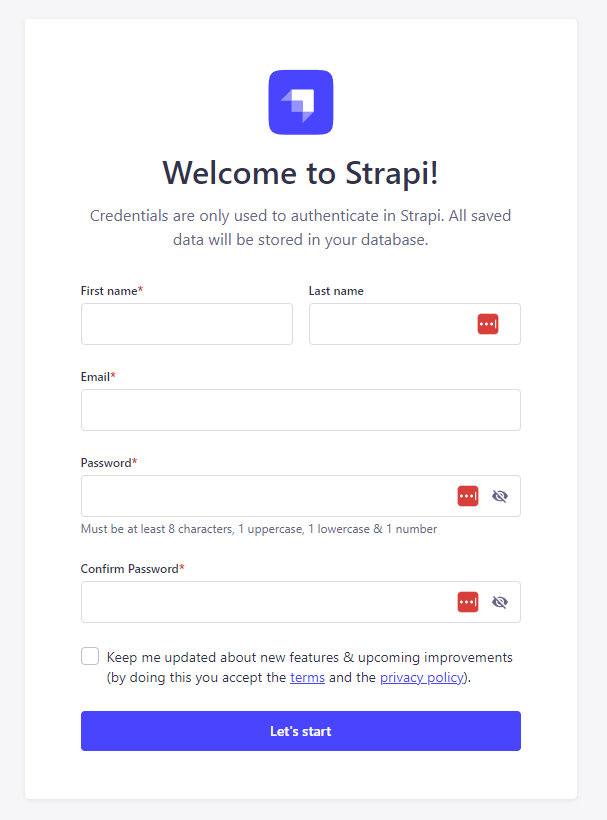
$ npx create-strapi-app@latest strapi
? Choose your installation type Custom (manual settings)
? Choose your preferred language TypeScript
? Choose your default database client mysql
? Database name: strapi
? Host: localhost
? Port: 3306
? Username: strapi
? Password: ****************
? Enable SSL connection: No
Strapi起動
$ npm run build
$ npm run start
$ mkdir /home/strapi/nginx
$ cp /opt/bitnami/nginx/conf/server_blocks/d
$ cp /opt/bitnami/nginx/conf/server_blocks/default-https-server-block.conf /home/strapi/nginx
$ ln -s /home/strapi/nginx/default-https-server-block.conf default-https-server-block.conf
default-https-server-block.conf
# HTTPS Server
+   upstream strapi {
+      server 127.0.0.1:1337;
+   }

server {
+    server_name strapi.spicysoft.com;

    # Port to listen on, can also be set in IP:PORT format
    listen  443 ssl;

    ssl_certificate      /opt/bitnami/nginx/conf/strapi.spicysoft.com.crt;
    ssl_certificate_key  /opt/bitnami/nginx/conf/strapi.spicysoft.com.key;

    include  "/opt/bitnami/nginx/conf/bitnami/*.conf";

+    location / {
+        proxy_pass http://strapi;
+        proxy_http_version 1.1;
+        proxy_set_header X-Forwarded-Host $host;
+        proxy_set_header X-Forwarded-Server $host;
+        proxy_set_header X-Real-IP $remote_addr;
+        proxy_set_header X-Forwarded-For $proxy_add_x_forwarded_for;
+        proxy_set_header X-Forwarded-Proto $scheme;
+        proxy_set_header Host $http_host;
+        proxy_set_header Upgrade $http_upgrade;
+        proxy_set_header Connection "Upgrade";
+        proxy_pass_request_headers on;
+    }

-    location /status {
-        stub_status on;
-        access_log   off;
-        allow 127.0.0.1;
-        deny all;
-    }
}
$ sudo nginx -t
$ sudo /opt/bitnami/ctlscript.sh restart nginx
メディアデータをS3で運用する
IAMユーザを作成
- ユーザ名:
strapi - AWS マネジメントコンソールへのユーザーアクセスを提供する - オプション:
オフ - 許可のオプション:
ポリシーを直接アタッチする+S3FullAccess
IAMユーザのアクセスキーを発行
ユースケース: AWS の外部で実行されるアプリケーション
説明タグ値: strapi
S3バケットの作成
- バケット名: 適当な名前
- オブジェクト所有者: ACL 有効
- パブリックアクセスをすべて ブロック: 外す
- 新しいアクセスコントロールリスト (ACL) を介して付与されたバケットとオブジェクトへのパブリックアクセスをブロックする: 外す
- 任意のアクセスコントロールリスト (ACL) を介して付与されたバケットとオブジェクトへのパブリックアクセスをブロックする: 外す
- 新しいパブリックバケットポリシーまたはアクセスポイントポリシーを介して付与されたバケットとオブジェクトへのパブリックアクセスをブロックする: チェックを入れる
- 任意のパブリックバケットポリシーまたはアクセスポイントポリシーを介したバケットとオブジェクトへのパブリックアクセスとクロスアカウントアクセスをブロックする: チェックを入れる
環境設定の更新
.env
+ NODE_ENV=production
+ AWS_ACCESS_KEY_ID=*****
+ AWS_ACCESS_SECRET==*****
+ AWS_REGION=ap-northeast-1
+ AWS_BUCKET==*****
プラグインのインストール
$ npm install @strapi/provider-upload-aws-s3 --save
// config/plugins.js
export default ({ env }) => ({
  upload: {
    config: {
      provider: 'aws-s3',
      providerOptions: {
        accessKeyId: env('AWS_ACCESS_KEY_ID'),
        secretAccessKey: env('AWS_ACCESS_SECRET'),
        region: env('AWS_REGION'),
        baseUrl: `https://${env('AWS_BUCKET')}.s3.${env('AWS_REGION')}.amazonaws.com`,
        rootPath: 'media',
        params: {
          ACL: env('AWS_ACL', 'public-read'),
          signedUrlExpires: env('AWS_SIGNED_URL_EXPIRES', 15 * 60),
          Bucket: env('AWS_BUCKET'),
        },
      },
      actionOptions: {
        upload: {},
        uploadStream: {},
        delete: {},
      },
    },
  },
});
// config/middlewares.js
export default ({ env }) => [
  'strapi::logger',
  'strapi::errors',
  /* Replace 'strapi::security', with this snippet */
  //   'strapi::security',
  /* Beginning of snippet */
  {
    name: 'strapi::security',
    config: {
      contentSecurityPolicy: {
        useDefaults: true,
        directives: {
          'connect-src': ["'self'", 'https:'],
          'img-src': [
            "'self'",
            'data:',
            'blob:',
            'market-assets.strapi.io',
            `${env('AWS_S3_BUCKET_NAME')}.s3.${env('AWS_REGION')}.amazonaws.com`,
          ],
          'media-src': [
            "'self'",
            'data:',
            'blob:',
            'market-assets.strapi.io',
            `${env('AWS_S3_BUCKET_NAME')}.s3.${env('AWS_REGION')}.amazonaws.com`,
          ],
          upgradeInsecureRequests: null,
        },
      },
    },
  },
  /* End of snippet */
  'strapi::cors',
  'strapi::poweredBy',
  'strapi::query',
  'strapi::body',
  'strapi::session',
  'strapi::favicon',
  'strapi::public',
];
起動方法
コンテンツモデルを編集したい場合
デバッグモードで起動
$ npm run develop
コンテンツモデルを編集せずリリースモードで起動
$ npm run build
$ npm run start
永続化する
developモード以外で実行するとモデル編集ができないので開発モードで永続化します
$ npm install pm2
$ npx pm2 start npm --name "starpi" -- run develop
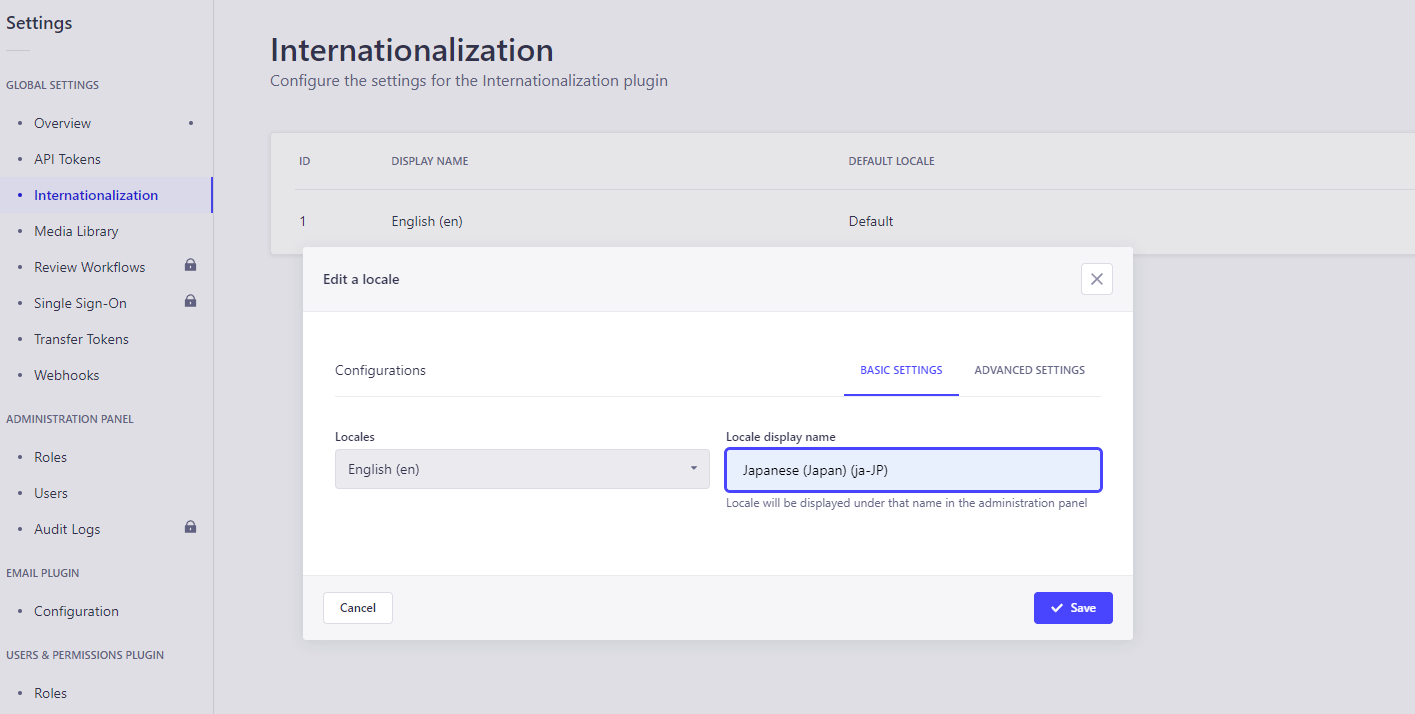
Strapiの詳細設定
cat