ClaudeのArtifactsが正式リリースしました。
とても便利に活用しています。たとえば、HTMLのモックを簡単に作ることができます。
利用者として便利なのはもちろんですが、独自で同じようなものが作れないか考えてみました。
StreamlitとBedrockを使ってそれっぽいものができましたので、作り方をご紹介します。
生成AIはBedrockのClaude 3 Haikuを使用します。
HTMLを生成する方法
方法1)普通にプロンプトで指定してみる
プロンプトに「HTMLを生成して」を指定すると以下のような結果となります。
client = boto3.client("bedrock-runtime", region_name="us-east-1")

response = client.converse(
    modelId="us.anthropic.claude-3-haiku-20240307-v1:0",
    messages=[{"role": "user", "content": [{"text": "HTMLでログイン画面を作って"}]}],
    inferenceConfig={"temperature": 0},
)
[
  {
    "text": "はい、HTMLでログイン画面を作成することができます。以下は一例です。\n\n```html\n<!DOCTYPE html>\n<html>\n<head>\n  <title>Login Page</title>\n  <style>\n    body {\n      font-family: Arial, sans-serif;\n      background-color: #f2f2f2;\n    }\n    \n    .login-container {\n      background-color: white;\n      padding: 20px;\n      border-radius: 5px;\n      box-shadow: 0 0 10px rgba(0,0,0,0.1);\n      max-width: 400px;\n      margin: 0 auto;\n      margin-top: 100px;\n    }\n    \n    input[type=text], input[type=password] {\n      width: 100%;\n      padding: 12px 20px;\n      margin: 8px 0;\n      display: inline-block;\n      border: 1px solid #ccc;\n      border-radius: 4px;\n      box-sizing: border-box;\n    }\n    \n    button {\n      background-color: #4CAF50;\n      color: white;\n      padding: 14px 20px;\n      margin: 8px 0;\n      border: none;\n      border-radius: 4px;\n      cursor: pointer;\n      width: 100%;\n    }\n    \n    button:hover {\n      background-color: #45a049;\n    }\n  </style>\n</head>\n<body>\n  <div class=\"login-container\">\n    <h2>Login</h2>\n    <form>\n      <label for=\"username\">Username:</label>\n      <input type=\"text\" id=\"username\" name=\"username\" placeholder=\"Enter your username\" required>\n      \n      <label for=\"password\">Password:</label>\n      <input type=\"password\" id=\"password\" name=\"password\" placeholder=\"Enter your password\" required>\n      \n      <button type=\"submit\">Login</button>\n    </form>\n  </div>\n</body>\n</html>\n```\n\nこのコードでは、ログイン画面のデザインを CSS で設定しています。ユーザー名とパスワードを入力するためのフォームが用意されています。ログインボタンをクリックすると、フォームが送信されます。\n\n実際のログイン処理は、サーバー側で行う必要があります。この HTML コードは、ログイン画面の見た目を作成するためのものです。"
  }
]
「text」の値を整形して出力するとこのようになります。前後にHTML以外の文章を生成してしまいます。
はい、HTMLでログイン画面を作成することができます。以下は一例です。

```html
<!DOCTYPE html>
<html>
<head>
  <title>Login Page</title>
  <style>
    body {
      font-family: Arial, sans-serif;
      background-color: #f2f2f2;
    }

    .login-container {
      background-color: white;
      padding: 20px;
      border-radius: 5px;
      box-shadow: 0 0 10px rgba(0,0,0,0.1);
      max-width: 400px;
      margin: 0 auto;
      margin-top: 100px;
    }

    input[type=text], input[type=password] {
      width: 100%;
      padding: 12px 20px;
      margin: 8px 0;
      display: inline-block;
      border: 1px solid #ccc;
      border-radius: 4px;
      box-sizing: border-box;
    }

    button {
      background-color: #4CAF50;
      color: white;
      padding: 14px 20px;
      margin: 8px 0;
      border: none;
      border-radius: 4px;
      cursor: pointer;
      width: 100%;
    }

    button:hover {
      background-color: #45a049;
    }
  </style>
</head>
<body>
  <div class="login-container">
    <h2>Login</h2>
    <form>
      <label for="username">Username:</label>
      <input type="text" id="username" name="username" placeholder="Enter your username" required>

      <label for="password">Password:</label>
      <input type="password" id="password" name="password" placeholder="Enter your password" required>

      <button type="submit">Login</button>
    </form>
  </div>
</body>
</html>
```

このコードでは、ログイン画面のデザインを CSS で設定しています。ユーザー名とパスワードを入力するためのフォームが用意されています。ログインボタンをクリックすると、サーバーにログイン情報が送信されます。

実際のログイン処理は、サーバー側のプログラミング (PHP、Node.js、Ruby on Rails など) で行う必要があります。このHTMLコードはログイン画面のデザインを提供するものです。
方法2)Tool useを使用する
テキストをうまくパースしても良いのですが、大変そうです。そこで、 Tool use (function calling) を使用しました。
まず、ツールを定義します。
HTMLを表示する「html_viewer」というツールを定義し、文字列型の「html」を受け取ります。
tools = {
    "toolSpec": {
        "name": "html_viewer",
        "description": "HTMLを表示します。",
        "inputSchema": {
            "json": {
                "type": "object",
                "properties": {
                    "html": {"type": "string", "description": "HTML Document"}
                },
                "required": ["html"],
            }
        },
    }
}
ツールを使用してBedrockを呼び出します。
response = client.converse(
    modelId="us.anthropic.claude-3-haiku-20240307-v1:0",
    messages=[{"role": "user", "content": [{"text": "HTMLでログイン画面を作って"}]}],
    toolConfig={
        "tools": [tools],
        "toolChoice": {"auto": {}},
    },
    inferenceConfig={"temperature": 0},
)

print(
    json.dumps(response["output"]["message"]["content"], indent=2, ensure_ascii=False)
)
「"toolChoice": {"auto": {}}」はツールを使用するかどうかを生成AIの判断に任せる設定です。
他には、「any」(いずれかのツールを使用する)「tool」(指定したツールを必ず使用する)などが設定可能です。(APIリファレンス)
[
  {
    "text": "わかりました。HTMLでログイン画面を作成しましょう。以下のコードをご覧ください:"
  },
  {
    "toolUse": {
      "toolUseId": "tooluse_U0VnnW8yQXex2WsAjDPMzg",
      "name": "html_viewer",
      "input": {
        "html": "<!DOCTYPE html>\n<html>\n<head>\n  <title>ログイン画面</title>\n  <style>\n    body {\n      font-family: Arial, sans-serif;\n      background-color: #f2f2f2;\n    }\n    \n    .login-container {\n      background-color: white;\n      padding: 20px;\n      border-radius: 5px;\n      box-shadow: 0 0 10px rgba(0,0,0,0.1);\n      max-width: 400px;\n      margin: 0 auto;\n      margin-top: 100px;\n    }\n    \n    input[type=text], input[type=password] {\n      width: 100%;\n      padding: 12px 20px;\n      margin: 8px 0;\n      display: inline-block;\n      border: 1px solid #ccc;\n      border-radius: 4px;\n      box-sizing: border-box;\n    }\n    \n    button {\n      background-color: #4CAF50;\n      color: white;\n      padding: 14px 20px;\n      margin: 8px 0;\n      border: none;\n      border-radius: 4px;\n      cursor: pointer;\n      width: 100%;\n    }\n    \n    button:hover {\n      background-color: #45a049;\n    }\n  </style>\n</head>\n<body>\n  <div class=\"login-container\">\n    <h2>ログイン</h2>\n    <form>\n      <label for=\"username\">ユーザー名:</label>\n      <input type=\"text\" id=\"username\" name=\"username\" placeholder=\"ユーザー名を入力してください\">\n      \n      <label for=\"password\">パスワード:</label>\n      <input type=\"password\" id=\"password\" name=\"password\" placeholder=\"パスワードを入力してください\">\n      \n      <button type=\"submit\">ログイン</button>\n    </form>\n  </div>\n</body>\n</html>"
      }
    }
  }
]
contentの内容が「text」と「toolUse」の2つになりました。「toolUse」の中に、ツールへのインプットパラメーター「html」の値として、HTMLが返却されました。
これでHTMLだけをきれいに取得することができました。
Streamlitでアプリにする
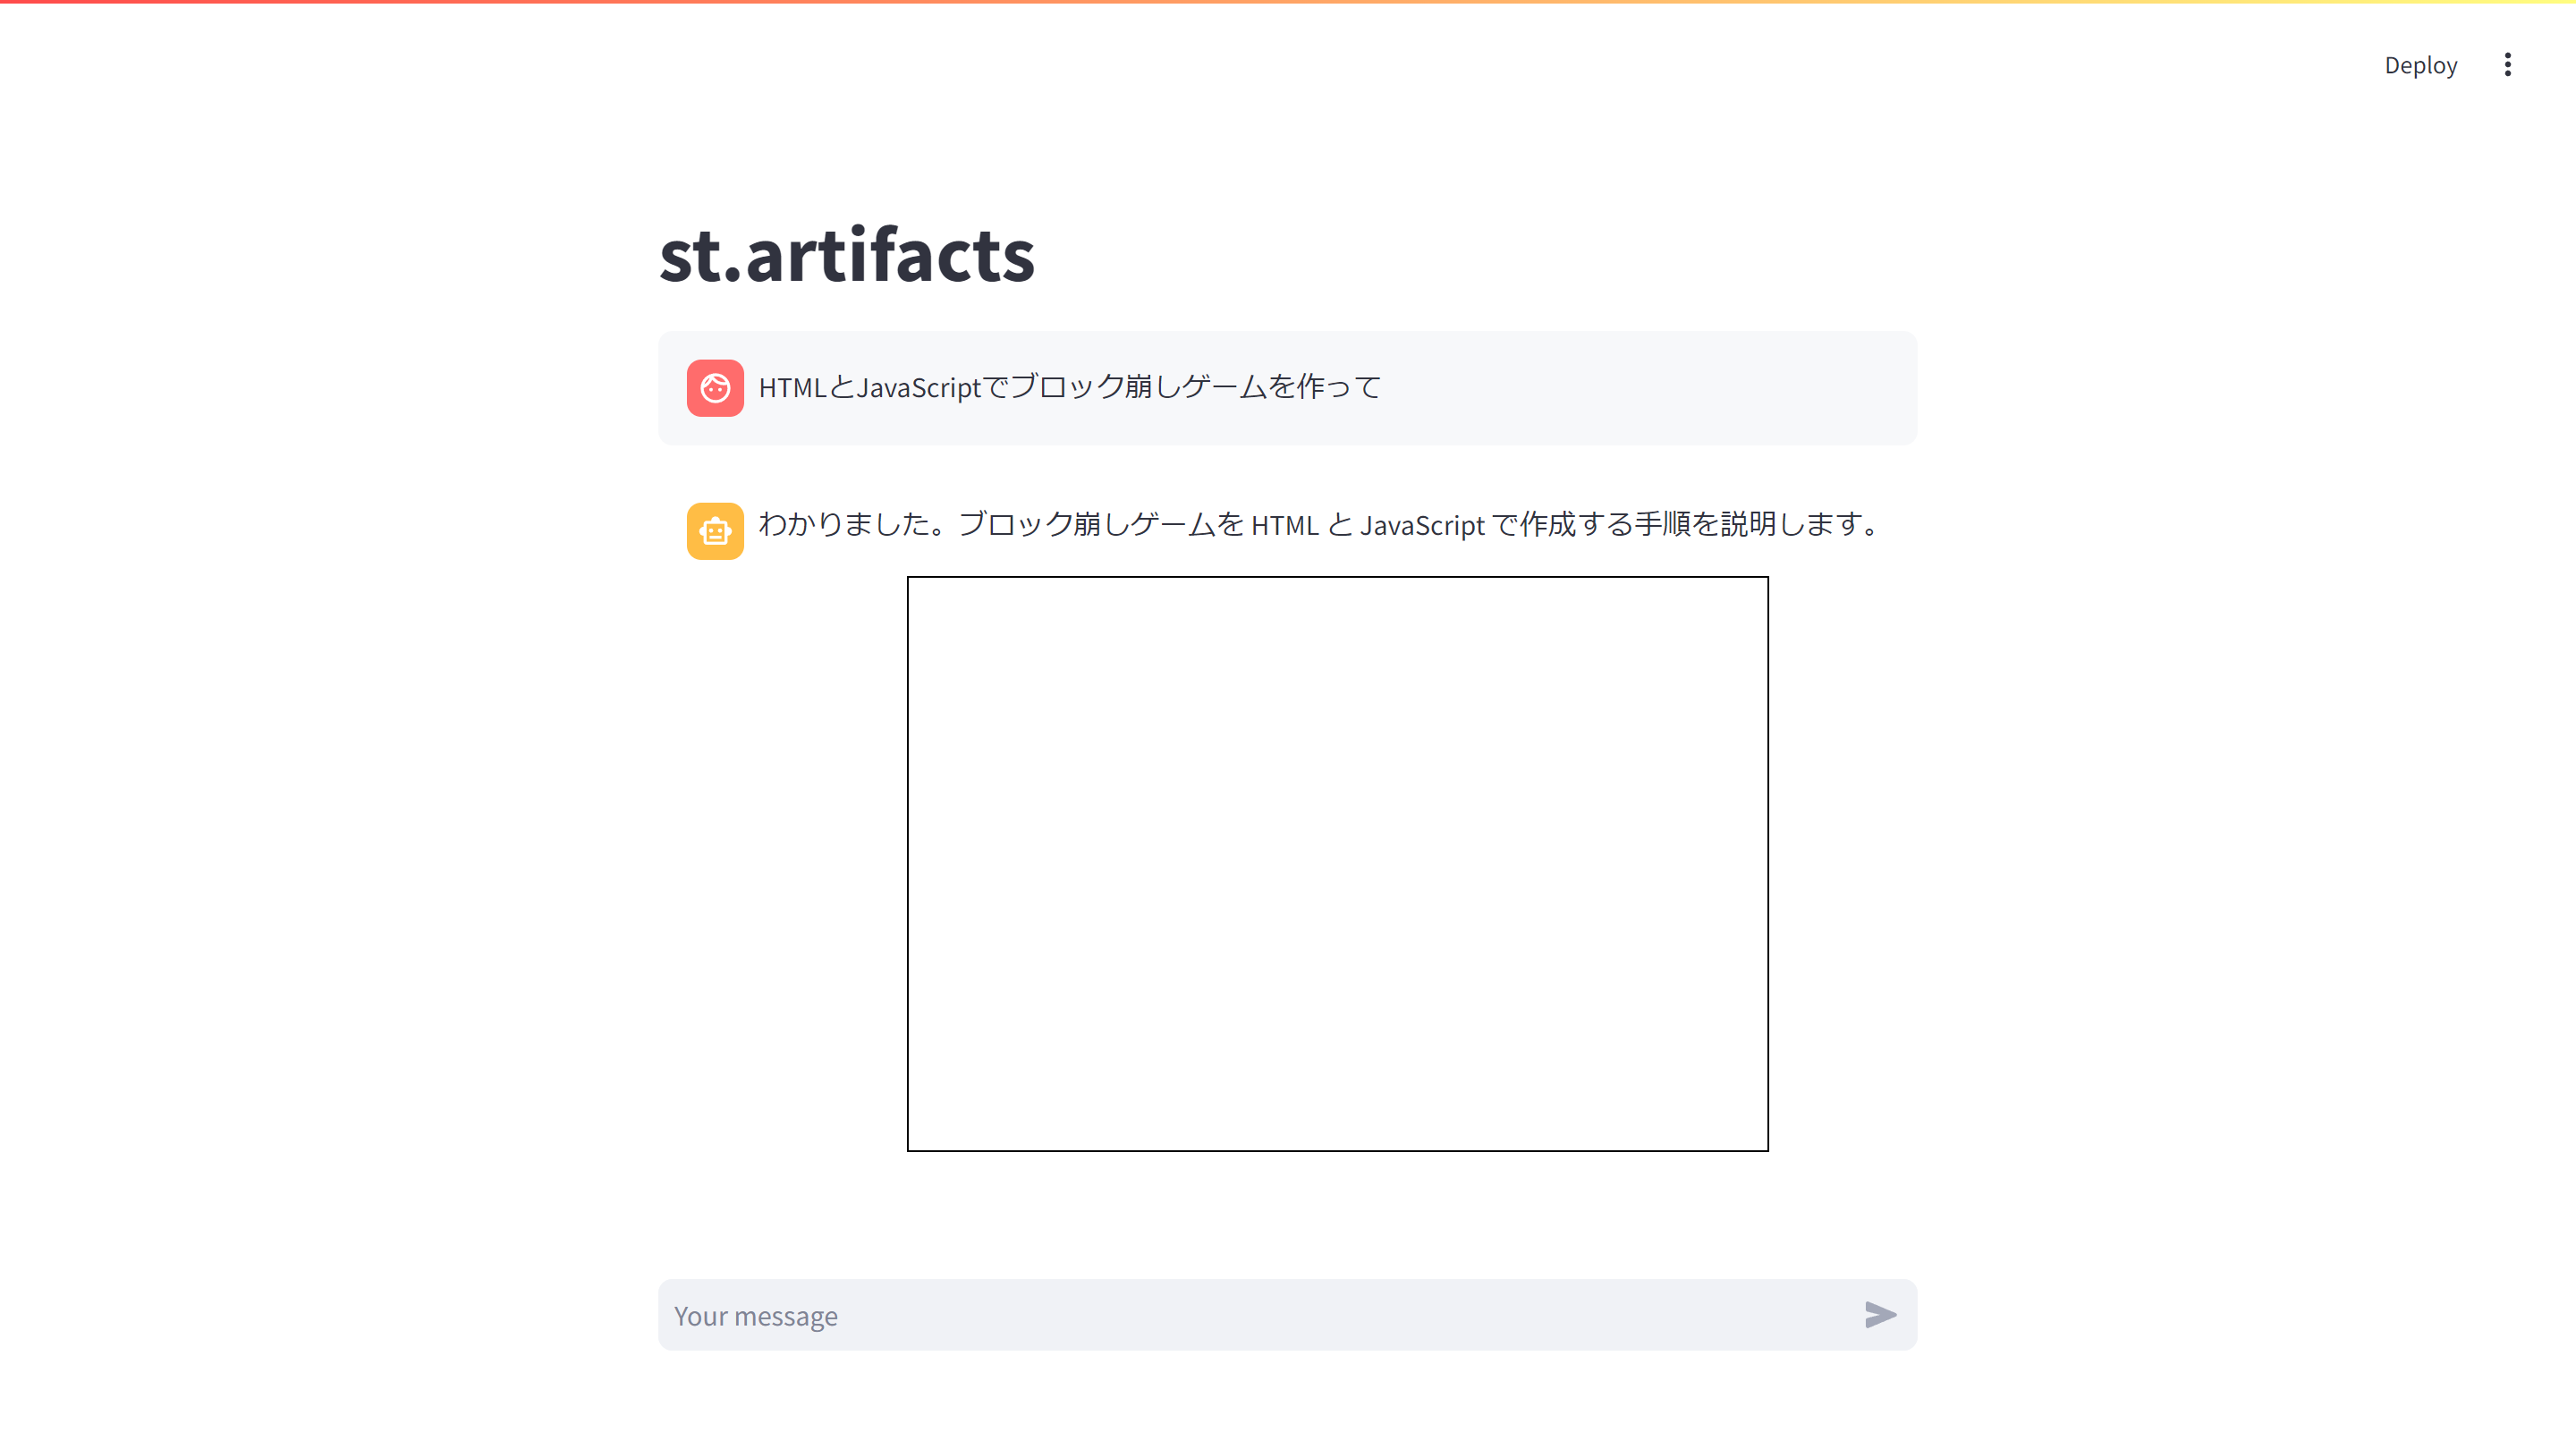
HTMLを取得できたので、Streamlitで表示します。
こちらのソースをベースとします。
app.py
import boto3
import streamlit as st

st.title("st.artifacts")

client = boto3.client("bedrock-runtime", region_name="us-east-1")

tools = {
    "toolSpec": {
        "name": "html_viewer",
        "description": "HTMLを表示します。",
        "inputSchema": {
            "json": {
                "type": "object",
                "properties": {
                    "html": {"type": "string", "description": "HTML Document"}
                },
                "required": ["html"],
            }
        },
    }
}


if prompt := st.chat_input():

    with st.chat_message("user"):
        st.markdown(prompt)

    user_message = {"role": "user", "content": [{"text": prompt}]}

    response = client.converse(
        modelId="us.anthropic.claude-3-haiku-20240307-v1:0",
        messages=[{"role": "user", "content": [{"text": prompt}]}],
        toolConfig={
            "tools": [tools],
            "toolChoice": {"auto": {}},
        },
        inferenceConfig={"temperature": 0},
    )

    with st.chat_message("assistant"):
        st.markdown(response["output"]["message"]["content"][0]["text"])
起動しましょう。
streamlit run app.py
HTMLを表示するコンポーネントはいくつかあります。
方法1)st.htmlを使用する
HTMLを表示するコンポーネントです。
st.html(html)
一見問題なさそうなのですが、JavaScriptを含んだ場合に動作しません。
方法2)st.components.v1.htmlを使用する
こちらのコンポーネントは、iFrameでHTMLを出力します。
import streamlit.components.v1 as components

components.html(
                html,
                height=640,
                scrolling=True,
            )
JavaScriptを含んだHTMLでも動作します。
st.components.v1.htmlの方法のほうが良さそうです。
タブでプレビュー表示とソースコード表示を切り替える
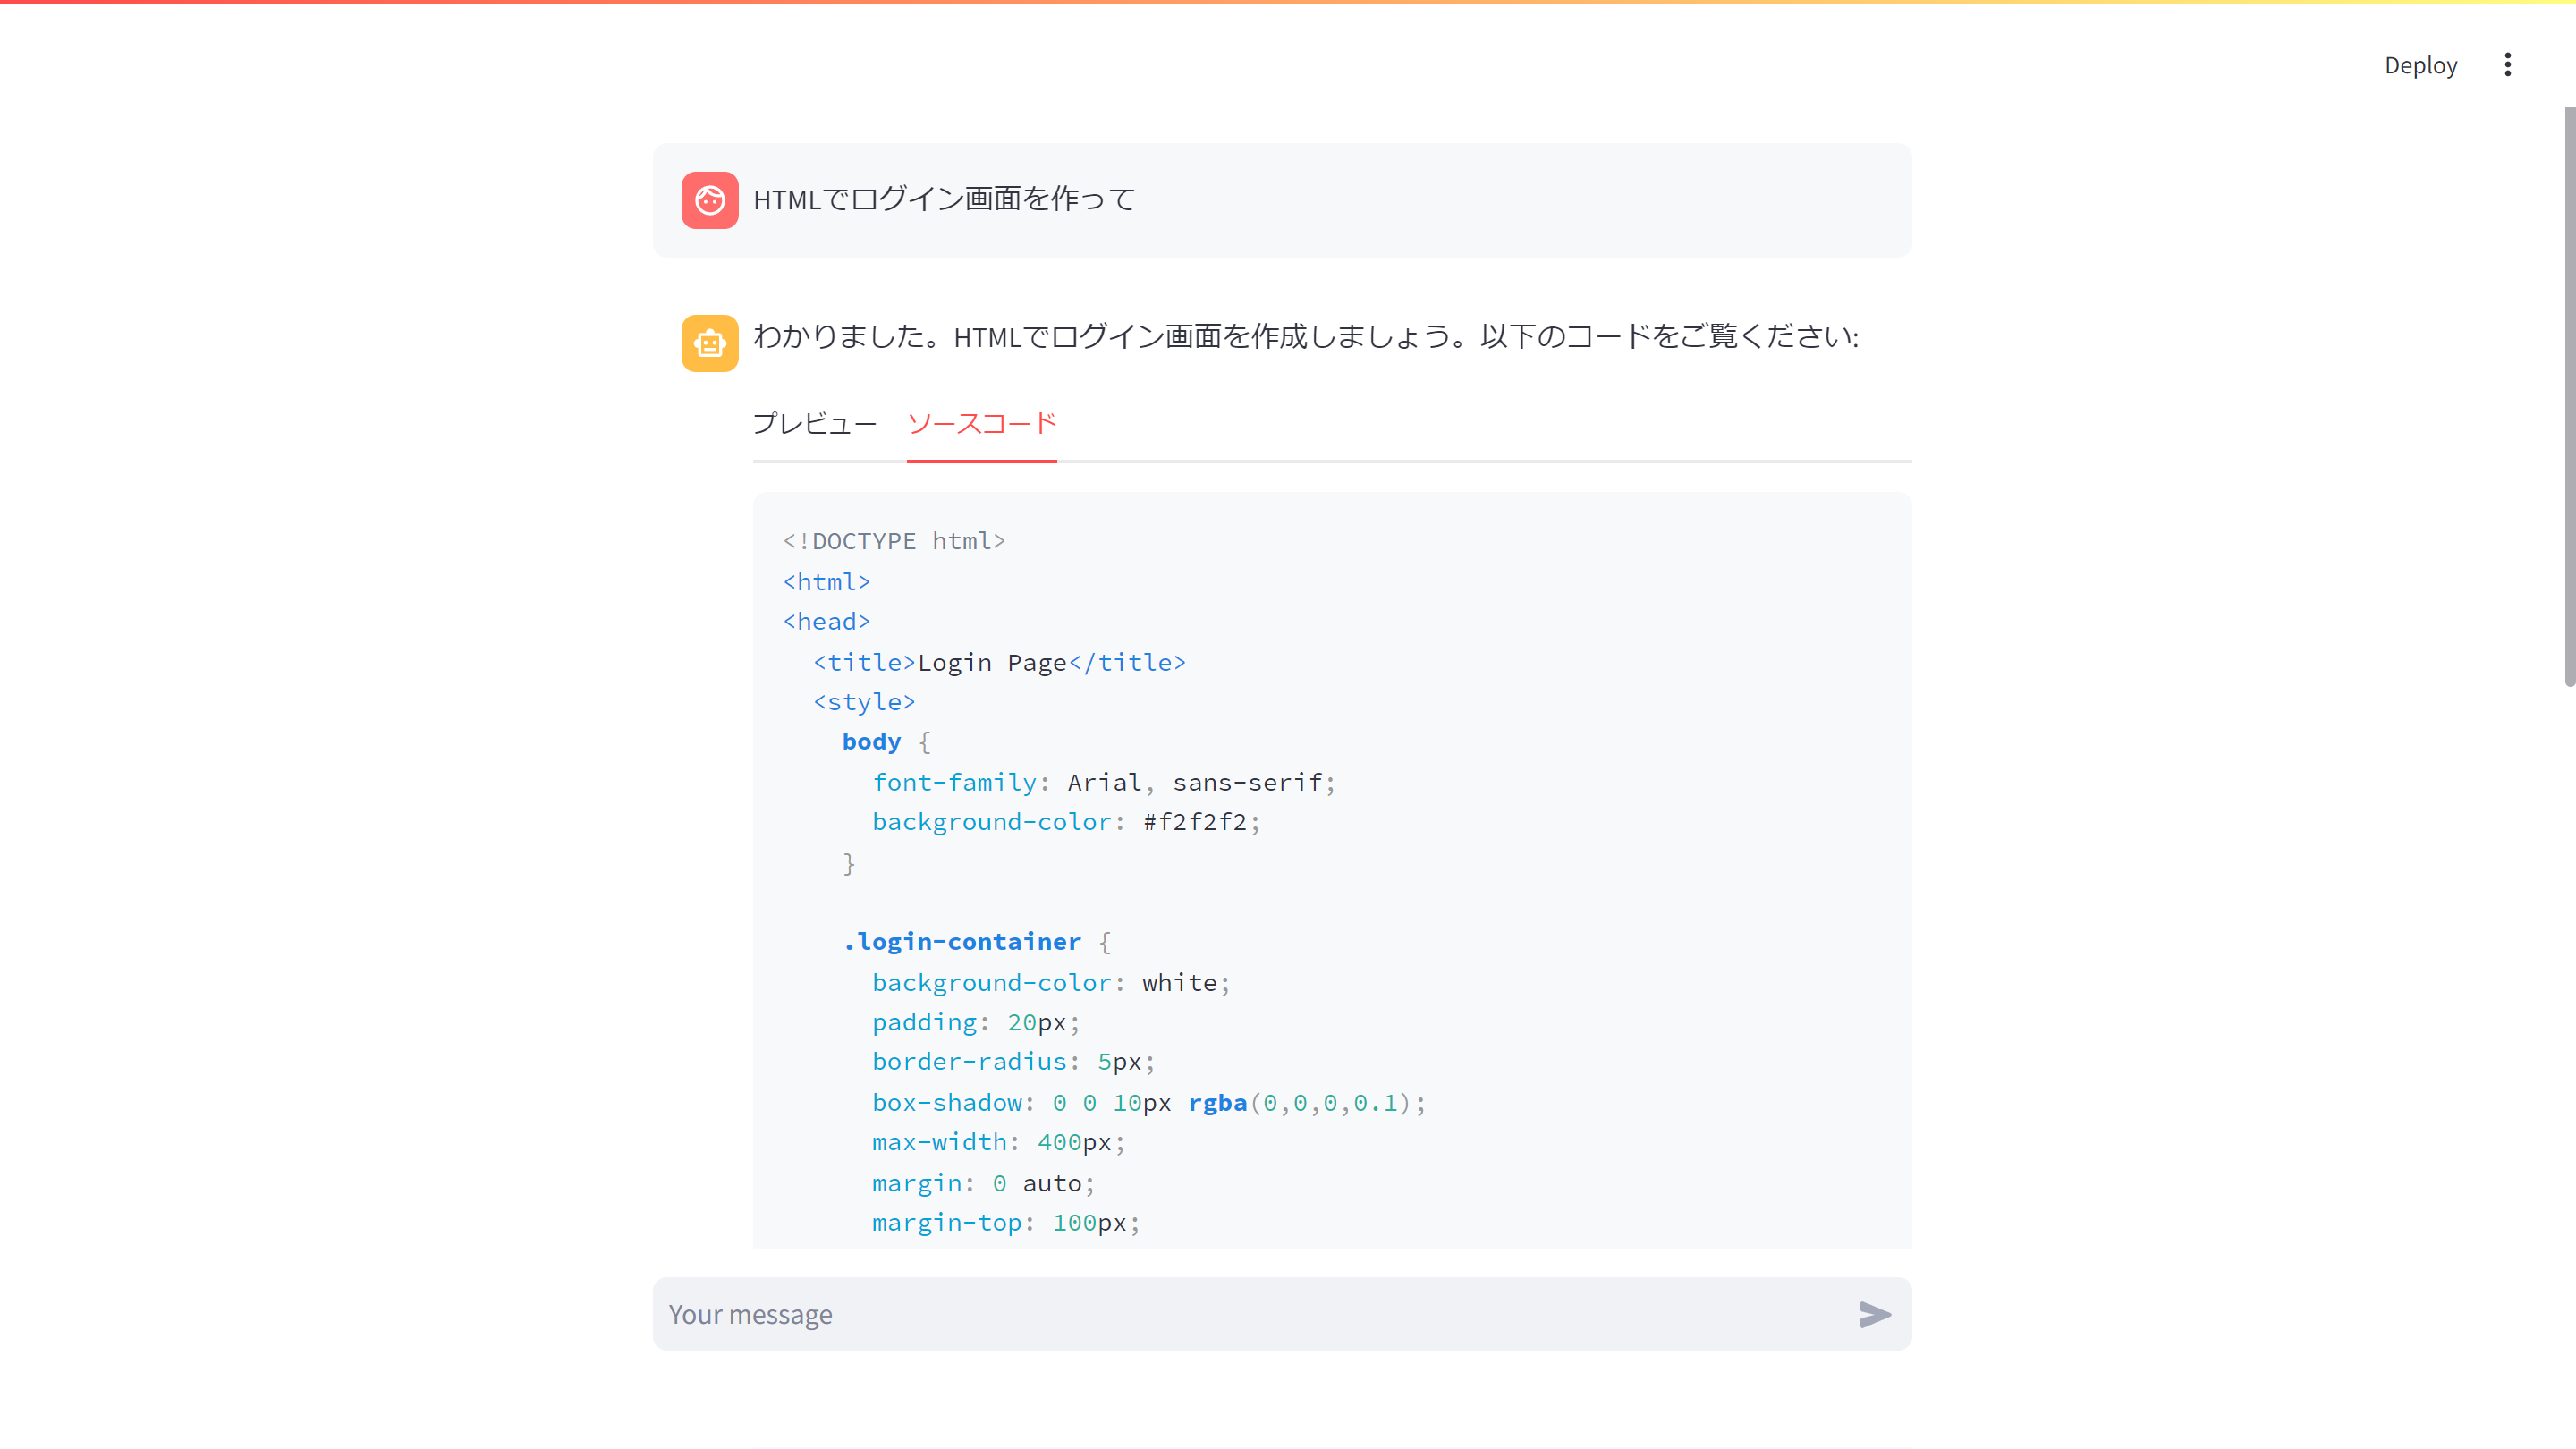
「st.tabs」コンポーネントを使って、本家のArtifactsのように、プレビュー表示とソースコード表示を切り替えられるようにします。
HTML表示は、「```html」と「```」で囲むことで、プレビューっぽくなるように工夫しました。
tab1, tab2 = st.tabs(["プレビュー", "ソースコード"])

with tab1:
    components.html(
        html,
        height=640,
        scrolling=True,
    )

with tab2:
    st.markdown(f"```html\n{html}\n```")
それっぽくなってきましたね。
ここまでのapp.py
import boto3
import streamlit as st
import streamlit.components.v1 as components

st.title("st.artifacts")

client = boto3.client("bedrock-runtime", region_name="us-east-1")

tools = {
    "toolSpec": {
        "name": "html_viewer",
        "description": "HTMLを表示します。",
        "inputSchema": {
            "json": {
                "type": "object",
                "properties": {
                    "html": {"type": "string", "description": "HTML Document"}
                },
                "required": ["html"],
            }
        },
    }
}


if prompt := st.chat_input():

    with st.chat_message("user"):
        st.markdown(prompt)

    user_message = {"role": "user", "content": [{"text": prompt}]}

    response = client.converse(
        modelId="us.anthropic.claude-3-haiku-20240307-v1:0",
        messages=[{"role": "user", "content": [{"text": prompt}]}],
        toolConfig={
            "tools": [tools],
            "toolChoice": {"auto": {}},
        },
        inferenceConfig={"temperature": 0},
    )

    with st.chat_message("assistant"):
        for content in response["output"]["message"]["content"]:
            if "text" in content:
                st.markdown(content["text"])
                pass
            if "toolUse" in content:
                tool_use = content["toolUse"]

                tool_use_id = tool_use["toolUseId"]
                name = tool_use["name"]
                html = tool_use["input"]["html"]

                tab1, tab2 = st.tabs(["プレビュー", "ソースコード"])

                with tab1:
                    components.html(
                        html,
                        height=640,
                        scrolling=True,
                    )

                with tab2:
                    st.markdown(f"```html\n{html}\n```")
チャットエリアとプレビューエリアを分離する
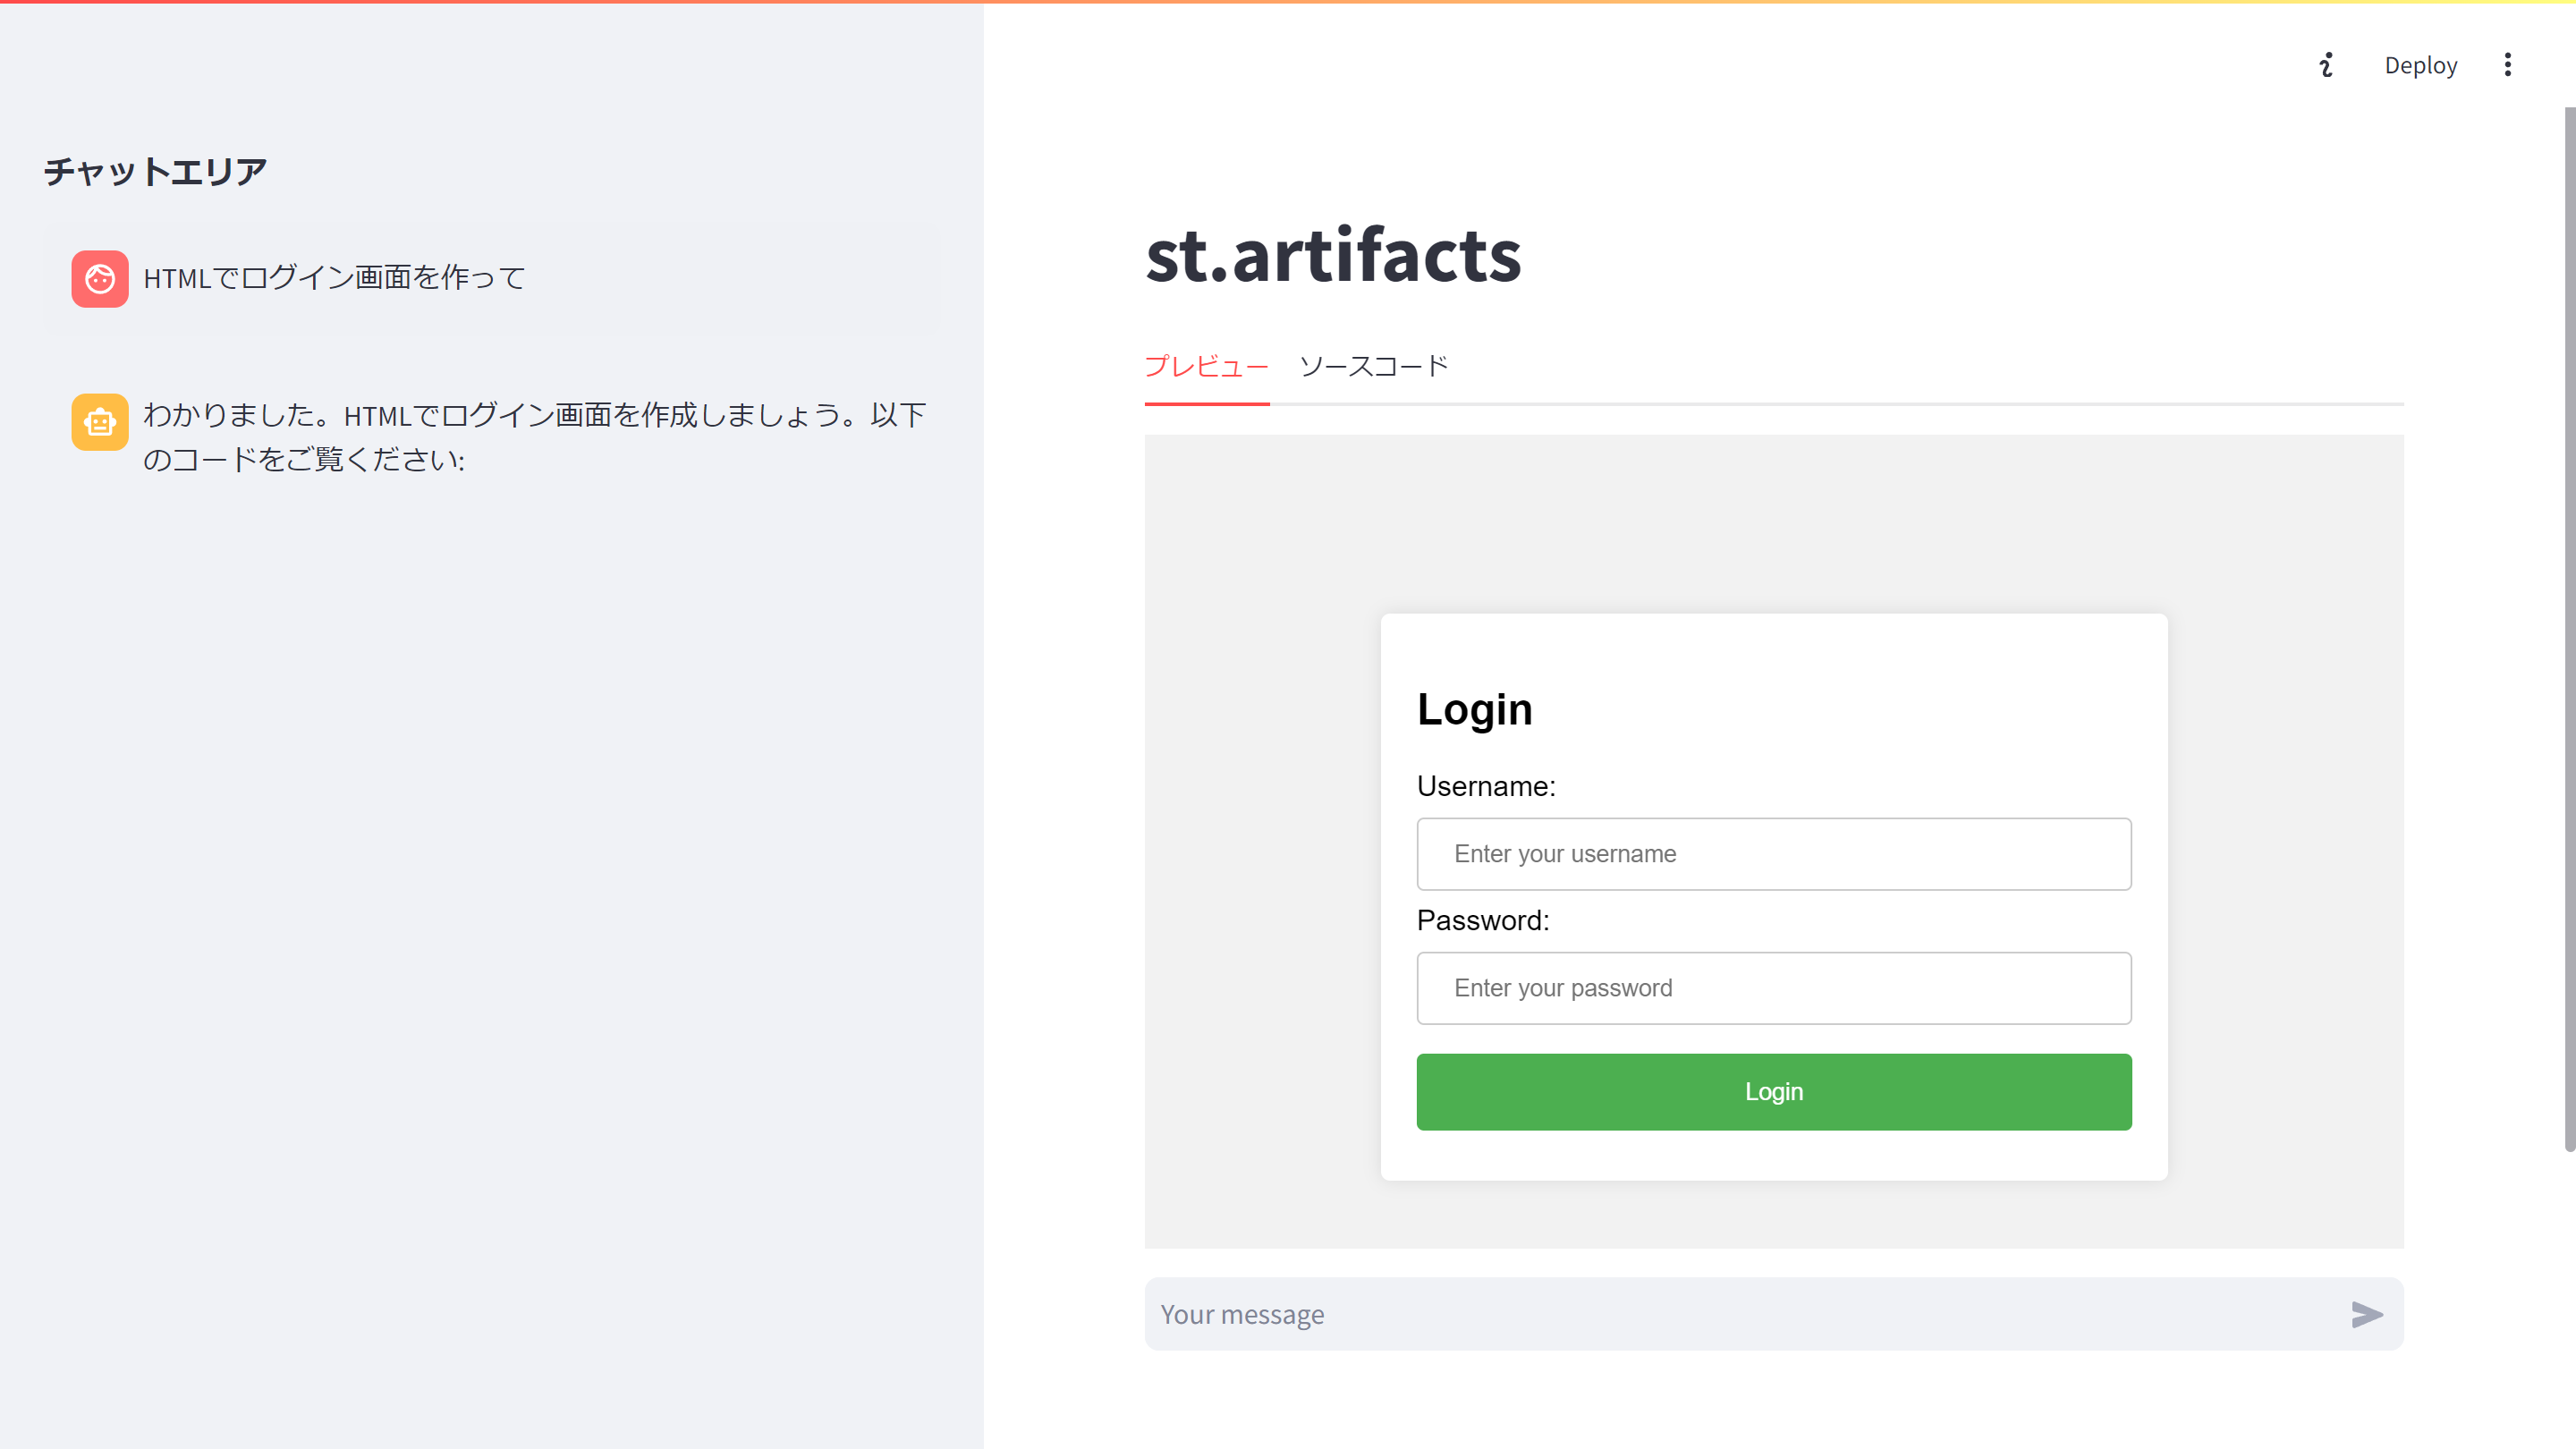
本家っぽく、チャットエリアとプレビューエリアを分離します。
「st.sidebar」コンポーネントを使います。
テキストの出力をサイドバーに行い、HTMLはメインエリアに表示します。
それぞれのエリアを宣言します。
main = st.container()
sidebar = st.sidebar
宣言したエリアをwithブロックで指定すると、そのエリアに出力されます。
with sidebar:
    st.subheader("チャットエリア")
with main:
    tab1, tab2 = st.tabs(["プレビュー", "ソースコード"])
    with tab1:
        components.html(
            html,
            height=640,
            scrolling=True,
        )
    with tab2:
        st.markdown(f"```html\n{html}\n```")
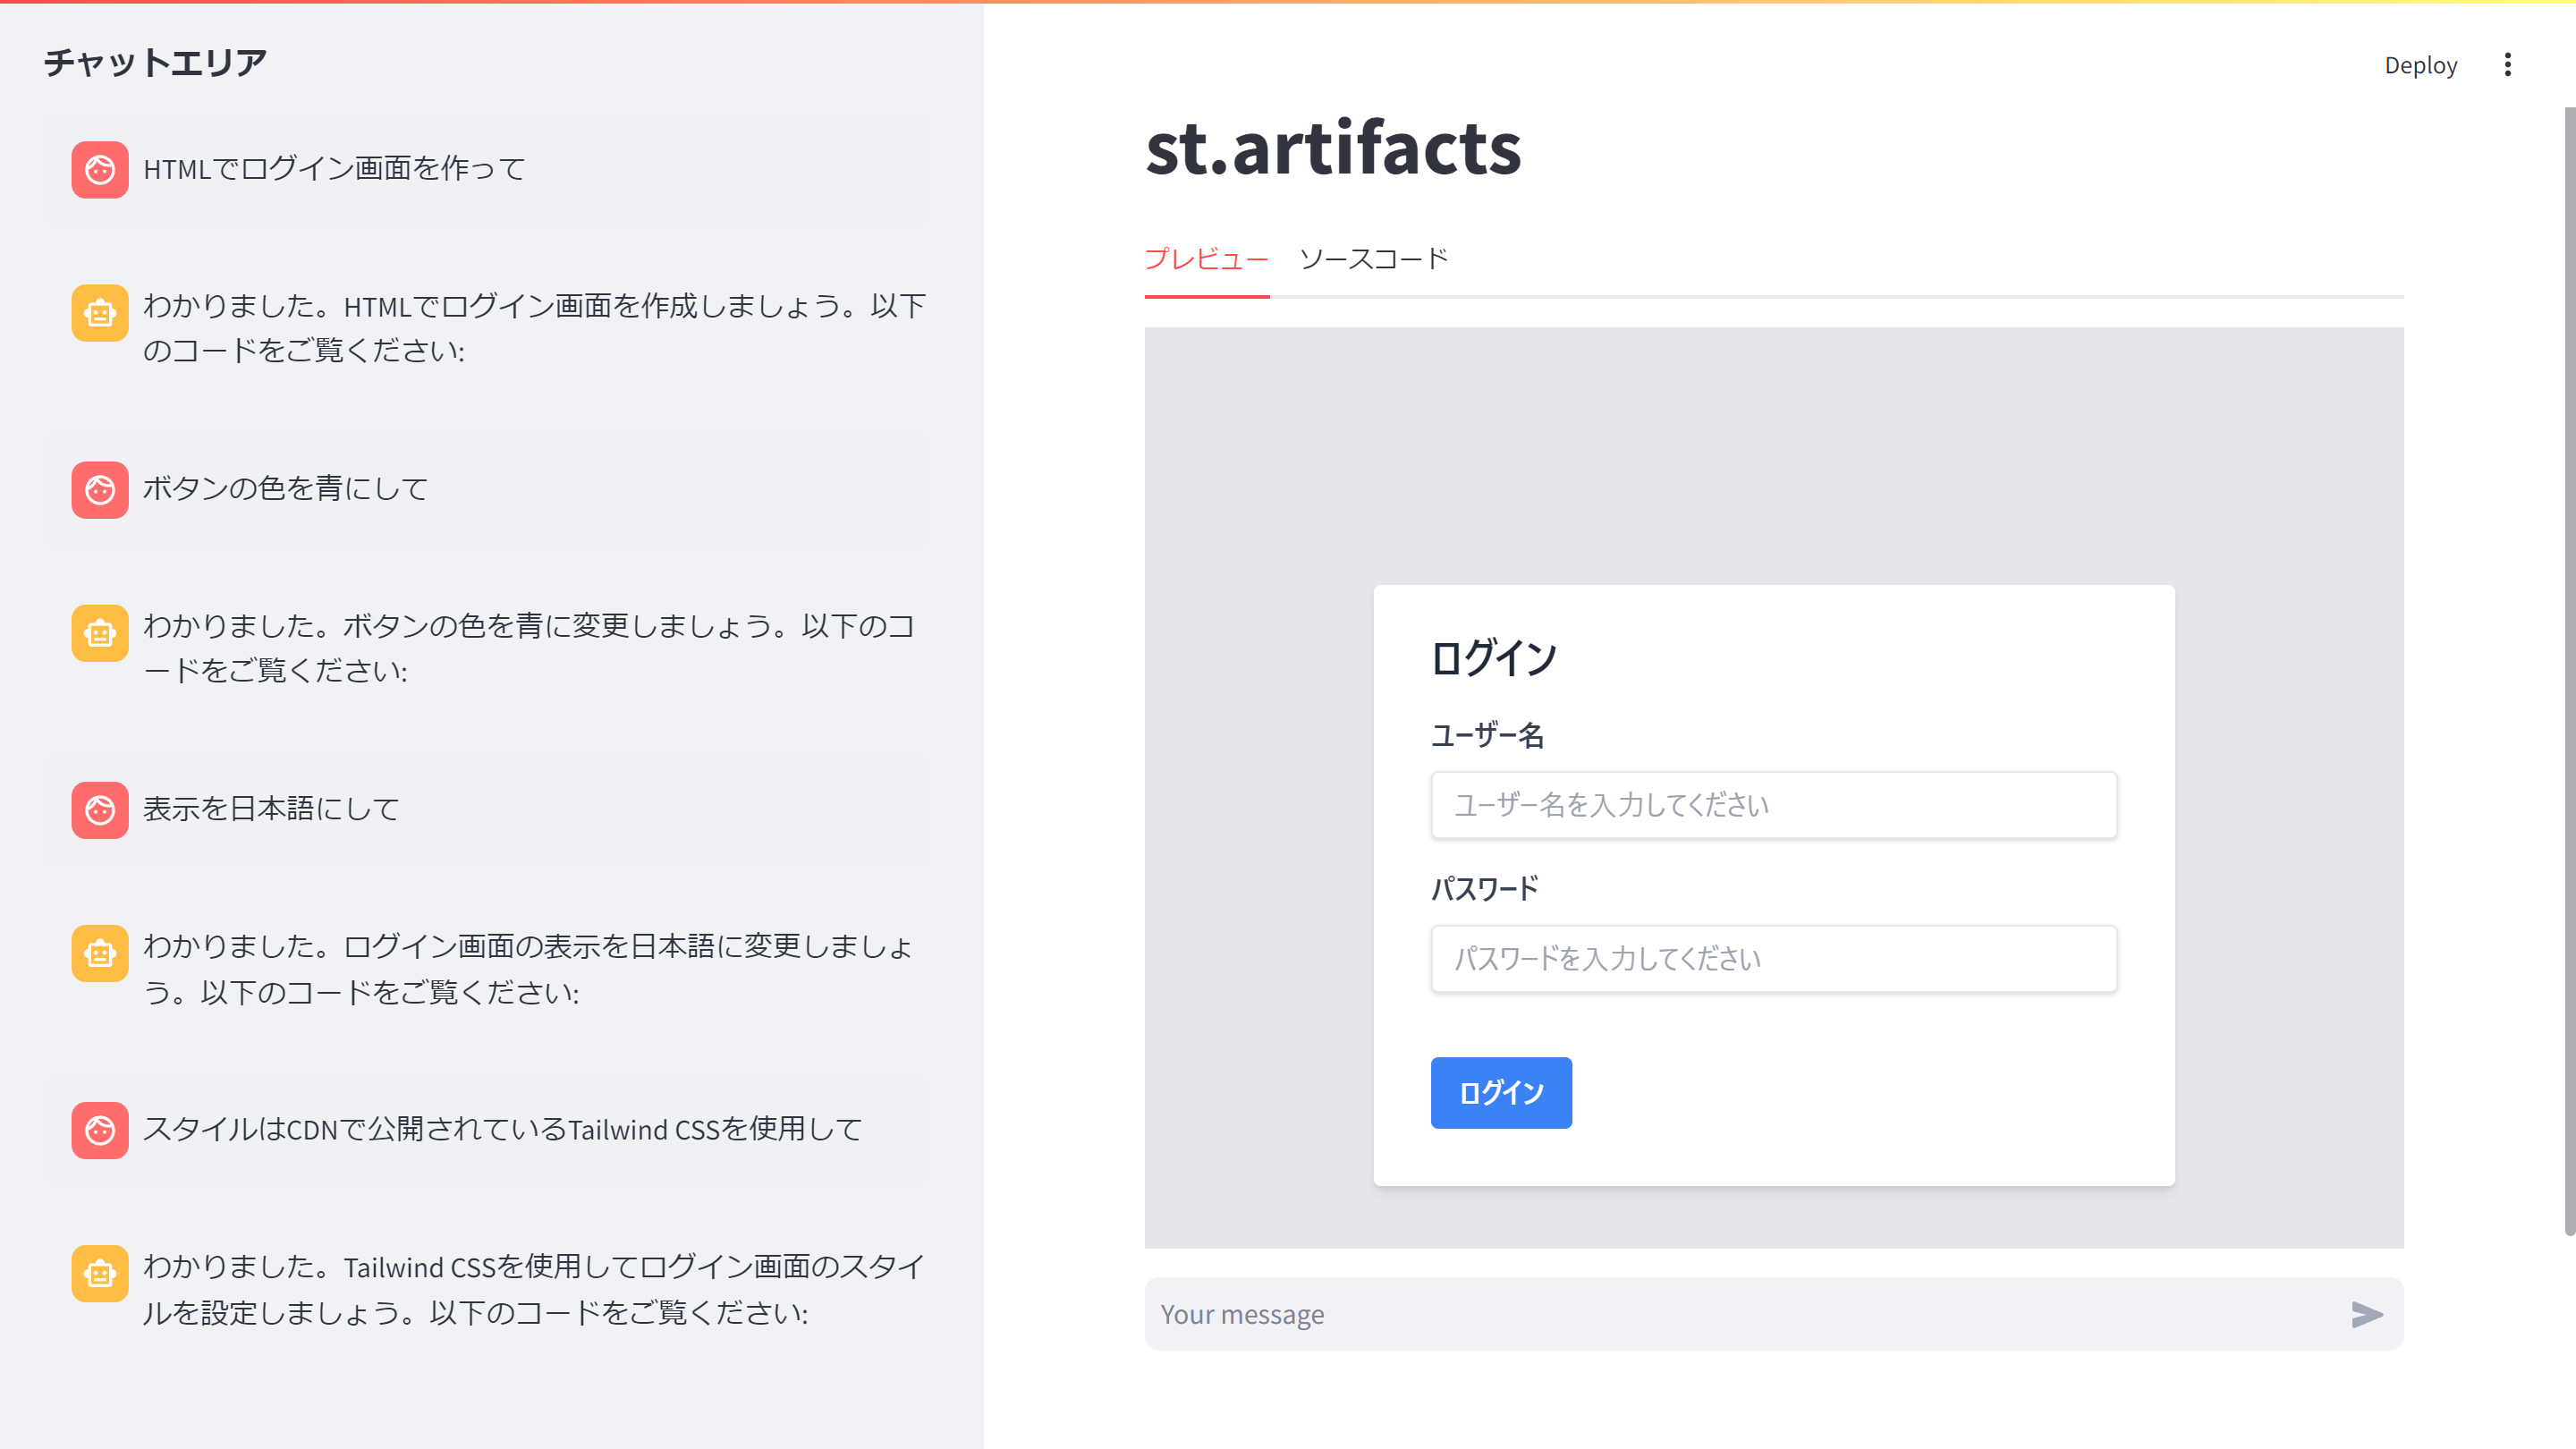
会話を継続させる
Streamlitで会話を継続させるには、「st.session_state」を使用します。詳細な解説は割愛します。末尾のコードを参照してください。
先日出版しましたこちらの書籍でも解説しておりますので、興味がありましたらぜひお手にとっていただけると幸いです。
Amazon Bedrock 生成AIアプリ開発入門 [AWS深掘りガイド]
https://amzn.asia/d/5NXeCKp
Tool useを使用したあとに会話を継続させる場合、converse APIで指定するメッセージが以下の形式だとエラーになります。
[
  {
    "role": "user",
    "content": [{"text": "HTMLでログイン画面を作って"}]
  },
  {
    "role": "assistant",
    "content": [
      {"text": "わかりました。HTMLでログイン画面を作成しましょう。以下のコードをご覧ください:"},
      {
        "toolUse": {
          "toolUseId": "tooluse_QZazvvUlQpWz3CjkCbNtyQ",
          "name": "html_viewer",
          "input": {
            "html": "<!DOCTYPE html>\n<html>\n...\n</html>"
          }
        }
      }
    ]
  },
  {
    "role": "user",
    "content": [{"text": "ボタンの色を青にしてください"}]
  }
]
botocore.errorfactory.ValidationException: An error occurred (ValidationException) when calling the Converse operation: The model returned the following errors: messages.2: Did not find 1
tool_resultblock(s) at the beginning of this message. Messages followingtool_useblocks must begin with a matching number oftool_resultblocks.
「toolUse」ブロックと「toolResult」の数が不一致だとエラーになるようです。今回はツールの結果は特にないのですが、空白文字を返却するとエラーになるため、適当な文字を返却します。
アシスタントの返答直後に、以下のブロックを追加します。
  {
    "role": "user",
    "content": [
      {
        "toolResult": {
          "toolUseId": "tooluse_lMBKBI79QtaHMABY5P5IKQ",
          "content": [
            {
              "text": "Done."
            }
          ]
        }
      }
    ]
  }
また、ユーザーのブロックとアシスタントのブロックは必ず交互に指定する必要があるので、更にダミーでアシスタントブロックを追加します。(これも特に内容があるわけではありません)
{"role": "assistant", "content": [{"text": "OK."}]}
ここまで考慮して、以下のメッセージを送信することで、会話を継続させることができます。
[
  {
    "role": "user",
    "content": [{"text": "HTMLでログイン画面を作って"}]
  },
  {
    "role": "assistant",
    "content": [
      {"text": "わかりました。HTMLでログイン画面を作成しましょう。以下のコードをご覧ください:"},
      {
        "toolUse": {
          "toolUseId": "tooluse_lMBKBI79QtaHMABY5P5IKQ",
          "name": "html_viewer",
          "input": {
            "html": "<!DOCTYPE html>\n<html>\n...\n</html>"
          }
        }
      }
    ]
  },
  {
    "role": "user",
    "content": [
      {
        "toolResult": {
          "toolUseId": "tooluse_lMBKBI79QtaHMABY5P5IKQ",
          "content": [
            {
              "text": "Done."
            }
          ]
        }
      }
    ]
  },
  {
    "role": "assistant",
    "content": [{"text": "OK."}]
  },
  {
    "role": "user",
    "content": [{"text": "ボタンの色を青にしてください"}]
  }
]
ソースコード全体
たった102行です。
import boto3
import streamlit as st
import streamlit.components.v1 as components

st.title("st.artifacts")

client = boto3.client("bedrock-runtime", region_name="us-east-1")

tools = {
    "toolSpec": {
        "name": "html_viewer",
        "description": "HTMLを表示します。",
        "inputSchema": {
            "json": {
                "type": "object",
                "properties": {
                    "html": {"type": "string", "description": "HTML Document"}
                },
                "required": ["html"],
            }
        },
    }
}

if "messages" not in st.session_state:
    st.session_state.messages = []
messages = st.session_state.messages

main = st.container()
sidebar = st.sidebar

with sidebar:
    st.subheader("チャットエリア")

    for message in messages:
        for content in message["content"]:
            if "text" in content and not (content["text"] == "OK."):
                with st.chat_message(message["role"]):
                    st.markdown(content["text"])


if prompt := st.chat_input():

    with sidebar:

        with st.chat_message("user"):
            st.markdown(prompt)

        user_message = {"role": "user", "content": [{"text": prompt}]}
        messages.append(user_message)

        response = client.converse(
            modelId="us.anthropic.claude-3-haiku-20240307-v1:0",
            messages=messages,
            toolConfig={
                "tools": [tools],
                "toolChoice": {"auto": {}},
            },
            inferenceConfig={"temperature": 0},
        )

        ai_message = response["output"]["message"]
        messages.append(ai_message)

        with st.chat_message("assistant"):
            for content in ai_message["content"]:
                if "text" in content:
                    st.markdown(content["text"])
                    pass
                if "toolUse" in content:
                    tool_use = content["toolUse"]

                    tool_use_id = tool_use["toolUseId"]
                    name = tool_use["name"]
                    html = tool_use["input"]["html"]

                    with main:
                        tab1, tab2 = st.tabs(["プレビュー", "ソースコード"])
                        with tab1:
                            components.html(
                                html,
                                height=640,
                                scrolling=True,
                            )
                        with tab2:
                            st.markdown(f"```html\n{html}\n```")

                    messages.append(
                        {
                            "role": "user",
                            "content": [
                                {
                                    "toolResult": {
                                        "toolUseId": tool_use_id,
                                        "content": [{"text": "Done."}],
                                    }
                                }
                            ],
                        }
                    )
                    messages.append({"role": "assistant", "content": [{"text": "OK."}]})
まとめ
作ってみると、意外と簡単にできました。本家のArtifactsはHTML以外にも色々対応しているのでそこまでやるのはもうひと工夫必要そうだなと思いました。
GitHubでコードも用意しました。ストリームレスポンスに対応したものも作ってみましたので、よかったら参考にしてください。
動画にもしてみました。


