AWS Summit New Yorkのタイミングで追加されたBedrockの新機能の一つ、「Code interpretation」をガッツリDeep Diveします。
その他のアップデートはこちらをご参照ください。
BedrockのCode interpretationとは
いわゆるCode Interpreterです。
公式ドキュメントでは、以下のように表現されています。
Code interpretationにより、エージェントは安全なテスト環境でアプリケーション コードを生成、実行、およびトラブルシューティングできます。Code interpretationを使用すると、エージェントの基盤モデルを使用して、基本的な機能を実装するためのコードを生成し、生成 AI アプリケーションの構築に集中できます。
Bedrockの機能というよりは、Agents for Amazon Bedrockの一部という位置づけです。
マネジメントコンソールでやってみる
Agents for Amazon Bedrockにオプションが追加されています。「Code Interpreter」の設定を有効にするだけです。
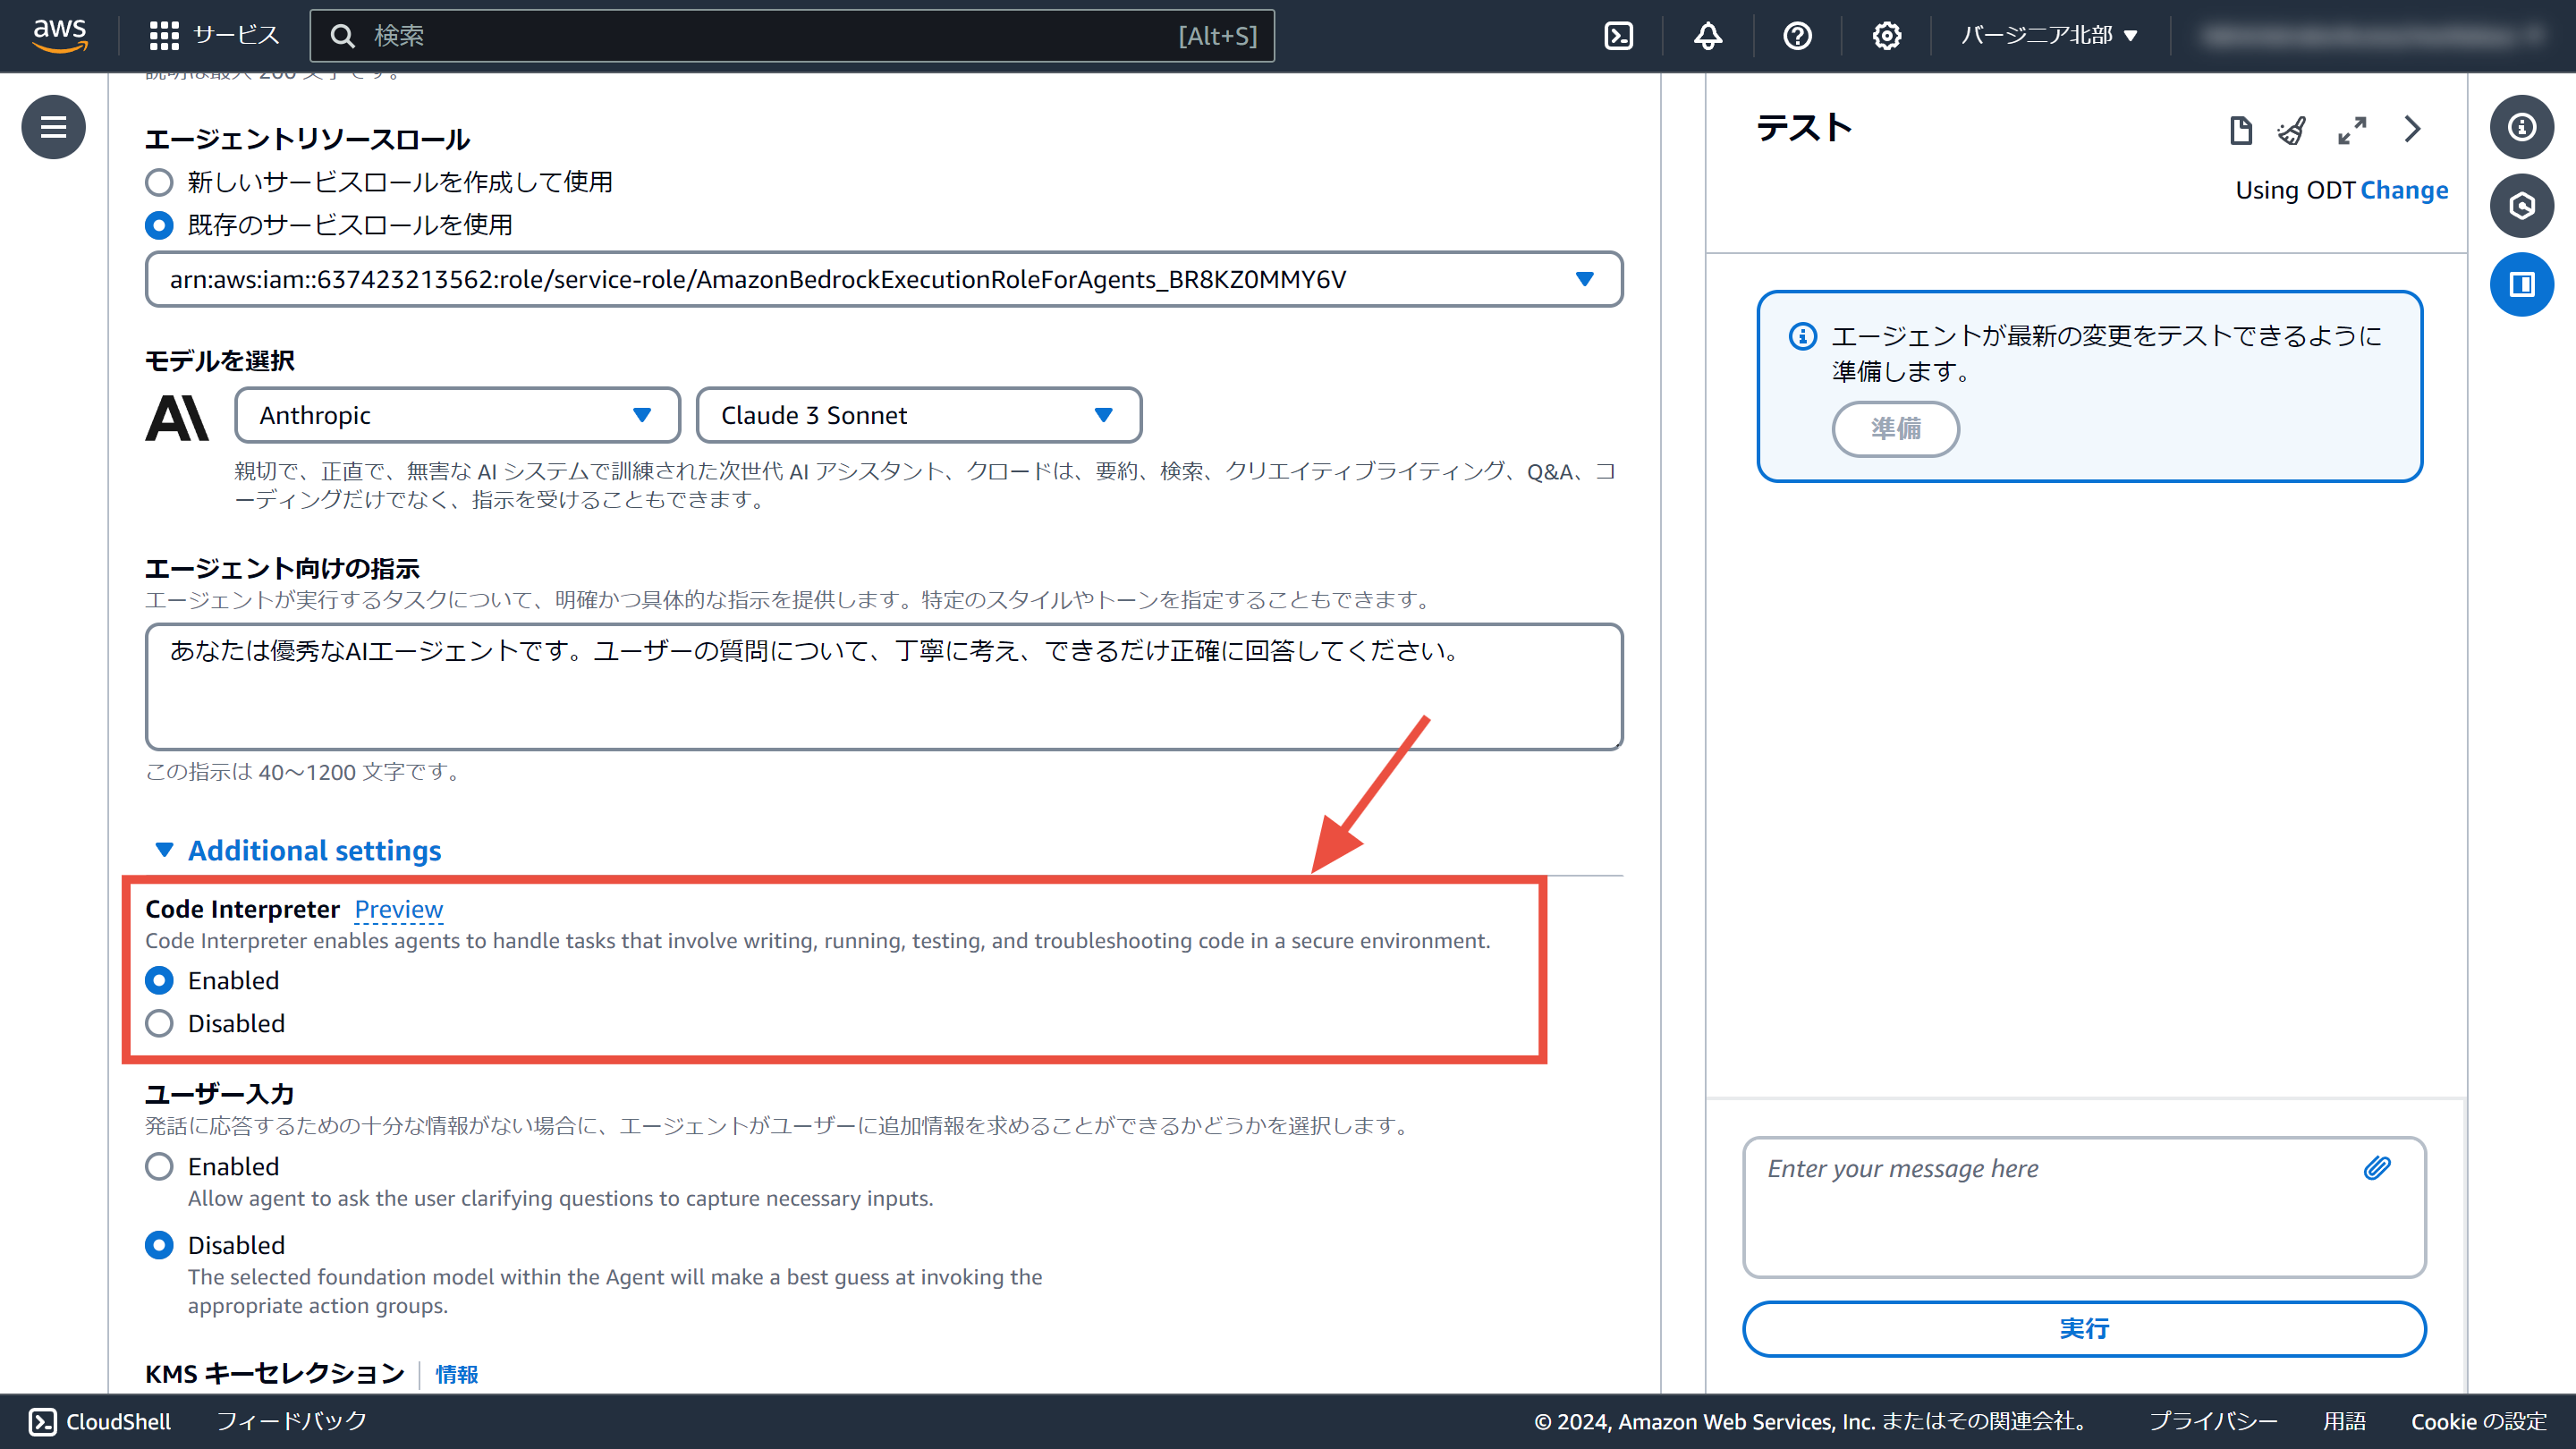
24/7/11時点で、ドキュメントでは「Code interpretation」、マネジメントコンソールでは「Code Interpreter」と表記が揺れています。
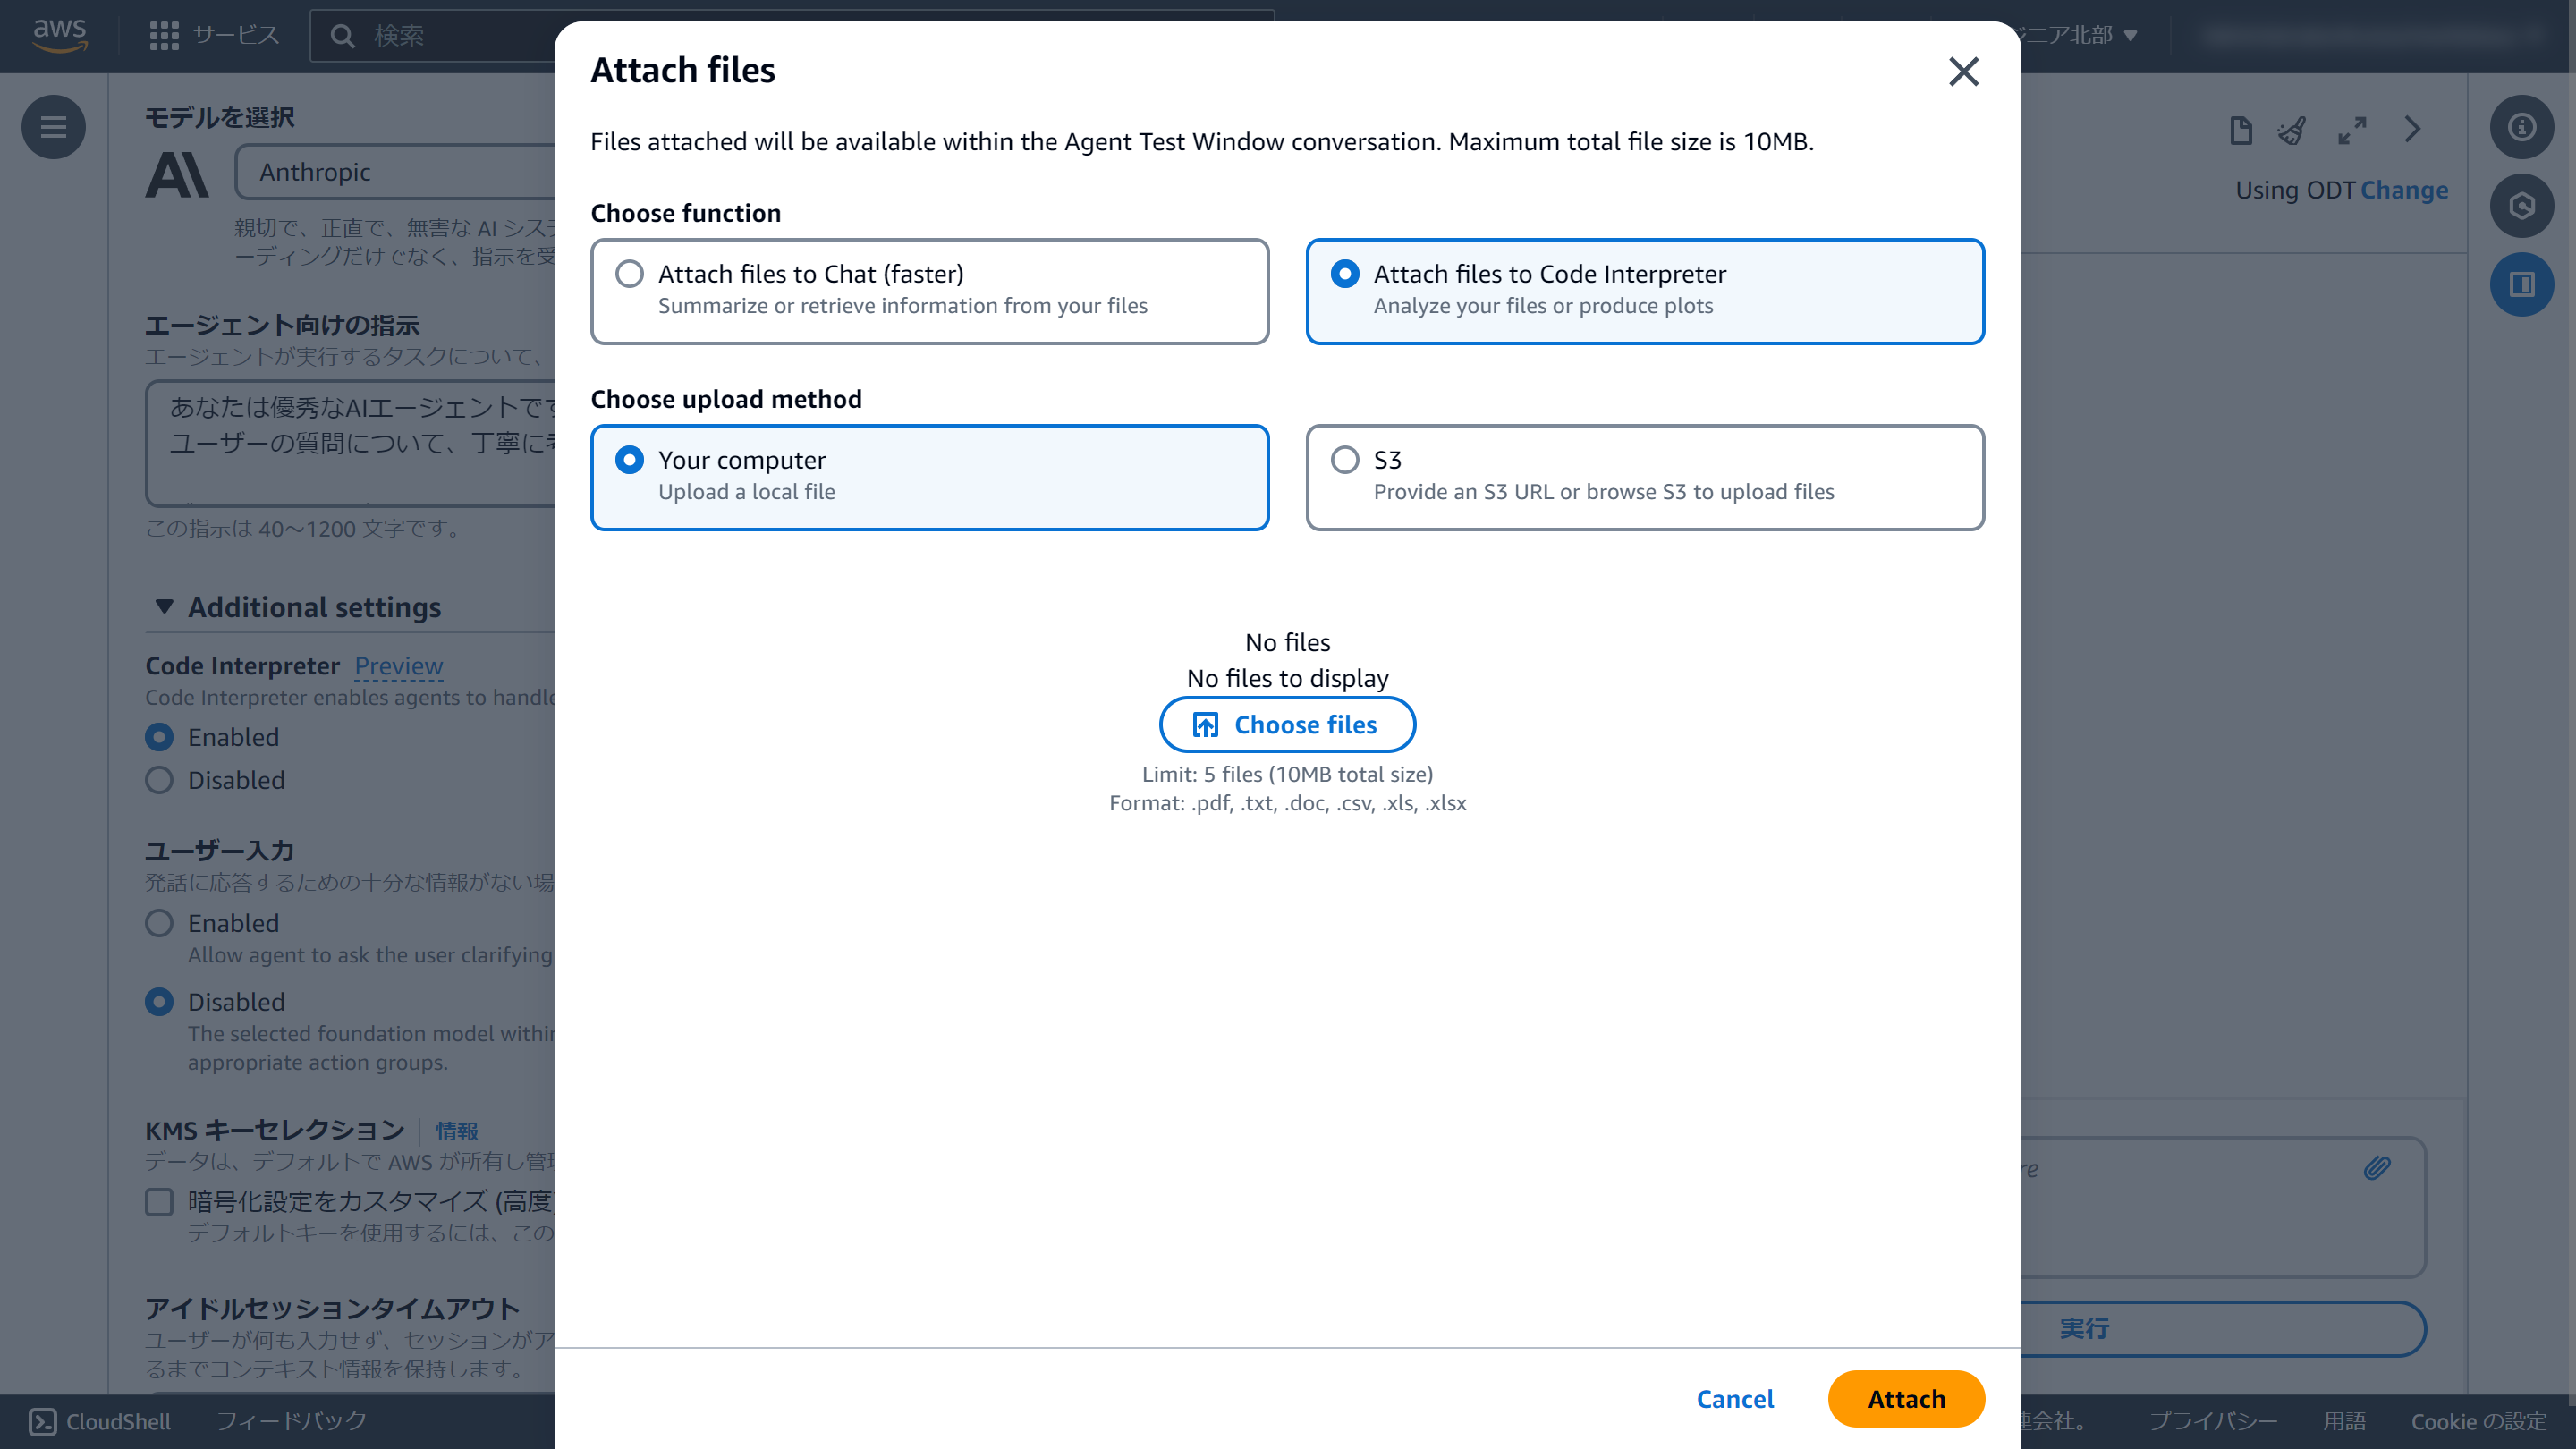
チャットメッセージを入力する際に、ファイルの添付を行います。

「添付ファイルをグラフにして」のように依頼すると、この通り、グラフにして表示してくれます。

いい!!!
SDKで呼び出す
Boto3は1.34.143以降でCode interpretationに対応しています。
リクエスト送信時にファイルを添付します。useCaseとしてCODE_INTERPRETERを指定します。
import boto3
import uuid

client = boto3.client("bedrock-agent-runtime")

with open("Data.xlsx", mode="rb") as f:
    source_file = f.read()

response = client.invoke_agent(
    agentId="ENGSPYXEUI",
    agentAliasId="TSTALIASID",
    sessionId=str(uuid.uuid4()),
    inputText="添付ファイルをグラフにしてください。グラフにする際はX軸をDateとし、昇順にソートしたうえでグラフ化してください",
    sessionState={
        "files": [
            {
                "name": "Data.xlsx",
                "source": {
                    "byteContent": {
                        "data": source_file,
                        "mediaType": "application/vnd.openxmlformats-officedocument.spreadsheetml.sheet",
                    },
                    "sourceType": "BYTE_CONTENT",
                },
                "useCase": "CODE_INTERPRETER",
            }
        ]
    },
)
レスポンスはストリーミング形式です。「files」の中に生成したファイルが格納され、「chunk」の中に生成したテキストが格納されます。
for event in response.get("completion"):
    if "files" in event:
        files = event["files"]["files"]
        for file in files:
            with open(file["name"], mode="wb") as f:
                f.write(file["bytes"])

    if "chunk" in event:
        chunk = event["chunk"]
        print(chunk["bytes"].decode())
添付のExcelファイルのデータを使って、X軸をDateとし、Y軸をValueとするグラフを作成しました。ご要望通り、Dateを昇順にソートした上でグラフ化しています。生成されたグラフは graph.png という名前で保存されています。

トレース情報付きでStreamlitにする
「invoke_agent」APIには「enableTrace」というパラメーターがあり、「True」にすることで、マネジメントコンソールでテスト実行した際の右側のエリアのようにトレース情報を取得可能です。
せっかくなので、StreamlitでGUIをつけたアプリにしました。
Streamlitのソースコードはこちら(折りたたみ表示)
# Pyhton外部モジュールのインポート
import uuid

import boto3
import streamlit as st

# タイトル
st.title("Bedrock Code Interpreter")

# Bedrock Agent Runtime クライアント
if "client" not in st.session_state:
    st.session_state.client = boto3.client("bedrock-agent-runtime")
client = st.session_state.client

# セッションID
if "session_id" not in st.session_state:
    st.session_state.session_id = str(uuid.uuid4())
session_id = st.session_state.session_id

# メッセージ
if "messages" not in st.session_state:
    st.session_state.messages = []
messages = st.session_state.messages

# ファイルの添付
uploaded_file = st.file_uploader("files", accept_multiple_files=True)


# アップロードファイルをCode Interpreterのフォーマットに変換
def get_files():
    files = []
    for file in uploaded_file:
        files.append(
            {
                "name": file.name,
                "source": {
                    "byteContent": {"data": file.getvalue(), "mediaType": file.type},
                    "sourceType": "BYTE_CONTENT",
                },
                "useCase": "CODE_INTERPRETER",
            }
        )
    return files


# チャット入力欄を定義
if prompt := st.chat_input("何でも聞いてください。"):
    # ユーザーの入力をメッセージに追加
    messages.append({"role": "human", "text": prompt})

    # ユーザーの入力を画面表示
    with st.chat_message("user"):
        st.markdown(prompt)

    response = client.invoke_agent(
        agentId="ENGSPYXEUI",
        agentAliasId="TSTALIASID",
        sessionId=session_id,
        enableTrace=True,
        inputText=prompt,
        sessionState={"files": get_files()},
    )

    with st.chat_message("assistant"):
        for event in response.get("completion"):
            if "trace" in event:
                if "orchestrationTrace" in event["trace"]["trace"]:
                    orchestrationTrace = event["trace"]["trace"]["orchestrationTrace"]

                    if "modelInvocationInput" in orchestrationTrace:
                        with st.expander("modelInvocationInput", expanded=False):
                            st.write(orchestrationTrace)

                    if "rationale" in orchestrationTrace:
                        with st.expander("rationale(根拠)", expanded=True):
                            st.write(orchestrationTrace)

                    if "invocationInput" in orchestrationTrace:
                        if (
                            "codeInterpreterInvocationInput"
                            in orchestrationTrace["invocationInput"]
                            and "code"
                            in orchestrationTrace["invocationInput"][
                                "codeInterpreterInvocationInput"
                            ]
                        ):
                            code = orchestrationTrace["invocationInput"][
                                "codeInterpreterInvocationInput"
                            ]["code"]

                            with st.expander("code", expanded=False):
                                st.write(orchestrationTrace)

                            with st.expander("Python Code", expanded=True):
                                st.markdown(f"```\n{code}\n```")
                        else:
                            with st.expander("invocationInput", expanded=False):
                                st.write(orchestrationTrace)

                    if "observation" in orchestrationTrace:
                        with st.expander("observation(観察)", expanded=True):
                            st.write(orchestrationTrace)

            if "files" in event:
                files = event["files"]["files"]
                for file in files:

                    with open(file["name"], mode="wb") as f:
                        f.write(file["bytes"])

                    st.image(file["bytes"], caption=file["name"])

            if "chunk" in event:
                chunk = event["chunk"]
                answer = chunk["bytes"].decode()

                st.write(answer)
                messages.append({"role": "assistant", "text": answer})
とりあえず動きを先に見てみましょう。
使用しているモデルはClaude 3 Sonnetです。
トレースを出力しながら、画像と最終回答を生成する様子が確認できました。
トレースの内容を追いかけてみましょう。
トレースにも複数種類ありますが、今回は「OrchestrationTrace」のみを対象とします。
詳細はドキュメントをご確認ください。
-
modelInvocationInput
生成AIに渡すインプット情報 -
rationale
インプットに対して、エージェント(生成AI)が考えた結果
「コードを書いてみましょう」と考えたので、次のステップでコードを生成します。
-
codeInterpreterInvocationInput
コードを生成する部分
ここにPythonのコードが含まれます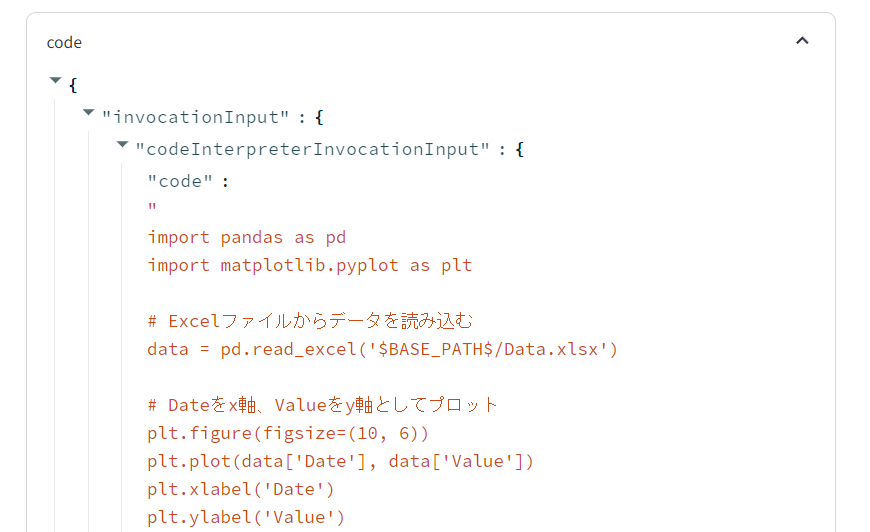
他のプロンプトに混ざってではなく、コード単体で返却される作りのようです。そのため、この部分を抽出することで、コードを流用することも可能です。

頑張ればClaudeのArtifactsみたいなことができるかも??
-
observation
これまでの手順を受けて、ユーザーのリクエストに答えられたかを確認します
無事、画像も生成されています。

このあと、再度modelInvocationInput、rationale、observationと一巡した後、最終回答が出力されました。
実行するたびに、処理の流れは変わるようでした。

使い道がすごく広がりそうです!