ここにBedrockのConverse APIを呼び出すサンプルがあります。
モデル名とメッセージをセットしてリクエストを送信しています。
# Create a Bedrock Runtime client in the AWS Region you want to use.
client = boto3.client("bedrock-runtime", region_name="us-east-1")
# Set the model ID, e.g., Claude 3 Haiku.
model_id = "anthropic.claude-3-haiku-20240307-v1:0"
# Start a conversation with the user message.
user_message = "Describe the purpose of a 'hello world' program in one line."
conversation = [
{
"role": "user",
"content": [{"text": user_message}],
}
]
try:
# Send the message to the model, using a basic inference configuration.
response = client.converse(
modelId=model_id,
messages=conversation,
inferenceConfig={"maxTokens": 512, "temperature": 0.5, "topP": 0.9},
)
# Extract and print the response text.
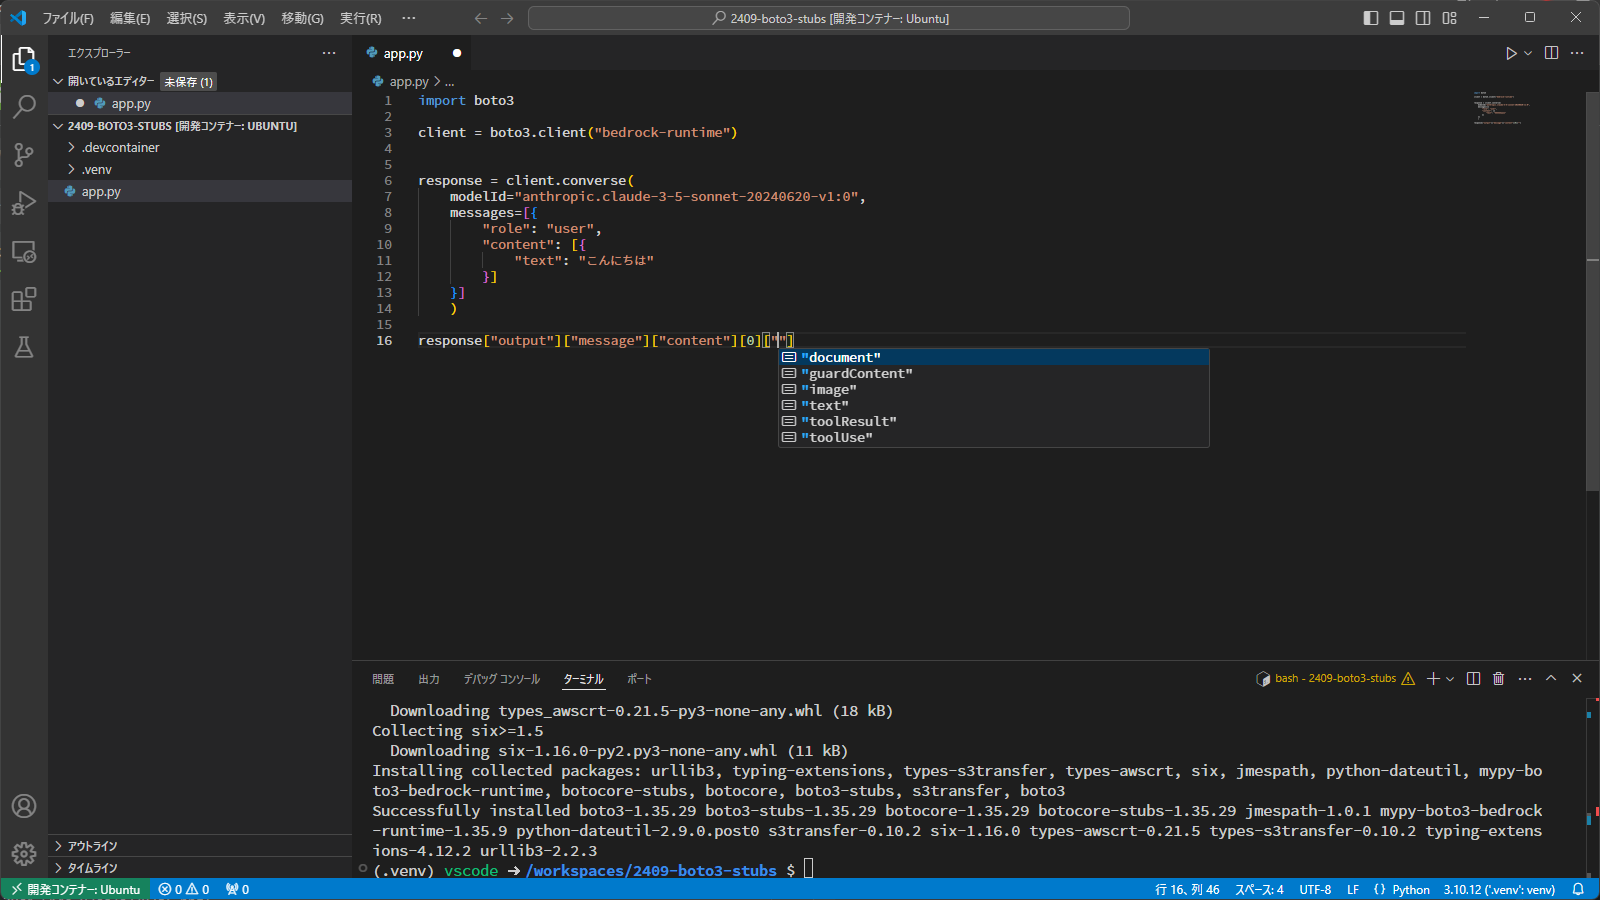
response_text = response["output"]["message"]["content"][0]["text"]
print(response_text)
サンプルはシンプルですので、コールドリーディングは難しくないと思います。
ただ、
このコードを何も見ずに書けますか??
残念ながら私は無理です。毎回サンプルコードを検索して、コピペしながら作ってました。
この開発体験をどうにかできないかなぁと思っていたところ、良いツールを発見しましたのでご紹介します。
boto3-stubs
boto3のコード補完を便利にする「boto3-stubs」というツールを使用します。
ドキュメントの冒頭には以下のように記載されています。型アノテーションを行うツールで、まさに私が求めていたものでした。
Auto-generated documentation for boto3 type annotations package boto3-stubs.
Generated by mypy-boto3-builder.
Bedrock専用ではなく、boto3で提供されている様々なAWSサービスに対応しています。
使い方の解説
導入
まずは専用の仮想環境を用意し、boto3とboto3-stubsをインストールします。
python3 -m venv .venv
source .venv/bin/activate

pip3 install boto3 boto3-stubs[bedrock-runtime]
boto3-stubsはサービスごとに分割されてインストールすることができます。BedrockやBedrockAgent、BedrockAgentRuntimeも別に用意されているのでこれらもインストールする場合は以下のようになります。
pip3 install boto3 boto3-stubs[bedrock,bedrock-runtime,bedrock-agent,bedrock-agent-runtime]
導入は以上です。
VSCode用の拡張もあるようです
https://marketplace.visualstudio.com/items?itemName=Boto3typed.boto3-ide
リクエストを構築
では、まず以下のように記述してみましょう。
import boto3
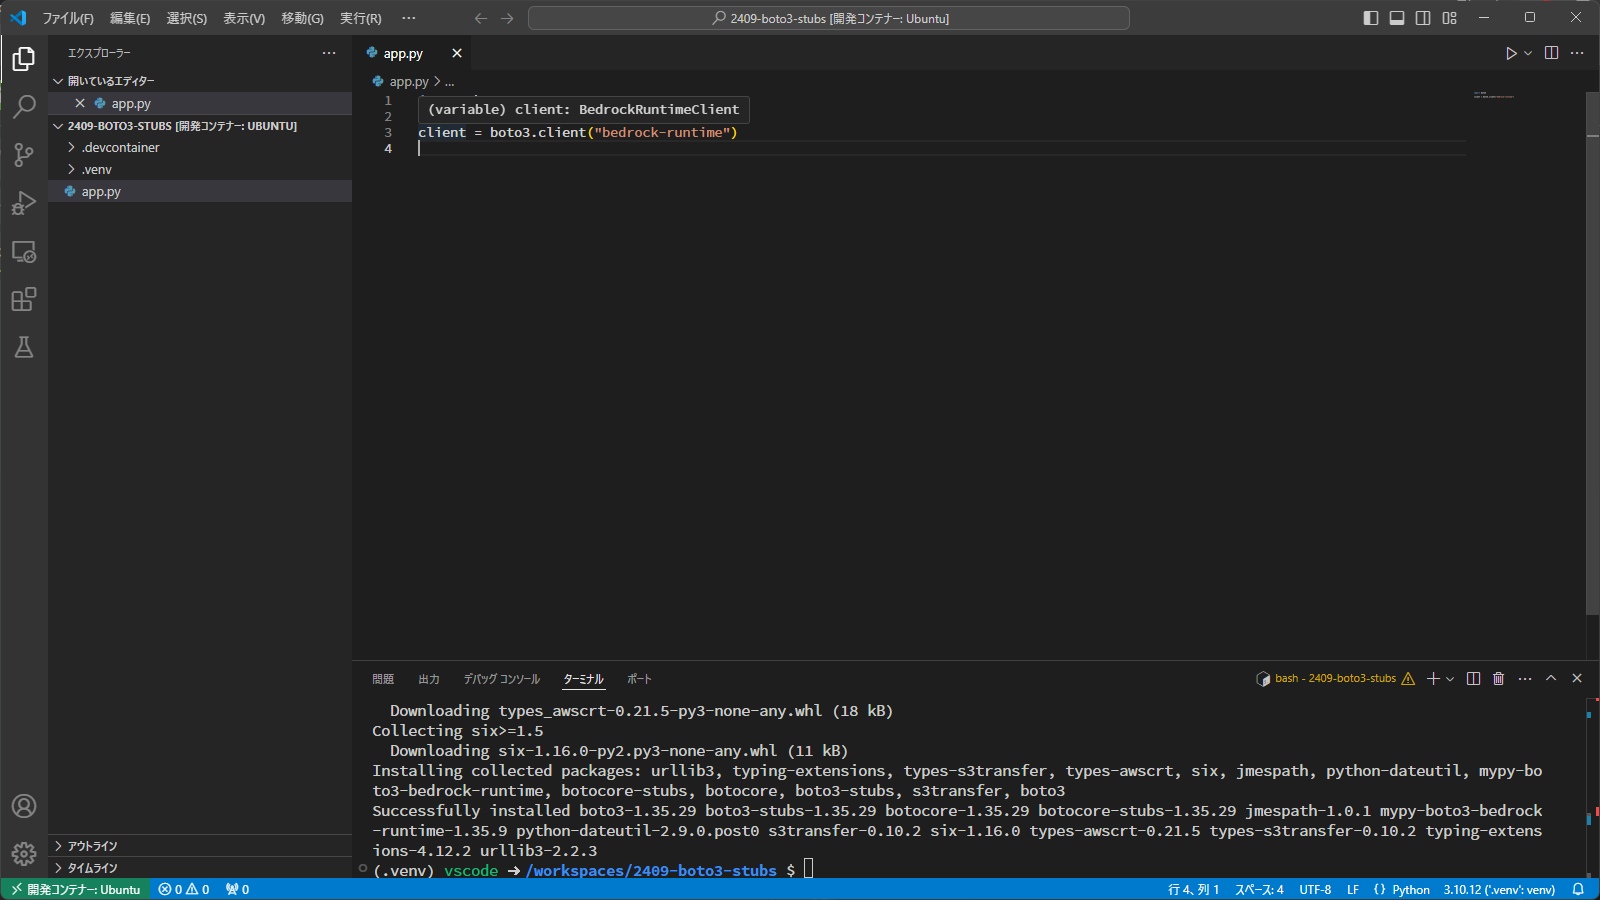
client = boto3.client("bedrock-runtime")
この状態で.clientの部分にマウスカーソルを合わせると形の定義が表示されます。

もし、ライブラリーの検出がうまく行っていない場合は、Python拡張機能がインストールされているか確認してください。
そのうえでコマンドパレットに「pytthon: select interpreter」と入力し、ライブラリーを導入した環境を選択してください。

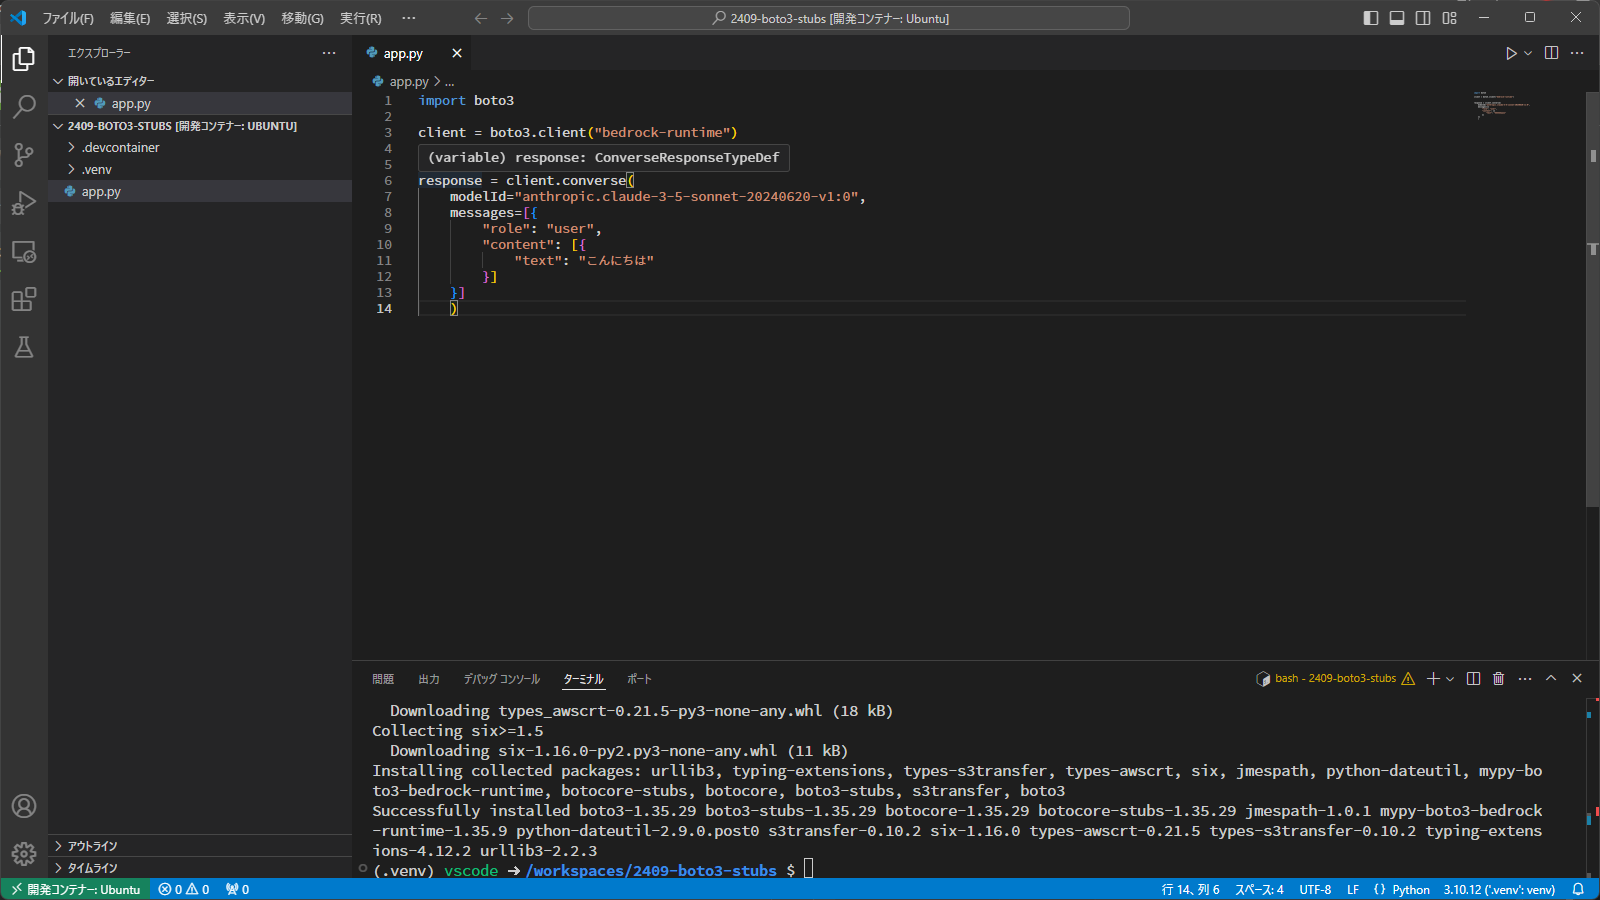
「client」変数にマウスカーソルを合わせると「BedrockRuntimeClient」という型が検出されていることがわかります。
「client.」まで記述し、補完(Ctrl + スペース)を入力すると、関数が表示されます。
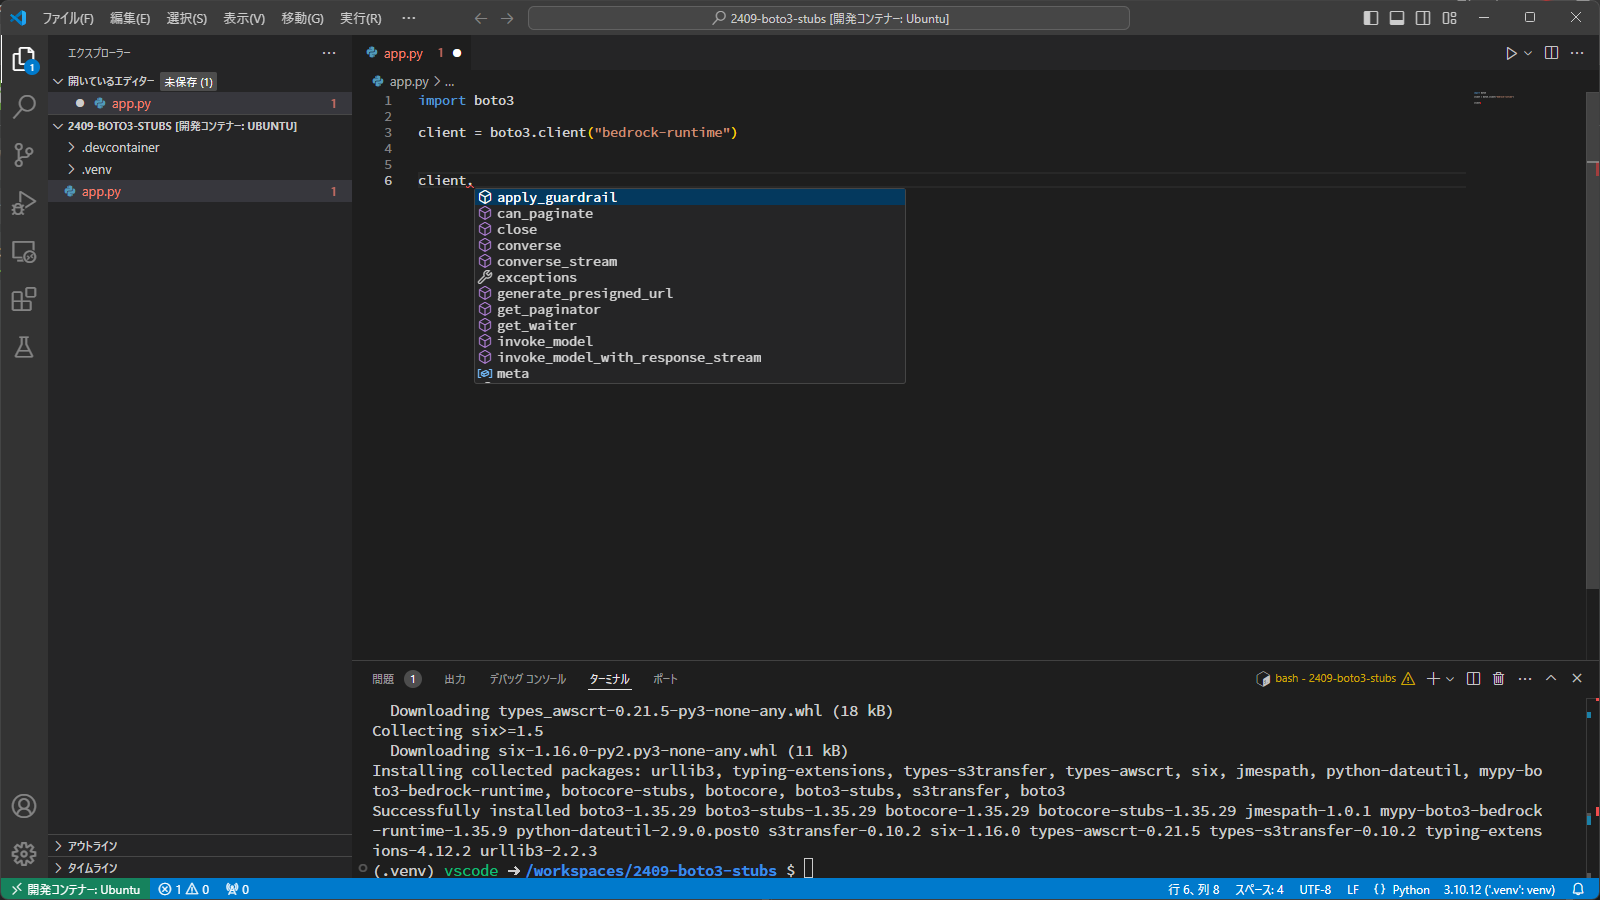
❗️❗️❗️
最高です。
試しにConverse APIを呼び出してみましょう。
パラメーターが確認できます。
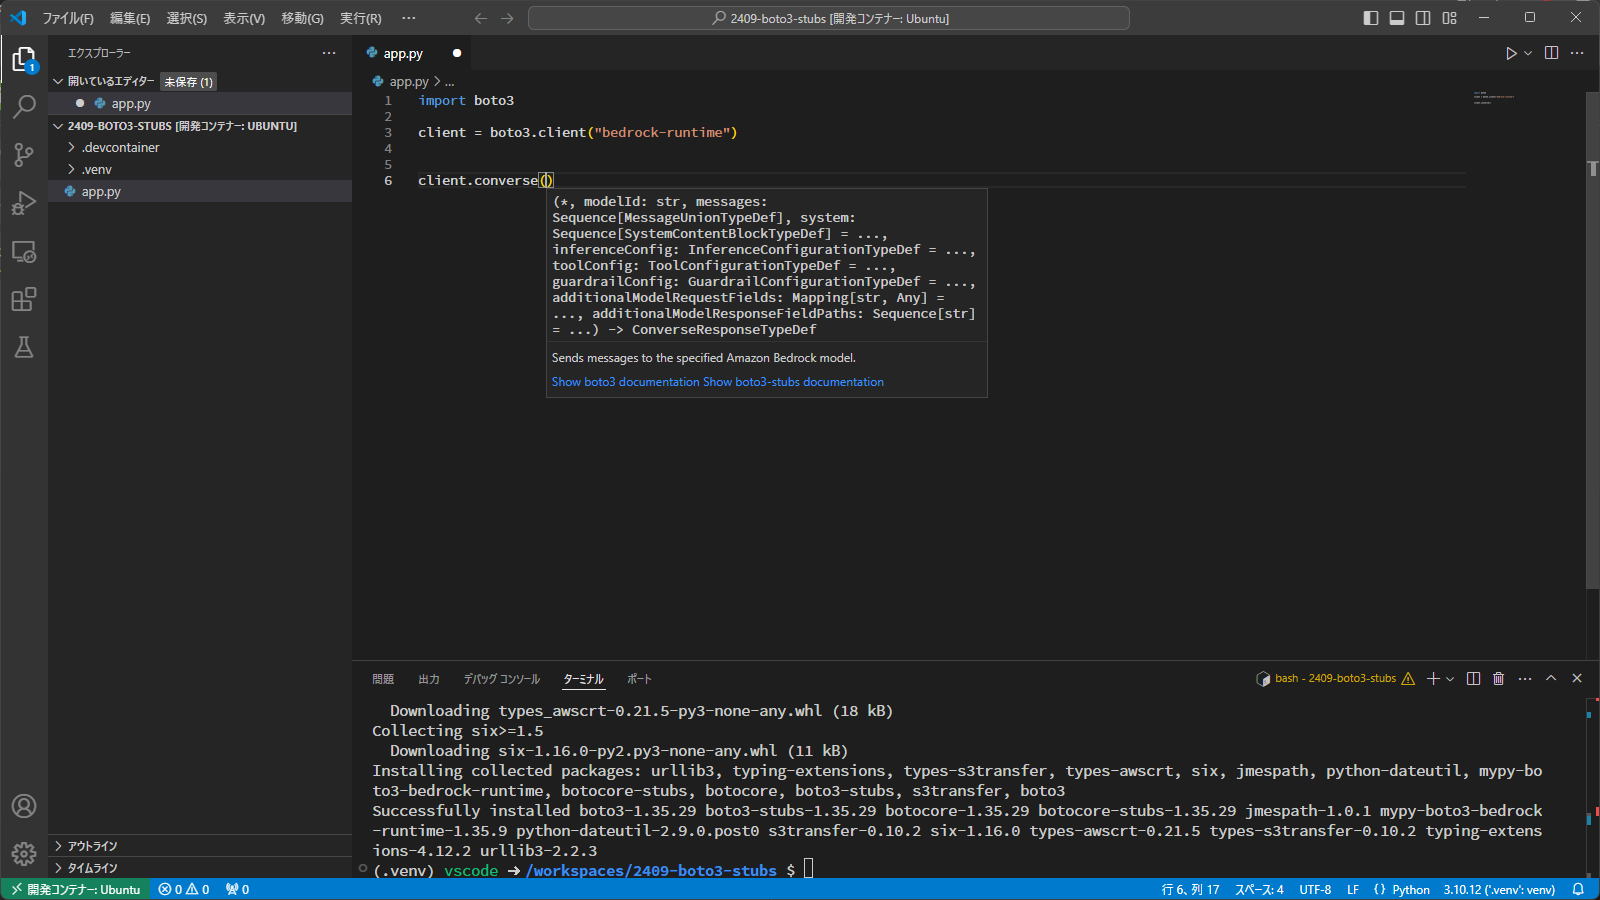
modelIdに指定するモデルIDは残念ながら補完されませんので、頑張って手入力します。
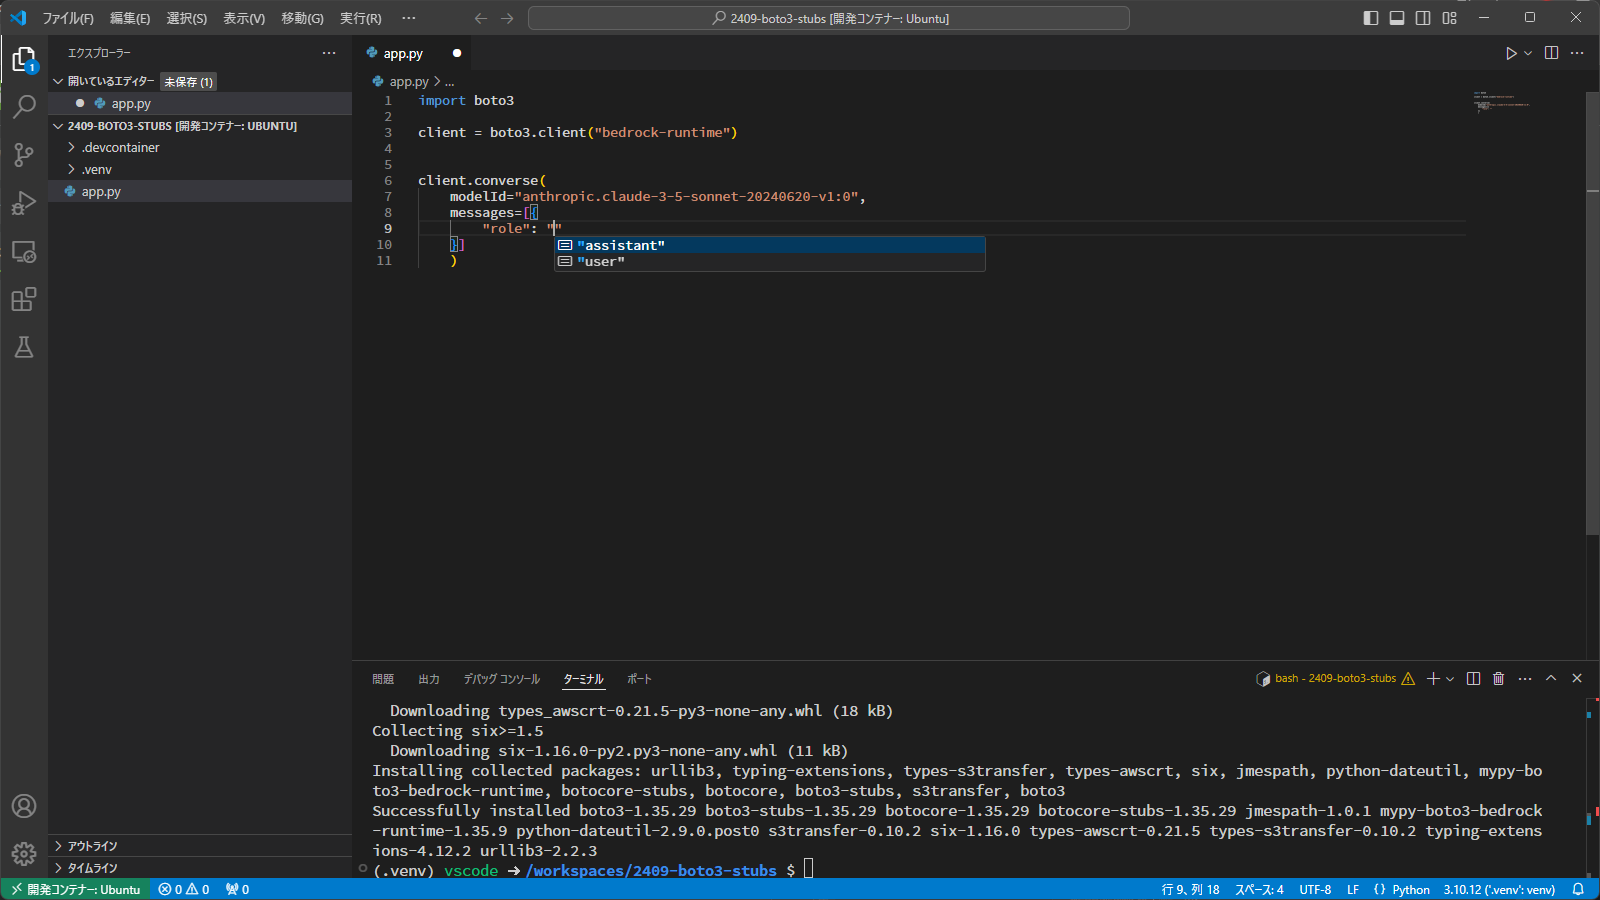
そして、「messages=」を補完を活用して入力し、マウスカーソルを「messages」の上に合わせると、パラメーターの型が「Sequence[MessageUnionTypeDef]」であることが確認できます。

Sequenceなので、「[]」とその中にオブジェクトを意味する「{}」を入力します。

ここで補完(Ctrl + スペース)を入力すると、指定可能なオブジェクトのキーが表示されます。

❗️❗️❗️
神
キーだけではなく値も補完が効きます。
この調子で記述できるので、「サンプルコードを探してコピペ」をしなくてもリクエストを作成できます!!!

「content」のタイプも選ぶだけ

テキストメッセージを指定するだけ

ドキュメントの場合、指定できるファイルタイプもわかっちゃいます。

これは、便利!!
レスポンスの値を取得
リクエストだけではなく、レスポンスも型が利用できます。
converse APIの呼び出し結果を受け取る「response」は「ConverseResponseTypeDef」という型が適用されます。
キーが一覧でリストアップされます。

補完を頼りにtextを取得する事ができました。
ストリームレスポンスの場合も正しく型が認識されます。

ストリームを処理する作法は少しわかっておく必要はありますが、forループの中でも型補完が行えます。

こちらも無事、textを取得することができました。

まとめ
これは必須ですね!Converse APIとの相性も抜群です!!
私が知らなかっただけで、すでにいろいろなところで紹介されていました。