2
0

Delete article

Deleted articles cannot be recovered.

Draft of this article would be also deleted.

Are you sure you want to delete this article?

More than 1 year has passed since last update.

M2チップのmacでfishを設定する

Last updated at Posted at 2023-07-27

新しいmacにしたのでfishを設定していきます。
M1チップと少し手順が異なるのでメモです。

環境

MacBookPro
チップ: Apple M2 Max
macOS: Venture(13.4)

手順

1. finderでterminalを検索

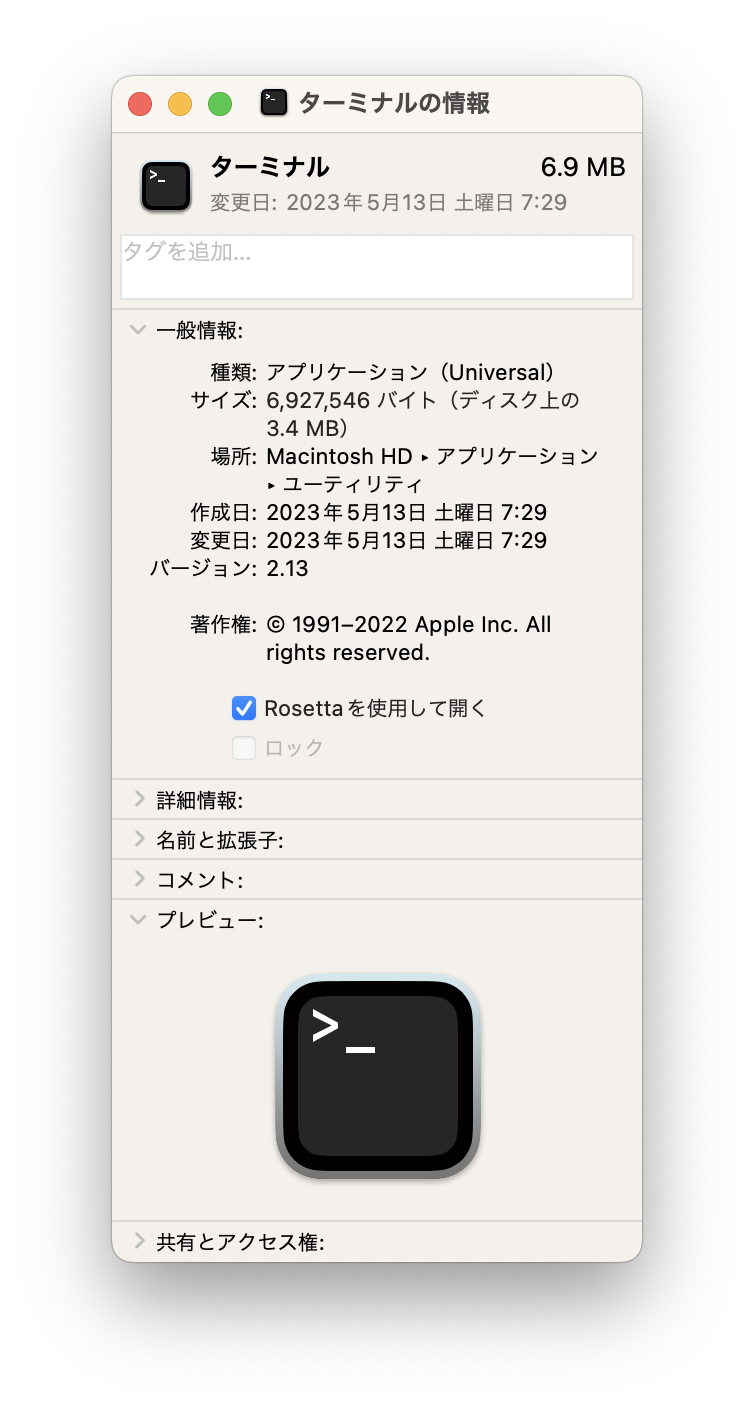
2.「情報を見る」から「Rosettaを使用して開く」にチェック

image.png

image.png

3. Homebrewのインストール

terminalを開いて公式サイトの以下のコマンドを実行
https://brew.sh/index_ja

/bin/bash -c "$(curl -fsSL https://raw.githubusercontent.com/Homebrew/install/HEAD/install.sh)"

4. Homebrewが入ったか確認

$ brew -v
Homebrew 4.1.1

5. fishをインストール

$ brew install fish

6. fishのインストール先を確認

localのbin以下にあればOK

$ which fish
/usr/local/bin/fish

7. デフォルトのシェルをfishにする

$ sudo vi /etc/shells

最後尾に以下を追加して保存

/usr/local/bin/fish

image.png

以下を実行

$ chsh -s /usr/local/bin/fish

terminalを再起動
image.png
お魚の矢印でてたら終わり

おわりに

intelの時と同じパスでHomebrewがインストールされてたり、手順はM1より楽になってるかも?

2
0
0

Register as a new user and use Qiita more conveniently

  1. You get articles that match your needs
  2. You can efficiently read back useful information
  3. You can use dark theme
What you can do with signing up
2
0

Delete article

Deleted articles cannot be recovered.

Draft of this article would be also deleted.

Are you sure you want to delete this article?