Swift 3 で NotificationCenter(旧 NSNotificationCenter ) がせっかく改良されたのに、そのメリットが活かされないようなコード例をよく見かけるので、正しい使い方をまとめます。
以下、主にSwift 2時代のコードを3でどうベターに書けるようになったのかという視点メインでの記述となっています。
次の class を用意して、それをもとに説明していきます(struct は自身を登録できないので class で説明)。
class NotificationObserver {
    func addObserver() {
        // A: ここに NotificationCenter 通知登録処理を書く
    }
    func removeObserver() {
        // B: ここに NotificationCenter 通知解除処理を書く
    }

    /** C: 今回、通知された時に呼ばれる用のメソッド */
    @objc private func notified(notification: Notification) {
        print("呼ばれた( ´・‿・`): \(notification)")
    }
}
すでに用意されている通知を利用する場合
例えば UIApplicationDidBecomeActiveNotification(アプリがアクティブになった時に呼ばれる)のタイミングで、自身の notified(notification:) メソッドが呼ばれるようにしたい場合、Swift 2 では次のように書きます。
let center = NSNotificationCenter.defaultCenter()

// A の箇所に記述
center.addObserver(self,
                   selector: #selector(type(of: self).notified(notification:)),
                   name: UIApplicationDidBecomeActiveNotification,
                   object: nil)
Swift 3 では 'UIApplicationDidBecomeActiveNotification' has been renamed to 'NSNotification.Name.UIApplicationDidBecomeActive' というコンパイルエラーメッセージとともに以下の修正を促されるので、それに従うと次のように、コンパイルの通るコードとなります。

let center = NotificationCenter.default

center.addObserver(self,
                   selector: #selector(type(of: self).notified(notification:)),
                   name: Notification.Name.UIApplicationDidBecomeActive,
                   object: nil)
このままでも問題無いですが、 Notification.Name 部分は型推論に頼って省略できます。
center.addObserver(self,
                   selector: #selector(type(of: self).notified(notification:)),
                   name: .UIApplicationDidBecomeActive,
                   object: nil)
好みの問題もあるかもしれませんが、僕は簡潔でこちらの方が好きです(書かずに済むものは極力書かずに済ませたいと思っています)。
NSNotification.Name.UIApplicationDidBecomeActive とは何かというと、次のように定義されている、NSNotification.Name 型の値です。
extension NSNotification {
    public struct Name : RawRepresentable, Equatable, Hashable, Comparable {
        public init(_ rawValue: String)
        public init(rawValue: String)
    }
}

extension NSNotification.Name {
    public static let UIApplicationDidBecomeActive: NSNotification.Name
}
ちなみに、クロージャーで記述する場合は、notified(notification:) メソッドを用意せずに次のように書けます。
center.addObserver(forName: .UIApplicationDidBecomeActive,
                   object: nil,
                   queue: nil) { notification in
    print("呼ばれた( ´・‿・`): \(notification)")
}
あるいは、notified(notification:) メソッドを用意したまま、次のように書くこともできます。
center.addObserver(forName: .UIApplicationDidBecomeActive,
                   object: nil,
                   queue: nil,
                   using: notified)
クロージャー版の addObserver(forName:object:queue:using:) と他の登録メソッドで、解除の仕方が異なることに注意です。 http://qiita.com/mono0926/items/754c5d2dbe431542c75e#通知の登録解除の仕方 をご覧ください。
自身で新しい通知を利用する場合
Swift 2 までは次のように書いていました。
// 文字列をベタ書きせず、このように別途定義しておいた方がベター
let myNotification = "myNotification"

center.addObserver(self,
                   selector: #selector(type(of: self).notified(notification:)),
                   name: myNotification,
                   object: nil)
これも、Xcode のマイグレーション支援に従うと、次のようにコンパイルの通るコードとなります。
center.addObserver(self,
                   selector: #selector(type(of: self).notified(notification:)),
                   name: NSNotification.Name(rawValue: myNotification),
                   object: nil)
ただ、これでは記述がまどろっこしくなっただけで、Swift 3 で良くなったメリットをまったく享受できていません。Swift 2以前はあらゆる文字列変数や文字列リテラルをそのまま name 引数に与えられたのが、Swift 3では NSNotification.Name 型を受けるように変わったのに、逐一 rawValue にて文字列を渡していたら意味がありません。
次のように別途定義してある myNotification を Notification.Name 型とすると、良くなります。
// `rawValue:` のラベルは省略可能
let myNotification = Notification.Name("myNotification")

center.addObserver(self,
                   selector: #selector(type(of: self).notified(notification:)),
                   name: myNotification,
                   object: nil)
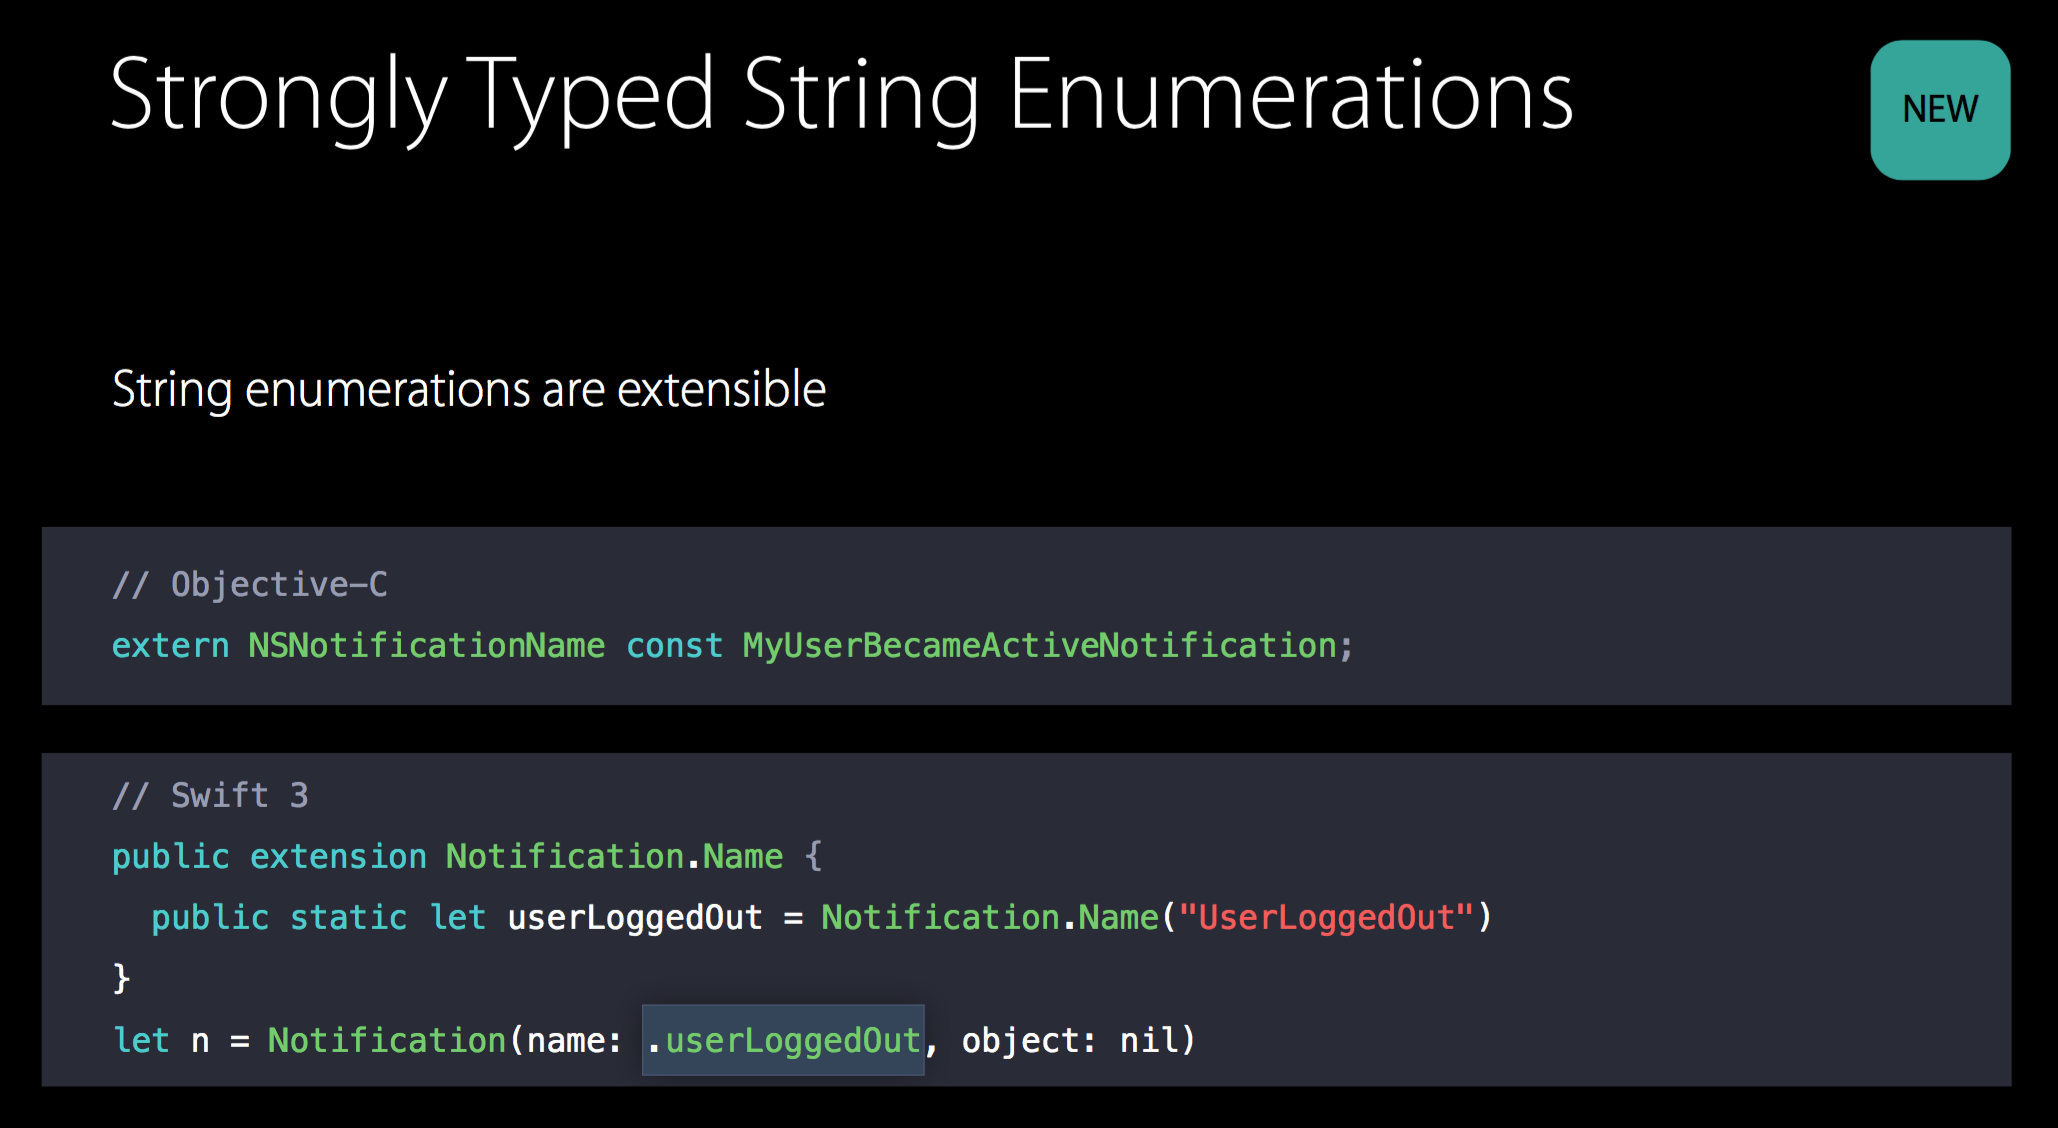
この時点で良い感じですが、さらに Notification.Name.UIApplicationDidBecomeActive など元々用意されているものと同様、次のように定義してみると良いでしょう。
extension Notification.Name {
    static let myNotification = Notification.Name("myNotification")
}

center.addObserver(self,
                   selector: #selector(type(of: self).notified(notification:)),
                   name: .myNotification,
                   object: nil)
Strongly Typed String Enumerationsとして、What's New in Foundation for Swift - WWDC 2016 - Videos - Apple Developer のpp.72-83にて紹介されているやり方です。
さらに、次のように、struct などで区切ることで元々用意されているものと区別するなど、応用も色々考えられますが省略します。
extension Notification.Name {
    struct Qiita {
        static let myNotification = Notification.Name("qiita.myNotification")
    }
}

center.addObserver(self,
                   selector: #selector(type(of: self).notified(notification:)),
                   name: Notification.Name.Qiita.myNotification,
                   object: nil)
通知の発行の仕方
これは特に変わらず、上で良い感じに定義した Notification.Name.myNotification を使って発行します。
center.post(name: .myNotification,
            object: nil)
次のような、よろしくないコード例が散見されて、気になっていました。
center.post(name: Notification.Name(rawValue: myNotification),
            object: nil)
通知の登録解除の仕方
次のメソッドなど使って、基本的に登録と対になるように適切に解除しましょう(登録してないのに解除しても特にエラー起きないですが)。
// B の箇所に記述
// すべて解除
center.removeObserver(self)
// 特定の通知のみ解除
center.removeObserver(self,
                      name: .UIApplicationDidBecomeActive,
                      object: nil)
addObserver(forName:object:queue:using:)を使った場合の解除パターン
https://developer.apple.com/reference/foundation/notificationcenter/1411723-addobserver#return-value に載っていますが、addObserver(forName:object:queue:using:) を使う場合、通知登録解除時、戻り値の NSObjectProtocol 型のオブジェクトを保持してそれを元に removeObserver(_:) を呼ぶ必要があることに注意です。戻り値不使用であれば警告が出るのでうっかりミスはしにくいです。
次のように書きます。
class NotificationObserver {
    var token: NSObjectProtocol?

    func addObserver() {
        token = center.addObserver(forName: .myNotification,
                                   object: nil,
                                   queue: nil) { notification in
                                    print("呼ばれた( ´・‿・`): \(notification)")
        }
    }

    func removeObserver() {
        if let token = token {
            center.removeObserver(token)
            self.token = nil
        }
    }
}
1回のみ通知を受けたい場合
1回通知受けたら解除、という場合はプロパティに保持せずに次のように書けます。
var token: NSObjectProtocol!
token = center.addObserver(forName: .myNotification,
                   object: nil,
                   queue: nil) { notification in
                    print("呼ばれた( ´・‿・`): \(notification)")
                    center.removeObserver(token)
        }
iOS 9.0・macOS 10.11以降では解除処理は必須ではなくなりました🎉
以下に記載の通り、iOS 9.0・macOS 10.11以降では、オブジェクトが解放された後に通知が発行されてもクラッシュしないようになりました。
If your app targets iOS 9.0 and later or macOS 10.11 and later, you don't need to unregister an observer in its deallocation method. If your app targets earlier releases, be sure to invoke
removeObserver:name:object:
before observer or any object specified in addObserver:selector:name:object: is deallocated.
addObserver:selector:name:object: - NSNotificationCenter | Apple Developer Documentation
つまり、以下の時のみ解除処理をすれば良いです。
-
deinit前の何らかのタイミングで通知を受け取るのをやめたい時- 1回のみ通知を受けたい場合というのもその一例
- iOS 9.0・macOS 10.11より前のオブジェクト解放タイミング(
deinit時)- iOS 9.0・macOS 10.11より前のバージョンをターゲットに含めている場合に必要
- この際、iOS 9.0・macOS 10.11以降でも通知解除処理をしてしまって問題ないため、処理分岐はしなくてOK
- iOS 9.0・macOS 10.11より前のバージョンを切ったら不要な処理になるので、そのタイミングでコード削除するのが望ましい)
以上のように、Swift 3 で NotificationCenter が改良されたのでベターな書き方をしていきましょう( ´・‿・`)
userInfo が [AnyHashable : Any]? 型という問題
ただ、まだ微妙な点は残っていて、notification オブジェクトには userInfo という情報を付与できますが、それが[AnyHashable : Any]? 型なので、すごく使いにくいです。
public struct Notification : ReferenceConvertible, Equatable, Hashable {
    public var userInfo: [AnyHashable : Any]?
}
いくつかアプローチがありますが、
-
userInfoが[AnyHashable : Any]?型であることを許容しつつ気を付けて使う -
userInfoに頼らない - ライブラリを使って(作って)解決
-
NotifwiftでNSNotification.userInfoをSwiftyに扱おう - Qiita など参照
- 記事はSwift 2 の時の情報ですが takasek/Notifwift: NSNotificationCenter wrapper for Swift は更新されています
- Swift 2 時点での微妙な点の半分くらい解消されましたね
-
NotifwiftでNSNotification.userInfoをSwiftyに扱おう - Qiita など参照
userInfoに頼らない
僕はこちらの方針でやっています。
NotificationCenter は 「特定の通知を検知すること」のみに使って、受け取った側でのハンドリングは受け取った側がアクセスできる情報で済ませる、という設計にしています。そもそも NotificationCenter は多用していないこともあって、これで充分済んでいます( ´・‿・`)