[!NOTE]
この記事は 2013/09/22 に momoto.github.io へ投稿した内容を Qiita へ移行してきたものです
Nagios Core 4.0.0 と Nagios Plugins 1.4.16 をソースからインストールします。OS は CentOS 6.4 を使用しています。
1. ソースコードを取得する
www.nagios.org から Nagios Core 4.0.0 と Nagios Plugins 1.4.16 のソースコードを取得します。
$ cd /usr/local/src/
$ sudo wget http://prdownloads.sourceforge.net/sourceforge/nagios/nagios-4.0.0.tar.gz
$ sudo wget http://prdownloads.sourceforge.net/sourceforge/nagiosplug/nagios-plugins-1.4.16.tar.gz
$ sudo tar xfz nagios-4.0.0.tar.gz
$ sudo tar xfz nagios-plugins-1.4.16.tar.gz
2. 要件を満たす
Documentation に従って、必要なパッケージをインストールします。
# RHEL/CentOSの場合
$ sudo yum install wget httpd php gcc glibc glibc-common gd gd-devel make net-snmp

# Ubuntuの場合
$ sudo apt-get install wget build-essential apache2 php5-gd libgd2-xpm libgd2-xpm-dev libapache2-mod-php5
続いて、Nagios のプロセスを実行するユーザとグループを用意します。
$ sudo useradd nagios
$ sudo groupadd nagcmd
$ sudo usermod -a -G nagcmd nagios
3. Nagios Core をインストールする
ソースコードを展開したディレクトリに移って Nagios Core をインストールしていきます。
# cd nagios

# RHEL/CentOSの場合
# ./configure --with-command-group=nagcmd

# Ubuntuの場合
# ./configure --with-nagios-group=nagios --with-command-group=nagcmd -–with-mail=/usr/bin/sendmail

*** Configuration summary for nagios 4.0.0 09-20-2013 ***:

 General Options:
 -------------------------
        Nagios executable:  nagios
        Nagios user/group:  nagios,nagios
       Command user/group:  nagios,nagcmd
             Event Broker:  yes
        Install ${prefix}:  /usr/local/nagios
    Install ${includedir}:  /usr/local/nagios/include/nagios
                Lock file:  ${prefix}/var/nagios.lock
   Check result directory:  ${prefix}/var/spool/checkresults
           Init directory:  /etc/rc.d/init.d
  Apache conf.d directory:  /etc/httpd/conf.d
             Mail program:  /bin/mail
                  Host OS:  linux-gnu

 Web Interface Options:
 ------------------------
                 HTML URL:  http://localhost/nagios/
                  CGI URL:  http://localhost/nagios/cgi-bin/
 Traceroute (used by WAP):
configure が終わると、Nagios の構成の要約を表示してくれます。
# make all
コンパイルまで済んだら、次の make オプションでインストールを続けていきます。
-
make installメインプログラム、CGI、HTML ファイルをインストール -
make install-init/etc/rc.d/init.d の起動スクリプトをインストール -
make install-commandmodeディレクトリの権限のインストールと設定 -
make install-config/usr/local/nagios/etc の設定ファイルのサンプルをインストール -
make install-webconfウェブインタフェースのための Apache 設定ファイルをインストール -
make install-exfoliationウェブインタフェースの Exfoliation テーマをインストール -
make install-classicuiウェブインタフェースのクラシックテーマをインストール
ウェブインタフェースのテーマは必要なければ省略できるようです。
# make install
# make install-init
# make install-config
# make install-commandmode
# make install-webconf
# cp -R contrib/eventhandlers/ /usr/local/nagios/libexec/
# chown -R nagios:nagios /usr/local/nagios/libexec/eventhandlers/
4. Nagios Plugin をインストールする
ソースコードを展開したディレクトリに移って Nagios Plugin をインストールしていきます。
# cd ../nagios-plugins-1.4.16
# ./configure --with-nagios-user=nagios --with-nagios-group=nagios
# make
# make install
5. Nagios と Apache を起動する
ウェブインタフェースの認証につかう Apache のパスワードファイルを用意します。
# htpasswd -c /usr/local/nagios/etc/htpasswd.users nagiosadmin
New password:
Re-type new password:
Adding password for user nagiosadmin
Nagios の設定ファイルを検証した後、Nagios、Apache を起動します。
# /usr/local/nagios/bin/nagios -v /usr/local/nagios/etc/nagios.cfg
# service nagios start
nagios is stopped
Starting nagios:                                           [  OK  ]
# service httpd start
                                                           [  OK  ]
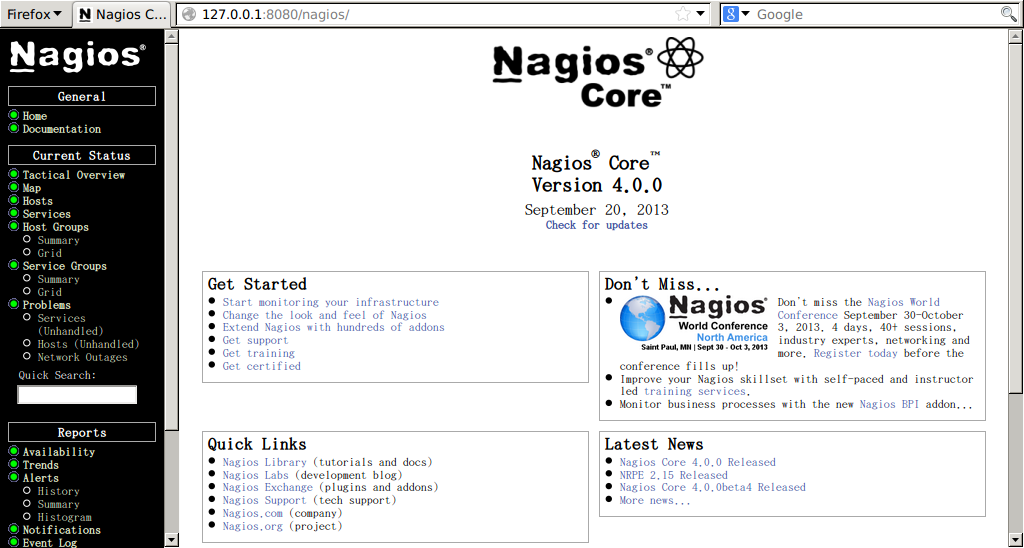
Nagiosのウェブインタフェースへアクセスして動作を確かめてみます。認証には上のhtpasswdで設定したユーザ名とパスワードを入力します。
6. 自動起動を設定する
必要に応じて、Nagiosの自動起動を設定します。
# chkconfig --add nagios
# chkconfig nagios on
# chkconfig httpd on

