前回ではFirebase Authenticationを使ってログイン機能の実装と周辺機能の実装を終えた.
今回は遂に完成させてデプロイまでいく.
React + Redux + Firebase を使ってログイン機能あり掲示板アプリ開発①
React + Redux + Firebase を使ってログイン機能あり掲示板アプリ開発②
React + Redux + Firebase を使ってログイン機能あり掲示板アプリ開発③
React + Redux + Firebase を使ってログイン機能あり掲示板アプリ開発④ ←今ここ!!!
#タイムスタンプを適切な時間フォーマットへ
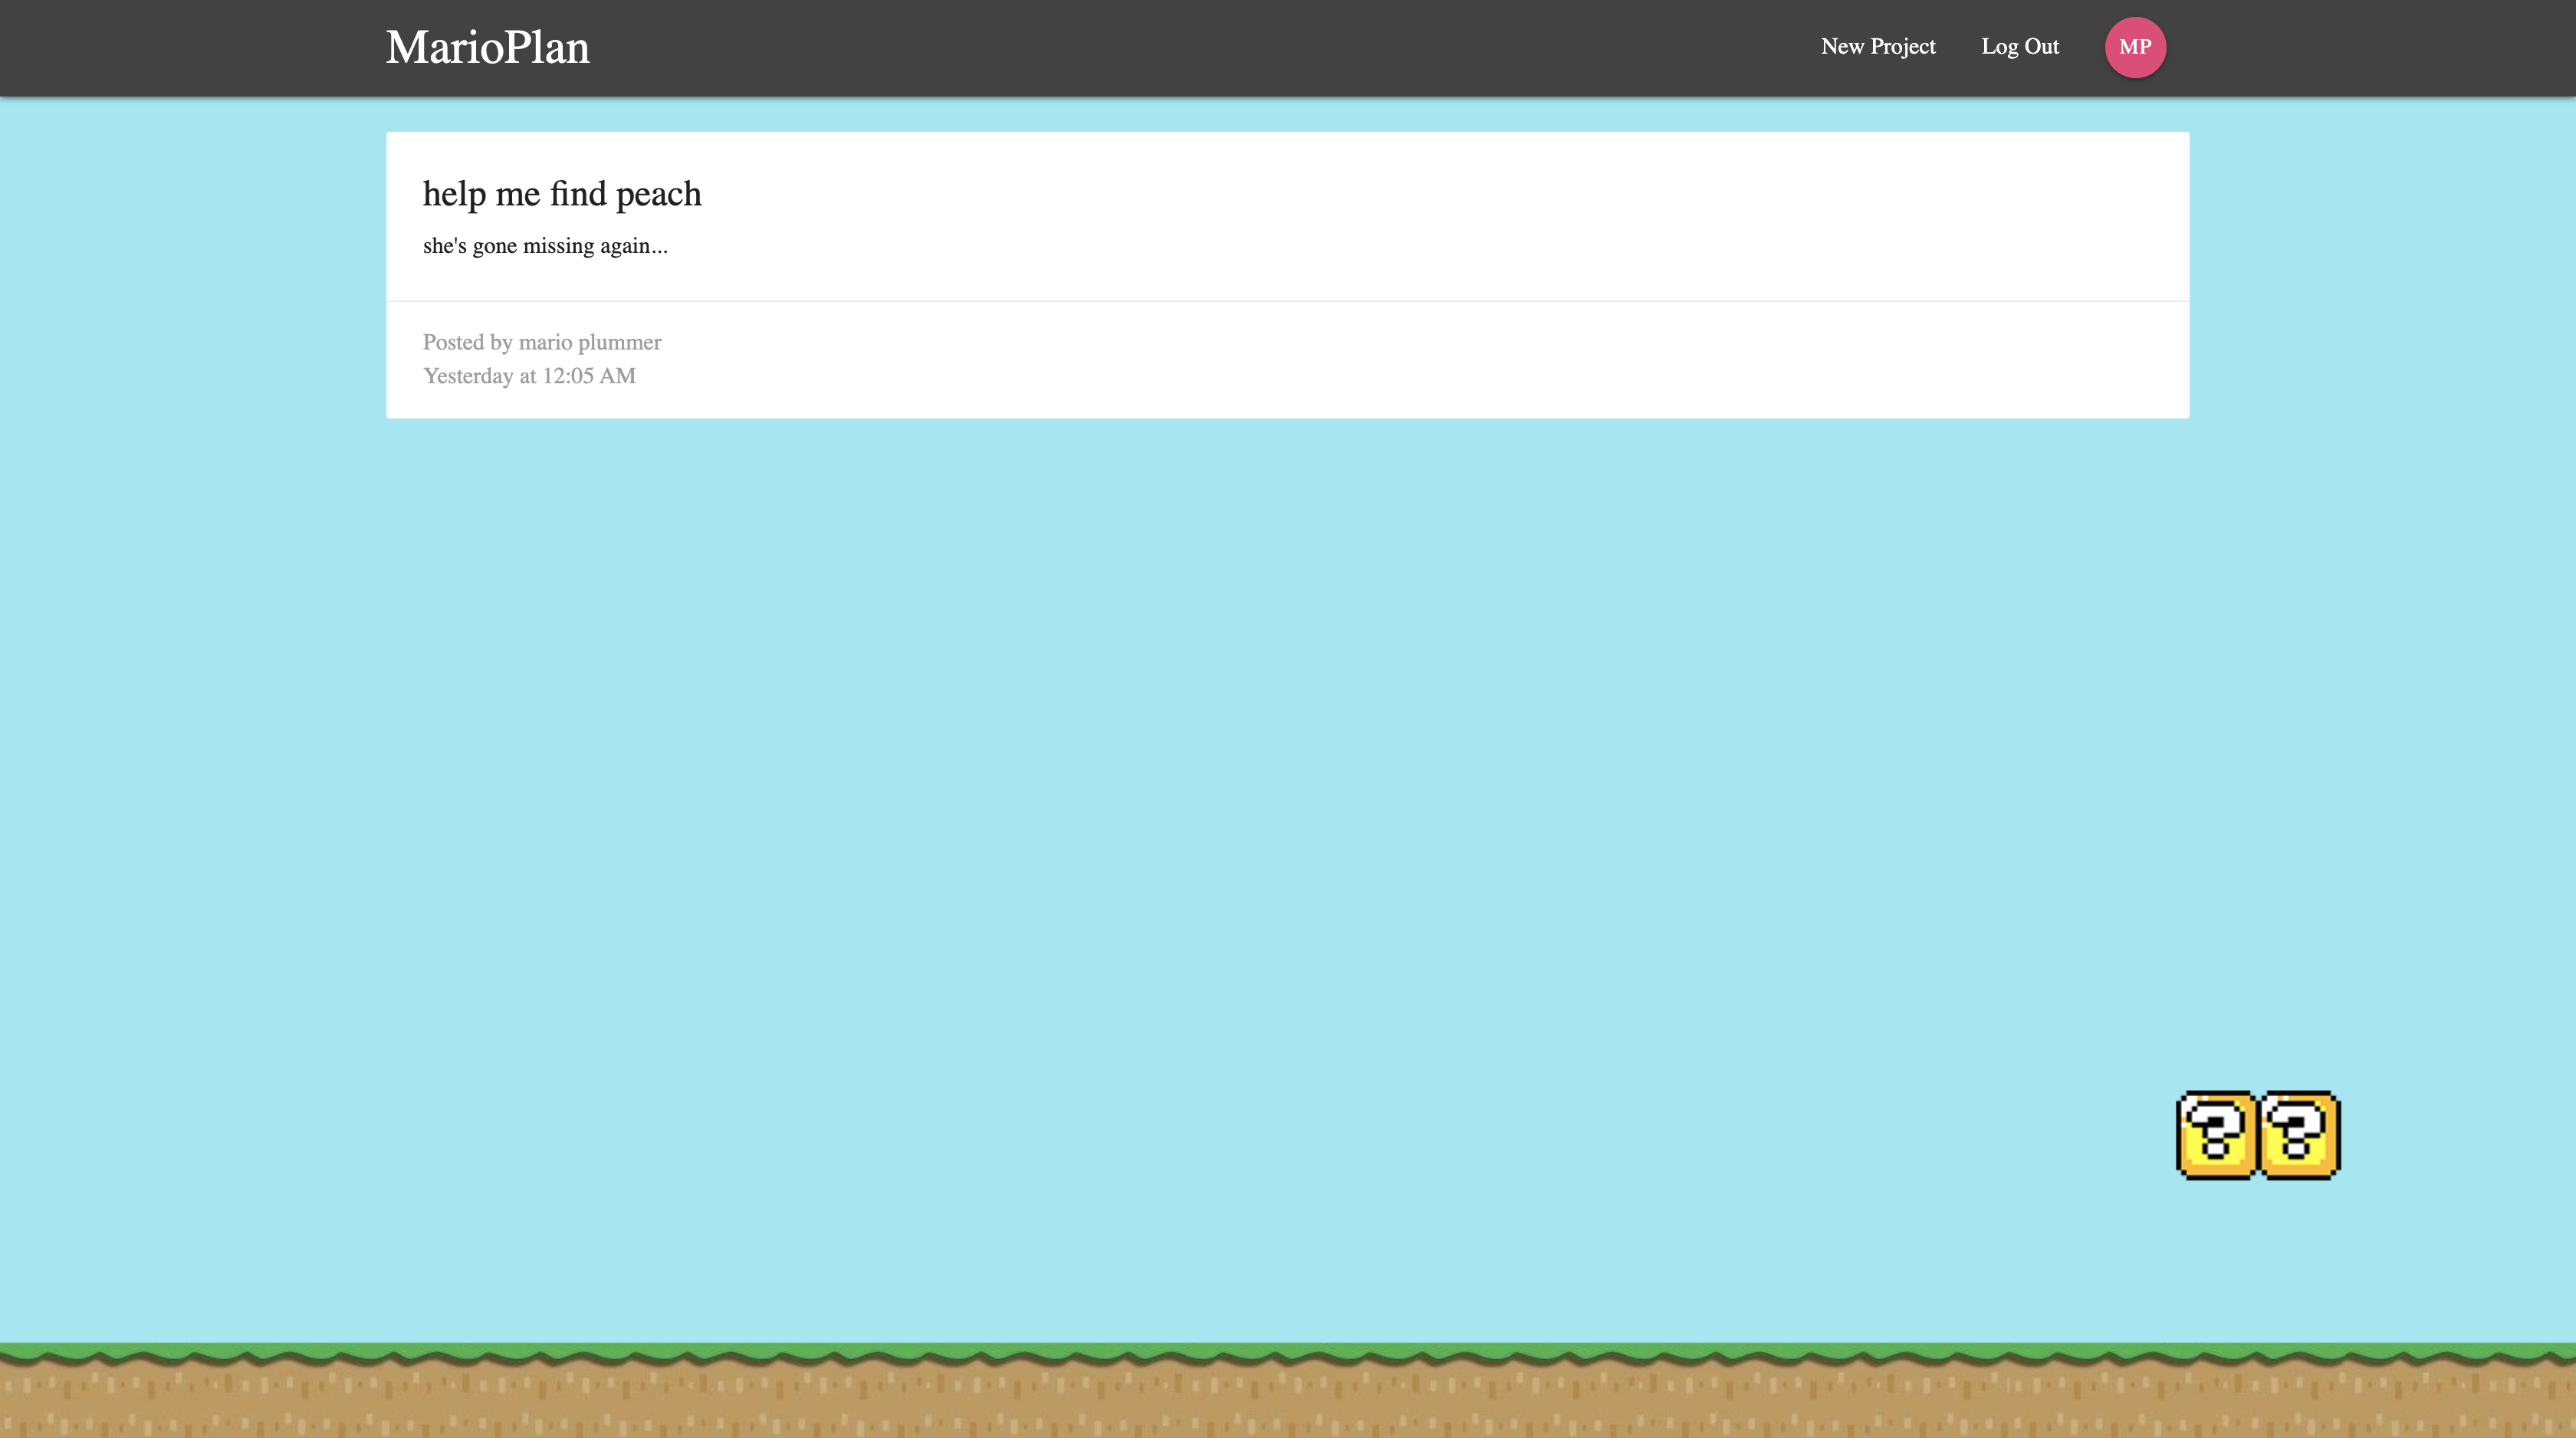
コンテンツ外観はかなり煮詰まってきたが,ProjectSummaryとProjectDetailsでの日付・時間表示がハードコーディングのままだ.
思い出して欲しいのは新しいプロジェクトを追加した時にcreatedAtというフィールドをfirestoreのprojectsコレクションに保存したはずだ.この値はタイムスタンプだ.
これを適切なフォーマットに変換して表示するように,まずはProjectSummaryから修正していこう.
toDate()メソッドはタイムスタンプをうまく変換してくれるが,こいつはDateオブジェクトと呼ばれるものなのでこのままだとエラーが出る.
なのでtoString()メソッドで文字列に変換してあげる.
後,projectsの中にテスト用に作ったcreatedAtプロパティを持たないドキュメントがあるので手動で削除しよう.しないとエラーが出る.
import React from 'react'

const ProjectSummary = ({project}) => {
    return (
        <div className="card z-depth-0 project-summary">
            <div className="card-content grey-text text-darken-3">
                <span className="card-title">{project.title}</span>
                <p>Posted by the {project.authorFirstName} {project.authorLastName}</p>
                <p className="grey-text">{project.createdAt.toDate().toString()}</p>
            </div>
        </div>
    )
}

export default ProjectSummary;
 一応,人間様がみれるフォーマットにはなったが,なんだか不格好だ.
なのでMoment.js と呼ばれるパッケージを使ってお好みなフォーマットを実装しよう.
npm install moment
インポートして使ってみる.
Moment.jsではDateオブジェクトを扱うのでtoStringは消して全体をmoment関数で囲み,そこにお好みのメソッドをつける.
今回はcalendarメソッドを使う.他にもたくさん綺麗なフォーマットがあるので公式参照.
import React from 'react'
import moment from 'moment'

const ProjectSummary = ({project}) => {
    return (
        <div className="card z-depth-0 project-summary">
            <div className="card-content grey-text text-darken-3">
                <span className="card-title">{project.title}</span>
                <p>Posted by the {project.authorFirstName} {project.authorLastName}</p>
                <p className="grey-text">{moment(project.createdAt.toDate()).calendar()}</p>
            </div>
        </div>
    )
}

export default ProjectSummary;

同じことをProjectDetailsにも実装していく.
import React from 'react'
import { connect } from 'react-redux'
import { firestoreConnect } from 'react-redux-firebase'
import { compose } from 'redux'
import { Redirect } from 'react-router-dom'
import moment from 'moment'

const ProjectDetails = (props) => {
    const { project, auth } = props;
    if (!auth.uid) return <Redirect to='/signin' />
    if (project) {
        return (
            <div className="container section project-details">
                <div className="card z-depth-0">
                    <div className="card-content">
                        <span className="card-title">{ project.title }</span>
                        <p>{ project.content }</p>
                    </div>
                    <div className="card-action gret lighten-4 grey-text">
                        <div>Posted by {project.authorFirstName} {project.authorLastName}</div>
                        <div>{moment(project.createdAt.toDate()).calendar()}</div>
                    </div>
                </div>
            </div>
        )
    } else {
        return (
            <div className="container center">
                <p>Loaging project...</p>
            </div>
        )
    }

}

const mapStateToProps = (state, ownProps) => {
    const id = ownProps.match.params.id;
    const projects = state.firestore.data.projects;
    const project = projects ? projects[id] : null
    return {
        project: project,
        auth: state.firebase.auth
    }
}

export default compose(
    connect(mapStateToProps),
    firestoreConnect([
        { collection: 'projects' }
    ])
)(ProjectDetails);
#Firestoreセキュリティルール
今,Firestoreはテストモードなので,誰でも読み書きが可能な状態にある.
現在のfirestoreのセキュリティルールをみると以下のようになっている.
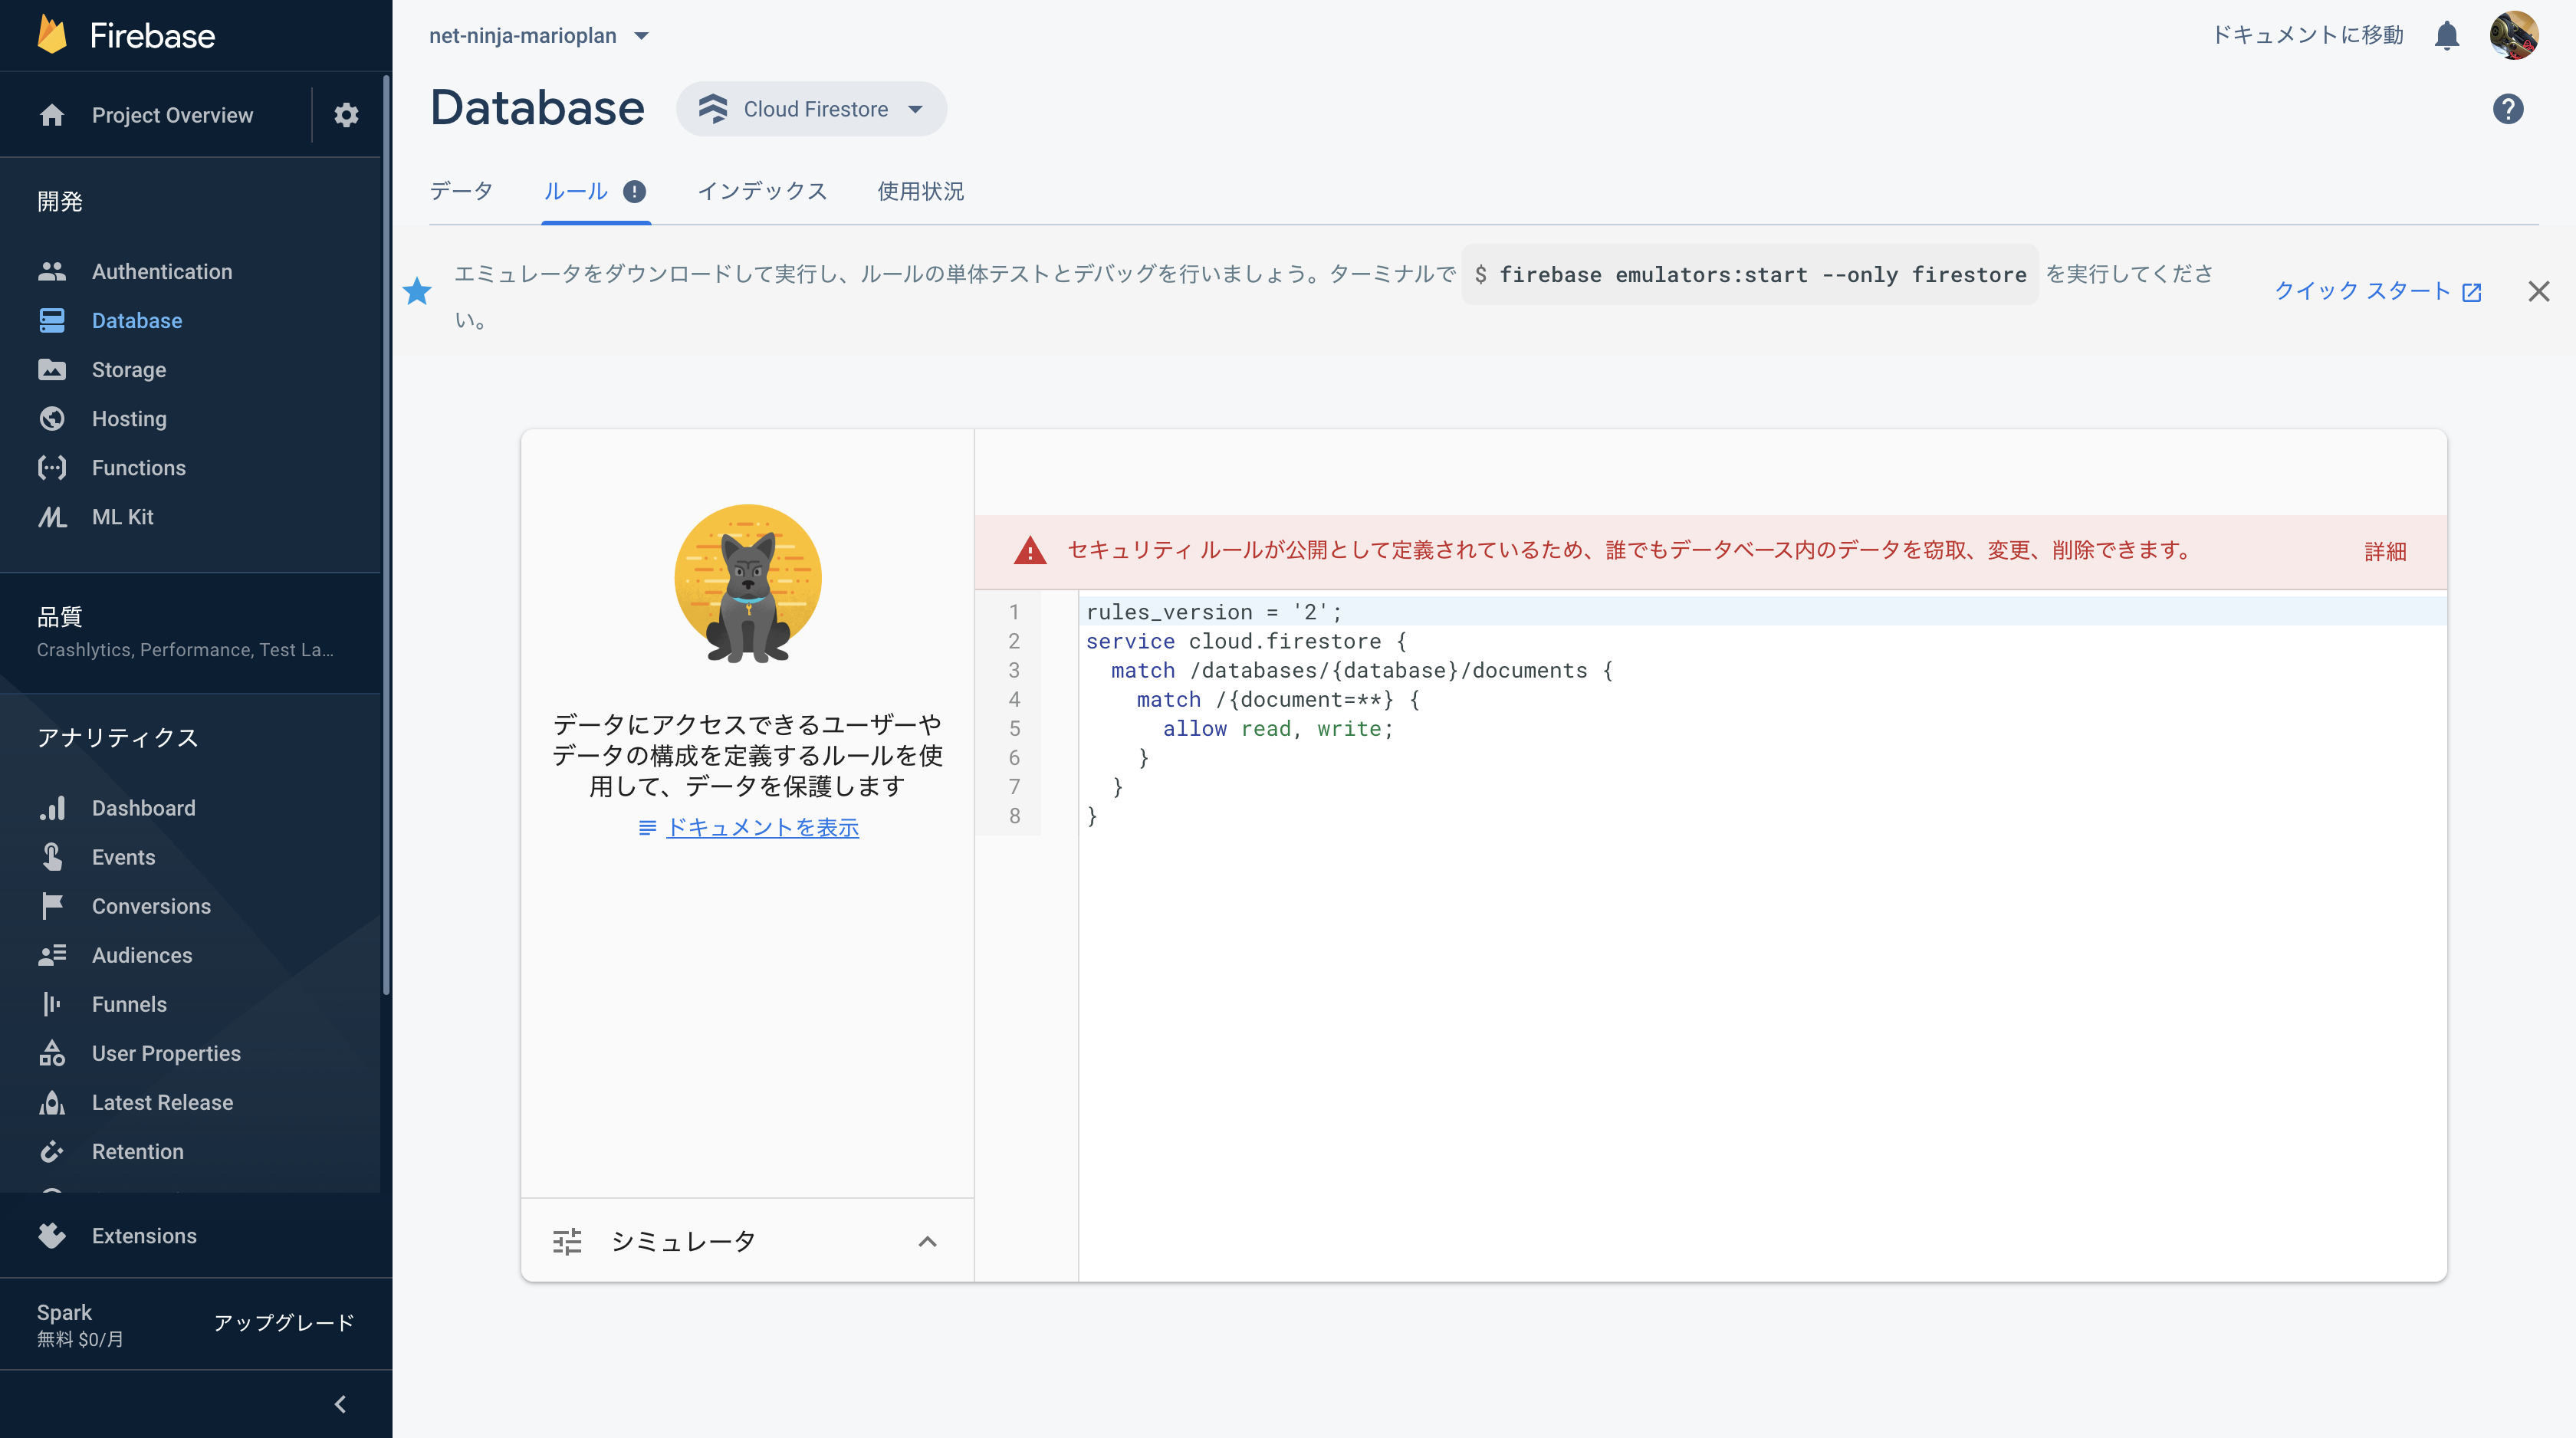 1行目はセキュリティルール言語のバージョン情報なのであまり気にしないでいい.
2行目はルールが`firestore`データベースのみに適用されることを表している.
3行目はルールがプロジェクト内の全ての`firestore`データベース(我々は元々1つしかないけど)に適用されることを表している.
なのでこの3行には手を加えないでいい.
4行目はルールがデータベースの全てのドキュメントに適用されることを表している.
5行目はデータベースの全てのドキュメントが誰にでも読み書き可能であることを設定している.
この設定は開発にはとても快適だが,いざデプロイする際には絶対にセキュリティをロックする必要がある.
シミュレータを使用して様々な状況をシミュレーションできる.
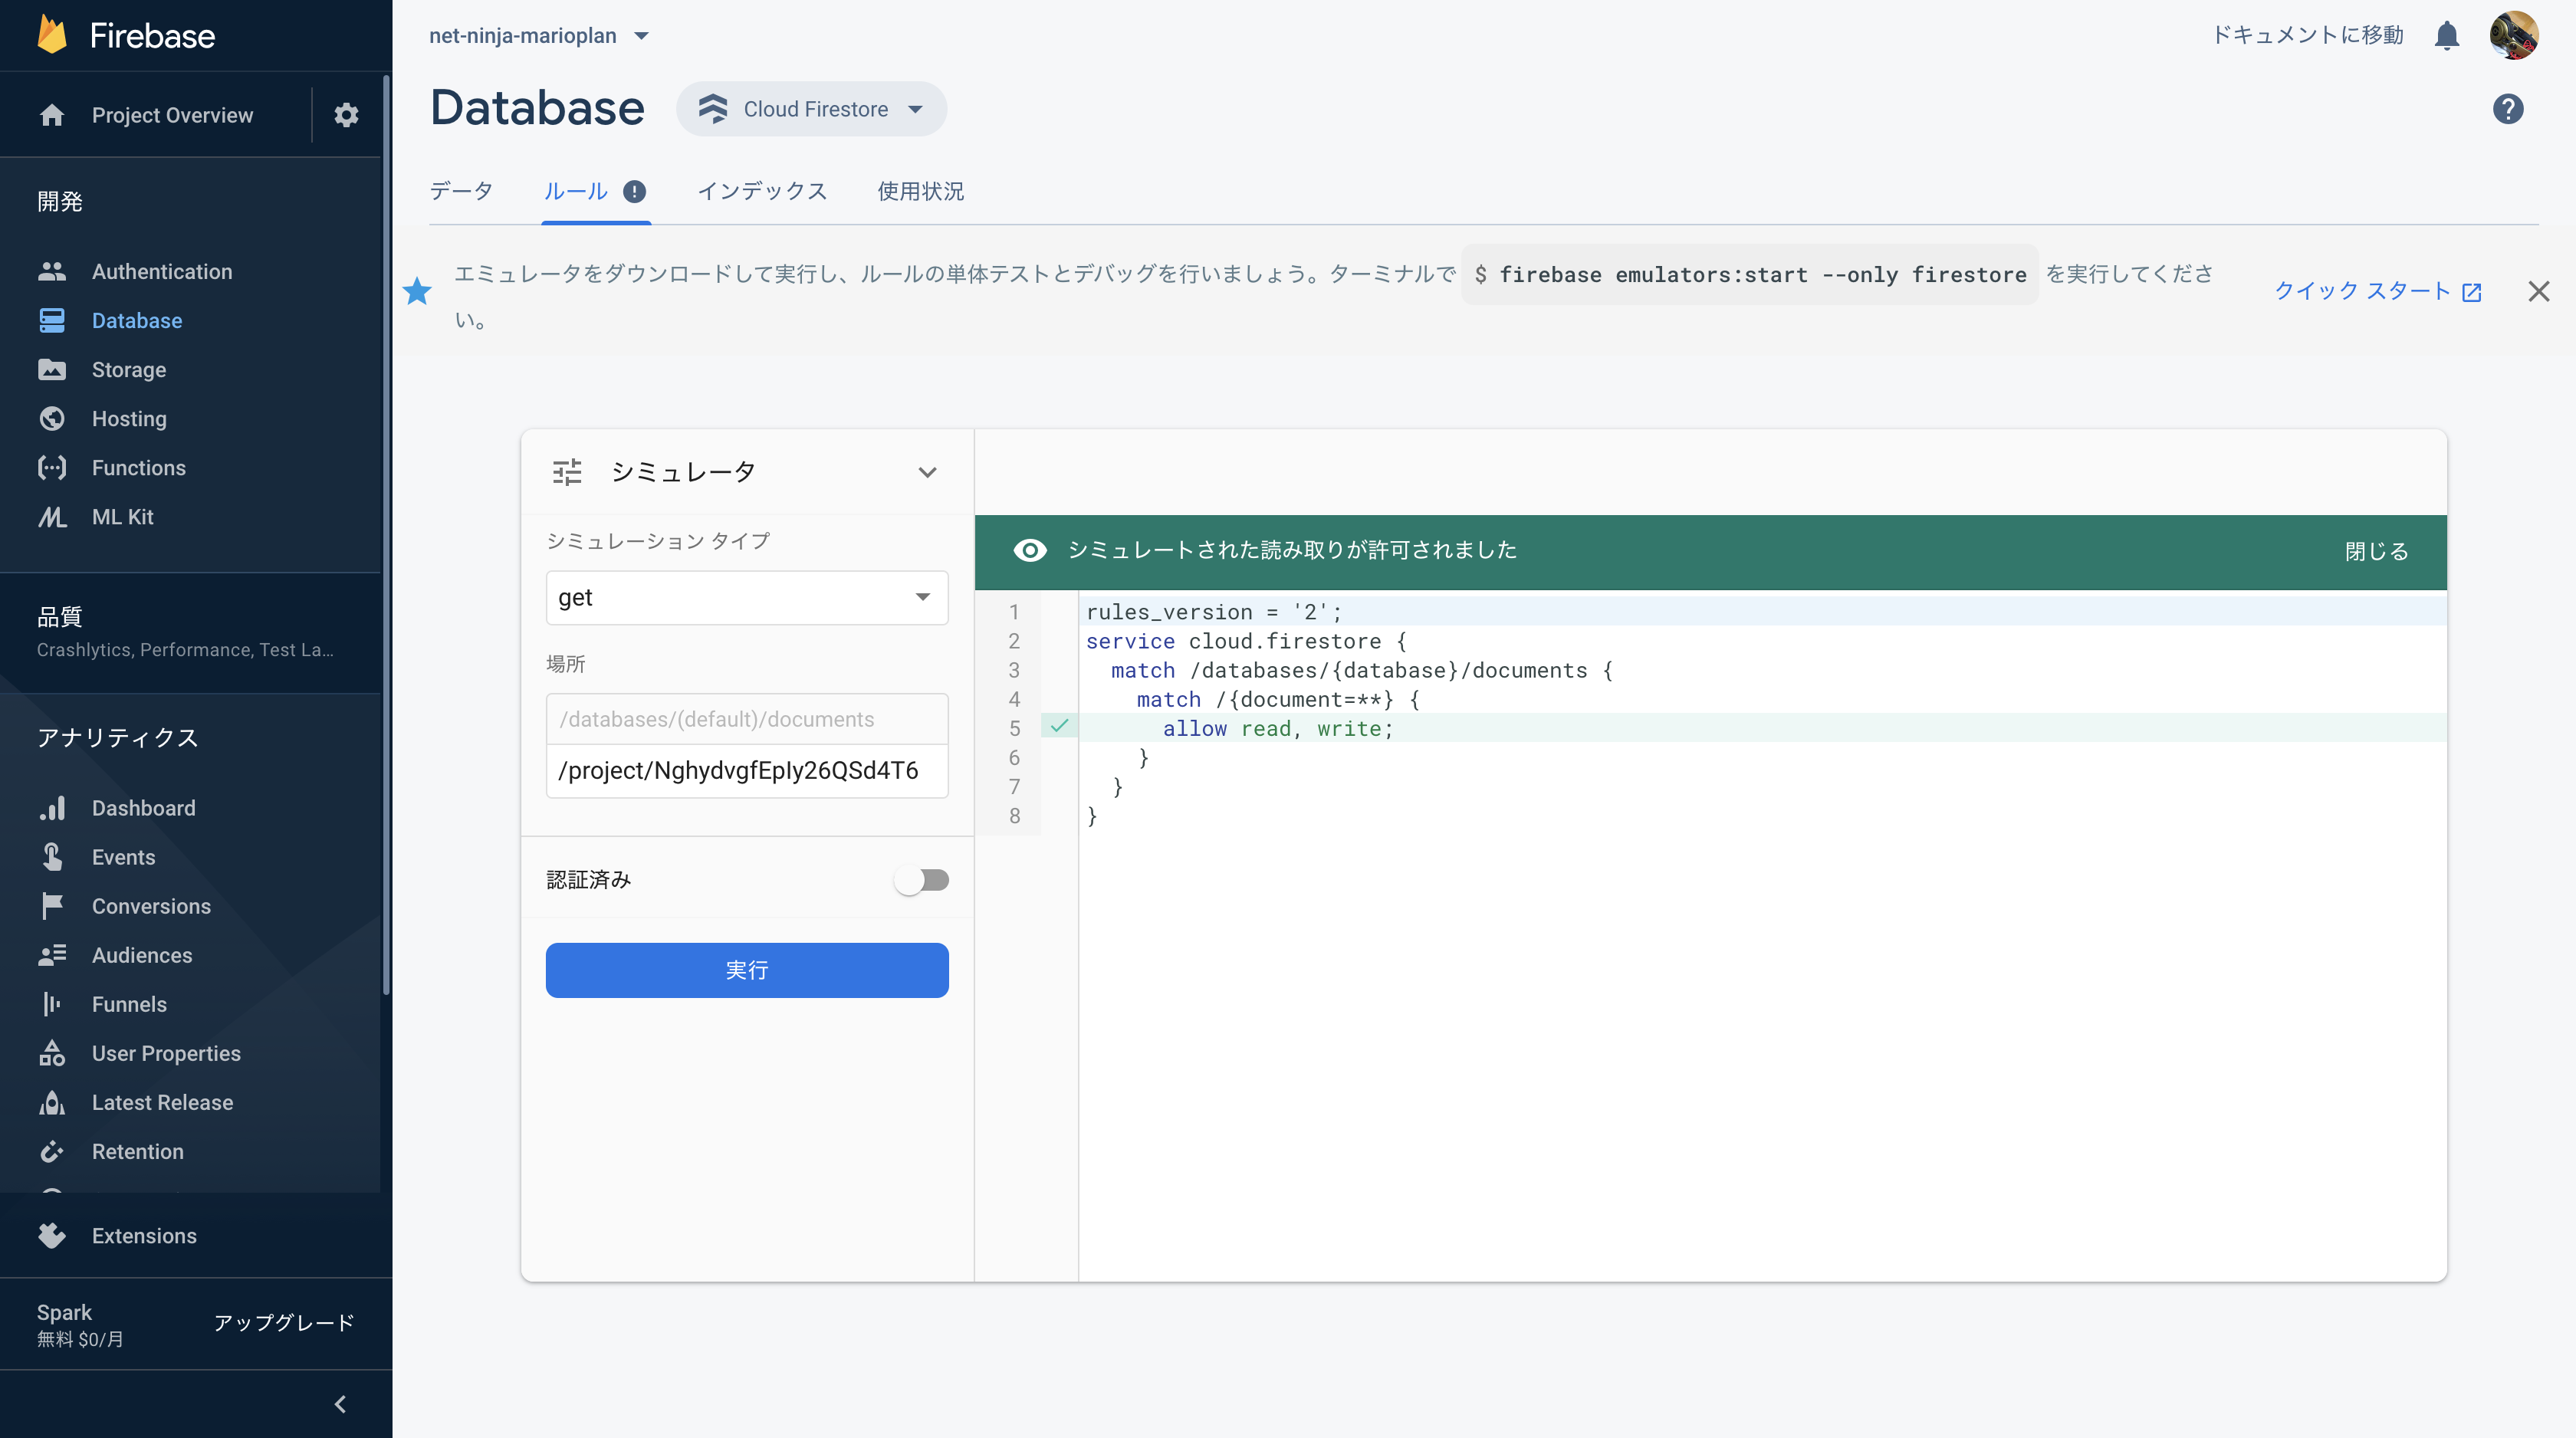
上画像では特定のプロジェクトの情報をログインしていないユーザーがGETリクエストした場合のシミュレートだが,しっかりアクセスできてしまっている.
こんな感じでこのままだとデータベース内の情報にアクセスされるだけでなく,更新や削除もされてしまう危険性がある.
なので早速セキュリティルールを書き換えていこう.
rules_version = '2';
service cloud.firestore {
  match /databases/{database}/documents {
    match /projects/{project} {
      allow read, write: if request.auth.uid != null
    }
  }
}
4行目はルールをprojectsコレクションの全てのドキュメントに適用することを表している.
5行目でrequest.auth.uidでログインステータスを確認し,ログインしているユーザーには読み込みと書き込みを許可している.
次にusersコレクションに対するルールも作っていく.
rules_version = '2';
service cloud.firestore {
  match /databases/{database}/documents {
    match /projects/{project} {
      allow read, write: if request.auth.uid != null
    }
    match /users/{useId} {
      allow create
      allow read: if request.auth.uid != null
    }
  }
}
7行目はルールがusersコレクションの全てのドキュメントにも適用されることを表している.
8行目は誰でもユーザーを登録することを許可している.
9行目はログインしているユーザーなら他のユーザー情報をみることを許可している.(ダッシュボード画面で他人のプロジェクトが見られるように)
以上のルールを書き込み公開を押す.適用には数分かかることがあるので,少し待ってプロジェクトを作ったりしてアプリの動作がおかしくなってないか確認しよう.
今回実装してセキュリティルールはとても基本的なことだけなので,実際の開発では公式ドキュメントを読んで他にどんなルールを敷けるのか調べてみよう.
#Cloud Functionイントロ&セットアップ
ここまででReact Appを作ってきたが,ここまでのJavaScriptコードが全てクライアントサイド,ブラウザで実行されるものだ.コードを実行するのにサーバーを使用しなかった.
しかしいくつかのタスクに取り組むに際してサーバーサイドでコードを実行したい時が出てくる.
例えばクライアントサイドからはアクセスできないデータの編集などだ.
そのためにCloud Functionを使えばコードをサーバーサイドで実行してくれる.
ローカルでコードを書いてfirebaseにデプロイするだけでいい.
それでは書く前にCloud Functionのセットアップをしていこう.
Firebaseプロジェクトのfunctionsページに行って使ってみるをクリックすると,cloud functionを使うためのステップが出てくるの1つ1つやっていこう.
まずfirebase-toolsのインストール
npm install -g firebase-tools
次にfirebase initとfirebaes deployしろと出てくるが,その前にログインしないといけない.
もし初回ログインなら,ブラウザが開くと思う.
このコマンドによりローカルマシンが Firebase に接続され,Firebase プロジェクトへのアクセスが許可される.
firebase login
次にfirebase initでfirebaseプロジェクトをフロントエンド側で初期化してdeployするための準備をする.
firebase init
Which Firebase CLI features do you want to set up for this folder? Press Space to select features, then Enter to confirm your choices.のところはFunctionとHostingだけを選択しよう.
Firestoreを選択しないのはもうオンライン上でルールを設定しデプロイしたからだ.
次のところはUse an existing project を選択.
次のところは今回作成しているfirebaseプロジェクトを選択.
次のところはJavaScriptを選択
次のところはnoを選択
次のところはyesを選択
次のところはbuildを選択
次のところはnoを選択
これでセットアップが完了した.アプリにfunctionsファイルができていると思う.ここにCloud Function用のコードを書いてデプロイする.
#シンプルなCloud Fucntionを書いてみる
まずfunctionsフォルダにあるindex.jsにあらかじめ用意されたダミーコードを説いていく.
1行目でモジュールをインポートしている.このモジュールの様々なプロパティを使ってコードを書いていく.
node.jsを書いたことのある人には馴染みやすいコードだと思う.特にexpressを書いたことのある人には.
const functions = require('firebase-functions');

// // Create and Deploy Your First Cloud Functions
// // https://firebase.google.com/docs/functions/write-firebase-functions
//
exports.helloWorld = functions.https.onRequest((request, response) => {
 response.send("Hello, ninjas!");
});
この状態でfunctionsだけをデプロイしてみる.
firebase deploy --only functions
デプロイ後に表示されるURLでCloud Functionが実行できるのでアクセスしてみよう.

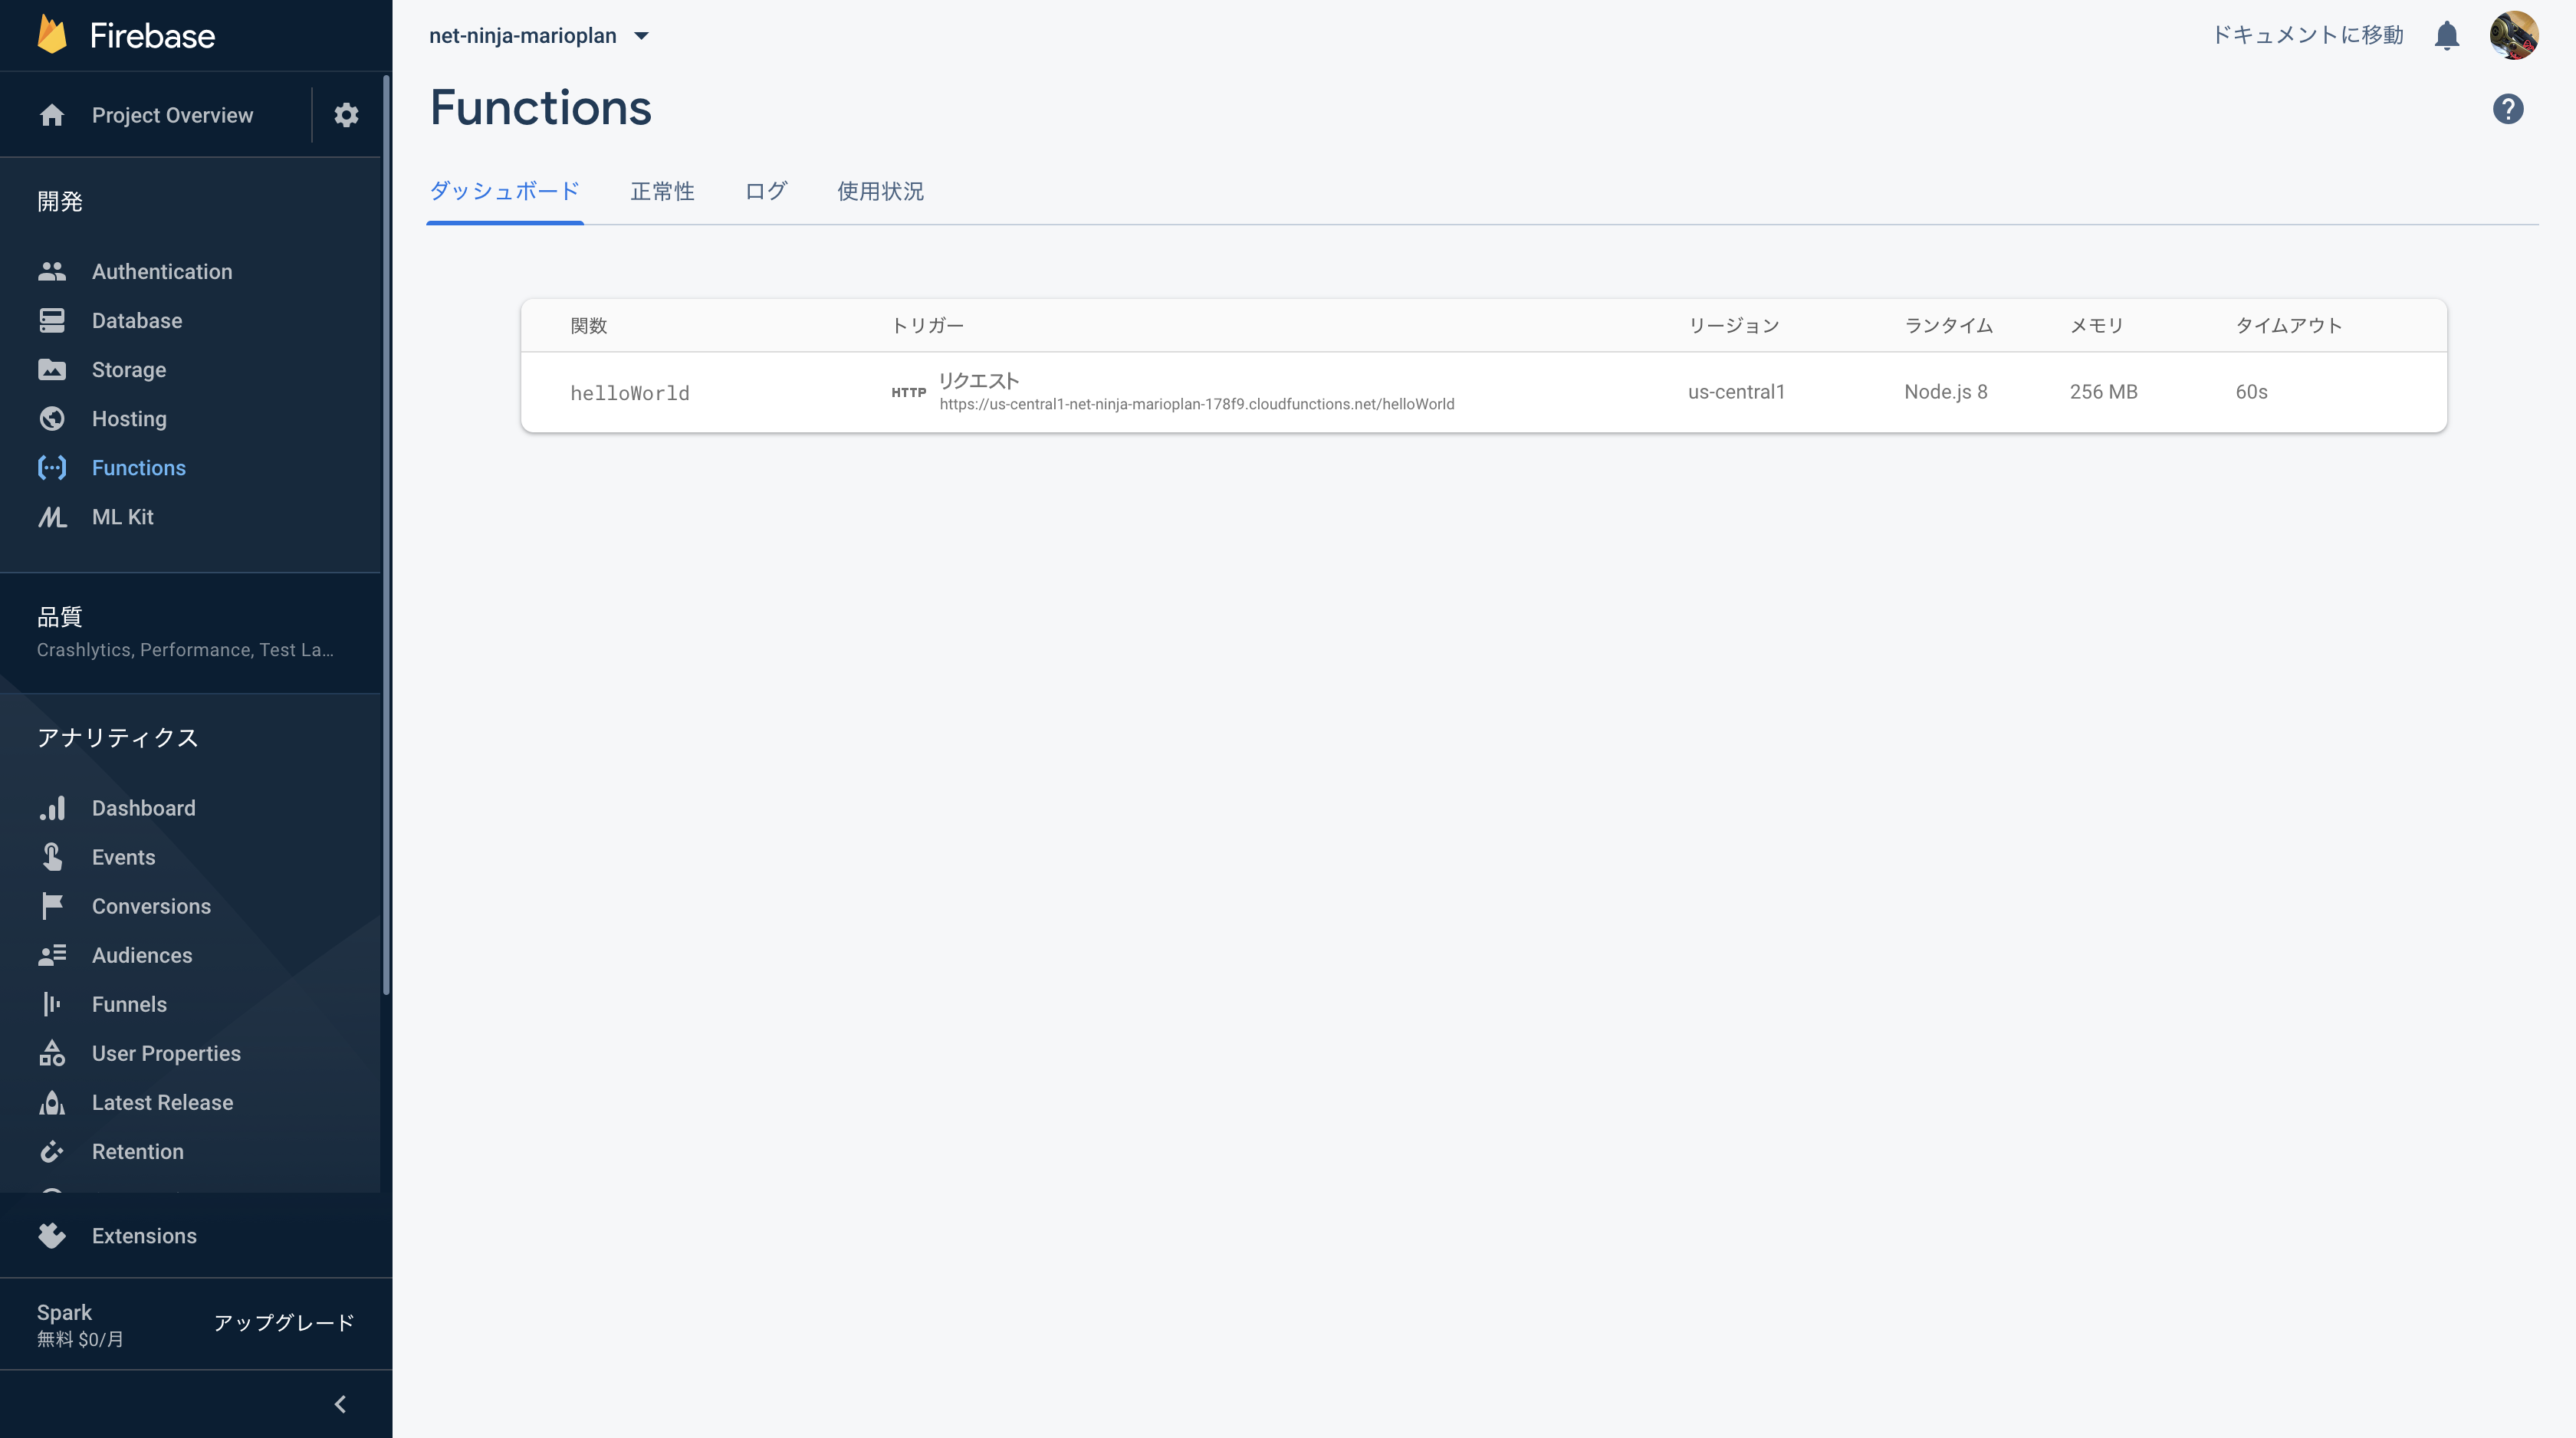
firebaseプロジェクトのfuncionsページでも確認します.
helloWorldという関数がHTTPリクエストをトリガーに実行されることがちゃんと書いてある.
ということでとりあえずCloud Fucntionの基礎がわかったところで次はCloud Functionを使って,Notificationsの実装に取り組んでいきたいと思う.
Notificationsは誰かがサインアップしたりプロジェクトを作ったことをトリガーに通知するパネルのようなものである.
#Notificationコンポネント
具体的に何をトリガーにするかというと,誰かがprojectsコレクションにドキュメントを追加した時か,誰かがFirebase Authenticationを使ってサインアップしたことをトリガーにしたい.
とはいえ現時点でのNotificationコンポネントはあまりに質素すぎるので,Cloud Function云々よりまずコンポネントの外観を作っていこう.
import React from 'react'

const Notification = (props) => {
    return (
        <div className="section">
            <div className="card z-depth-0">
                <div className="card-content">
                    <span className="card-title">Notifications</span>
                    <ul className="notifications">
                        <li>Notification</li>
                        <li>Notification</li>
                        <li>Notification</li>
                        <li>Notification</li>
                    </ul>
                </div>
            </div>
        </div>
    )
}

export default Notification;
これで外観はいい感じなので,次から実際にCloud Funcitonを書いていこうと思う.
#Firestoreのトリガー設定①
Cloud Functionで2つの関数を実装していきたい.
1つはユーザーが新しいプロジェクトを作成した時,2つ目は新しいユーザーがサインアップした時をトリガーにする関数だ.
まずは前者に関する関数を実装していこう.
firebase内で他のサービス(AuthやFirestore)にアクセスするためにはまずfirebase-adminをインポートして初期化する必要がある.
projectCreatedという関数を作成する.
詳しく知りたい人はCloud Functions 公式ドキュメントを参照して欲しいのだが,ここではprojectsコレクションに新しいドキュメントが作られたことをトリガーに設定している.
中では,docというレスポンスを使ってnotificationオブジェクトを作成している.
const functions = require('firebase-functions');
const admin = require('firebase-admin');
admin.initializeApp(functions.config().firebase)

exports.helloWorld = functions.https.onRequest((request, response) => {
 response.send("Hello, ninjas!");
});

exports.projectCreated = functions.firestore
    .document('projects/{projectId}')
    .onCreate(doc => {

        const project = doc.data();
        const notification = {
            content: 'Added a new project',
            user: `${project.authorFirstName} ${project.authorLastName}`,
            time: admin.firestore.FieldValue.serverTimestamp()
        }
})
ここまではトリガーと前処理しか書いていない.
あとはこのnotificationオブジェクトをfirestoreのnotificationsコレクションに追加したい.
そこでnotificationsコレクションにドキュメントを追加する関数を外側に定義してprojectCreatedで呼び出してあげよう.
この関数は単にprojectCreatedで呼び出すだけのものなので,Cloud Functions用の関数の書き方でなく,通常のJS文法でかける.
なお,Cloud Functions用の関数は何かしらのレスポンスが必要なのでreturnする形で関数を呼び出している.
const functions = require('firebase-functions');
const admin = require('firebase-admin');
admin.initializeApp(functions.config().firebase)

exports.helloWorld = functions.https.onRequest((request, response) => {
 response.send("Hello, ninjas!");
});

const createNotification = (notification => {
    return admin.firestore().collection('notifications')
        .add(notification)
        .then(doc => console.log('notification added', doc));
})

exports.projectCreated = functions.firestore
    .document('projects/{projectId}')
    .onCreate(doc => {

        const project = doc.data();
        const notification = {
            content: 'Added a new project',
            user: `${project.authorFirstName} ${project.authorLastName}`,
            time: admin.firestore.FieldValue.serverTimestamp()
        }

        return createNotification(Notification)

})
それではこの関数をデプロイして確認してみよう.
firebase deploy --only functions
 ちゃんとトリガーが起動するかどうか確かめるために新しいプロジェクトを作ってみよう.


#Firestoreのトリガー設定②
次は誰かがサインアップしたことをトリガーにする関数を実装していく.
ここでも詳しい説明はCloud Functions 公式ドキュメントに任せて,概要を説明していく.
新しいユーザーが作られたことをトリガーに.doc(user.uid).get()で作られたユーザーの情報をusersコレクションから取ってきて,データを元にnotificationオブジェクトを作成.それをcreateNotification関数へ渡す.
const functions = require('firebase-functions');
const admin = require('firebase-admin');
admin.initializeApp(functions.config().firebase)

exports.helloWorld = functions.https.onRequest((request, response) => {
 response.send("Hello, ninjas!");
});

const createNotification = (notification => {
    return admin.firestore().collection('notifications')
        .add(notification)
        .then(doc => console.log('notification added', doc));
})

exports.projectCreated = functions.firestore
    .document('projects/{projectId}')
    .onCreate(doc => {

        const project = doc.data();
        const notification = {
            content: 'Added a new project',
            user: `${project.authorFirstName} ${project.authorLastName}`,
            time: admin.firestore.FieldValue.serverTimestamp()
        }

        return createNotification(notification);

})

exports.userJoined = functions.auth.user()
    .onCreate(user => {

        return admin.firestore().collection('users')
            .doc(user.uid).get().then(doc => {

                const newUser = doc.data();
                const notification = {
                    content: 'Joined the party',
                    user: `${newUser.firstName} ${newUser.lastName}`,
                    time: admin.firestore.FieldValue.serverTimestamp()
                }

                return createNotification(notification);

            })

})
先ほどと同じようにデプロイして確認してみよう.
firebase deploy --only functions
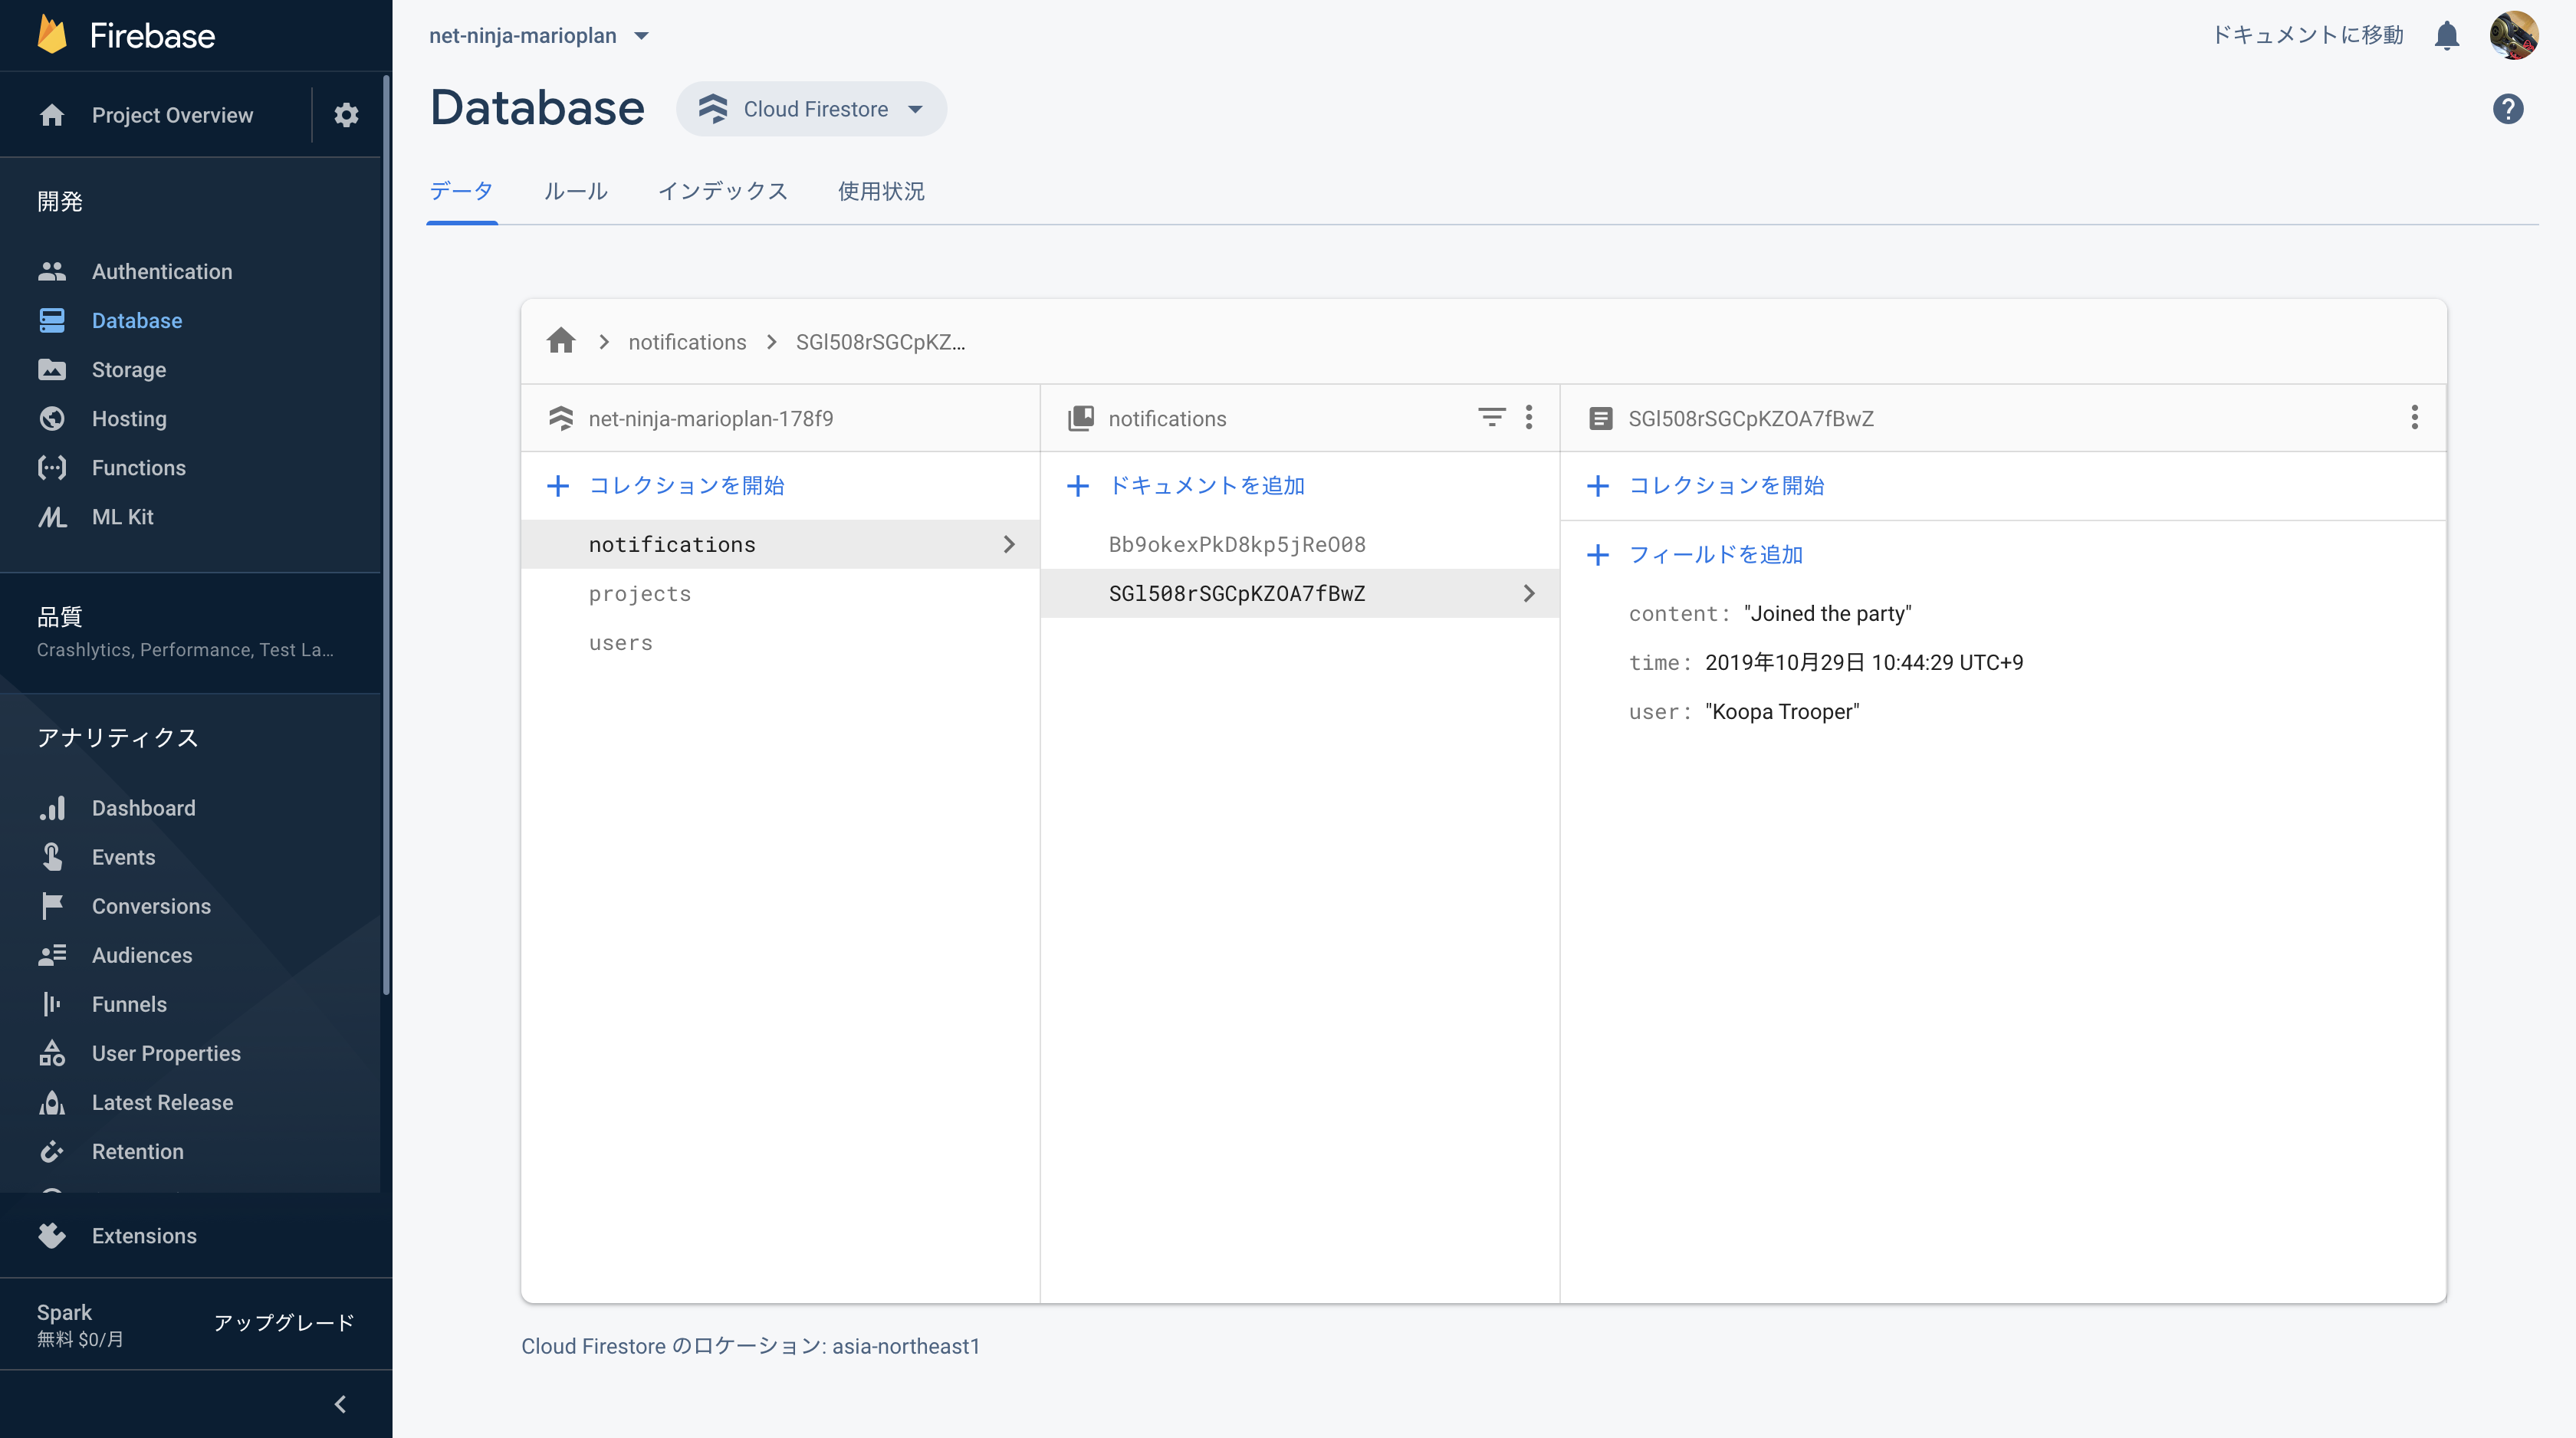
 ユーザーを作ってみて`notifications`コレクションに適切に保存されるか確認しよう.

#Notification表示
あとはnotificationsコレクションのドキュメントを取得してNotificationコンポネントで表示してやろう.
そのためにはこのコンポネントとReduxstateとをconnectしないといけない.
NotificationをラップしているDashboardではすでにつながっているので後はnotificationsコレクションとの同期をするだけだ.
特定の数(3)しか通知を表示したくないのでlimitを3に設定した.
import React, { Component } from 'react'
import Notification from './Notification'
import ProjectList from '../projects/ProjectList'
import { connect } from 'react-redux'
import { firestoreConnect } from 'react-redux-firebase'
import { compose } from 'redux'
import { Redirect } from 'react-router-dom'

class Dashboard extends Component {
    render() {
        const { projects, auth, notifications } = this.props;
        if (!auth.uid) return <Redirect to='/signin' />

        return (
            <div className="dashboard container">
                <div className="row">
                    <div className="col s12 m6">
                        <ProjectList projects={projects} />
                    </div>
                    <div className="col s12 m5 offset-m1">
                        <Notification notifications={notifications} />
                    </div>
                </div>
            </div>
        )
    }
}

const mapStateToProps = (state) => {
    return {
        projects: state.firestore.ordered.projects,
        auth: state.firebase.auth,
        notifications: state.firestore.ordered.notifications
    }
}

export default compose(
    connect(mapStateToProps),
    firestoreConnect([
        { collection: 'projects' },
        { collection: 'notifications', limit: 3 }
    ])
)(Dashboard);
後はNotificationコンポネント側で適切に処理する.
import React from 'react'
import moment from 'moment'

const Notification = (props) => {
    const { notifications } = props;
    return (
        <div className="section">
            <div className="card z-depth-0">
                <div className="card-content">
                    <span className="card-title">Notifications</span>
                    <ul className="notifications">
                        { notifications && notifications.map(item => {
                            return (
                                <li key={item.id}>
                                    <span className="pink-text">{item.user} </span>
                                    <span>{item.content}</span>
                                    <div className="grey-text note-date">
                                        {moment(item.time.toDate()).fromNow()}
                                    </div>
                                </li>
                            )
                        })}
                    </ul>
                </div>
            </div>
        </div>
    )
}

export default Notification;
これでもう終わりに見えるが,実はまだやってないことがある.
notificationsコレクションのセキュリティルールを設定していないのだ.
なのでこの状態ではエラーが出ると思う.
ということでルールを実装していこう.
ログインしているユーザーならいかなるnotificationデータを読めるようにする.そうしないとNotificationコンポネントのところが見れなくなってしまう.
rules_version = '2';
service cloud.firestore {
  match /databases/{database}/documents {
    match /projects/{project} {
      allow read, write: if request.auth.uid != null
    }
    match /users/{useId} {
    	allow create
      allow read: if request.auth.uid != null
    }
    match /notifications/{notification} {
      allow read: if request.auth.uid != null
    }
  }
}
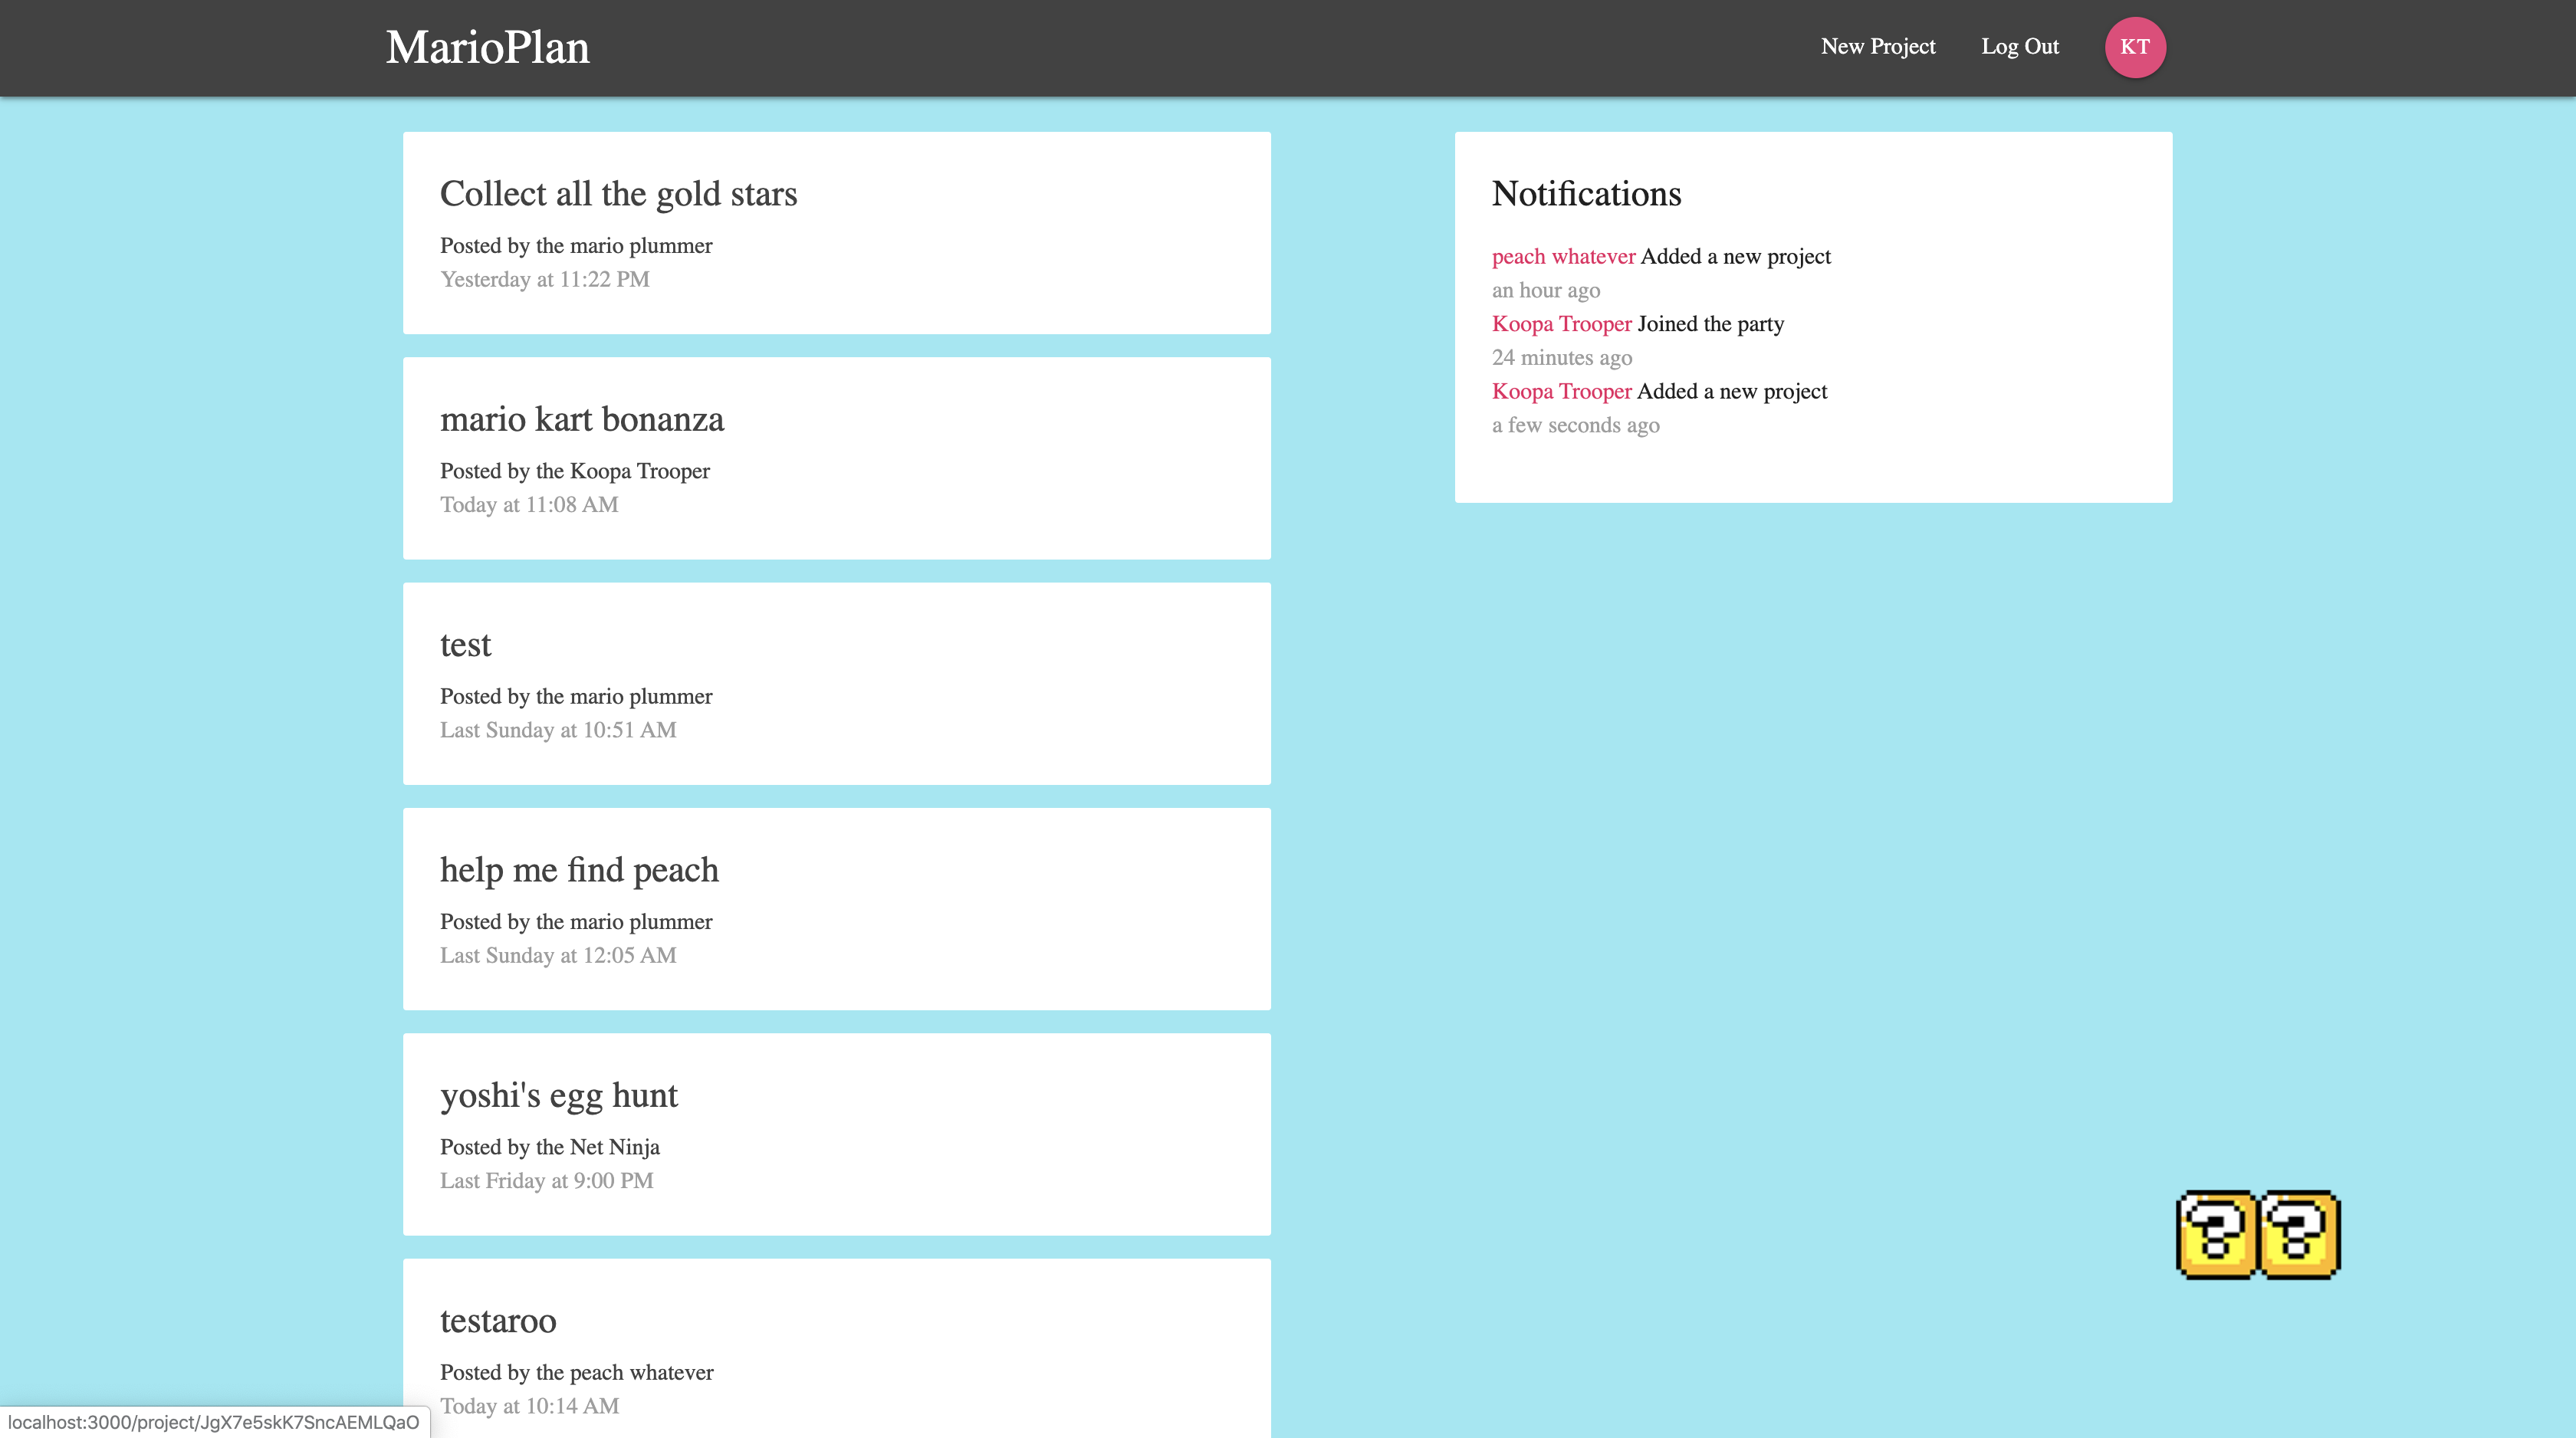
これでうまく表示されるはずだ.新しいプロジェクトを追加してみて数秒後にNotificationの載るかどうか確認してみよう.
#データの順番
実装中に気づいていた人も多いだろう.
今の段階ではProjectListもNotificationもランダムな順番でデータを羅列しているのだ.
プロジェクト一覧はまだしも通知欄がランダムに3つ取ってくるようでは致命的にダメだろう.
今回はその問題を解決していきたいと思う.
方法はめちゃくちゃ簡単だ.
DashboardのfirestoreConnectのところでorderByで基準にしたいプロパティ整列の方向を指定してあげるだけだ.
import React, { Component } from 'react'
import Notification from './Notification'
import ProjectList from '../projects/ProjectList'
import { connect } from 'react-redux'
import { firestoreConnect } from 'react-redux-firebase'
import { compose } from 'redux'
import { Redirect } from 'react-router-dom'

class Dashboard extends Component {
    render() {
        const { projects, auth, notifications } = this.props;
        if (!auth.uid) return <Redirect to='/signin' />

        return (
            <div className="dashboard container">
                <div className="row">
                    <div className="col s12 m6">
                        <ProjectList projects={projects} />
                    </div>
                    <div className="col s12 m5 offset-m1">
                        <Notification notifications={notifications} />
                    </div>
                </div>
            </div>
        )
    }
}

const mapStateToProps = (state) => {
    return {
        projects: state.firestore.ordered.projects,
        auth: state.firebase.auth,
        notifications: state.firestore.ordered.notifications
    }
}

export default compose(
    connect(mapStateToProps),
    firestoreConnect([
        { collection: 'projects', orderBy: ['createdAt', 'desc'] },
        { collection: 'notifications', limit: 3, orderBy: ['time', 'desc'] }
    ])
)(Dashboard);
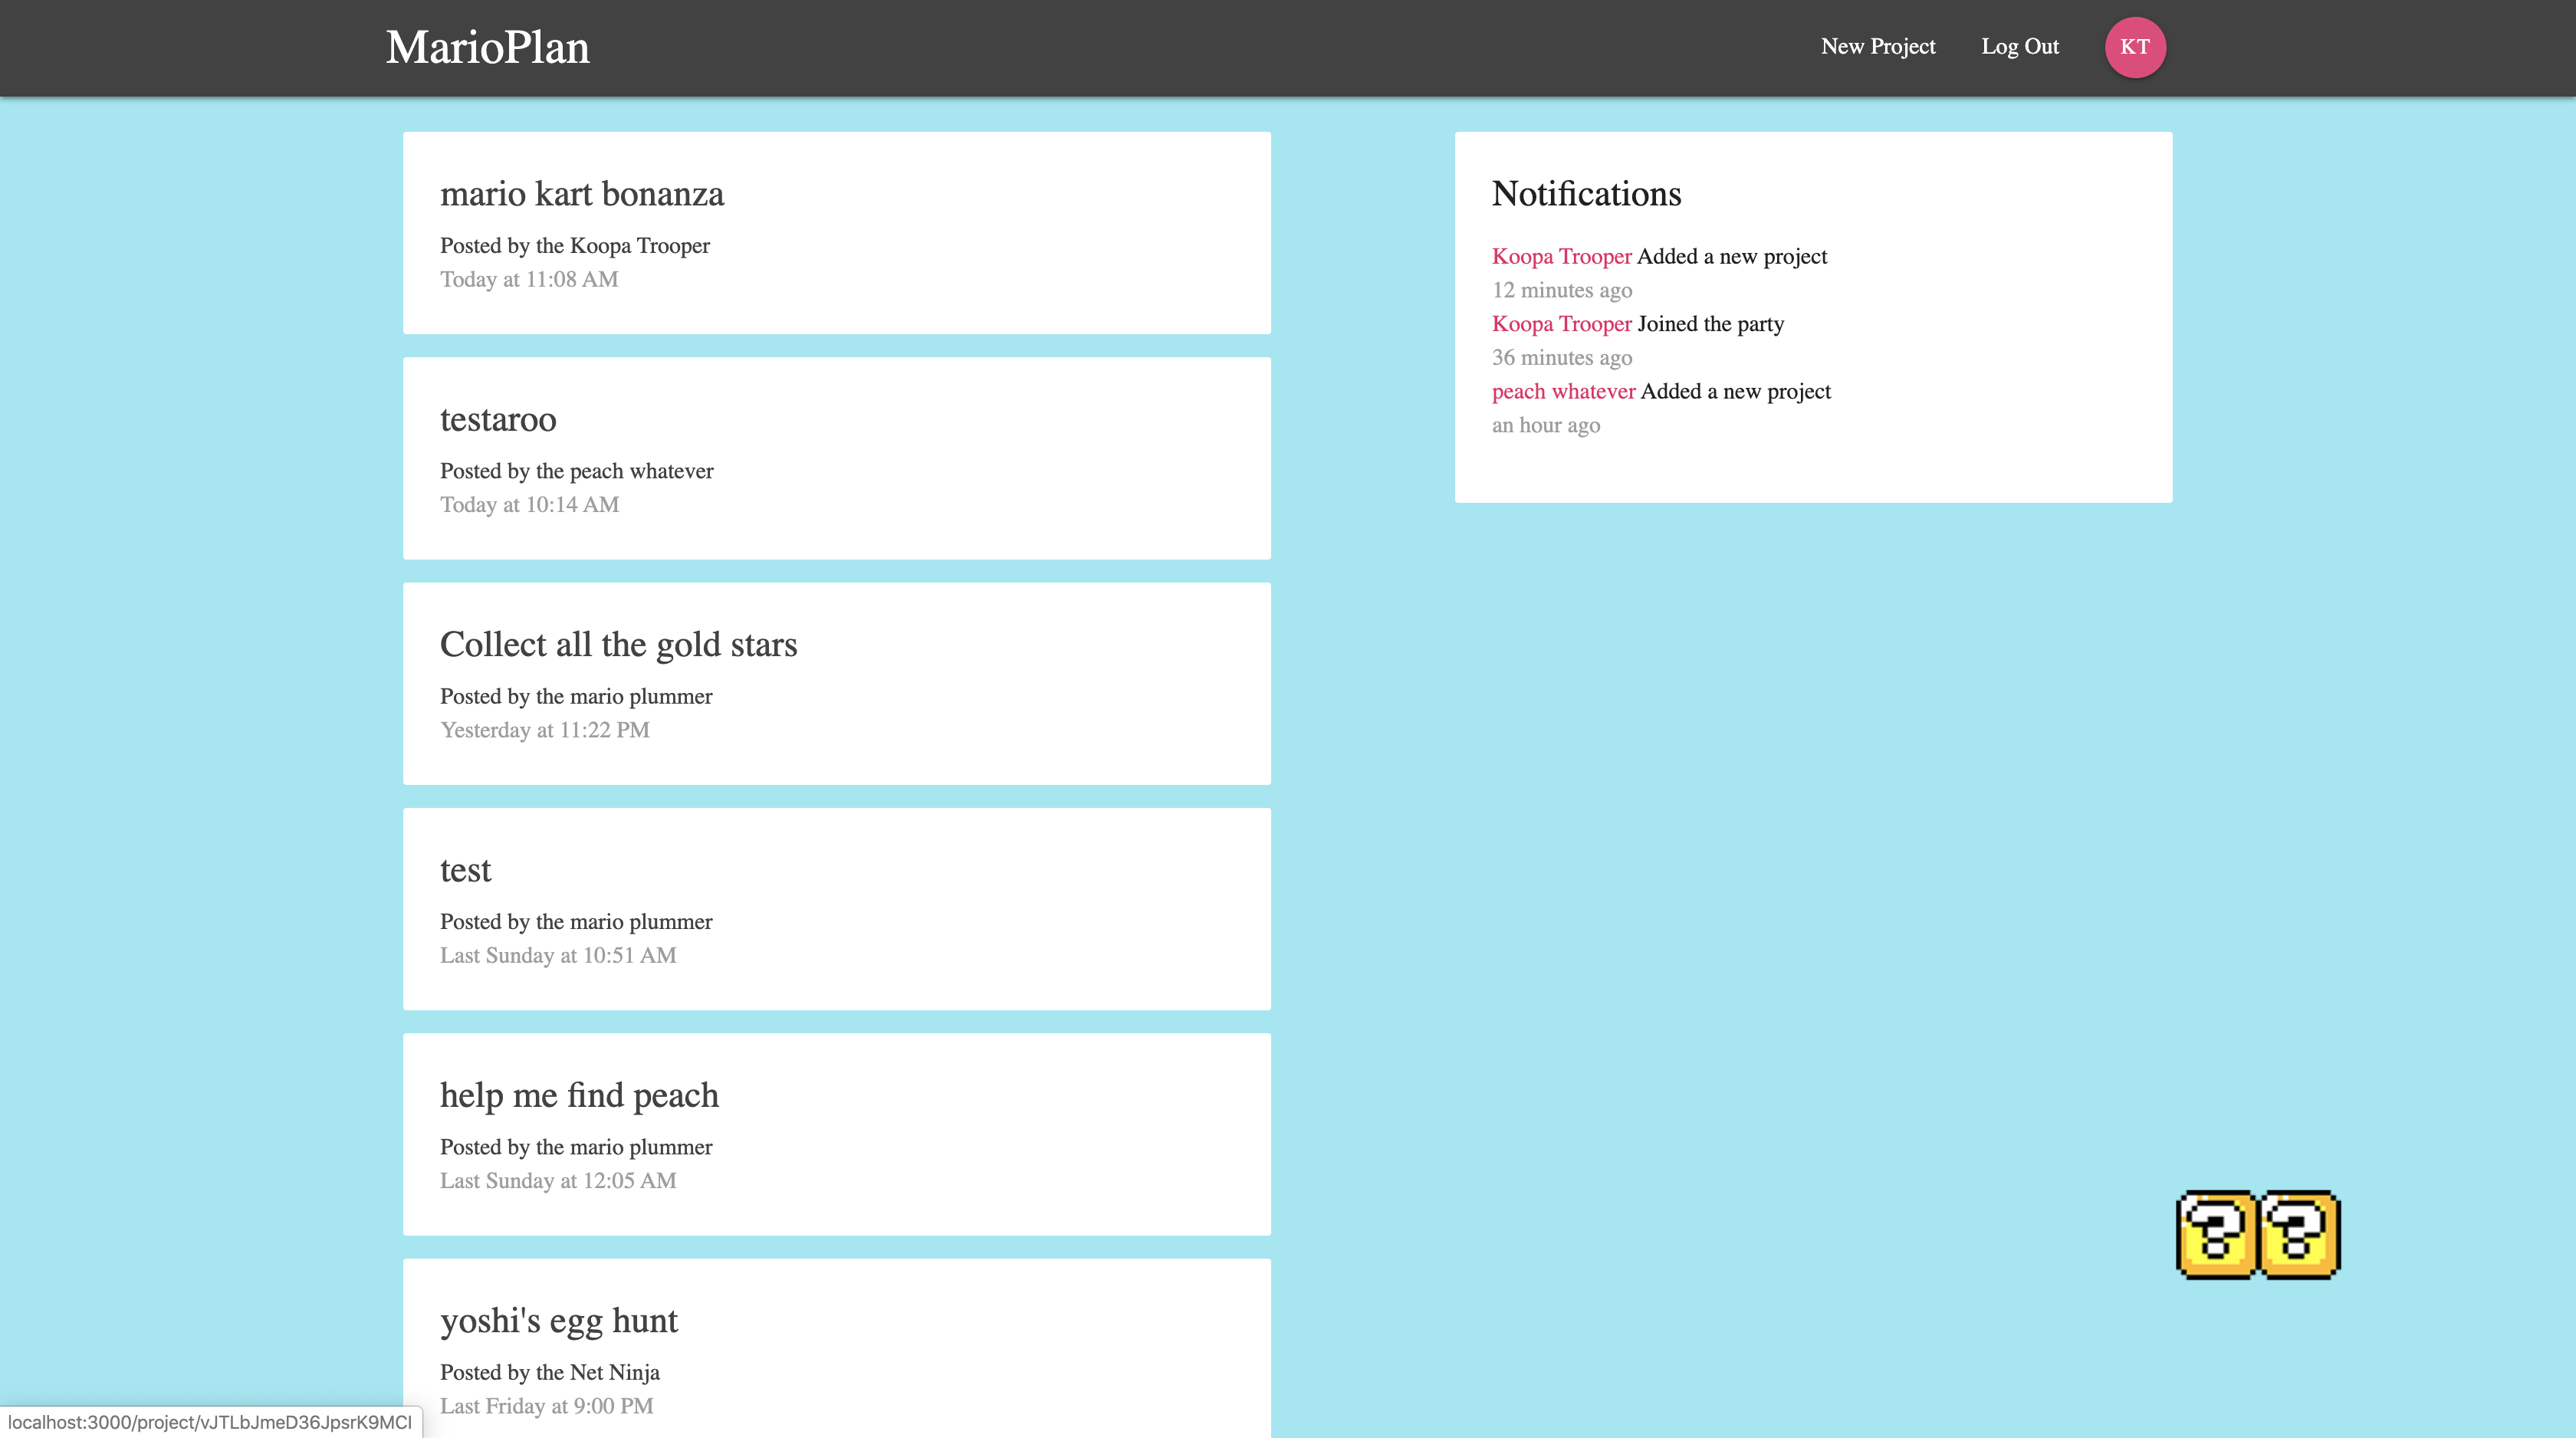
新しいプロジェクトを作ってみて,プロジェクト一覧のトップに表示されるかどうか,通知欄のトップの表示されるかを確認してみよう.
#Firebase Hostingへデプロイ
ついにアプリが完成した.後はFirebase Hostingへアプリをデプロイするだけだ.
まずはFirebase Hostingのセットアップから始めよう.
FirebaseプロジェクトのHostingページへいき,始めるを押して設定を進めていこう.
npm install -g firebase-tools
も
firebase login
も
firebase init
もすでにやっているので後は
firebase deploy
だけなのだが,その前にいくつかやることがある.アプリをビルドしないといけない.
なので以下のコマンドを打っていこう.
npm run build
するとアプリ内にデプロイするためのbuildフォルダが作られる.
よし準備は全て整った!デプロイしよう!
firebase deploy
deploy complete!と出たら君の勝ちだ.
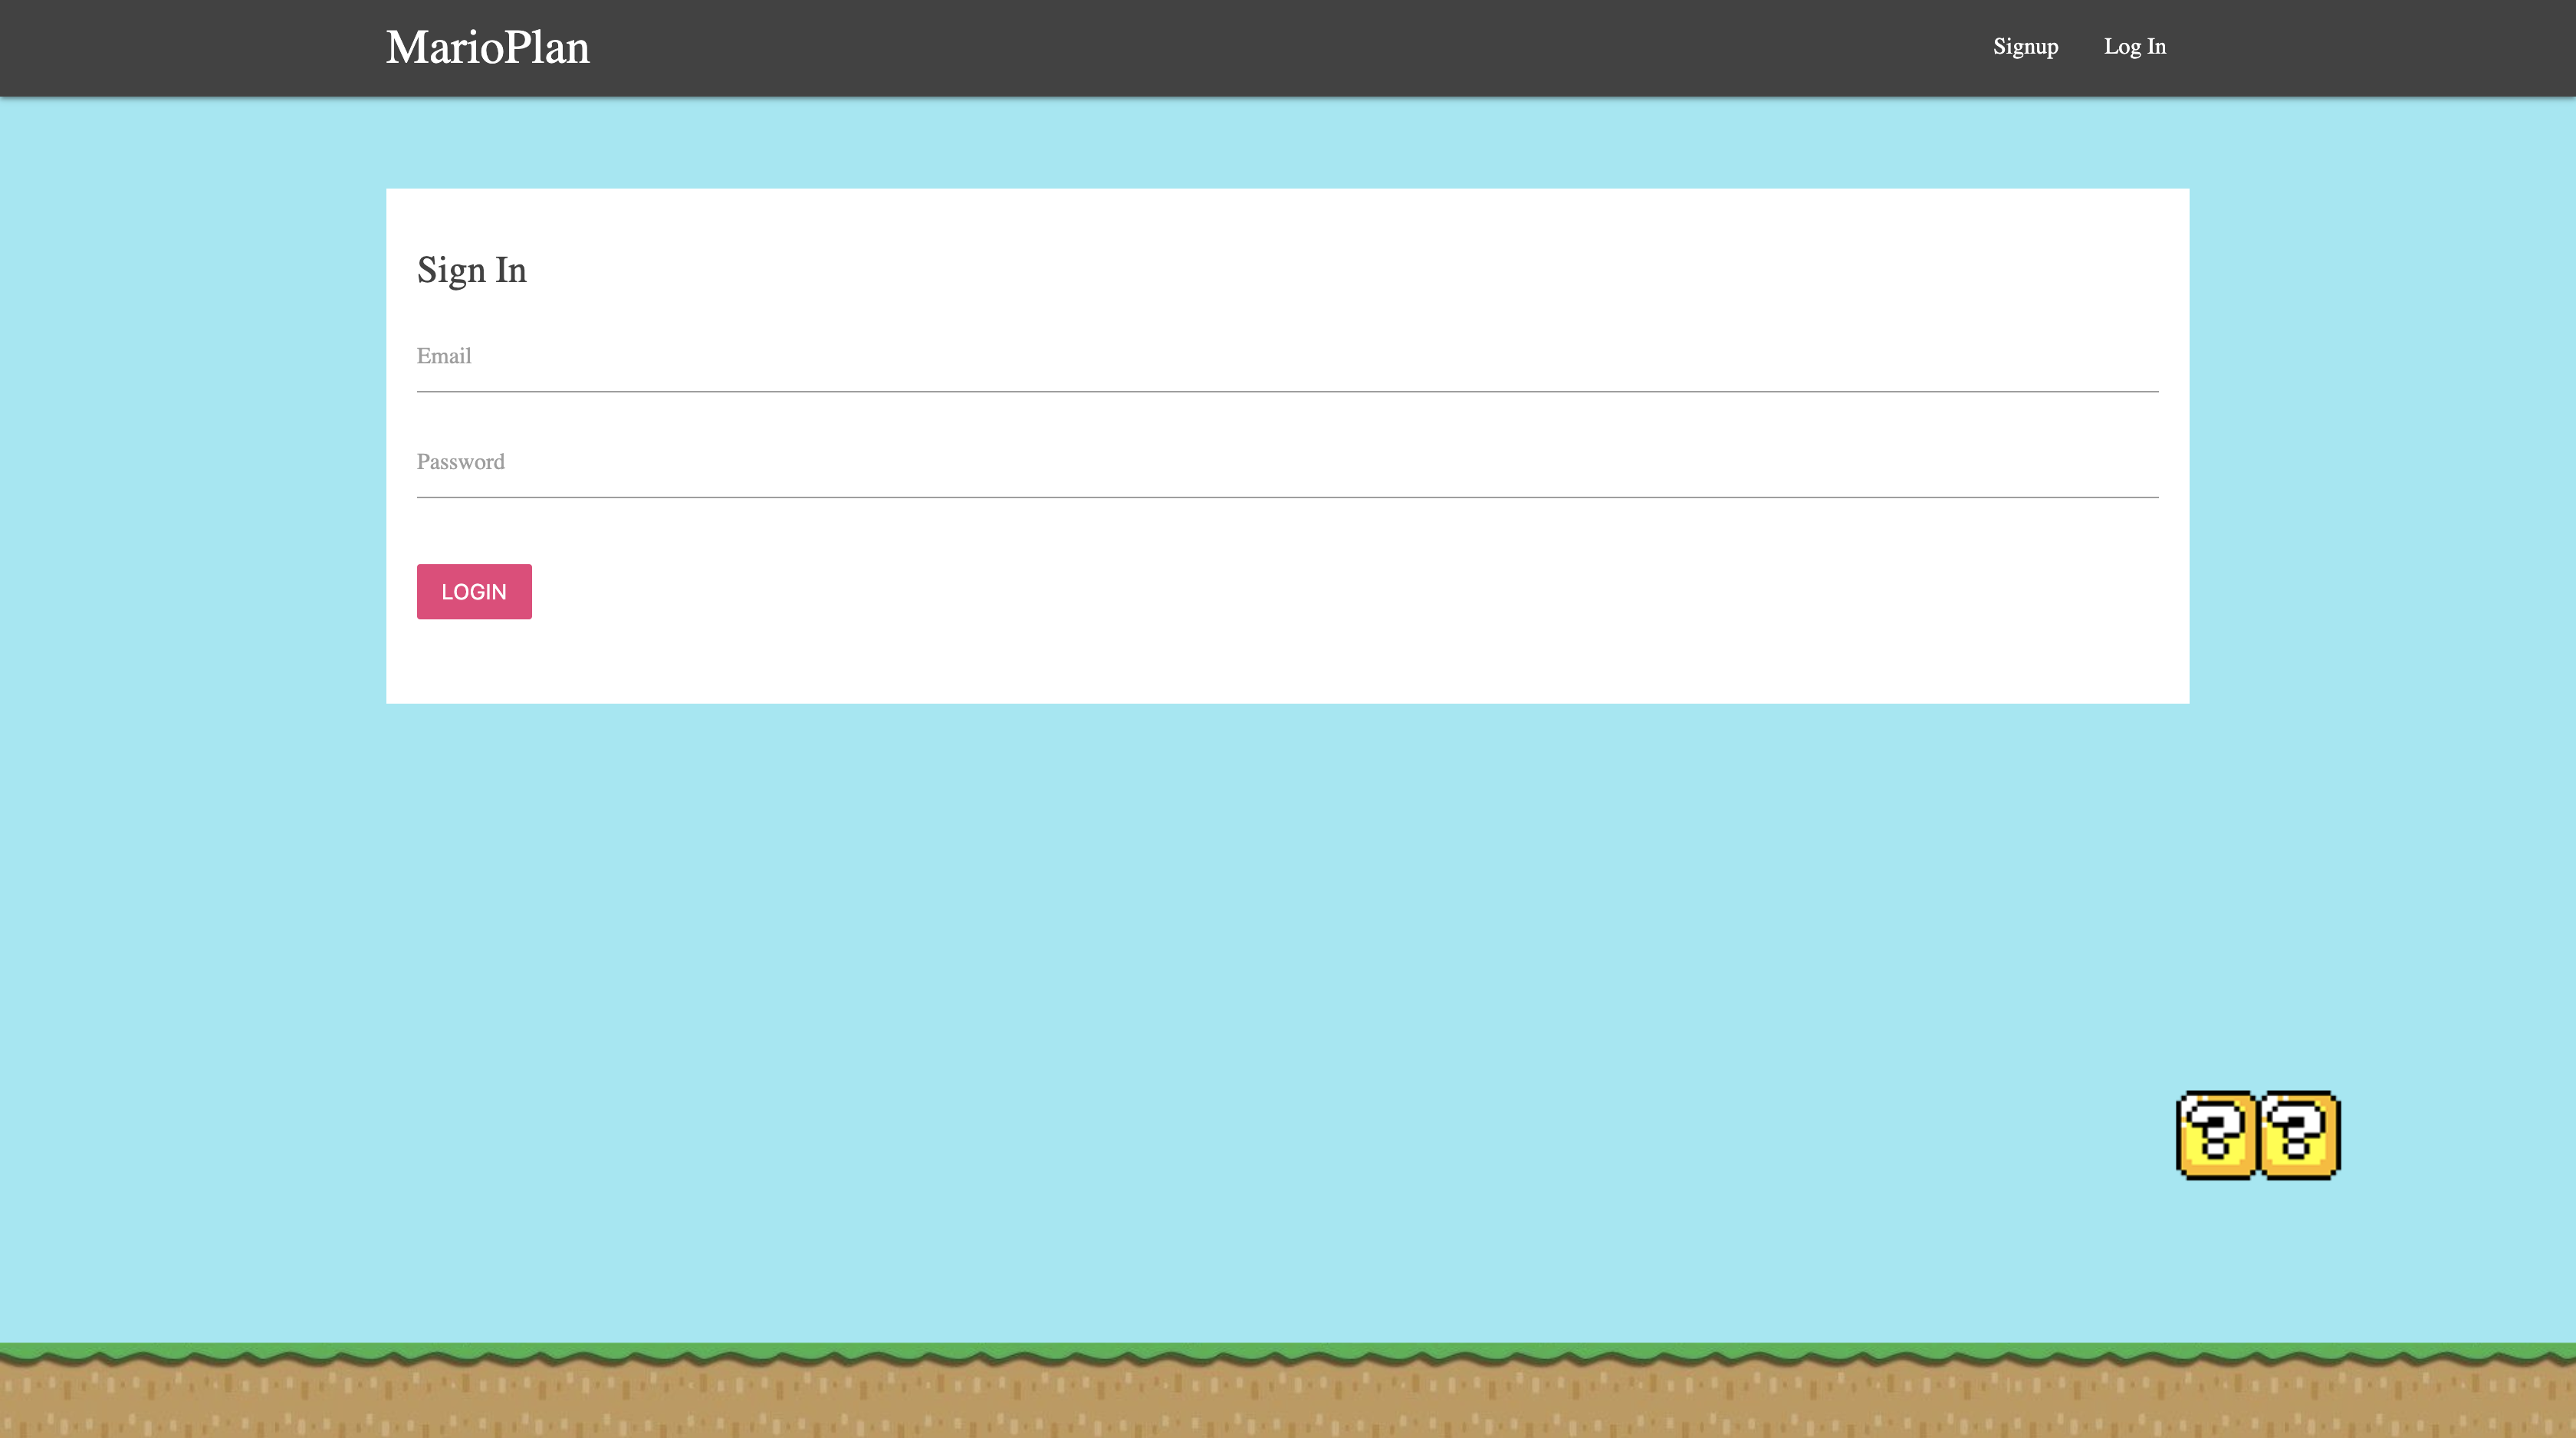
Firebase Hostingページに表示されたURLにアクセスしてリダイレクトされたログイン画面が表示されれば完全勝利だ!
ログインして動作確認してみるといい.
