概要
以下のgemを利用してウィザード形式の入力を行う
GitHub - schneems/wicked: Use wicked to turn your controller into a wizard
ほとんど以下を見ながら作成させてもらいました、ありがとうございます。
Rails5.1でフォームをウィザード化〜wicked | | Scimpr Blog
作成したソースは以下に置いております。
GitHub - mojihige/wicked-example
出来る事
入力画面を分割してウィザード形式で登録することを簡単にできる
出来ない事
step毎に保存される仕様になっているため
途中のstepで保存しないようには出来ない ※1
作成手順
1. install
gemfile に以下を追加
gem 'wicked'
2. usersモデルを作成
scaffoldで作成
rails generate scaffold user email:string password:string zip:string address:string message:string
3. userの登録処理を修正
controllerの修正
登録後に次のSTEPの入力画面に遷移するため #create を以下のように修正
  def create
    @user = User.new(user_params)
    if @user.save
      session[:user_id] = @user.id
      redirect_to user_steps_path
    else
      render :new
    end
  end
4. Viewの修正
最初に入力する項目をemailとpasswordのみにするため
_form.html.erbを以下のように修正
<%= form_with(model: user, local: true) do |form| %>
  <% if user.errors.any? %>
    <div id="error_explanation">
      <h2><%= pluralize(user.errors.count, "error") %> prohibited this user from being saved:</h2>

      <ul>
      <% user.errors.full_messages.each do |message| %>
        <li><%= message %></li>
      <% end %>
      </ul>
    </div>
  <% end %>

  <div class="field">
    <%= form.label :email %>
    <%= form.text_field :email, id: :user_email %>
  </div>

  <div class="field">
    <%= form.label :password %>
    <%= form.text_field :password, id: :user_password %>
  </div>

  <div class="actions">
    <%= form.submit %>
  </div>
<% end %>
5. ウィザードを制御するcontrollerを作成
ウィザード入力をコントロールするcontrollerの修正点は以下の2つ
- routesの修正
- 作成したコントローラーの実装
UserStepsControllerを作成
以下のコマンドを実行してcontrollerを作成(コントローラ名の制約はありません)
rails g controller user_steps
作成したcontrollerの内容を以下のように修正
stepsが入力する順番のキーになります。名前は自由に決められます。
#finish_wizard_pathで登録後の遷移先を変更できます。
class UserStepsController < ApplicationController
  include Wicked::Wizard
  steps :second, :third

  def show
    @user = current_user
    render_wizard
  end

  def update
    @user = current_user
    @user.attributes = user_params
    render_wizard @user
  end

  private

  def finish_wizard_path
    users_path(current_user)
  end

  def current_user
    User.find_by(id: session[:user_id])
  end

  def user_params
    params.require(:user).permit(:email, :password, :zip, :address, :message)
  end
end
routes.rbの修正
以下を追加
resources :user_steps, only: [:index, :show, :update]
6. ウィザードのViewを作成
ウィザード入力に利用するViewを作成する。
作成するときにファイル名を UserStepsController で指定した steps の値と同じにする事。
- second.html.erb
<%= form_with model: @user, url: wizard_path do |form| %>
  <div class="field">
    <%= form.label :zip %>
    <%= form.text_field :zip, id: :user_zip %>
  </div>
  <div class="field">
    <%= form.label :address %>
    <%= form.text_field :address, id: :user_address %>
  </div>
  <div class="actions">
    <%= form.submit %>
  </div>
  <div>
    <%= link_to 'Skip', next_wizard_path %>
  </div>
<% end %>
- third.html.erb
<%= form_with model: @user, url: wizard_path do |form| %>
  <div class="field">
    <%= form.label :message %>
    <%= form.text_field :message, id: :user_message %>
  </div>
  <div class="actions">
    <%= form.submit %>
  </div>
  <div>
    <%= link_to 'Back', previous_wizard_path %>
  </div>
<% end %>
7. 結果
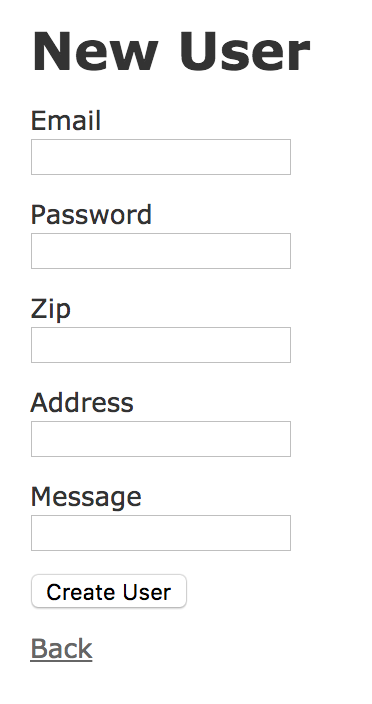
元の入力画面
 #### ウィザード形式になった画面
##### step1
#### ウィザード形式になった画面
##### step1

step2

step3

ちょっと中身を覗いてみる
UserStepsController
include Wicked::Wizard
includeする事で wickedgemの機能が利用できるようになる。
またUserStepsControllerのアクションが実行される前に#setup_wizard が実行される。
def setup_wizard
  check_steps!
  return if params[:id].nil?

  @step = setup_step_from(params[:id])
  set_previous_next(@step)
end
やっていることは主に以下の3つ
- stepsのチェック
include Wicked::Wizardを行うとstepsが必須となる。
stepsを削除するとUndefinedStepsErrorエラーが発生する - 現在のstepの取得
現在のステップはparams[:id]で管理されています - 次のstepの保持
render_wizard
def render_wizard(resource = nil, options = {}, params = {})
  process_resource!(resource)

  if @skip_to
    url_params = (@wicked_redirect_params || {}).merge(params)
    redirect_to wizard_path(@skip_to, url_params), options
  else
    render_step(wizard_value(step), options, params)
  end
end
第一引数のresource(例の場合だと@user)がある場合は#saveを実行して次のstepへ#redirect_toが実行される。
resourceがない場合は現在のstepへ#renderが実行される。
よって#showの場合はresourceがないため現在のstepを表示する。
#updateの場合は入力内容を保存して次のstepへリダイレクトしている。
また次のstepへ行く際は必ず#saveが実行されるので入力した値は保存されながら
次のstepへと遷移する。 ※1
stepはどのようにして保持しているか
次ステップへ移行する場合は最初のinclude Wicked::Wizardで書いてある通り
params[:id]で管理されている。
stepの内容を#setup_wizardで以下のインスタンス変数にセットしている。
-
@step
現在のstepを保持 -
@previous_step
前のstepを保持 -
@next_step
次のstepを保持 -
@skip_to
skip処理をするときに保持(#render_wizardでmodelを保存した時も使用)
View
next_wizard_path、previous_wizard_path
前述のインスタンス変数を利用してパスを生成している。
def next_wizard_path(options = {})
  wizard_path(@next_step, options)
end

def previous_wizard_path(options = {})
  wizard_path(@previous_step, options)
end
ある条件下においてはSTEPをスキップしたい場合
UserStepsControllerの修正
#showに以下のように分岐を追加する。
def show
  @user = current_user
  case step
  when :second
    jump_to :forth, word: 'secondとthirdをスキップしたよ!!!' if @user.zip.present?
  when :third
    skip_step word: 'thirdをスキップしたよ!!!' if @user.zip.blank?
  end
  render_wizard
end
stepで現在のstepが取得できるためそれを基準に分岐を実装する。
分岐以降での使用しているのは以下の2つ
- #jump_to
任意のstepに遷移できる、第1引数にstepsのいずれかの値を渡す。 - #skip_step
次のstepに遷移できる。
いずれも上記のメソッドを呼び出した後に#render_wizardを呼び出すことが必要。
上記の2つのメソッドを呼び出すと@skip_toに値を入れているため#render_wizardにて
指定のstepへ遷移するようになる。
修正したソースはこちらのbranch
GitHub - mojihige/wicked-example at skip-step
まだわかっていない点
※1について
保存しないと次へ進めないと書いていますがrender_wizardにパラメタを渡してそれを
遷移先で保持していけば保存しなくても遷移していけそうですが何か違う気がします。
(そもそもそのような使い方を想定していないと思う)
また調べることがあれば追記します。