まえおき
先日投稿した「実践コンピュータビジョン」の全演習問題をやってみたの詳細です。なお、あくまで「やってみた」であって、模範解答ではありません。「やってみた」だけなので、うまくいかなかった、という結果もあります。
この記事は「実践コンピュータビジョン」(オライリージャパン、Jan Erik Solem著、相川愛三訳)の演習問題に関する記事です。この記事を書いた人間と書籍との間には何の関係もありません。著者のJan氏と訳者の相川氏にはコンピュータビジョンについて学ぶ機会を与えて頂いたことに感謝します。
実践コンピュータビジョンの原書("Programming Computer Vision with Python")の校正前の原稿は著者のJan Erik Solem氏がCreative Commons Licenseの元で公開されています。。
回答中で使用する画像の多く、また、sfm.py, sift.py, stereo.pyなどの教科書中で作られるファイルはこれらのページからダウンロードできます。
オライリージャパンのサポートページ
Jan Erik Solem氏のホームページ
相川愛三氏のホームページ
ここで扱うプログラムはすべてPython2.7上で動作を確認しています。一部の例外を除きほとんどがJupyter上で開発されました。また必要なライブラリーを適宜インストールしておく必要があります。Jupyter以外の点は、上記の書籍で説明されています。
結構な分量なので章毎に記事をアップしています。今回は第10章です。
10章 OpenCV
様々な応用で広く使われているOpenCVについて学びます。実用的な応用に扉が開くことでしょう。
なお、私の環境ではバイナリからインストールしたOpenCVでは動画のキャプチャーがうまく行かず、ソースコードからビルドしました1。
10.6.1 Use optical flow to build a simple gesture recognition system. For example, you could sample the flow as in the plotting function and use these sample vectors as input.
簡単なジェスチャー認識システムを作れ
私の回答
しょっぱなから来ましたざっくり問題。OpenCVの機能を使えば大丈夫でしょう
10.4のオプティカルフローの応用です。次のコマンドでウィンドウが立ち上がり動きが図示されるはずです。
python exercise10.1.py
コンソールには
Right
Right
Down
Right
Left
Up
Left
Right
Right
と動きに合わせて文字が表示されています。
10.6.2 There are two warp functions available in OpenCV, cv2.warpAffine() and cv2.warpPerspective(). Try to use them on some of the examples from Chapter 3.
cv2.warpAffine()とcv2.warpPerspective()を使って、3章のワーピングを実現せよ
私の回答
まずndimageによるものです(抜粋)
from PIL import Image
from numpy import *
from pylab import *
from scipy import ndimage
im = array(Image.open('empire.jpg').convert('L'))
H = array([[1.4, 0.05, -100], [0.05, 1.5, -100], [0, 0, 2]])
im2 = ndimage.affine_transform(im, H[:2, :2], (H[0,2],H[1,2]))
次に、OpenCVのwarpAffineによるもの
import cv2
H4 = inv(H)
H4[:, 2] = H4[:, 2]/H4[2, 2]
im3 = cv2.warpAffine(im.T, H4[:2, :3], im.shape)
次にはめ込みの例をwarpPerspectiveを使ってやってみます
im1 = array(Image.open('cat.jpg').convert('L'))
im2 = array(Image.open('blank_billboard.jpg').convert('L'))
tp = array([[143, 353, 302, 50],[100,30,980,922],[1,1,1,1]])
m, n = im1.shape[:2]
fp = array([[0,m,m,0],[0,0,n,n],[1,1,1,1]])
pts1 = fp.T[:, 1::-1].astype(float32)
pts2 = tp.T[:, 1::-1].astype(float32)
M = cv2.getPerspectiveTransform(pts1, pts2)
im3 = cv2.warpPerspective(im1, M, im2.shape[::-1])
alpha = 1.0*(im3==0)
im4 = im2*alpha + im3
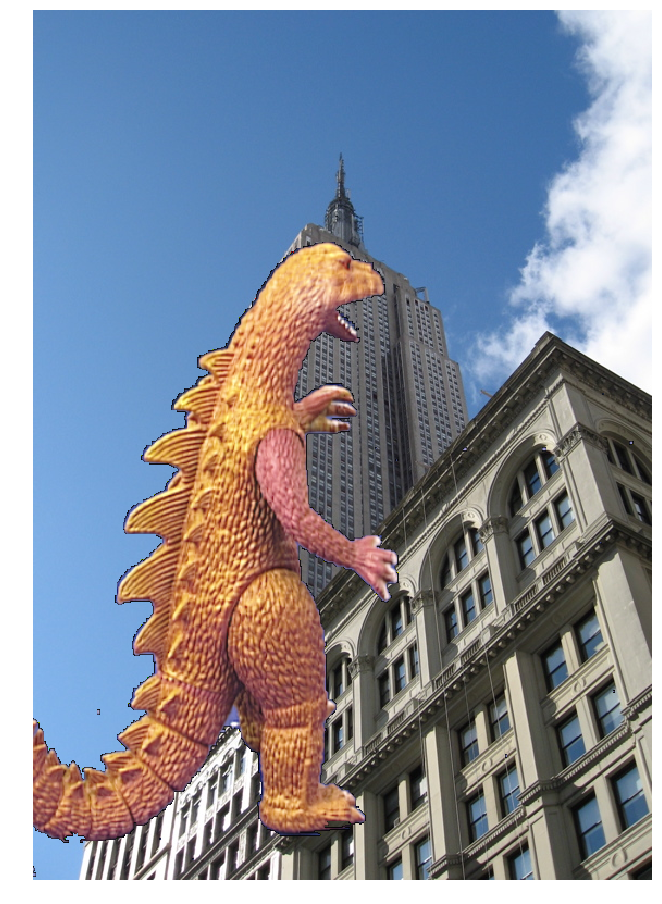
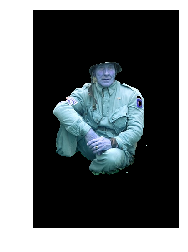
10.6.3 Use the flood fill function to do background subtraction on the Oxford "dinosaur" images used in Figure 10.7. Create new images with the dinosaur placed on a different color background or on a different image.
恐竜画像の背景を塗りつぶしで削除しなさい。また別の画像に合成しなさい。
私の回答
from PIL import Image
from numpy import *
from pylab import *
from scipy import ndimage
import cv2
imname = 'dinosaur/viff.000.ppm'
im = cv2.imread(imname)
figure()
imshow(cv2.cvtColor(im, cv2.COLOR_BGR2RGB))
show()
im = cv2.imread(imname)
h, w, c = im.shape
diff = (12, 12, 12)
mask = zeros((h+2, w+2), uint8)
cv2.floodFill(im, mask, (10, 10), (0, 0, 0), diff, diff)
im[:, :4] = 0
im[:, -4:] = 0
im[:4, :] = 0
im[-4:, :] = 0
figure()
imshow(cv2.cvtColor(im, cv2.COLOR_BGR2RGB))
axis('off')
show()
print im.shape
im2 = cv2.imread('empire.jpg')
M = array([[1.2, 0, -200], [0, 1.2, 200]]).astype(float)
im3 = cv2.warpAffine(im, M, im2.shape[1::-1])
alpha = 1.0*(im3<4)
im4 = im2*alpha + im3
figure(figsize=(16, 16))
imshow(cv2.cvtColor(im4.astype(uint8), cv2.COLOR_BGR2RGB))
axis('off')
show()
できました。輪郭に黒い部分があるのがちょっと気になります。
10.6.4 OpenCV has a function ccv2.findChessboardCorners() which automatically finds the corners of a chessboard pattern. Use this function to get correspondences for calibrating a camera with the function cv2.calibrateCamera().
市松模様のコーナーを見つけるfindChessboardCorners関数とcalibrateCamera関数を使ってキャリブレーションを実装せよ
私の回答
こちらのOpenCVサンプルを参考にしました
http://docs.opencv.org/3.0-beta/doc/py_tutorials/py_calib3d/py_calibration/py_calibration.html
また、市松模様はこちらのものを使いました。
http://opencv.jp/sample/pics/chesspattern_7x10.pdf
まずこんな画像をVideoCapture()関数で取り込みます

といっても、あまり変わってないですね。(ちなみに仕事では専用の大きなドットチャートなどをつかって歪の検出をおこないます)
10.6.5 If you have two cameras, mount them in a stereo rig setting and capture stereo image pairs using cv2.VideoCapture() with different video device ids. Try 0 and 1 for starters. Compute depth maps for some varying scenes.
ステレオ画像をキャプチャして奥行きマップを計算しなさい
私の回答
簡単そうににいいますね。
まず同じ型のUSBカメラを買うところからはじめました。最近はUSBカメラも千円程度で買えるので助かります。クリップ付きのものにして、定規などたいらなものに繋げてなるべく平行にしました。それでも左右の画像は完全には平行にならないので、残りはできるだけ画像処理で中心をあわせました。
なんとか深度マップのようなものが取れていますね。これ以上はカメラの調整を行わないと、やる気になりませんでした。
10.6.6 Use Hu moments with cv2.HuMoments() as features for the sudoku OCR classification problem in Section 8.4 and check the performance.
OCRの特徴量にHuMoments()を使え
私の回答
from numpy import *
from PIL import *
import pickle
from pylab import *
import os
from scipy.misc import *
from matplotlib.pyplot import *
import cv2
import imtools

def compute_feature(im):
    """ Returns a feature vector for an
    ocr image patch. """

    # resize and remove border
    norm_im = imresize(im, (30, 30))
    norm_im = norm_im[3:-3, 3:-3]
    m = cv2.moments(norm_im)
    hu = cv2.HuMoments(m)
    hu = hu

    return hu.flatten()

def load_ocr_data(path):
    """ Return labels and ocr features for all images in path. """

    # create list of all files ending in .jpg
    imlist = [os.path.join(path, f) for f in os.listdir(path) if f.endswith('.jpg')]

    labels = [int(imfile.split('/')[-1][0]) for imfile in imlist]
    features = []
    for imname in imlist:
        im = array(Image.open(imname).convert('L'))
        features.append(compute_feature(im))
    return array(features), labels

from svmutil import *

features, labels = load_ocr_data('sudoku_images/ocr_data/training/')
test_features, test_labels = load_ocr_data('sudoku_images/ocr_data/testing/')
# freatures = array([f/linalg.norm(f) for f in features.T if linalg.norm(f)>0]).T

features = map(list, features)
test_features = map(list, test_features)
prob = svm_problem(labels, features)
param = svm_parameter('-t 0')
m = svm_train(prob, param)

res = svm_predict(labels, features, m)
Accuracy = 30.1632% (425/1409) (classification)
res = svm_predict(test_labels, test_features, m)
Accuracy = 22.3671% (223/997) (classification)
よくありません。何か間違えているんでしょうか。
何にせよOpenCVを使って文字認識をするのなら、他に良い方法があると思います。
10.6.7 OpenCV has an implementation of the Grab Cut segmentation algorithm. Use the function cv2.grabCut() on the Microsoft Research Grab Cut dataset (see Section 9.1). Hopefully you will get better results that the low resolution segmentation in our examples.
マイクロソフトリサーチのGrabCutにcv2.grabCut()を試せ
私の回答
import numpy as np
import cv2
from PIL import Image
from pylab import *
from scipy import ndimage
from matplotlib import pyplot as plt
from scipy.misc import imresize

img = cv2.imread('376043.jpg')
mask = np.zeros(img.shape[:2], np.uint8)
bgdModel = np.zeros((1, 65), np.float64)
fgdModel = np.zeros((1, 65), np.float64)
rect = (10, 56, 255, 400)
cv2.grabCut(img,mask,rect,bgdModel,fgdModel,5,cv2.GC_INIT_WITH_RECT)

mask2 = np.where((mask==2)|(mask==0), 0, 1).astype('uint8')
img2 = img*mask2[:, :, np.newaxis]
newmask = cv2.imread('newmask.png',0)
mask[newmask == 0] = 0
mask[newmask == 255] = 1
mask3, bgdModel, fgdModel = cv2.grabCut(img,mask,None,bgdModel,fgdModel,5,cv2.GC_INIT_WITH_MASK)
mask4 = np.where((mask3==2)|(mask3==0),0,1).astype('uint8')
img4 = img*mask4[:,:,np.newaxis]
おおすごい。さすがOpenCV。9章で苦労したのがウソのようだ
10.6.8 Modify the Lucas-Kanade tracker class to take a video file as input and write a script that tracks points between frames and detects new points every k frames.
Lukas-Kanade法を使ったプログラムを改造して動画ファイルから特徴点を検出しろ
私の回答
内容的には10.4.2のLukas-Kanade法を使ったプログラムと大差ないので割愛します。
これにて『「実践コンピュータビジョン」の全演習問題をやってみた』終了です。おつかれさまでした。
10章
とうとう終わり。OpenCV便利。だけど、環境依存がきびしいね。


