はじめに
gpt4を安価に利用したいと思い、apiを使用する事にしました。
簡単にではありますが、ノートブックからapiを叩くだけでは味気なかったので、
aws-ec2とdiscord-botを用いて最低限の機能だけを実装しています。
どなたかのお役に立てば幸いです。
開発環境
- windows11
- vscode-RemoteSSH
- python=3.9.0
- ec2-ubuntu-t2.micro
制作の流れ
制作が簡単でコストが低い理由として、いくつかのサービスを併用しているという側面があります。
登録は面倒ですが数は多くないので、慣れている人であれば数十分で作れるかと思います。
- ec2インスタンス作成
- パッケージ導入
- OpenAIのapi-key作成
- discord-botの登録
- スクリプトの作成
- 動作確認
1. ec2インスタンス作成
こちらの方の動画を参考にEC2のインスタンスを作成し、Pythonをインストールします。
まだ、vscodeでssh接続をしたことが無い方であれば、以下の拡張機能をインストールしておいてください。
2. パッケージ導入
導入するパッケージは、以下の通りです。
- discord
- openai
3. open-aiの登録
OpenAIのアカウントを作成したら、api-keyを作成して、key文字列をどこかへ保存しておいてください。
sk-****の様な文字列になっていれば正解です。
また、gpt-4を使うために現在はwaitlistへ登録する必要があります。
こちらは許可が下りるまで時間が掛かります。
まだ、登録されていない方は、この後のスクリプトをgpt-3.5-turboへ置き換えることでも動作します。
4. discord-botの登録
botの作成方法は少し変更があったので、一部注意が必要です。
基本的には以下のサイトに沿って作成してください。
変更点は以下にまとめておきます。
一番上の公開設定は自由に変更して頂いて構いません。
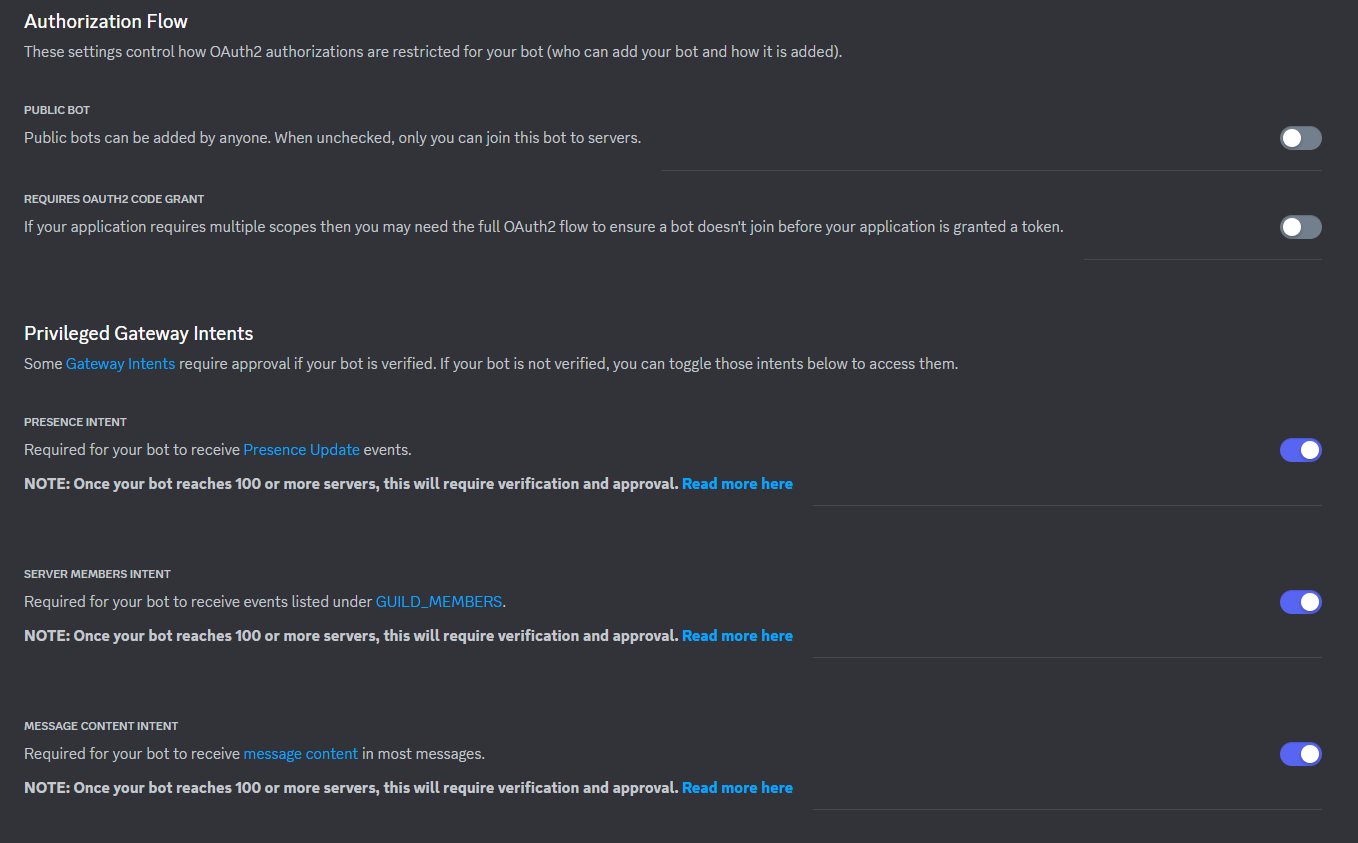
パーミッションには「Read Message History」が含まれるように設定してください。
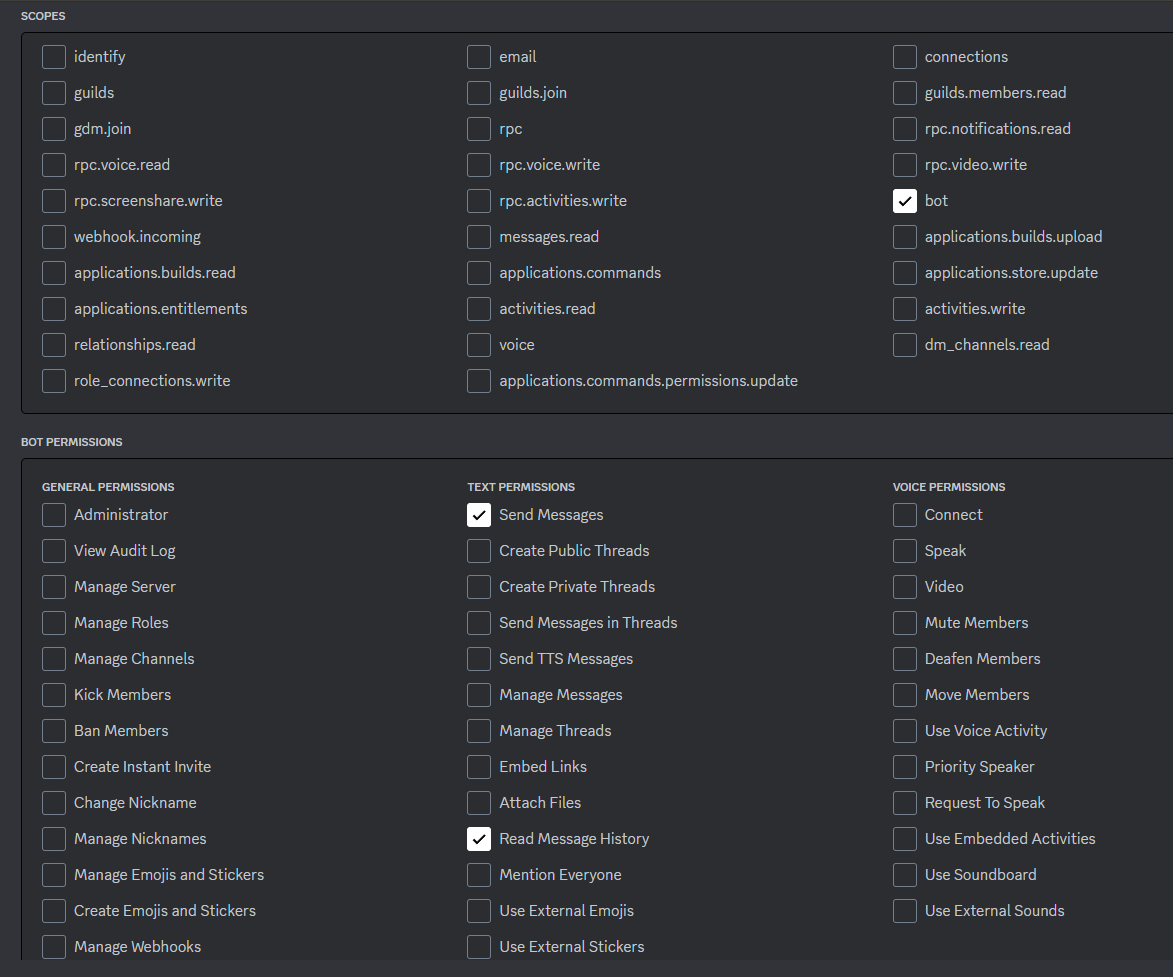
※この段階でGENERATED URLが自動生成されない場合、これまでの設定で間違っている可能性が高いです。
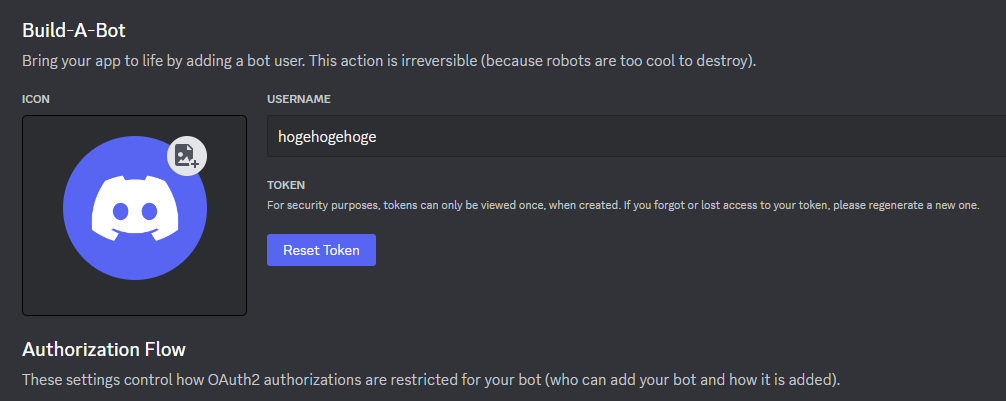
ここでトークンを取得してどこかに保存しておいてください。
hoge.hoge.hogeの様な文字列になっていれば正しいです。
BOTへのDMには必要ありませんが、channelへBOTを追加する場合は、別途channelIDを取得しておいてください。
5. スクリプトの作成
import discord
import openai
import logging
from collections import deque
import asyncio
import json

# Set log level
log_path = "logfile.log"
logging.basicConfig(level=logging.INFO,
                    format='%(asctime)s [%(levelname)s] %(message)s',
                    handlers=[logging.FileHandler(log_path, mode='w'), logging.StreamHandler()])

# Load config
with open('config.json', 'r') as f:
    config = json.load(f)
    MODEL             = config['MODEL'][0]
    OPENAI_API_KEY    = config['OPENAI_API_KEY'][0]
    DISCORD_BOT_TOKEN = config['DISCORD_BOT_TOKEN'][0]
    TARGET_CHANNEL_ID = config['TARGET_CHANNEL_ID'][0]

# Initialize OpenAI API
openai.api_key = OPENAI_API_KEY

# Initialize Discord Client
intents = discord.Intents.default()
client = discord.Client(intents=intents)

# message queue
message_queue = deque()

@client.event
async def on_ready():
    print(f'{client.user} が接続されました')

@client.event
async def on_message(message):
    # Don't reply to yourself
    if message.author.bot:
        return

    # DM or Text Channel
    if isinstance(message.channel, discord.DMChannel): # DM
        message_queue.append((message.content, message.channel))
    else:
        channel = client.get_channel(TARGET_CHANNEL_ID) # Text Channel
        async for message in channel.history(limit=1):
            if message.author.bot:
                return
            message_queue.append((message.content, message.channel))

    # Run message queue
    await process_message_queue()

# Run Discord Client
client.run(DISCORD_BOT_TOKEN)

## Process message queue
async def process_message_queue():
    while True:
        if len(message_queue) > 0:
            message_content, channel = message_queue.popleft()
            response = await process_gpt_response(message_content)
            await channel.send(response)
            # Print log
            logging.info(f"message: {message_content}, response: {response}")
        await asyncio.sleep(1)


# Process GPT response
async def process_gpt_response(message_content):
    response = openai.ChatCompletion.create(
        model=MODEL,
        messages=[
            {'role': 'user', 'content': message_content},
        ]
    )

    if 'choices' in response and len(response['choices']) > 0:
        return response['choices'][0]['message']['content']
    else:
        return "すみませんが、お答えできません。"
{
    "MODEL": [
        "gpt-4",
        "gpt-3.5-turbo"
    ],
    "OPENAI_API_KEY": [
        "your-openai-api-key"
    ],
    "DISCORD_BOT_TOKEN": [
        "your-discord-bot-token"
    ],
    "TARGET_CHANNEL_ID": [
        "your-target-channel-id"
    ]
}
これらを同階層に配置して、script.pyを実行すれば、botが動作します。
6. 動作確認
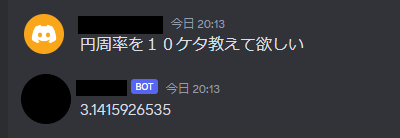
これでひとまず動作が確認できました。
今回、お試しで一か月程使用したたところ、月300円程度でした。
その後、複数人でdiscord上で利用したところ、月900円ほどまで値上がりしています。安く利用するとは?
1回の返信に掛かる処理量(料金)の最大値を決めたり、
メッセージの読み込み幅を変えることもできます。
処理量はパラメータを与えるだけで出来ますが、メッセージをいくつ遡るかについては、
少し処理を変える必要があります。
もっとエレガントに処理したい場合は、awsの他のサービスを組み合わせてみるのも良いかもしれません。
ssh接続を解除してもスクリプトを続行させたい場合は、screenなどを利用すると簡単に実行できます。
なお、セキュリティ設定などについては各自でお願いいたします。
この魂胆がどなたかのお役に立てれば幸いです。