こんにちは。virapture株式会社のもぐめっとです。

弊社のオフィスにはバーがあるのですが夜になるとネオンが光りだしてエロい雰囲気になります。ついつい飲んでしまうようなオフィスです。
最近flutterを書いているのですが、riverpodを使う際のinit処理とか諸々をどうしたもんかと悩んだところ、@hhiroshi_jaにriverpodを使うならviewとcontroller処理をわけて書くといいよの共有をもらったので、メモがてら記載しておきます。
riverpodの基本的な使い方は他記事に投げます。
riverpodを使わない場合の処理
StateのinitState()を使って初期処理を行うような処理を想定します。
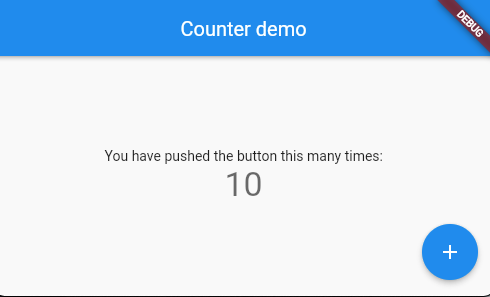
今回のサンプルとしてはみんな大好きカウンターアプリで初期値として10をいれるといったことを想定します。
(実際の使い方でいうとAPIを叩きに行くとか考えられる)
import 'package:flutter/material.dart';

void main() {
  runApp(MyApp());
}

class MyApp extends StatelessWidget {
  // This widget is the root of your application.
  @override
  Widget build(BuildContext context) {
    return MaterialApp(
      title: 'Flutter Demo',
      theme: ThemeData(
        primarySwatch: Colors.blue,
      ),
      home: MyHomePage(title: 'Flutter Demo Home Page'),
    );
  }
}

class MyHomePage extends StatefulWidget {
  MyHomePage({Key? key, required this.title}) : super(key: key);
  final String title;

  @override
  _MyHomePageState createState() => _MyHomePageState();
}

class _MyHomePageState extends State<MyHomePage> {
  int _counter = 0;

  void _incrementCounter() {
    setState(() {
      _counter++;
    });
  }

  @override
  void initState() {
    super.initState();
    setState(() {
      _counter = 10; // 初期化処理!
    });
  }

  @override
  Widget build(BuildContext context) {
    return Scaffold(
      appBar: AppBar(
        title: Text(widget.title),
      ),
      body: Center(
        child: Column(
          mainAxisAlignment: MainAxisAlignment.center,
          children: <Widget>[
            Text(
              'You have pushed the button this many times:',
            ),
            Text(
              '$_counter',
              style: Theme.of(context).textTheme.headline4,
            ),
          ],
        ),
      ),
      floatingActionButton: FloatingActionButton(
        onPressed: _incrementCounter,
        tooltip: 'Increment',
        child: Icon(Icons.add),
      ), // This trailing comma makes auto-formatting nicer for build methods.
    );
  }
}
見事にviewとcontrollerが入り混じったよくあるViewControllerな設計になってます。
riverpodを使ってviewとcontrollerを分ける
riverpodを使う場合は基本的にStatefulWidgetを使わず、StatelessWidgetか、ConsumerWidgetを使って組み込みます。
今回はConsumerWidgetを使ってviewとcontrollerを分けてみます。
/// 動的に表示を変えたいState
class MyHomePageControllerState {
  MyHomePageControllerState({this.counter = 0});
  final int counter;

  /// 値を変えるようのメソッド
  MyHomePageControllerState copyWith({required int counter}) {
    return MyHomePageControllerState(counter: counter);
  }
}

/// コントローラ
class MyHomePageController extends StateNotifier<MyHomePageControllerState> {
  MyHomePageController(): super(MyHomePageControllerState()) {
    state = state.copyWith(counter: 10); // 初期化処理!
  }
  // riverpodで使うproviderはコントローラ用なのでstaticで定義
  static final provider = StateNotifierProvider.autoDispose((ref) => MyHomePageController());

  void incrementCounter() {
    state = state.copyWith(counter: state.counter + 1);
  }
}
void main() {
  runApp(ProviderScope(child: MyApp()));
}

class MyApp extends StatelessWidget {
  // This widget is the root of your application.
  @override
  Widget build(BuildContext context) {
    return MaterialApp(
      title: 'Flutter Demo',
      theme: ThemeData(
        primarySwatch: Colors.blue,
      ),
      home: MyHomePage(),
    );
  }
}

class MyHomePage extends ConsumerWidget {
  MyHomePage({Key? key}) : super(key: key);

  @override
  Widget build(BuildContext context, ScopedReader watch) {
    // 値が変わったら再描画してほしいのでwatchする
    final counter = watch(MyHomePageController.provider).counter;
    // stateの監視ではなく、controllerの処理を呼びたいときに使うのでreadで呼ぶ
    final controller = context.read(MyHomePageController.provider.notifier);
    return Scaffold(
      appBar: AppBar(
        title: Text('Counter demo'),
      ),
      body: Center(
        child: Column(
          mainAxisAlignment: MainAxisAlignment.center,
          children: <Widget>[
            Text(
              'You have pushed the button this many times:',
            ),
            Text(
              '$counter',
              style: Theme
                  .of(context)
                  .textTheme
                  .headline4,
            ),
          ],
        ),
      ),
      floatingActionButton: FloatingActionButton(
        onPressed: controller.incrementCounter,
        tooltip: 'Increment',
        child: Icon(Icons.add),
      ), // This trailing comma makes auto-formatting nicer for build methods.
    );
  }
}
riverpodのStateNotifierを使うことでcontrollerとviewを切り分けすることができるようになりました!
androidのViewBindingと使い方が近い感じがしますね。
ダイアログを表示したい場合
初期化処理でエラーおこったからダイアログ表示したい!けどダイアログはコンテキストが必要・・・どうしよう・・・
と悩んでいる方たちへ。
こちらもstateをうまく使うことで解決できます。
上記記事を参考にWidgetsBinding.instance?.addPostFrameCallbackを使った方法で実装できました。
stateをerrorにも対応できるようにします。
import 'package:flutter_riverpod/flutter_riverpod.dart';

/// 動的に表示を変えたいState
class MyHomePageControllerState {
  MyHomePageControllerState({this.counter = 0, this.exception});
  final int counter;
  final Exception? exception;

  /// 値を変えるようのメソッド
  MyHomePageControllerState copyWith({required int counter, Exception? exception}) {
    return MyHomePageControllerState(counter: counter, exception: exception);
  }
}

/// コントローラ
class MyHomePageController extends StateNotifier<MyHomePageControllerState> {
  MyHomePageController(): super(MyHomePageControllerState()) {
    // 初期化中にエラーが起こってしまった!
    state = state.copyWith(counter: state.counter, exception: Exception('error'));
  }
  // riverpodで使うproviderはコントローラ用なのでstaticで定義
  static final provider = StateNotifierProvider((ref) => MyHomePageController());

  void incrementCounter() {
    state = state.copyWith(counter: state.counter + 1, exception: state.exception);
  }

  void dismissException() {
    state = state.copyWith(counter: state.counter, exception: null);
  }
}
import 'package:flutter/material.dart';
import 'package:flutter_riverpod/flutter_riverpod.dart';
import 'my_home_page_controller.dart';

void main() {
  runApp(ProviderScope(child: MyApp()));
}

class MyApp extends StatelessWidget {
  // This widget is the root of your application.
  @override
  Widget build(BuildContext context) {
    return MaterialApp(
      title: 'Flutter Demo',
      theme: ThemeData(
        primarySwatch: Colors.blue,
      ),
      home: MyHomePage(),
    );
  }
}

class MyHomePage extends ConsumerWidget {
  MyHomePage({Key? key}) : super(key: key);

  @override
  Widget build(BuildContext context, ScopedReader watch) {
    // 値が変わったら再描画してほしいのでwatchする
    final counter = watch(MyHomePageController.provider).counter;
    final exception = watch(MyHomePageController.provider).exception;
    // stateの監視ではなく、controllerの処理を呼びたいときに使うのでreadで呼ぶ
    final controller = context.read(MyHomePageController.provider.notifier);
    showError(context, exception);
    return Scaffold(
      appBar: AppBar(
        title: Text('Counter demo'),
      ),
      body: Center(
        child: Column(
          mainAxisAlignment: MainAxisAlignment.center,
          children: <Widget>[
            Text(
              'You have pushed the button this many times:',
            ),
            Text(
              '$counter',
              style: Theme
                  .of(context)
                  .textTheme
                  .headline4,
            ),
          ],
        ),
      ),
      floatingActionButton: FloatingActionButton(
        onPressed: controller.incrementCounter,
        tooltip: 'Increment',
        child: Icon(Icons.add),
      ), // This trailing comma makes auto-formatting nicer for build methods.
    );
  }

  void showError(BuildContext context, Exception? exception) {
    if (exception == null) {
      return;
    }
    // 直接表示してしまうと、ビルド前にエラーが起きた場合ダイアログが表示できないのでaddPostFrameCallbackをうまく使う
    WidgetsBinding.instance?.addPostFrameCallback((_) {
      showDialog(
          context: context,
          builder: (BuildContext childContext) {
            return AlertDialog(title: Text(exception.toString()));
          });
      // エラーが再表示されないようにエラーを抹消する
      context.read(MyHomePageController.provider.notifier).dismissException();
    });
  }
}
無事表示されました。
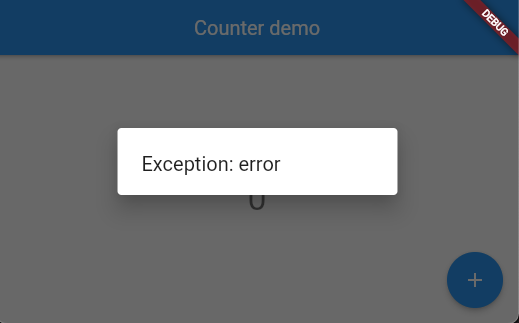
肝になるのはaddPostFrameCallbackになるのですが、コメントにある通り、そのまま表示しちゃうとエラーになるのでビルドが終わったタイミングで表示するようにしています。
  void showError(BuildContext context, Exception? exception) {
    if (exception == null) {
      return;
    }
    // 直接表示してしまうと、ビルド前にエラーが起きた場合ダイアログが表示できないのでaddPostFrameCallbackをうまく使う
    WidgetsBinding.instance?.addPostFrameCallback((_) {
      showDialog(
          context: context,
          builder: (BuildContext childContext) {
            return AlertDialog(title: Text(exception.toString()));
          });
      // エラーが再表示されないように抹消する
      context.read(MyHomePageController.provider.notifier).dismissException();
    });
  }
わからないこと/イケてないところ
紹介した記事では最終的にProviderListenerを使っていましたが、onChangeが初回ビルド時には呼ばれないためうまくダイアログ表示ができませんでした。。。
また、エラー表示後わざわざstateからエラーを削除してるのでStreamとか使ってうまくダイアログ表示できないかなぁとか思ったりもしてます。
もしどなたかもっと良い書き方あったら教えて下さい。
まとめ
riverpodとStateNotifierを使うことで処理の切り分けをすることができました!
ProviderNotifierを使う名称に関してはcontrollerなのか、viewmodelなのか、notifierなのかと色々あるみたいですが、Controllerが良さげな雰囲気も醸し出してます。
また、色々とflutterのいろはを教えてくれた@hhiroshi_jaにspecial thanxでございます。
最後に、ワンナイト人狼オンラインというゲームを作ってます!よかったら遊んでね!
他にもCameconやOffchaといったサービスも作ってるのでよかったら使ってね!
また、チームビルディングや技術顧問、Firebaseの設計やアドバイスといったお話も受け付けてますので御用の方は弊社までお問い合わせください。