こんにちは。virapture株式会社のもぐめっとです。

先日シーサーになりました。シーサーのごとし、怒涛の顔でプロダクトを世に出指定こおうと思いました。
ところで、先日のFirebase Summit 2021でも発表されたFirestore Stripe Paymentsのweb sdkがリリースされたので早速使ってみました。
APIのリファレンスとしては一覧になってます。
これを使ってサンプルを書いてみたので、実際の使い方の説明とともにサンプルを説明いたします。
前提としてstripeとfirebaseの設定は終わっているものとします。
終わってない方は下記を参考に設定しておいてください。
サンプルのゴール
完成品はこちらになります。
今回のサンプルのゴールはClient SDKを使って、商品の表示と購入ができ、
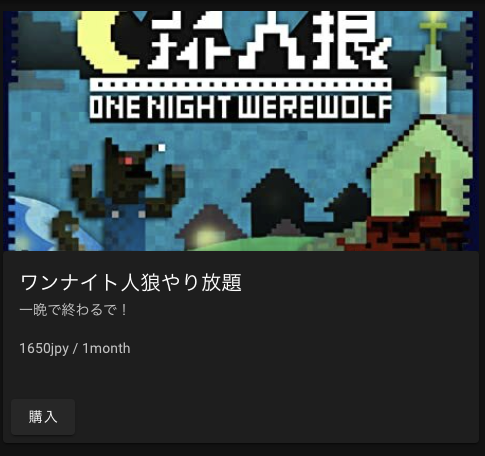
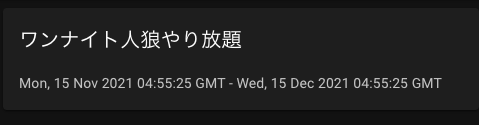
購入した後は購入したサブスクの情報を表示するまでをゴールとします。
できればpure jsでやりたかったのですが、いい感じにnpmにあがっているjsを組み込む方法がわからなかったのでnuxtにしてしまいました。
全体のサンプルコードを掲載しておきます。
<template>
  <v-row>
    <!-- 課金済みは現在課金している情報を表示 -->
    <v-col v-if='this.subscriptions.length > 0'>
      <v-card v-for='subscript in subscriptions' :key='subscript.id'>
        <v-card-title>{{getProductTitle(subscript.product)}}</v-card-title>
        <v-card-text>{{subscript.current_period_start}} - {{subscript.current_period_end}}</v-card-text>
      </v-card>
    </v-col>
    <!-- 商品一覧を表示 -->
    <v-col v-for="product in products" v-else :key="product.id">
      <v-img :src='product.images[0]' height='240' aspect-ratio='3' />
      <v-card :loading='isLoading'>
        <v-card-title>{{product.name}}</v-card-title>
        <v-card-subtitle>{{product.description}}</v-card-subtitle>
        <v-card-text>
          <p>{{product.prices[0].unit_amount}}{{product.prices[0].currency}} / {{product.prices[0].interval_count}}{{product.prices[0].interval}}</p>
        </v-card-text>
        <v-card-actions><v-btn :loading='isLoading' @click='onClickPurchase(product.prices[0].id)'>購入</v-btn></v-card-actions>
      </v-card>
    </v-col>
  </v-row>
</template>

<script lang='ts'>
import {
  createCheckoutSession,
  getProducts,
  onCurrentUserSubscriptionUpdate,
  // eslint-disable-next-line import/named
  Product,
  // eslint-disable-next-line import/named
  Subscription
} from '@stripe/firestore-stripe-payments'
import Vue from 'vue'
import { signInAnonymously } from 'firebase/auth'
import { payments } from '~/stripe'
import { auth } from '~/firebase/firebase'
interface PageStripeData {
  products: Product[],
  subscriptions: Subscription[],
  isLoading: boolean
}
export default Vue.extend({
  name: 'Stripe',
  data(): PageStripeData {
    return {
      products: [] as Product[],
      subscriptions: [] as Subscription[],
      isLoading: false
    }
  },
  async created() {
    await signInAnonymously(auth)
    // 商品一覧を取得
    const products = await getProducts(payments, {
      includePrices: true,
      activeOnly: true,
    })
    this.products = products
    // 既に課金済みであればサブスク情報をセットする
    onCurrentUserSubscriptionUpdate(payments, snapshot => {
      this.subscriptions = snapshot.changes.map(value => value.subscription)
    })
  },
  methods: {
    /// サブスク購入処理
    async onClickPurchase(priceId: string): Promise<void> {
      this.isLoading = true
      try {
        const session = await createCheckoutSession(payments, {
          price: priceId,
          success_url: window.location.origin,
          cancel_url: window.location.origin
        })
        window.location.assign(session.url)
      } catch (error) {
        alert(error)
      } finally {
        this.isLoading = false
      }
    },
    /// 商品名を返す
    getProductTitle(productId: string): string {
      return this.products.find(product => product.id === productId)?.name ?? ''
    }
  }
})
</script>
ソースコード解説
web sdkを使っている箇所としては、初期化、商品の取得、サブスク購入処理、サブスク情報取得の4つになります。
初期化
import { getStripePayments } from '@stripe/firestore-stripe-payments'
import { app } from '~/firebase/firebase'

export const payments = getStripePayments(app, {
  productsCollection: "products",
  customersCollection: "customers",
});
getStripePaymentsメソッドにfirebaseを渡してあげることで初期化されます。
productsCollectionとcustomersCollectionはExtensionで設定した時のfirestoreのcollection pathを入れておきます。
以降はことあるごとにこのpaymentsを一緒に渡すことでstripeの処理を行いますので、どこからでも呼び出せるようにしておくといいと思います。
商品の取得
ココからはすべて下記ファイルの説明になります。
    const products = await getProducts(payments, {
      includePrices: true,
      activeOnly: true,
    })
たったこれだけで今有効化状態の商品一覧を取得できます。
とってもシンプルにかけますね。
他にもwhereで条件を絞ることもできるみたいです。
const products = await getProducts(payments, {
  includePrices: true,
  activeOnly: true,
  where: [
    ["metadata.type", "==", "books"],
    ["metadata.rating", ">=", 4],
  ],
  limit: 10,
});
サブスク購入処理
        const session = await createCheckoutSession(payments, {
          price: priceId, // productに紐付いているpriceIdを指定する
          success_url: window.location.origin, // 購入成功先のURL
          cancel_url: window.location.origin // 購入キャンセル先のURL
        })
        window.location.assign(session.url)
createCheckoutSessionでセッション情報を取得してstripeのページに遷移します。
たったこれだけです!!!
pure jsだとfirestoreに書き込みされるのを待ったりとかしないといけないのでココが一番web sdkの恩恵をうけますね。
サブスク情報取得
    onCurrentUserSubscriptionUpdate(payments, snapshot => {
      this.subscriptions = snapshot.changes.map(value => value.subscription)
    })
onCurrentUserSubscriptionUpdateメソッドを使うことでsubscriptionの購入状況によってリアルタイムに変更を受け取ることができます。
changesの中にはそれぞれsubscriptionとtypeがあって、typeは"added" | "modified" | "removed"の3つの状態を振り分けることができます。
これを見ておけばサブスクを購入しているかどうかがすぐ丸わかりです。
簡単ですね。
まとめ
getStripePayments, getProducts, createCheckoutSession, onCurrentUserSubscriptionUpdateのメソッドを使うことでより簡単にwebでのサブスク課金が実装できるようになりました!
pure jsのサンプルをみると、結構入り組んだ実装だったので振り返ると大分楽ができていい感じですね。
年々課金実装が気軽にできるようになってきているのでどんどん課金を実装していきましょう!!
最後に、ワンナイト人狼オンラインというゲームを作ってます!よかったら遊んでね!
他にもCameconやOffchaといったサービスも作ってるのでよかったら使ってね!
また、チームビルディングや技術顧問、Firebaseの設計やアドバイスといったお話も受け付けてますので御用の方は弊社までお問い合わせください。