今回は 「Spring Boot 初心者で、尚且つ Google App Engine(PaaS)も触ったことがないけど、とりあえず自家製 API を公開するまでの手順が知りたいという人」向けに、 Spring Initializr で作成したプロジェクトを App Engine にデプロイして動作確認をするまでの入門講座を行いたいと思います。
1. プロジェクトの作成
早速、プロジェクトの作成手順について説明をしていきます。プロジェクトの作成手順ですが、Spring Boot の公式が Spring Boot プロジェクトの生成ツール(SpringInitilizr)を公開しているので、Spring Initilizrにアクセスし、以下のように設定を行い Generate ボタンをクリックし、プロジェクトの作成を行って下さい。

2. IntelliJ IDEA で生成したプロジェクトを読み込む
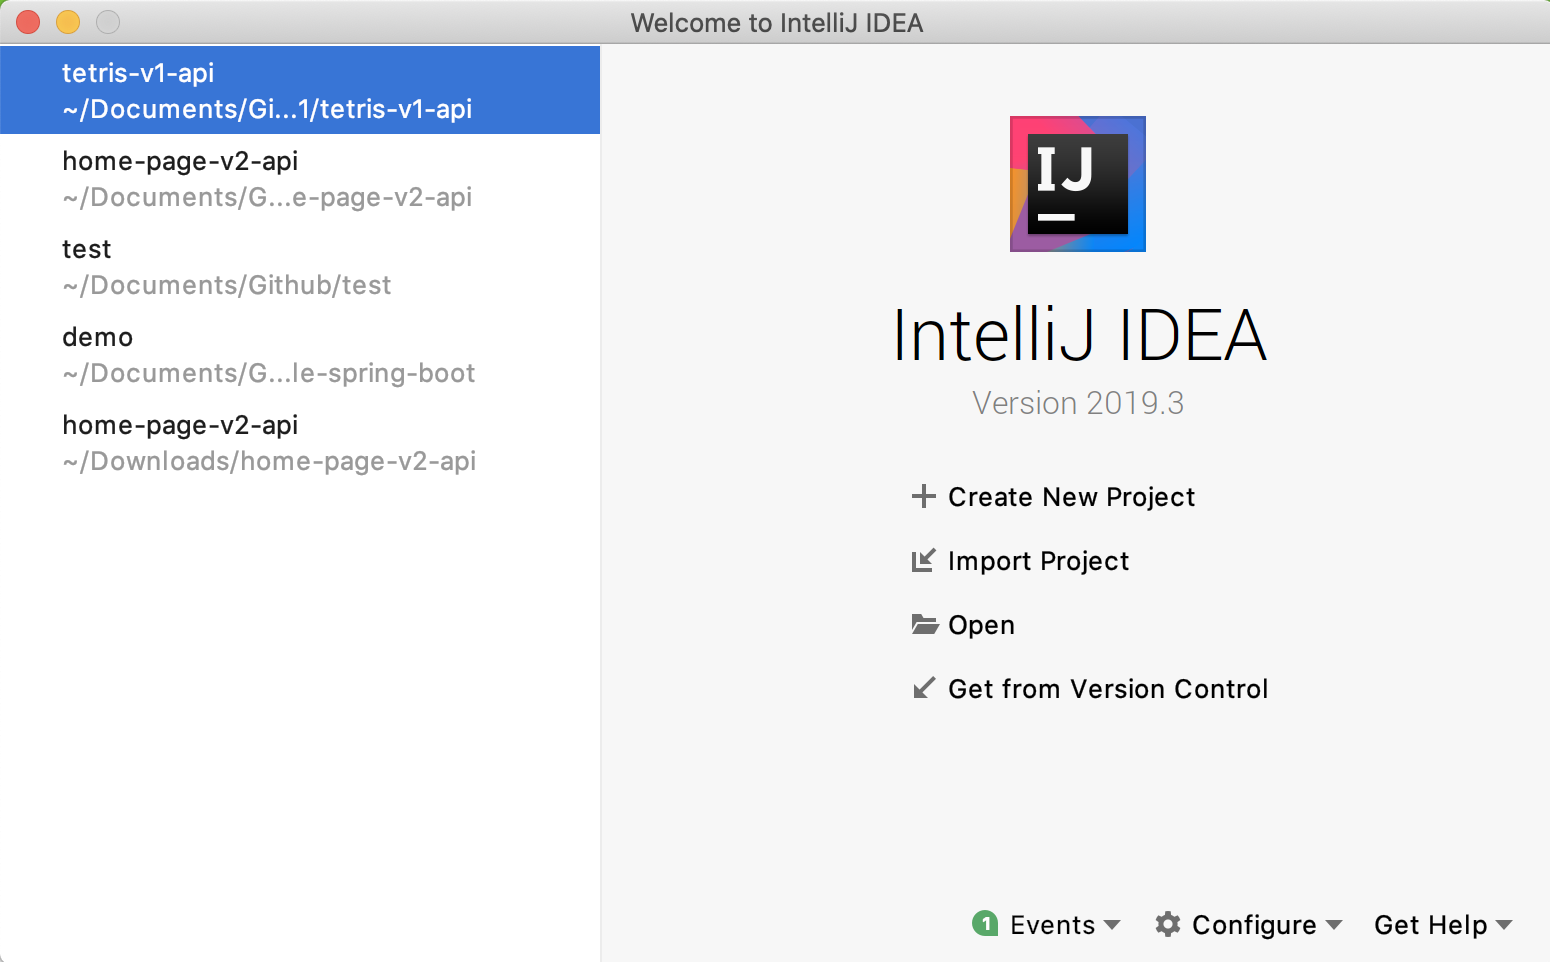
本記事では、IntelliJ IDEA のコミュニティエディションを使用して、API を実装していきます。そのため、IntelliJ IDEA で先ほど生成したプロジェクトを読み込む手順を説明していきます。まず、IntelliJ IDEA を起動した時に最初に表示される画面の import project ボタンをクリックすると画面が遷移し、プロジェクトの読み込み設定を確認されるので、設定が import project from external model で gradle となっていることを確認したら、Finish ボタンをクリックしてプロジェクトの読み込みを行います。
3. プロジェクトの初期設定
読み込みが終わったら、~/Documents/simple-v1-api/src/main/resources の中にある application.properties を rename して application.yml に変え、中身を以下の様に設定します。(ちなみに公開されるポート番号の設定を行っています。)
server:
  port: 8080
4. APIの実装
本記事では、http://localhost:8080/v1/api/test にアクセスされたときに、 JSON 形式のオブジェクトを返す簡単な API を実装していきます。APIの実装にあたり、本記事の目的を改めて整理させていただくと、 Spring Boot プロジェクトを作成し、Google App Engine に API をデプロイするまでの流れを説明する事が本記事の目的となります。そのため、Spring Boot の詳しい実装方法は他のサイトに譲り(つまりデータアクセスロジックを持たせる Repository や ビジネスロジックを持たせる Service 等は実装せずに)、ユーザからのアクセスを受け取る Controller のみを実装します。
package tokyo.masayuki.simplev1api

import org.springframework.web.bind.annotation.GetMapping
import org.springframework.web.bind.annotation.RequestMapping
import org.springframework.web.bind.annotation.RestController

@RestController
@RequestMapping("/v1/api")
class SimpleController {
    @GetMapping("/test")
    fun getSimple(): SimpleResponse {
        return SimpleResponse("test response")
    }
}
package tokyo.masayuki.simplev1api

class SimpleResponse(val test: String)

5. ローカル環境で実行
実行した後に http://localhost:8080/v1/api/test にアクセスすると、以下の様なJSON形式の Response を取得出来ていることが確認出来ます。
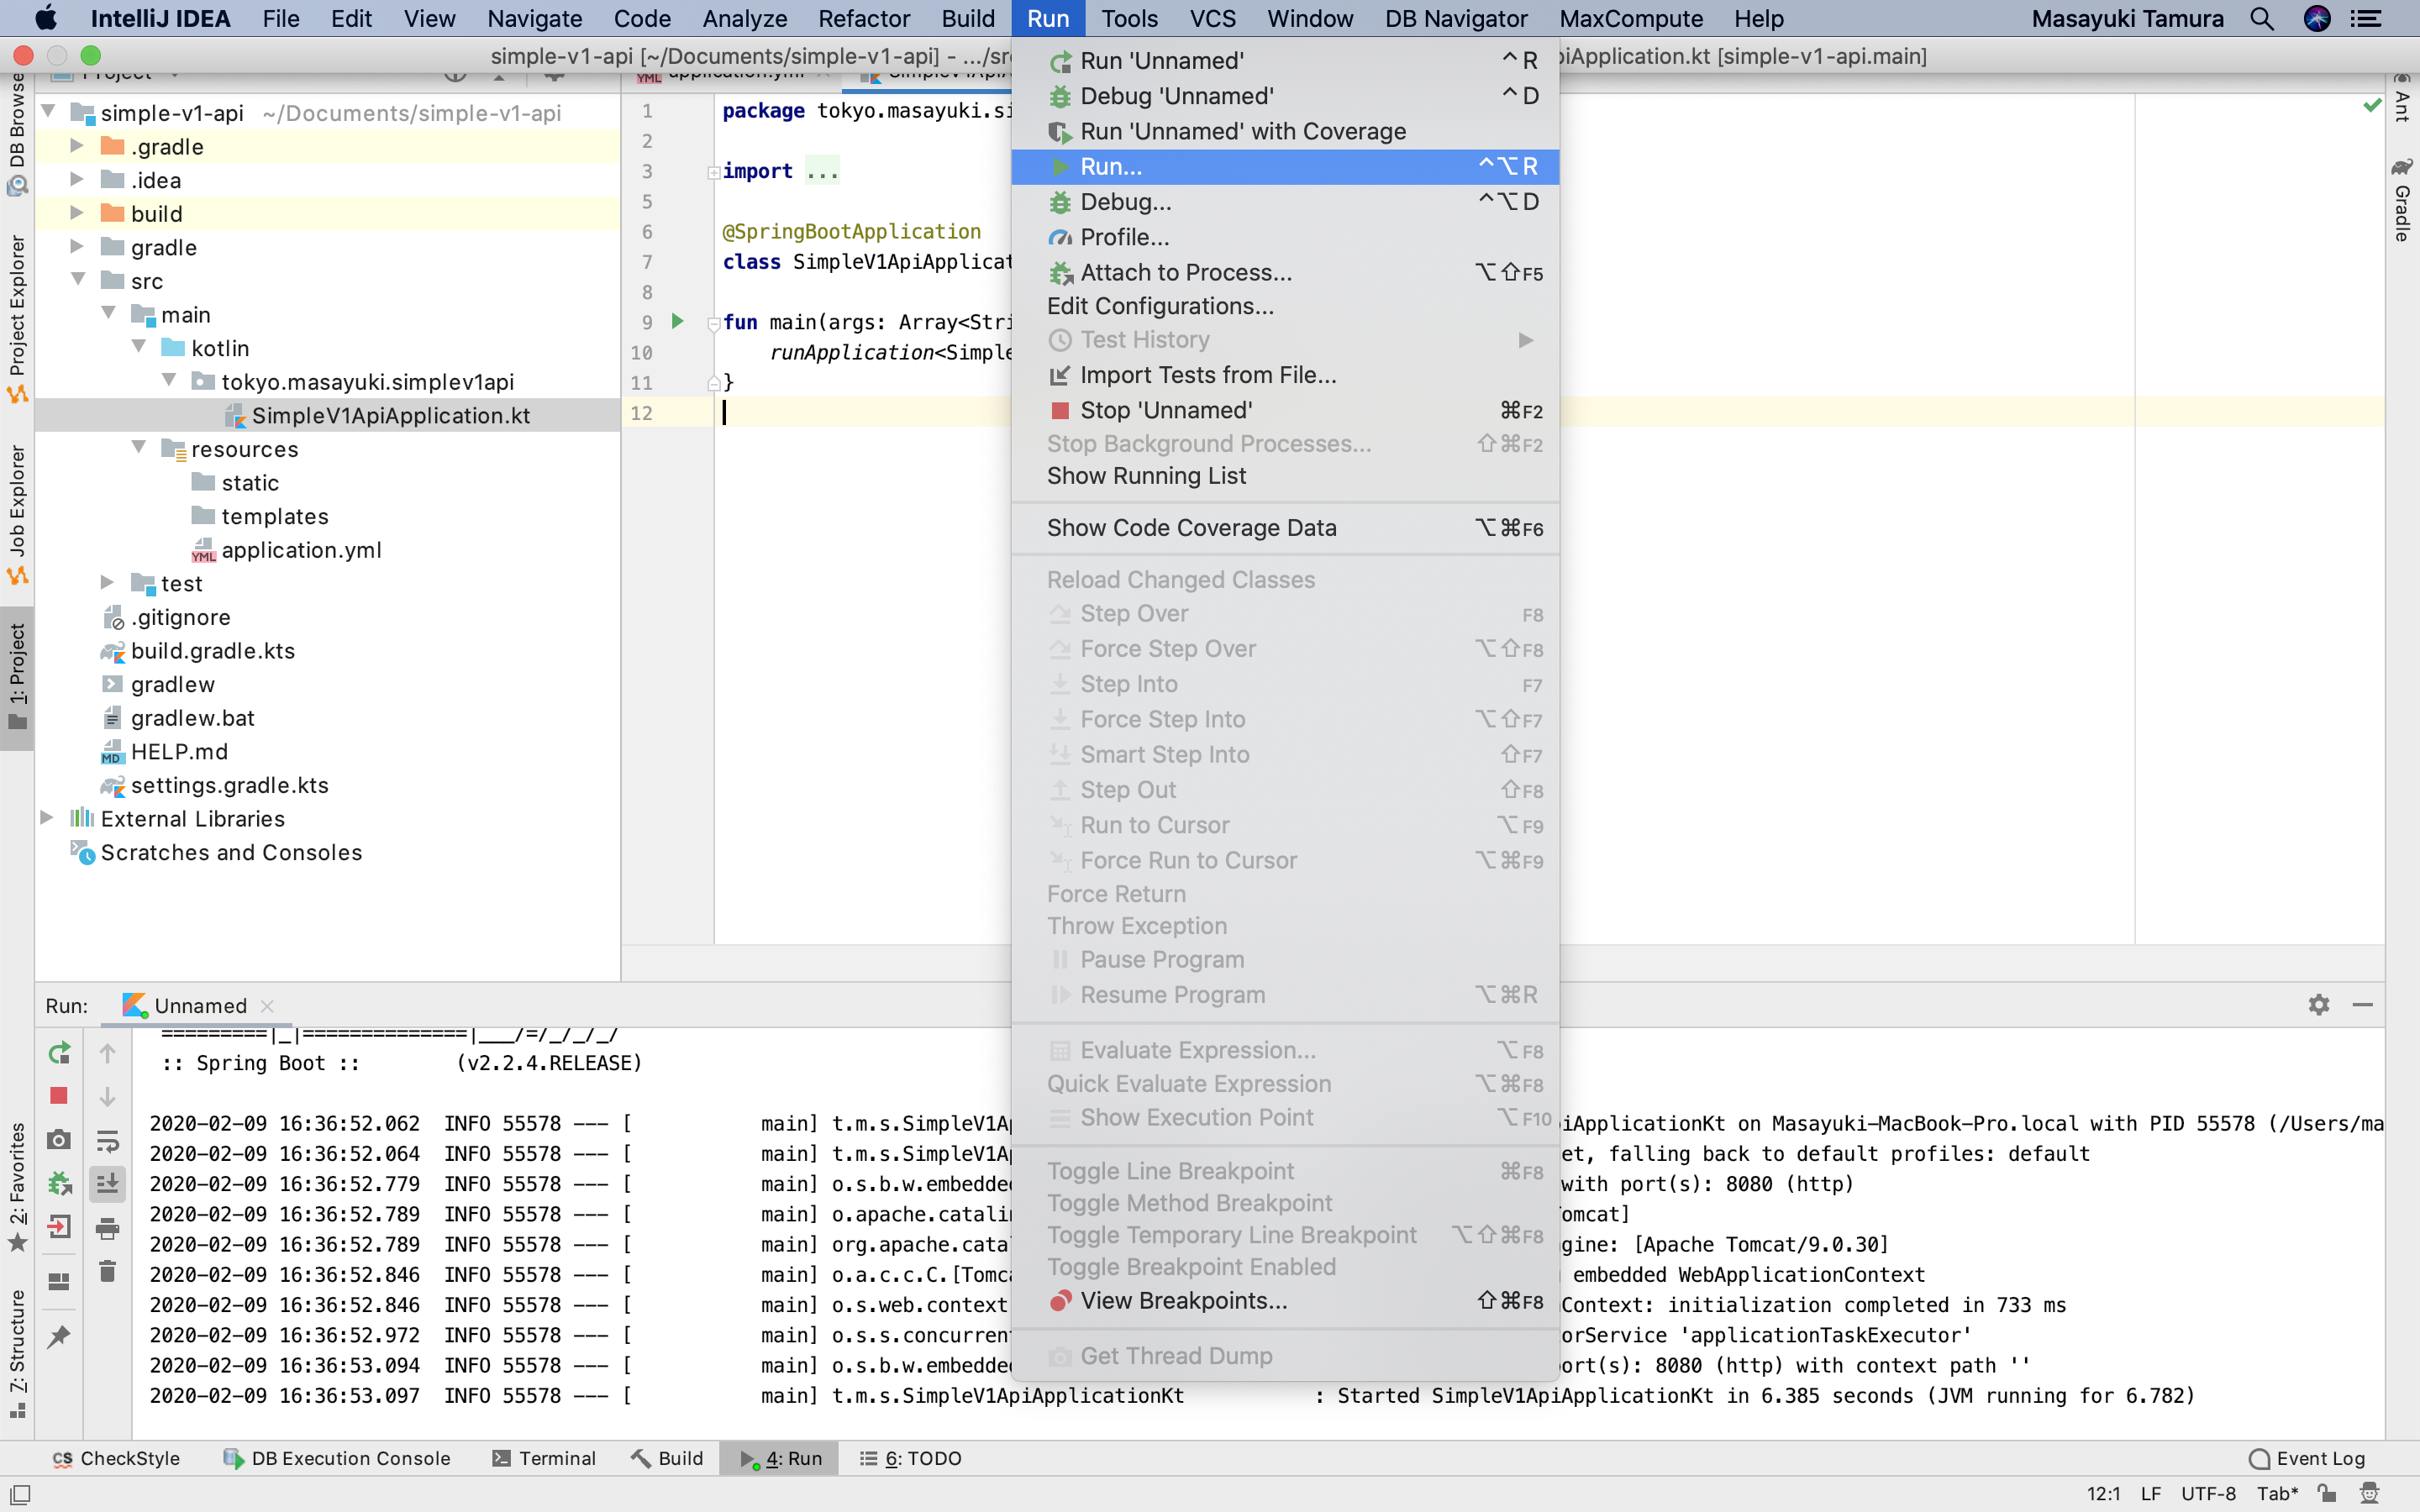
補足:実行方法
【Pattern1】
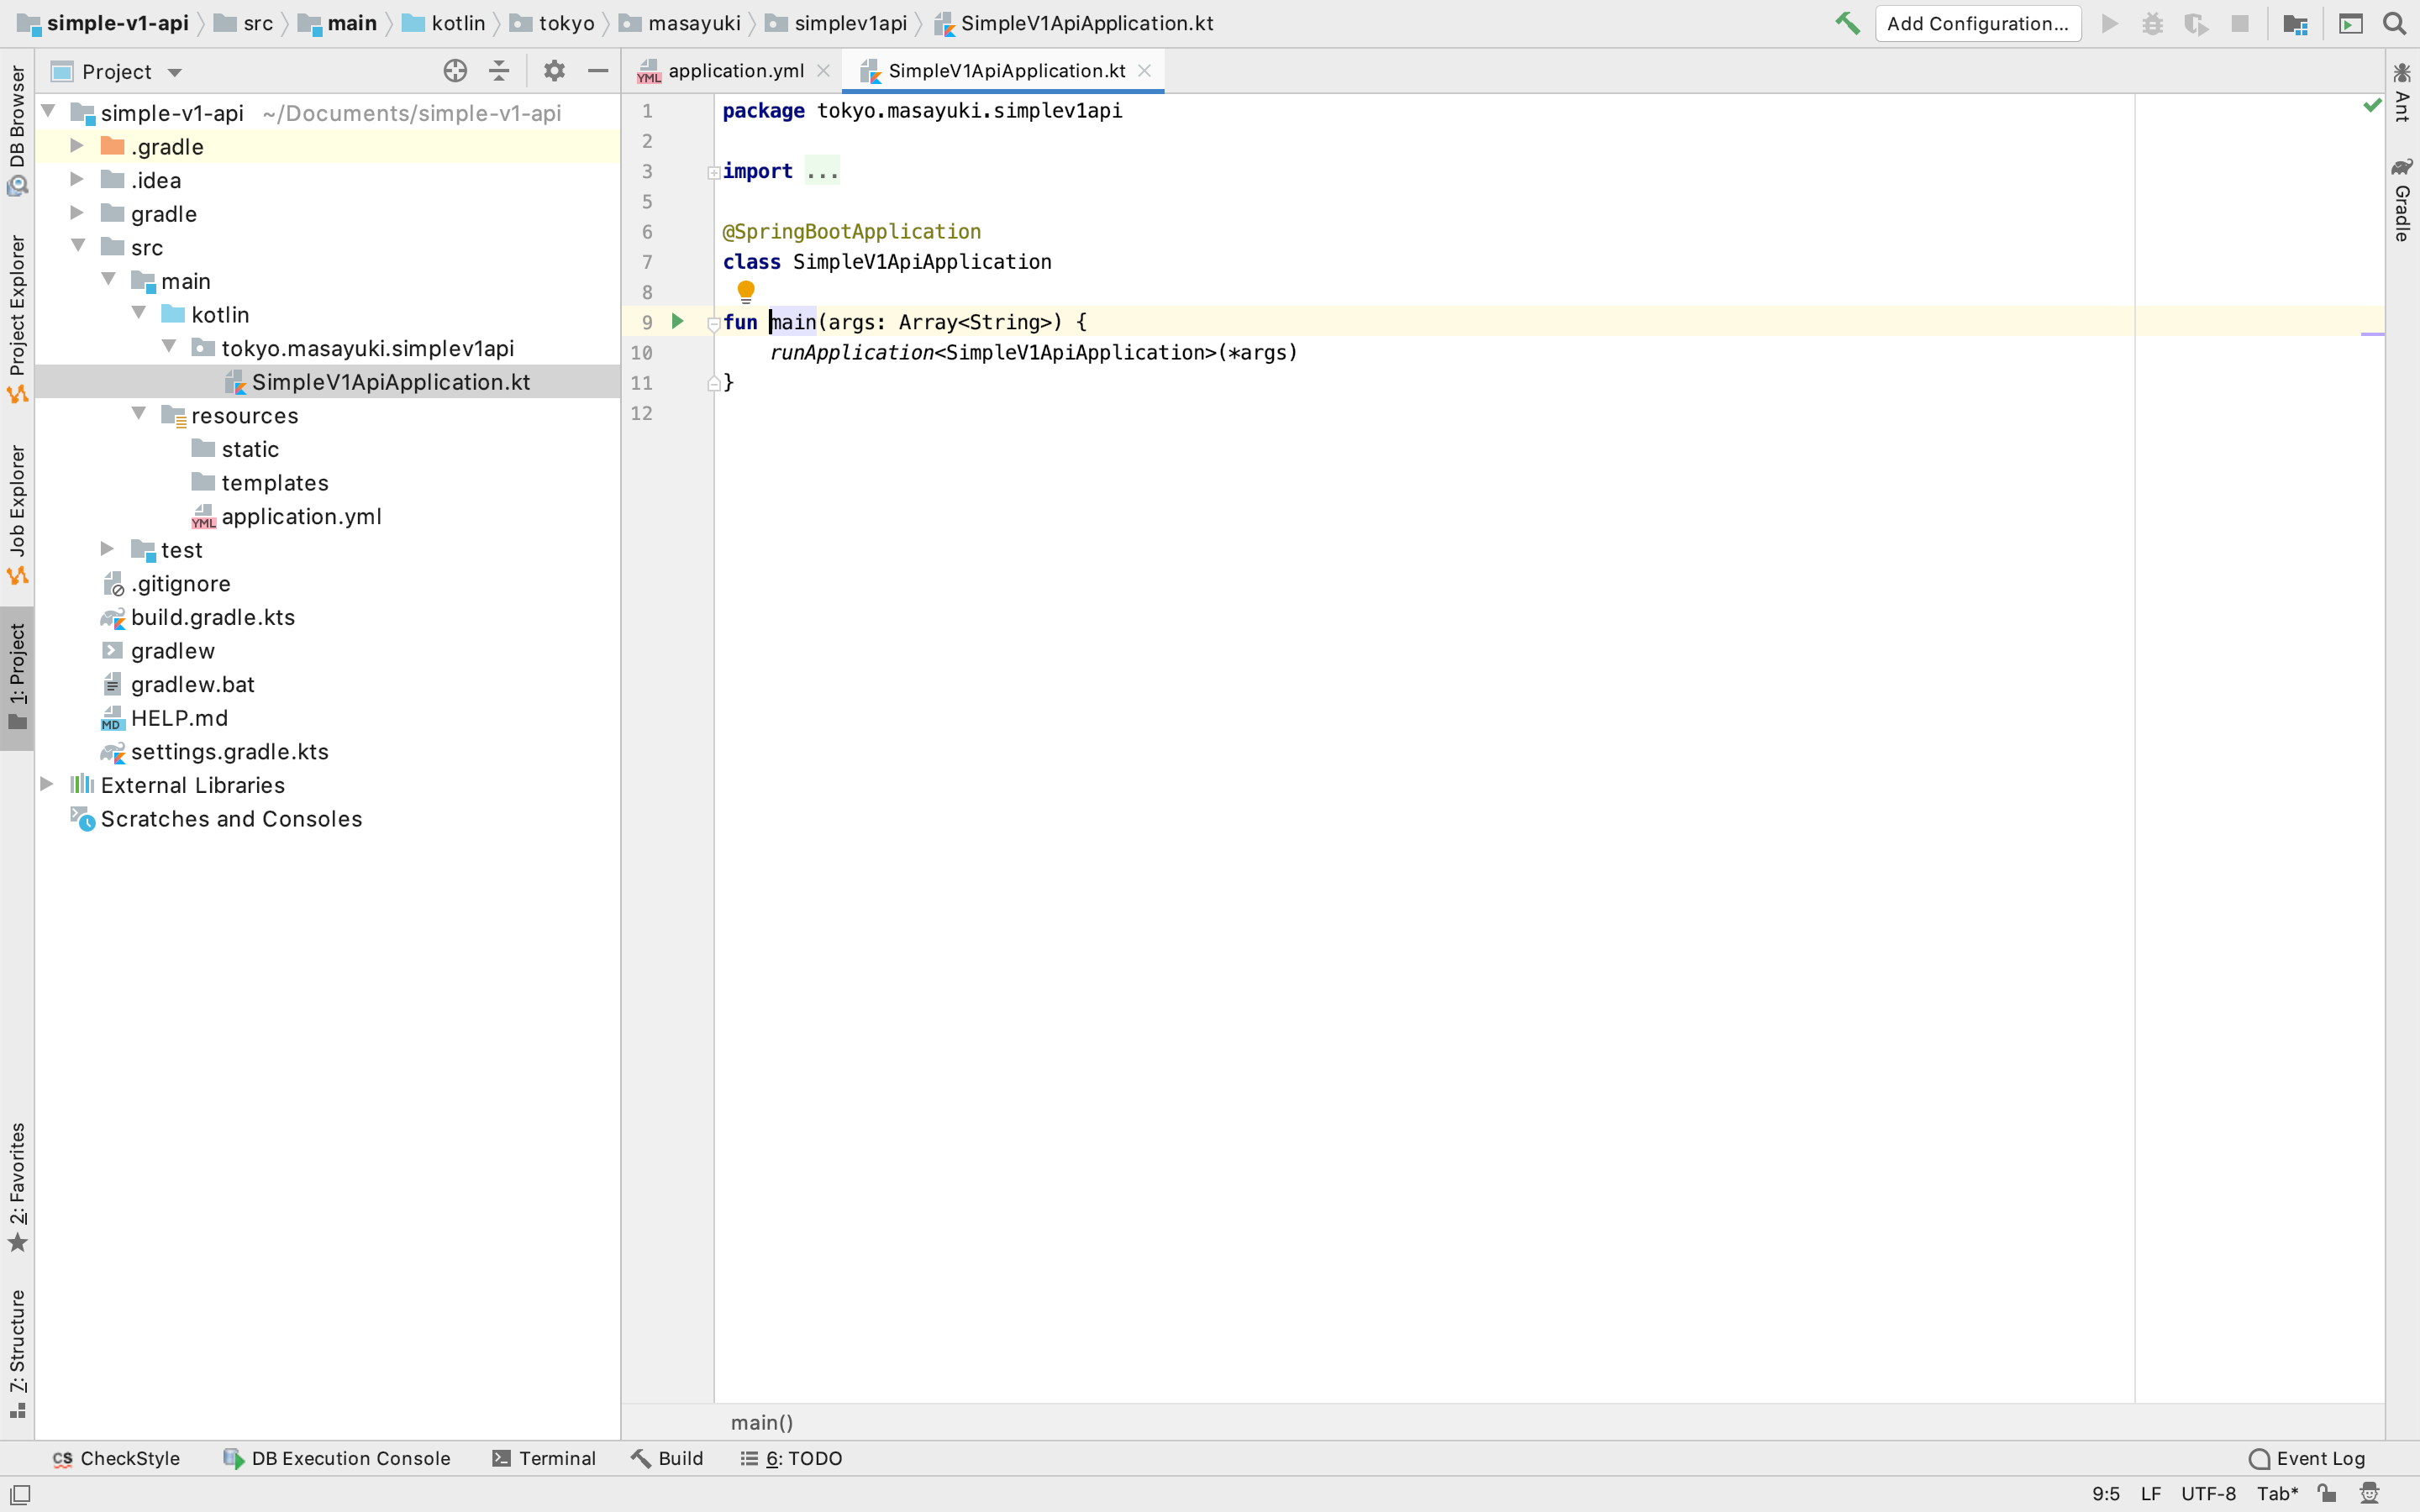
SimpleV1ApiApplication.kt の9行目の緑色の三角のボタンをクリックすると実行出来ます。
【Pattern2】
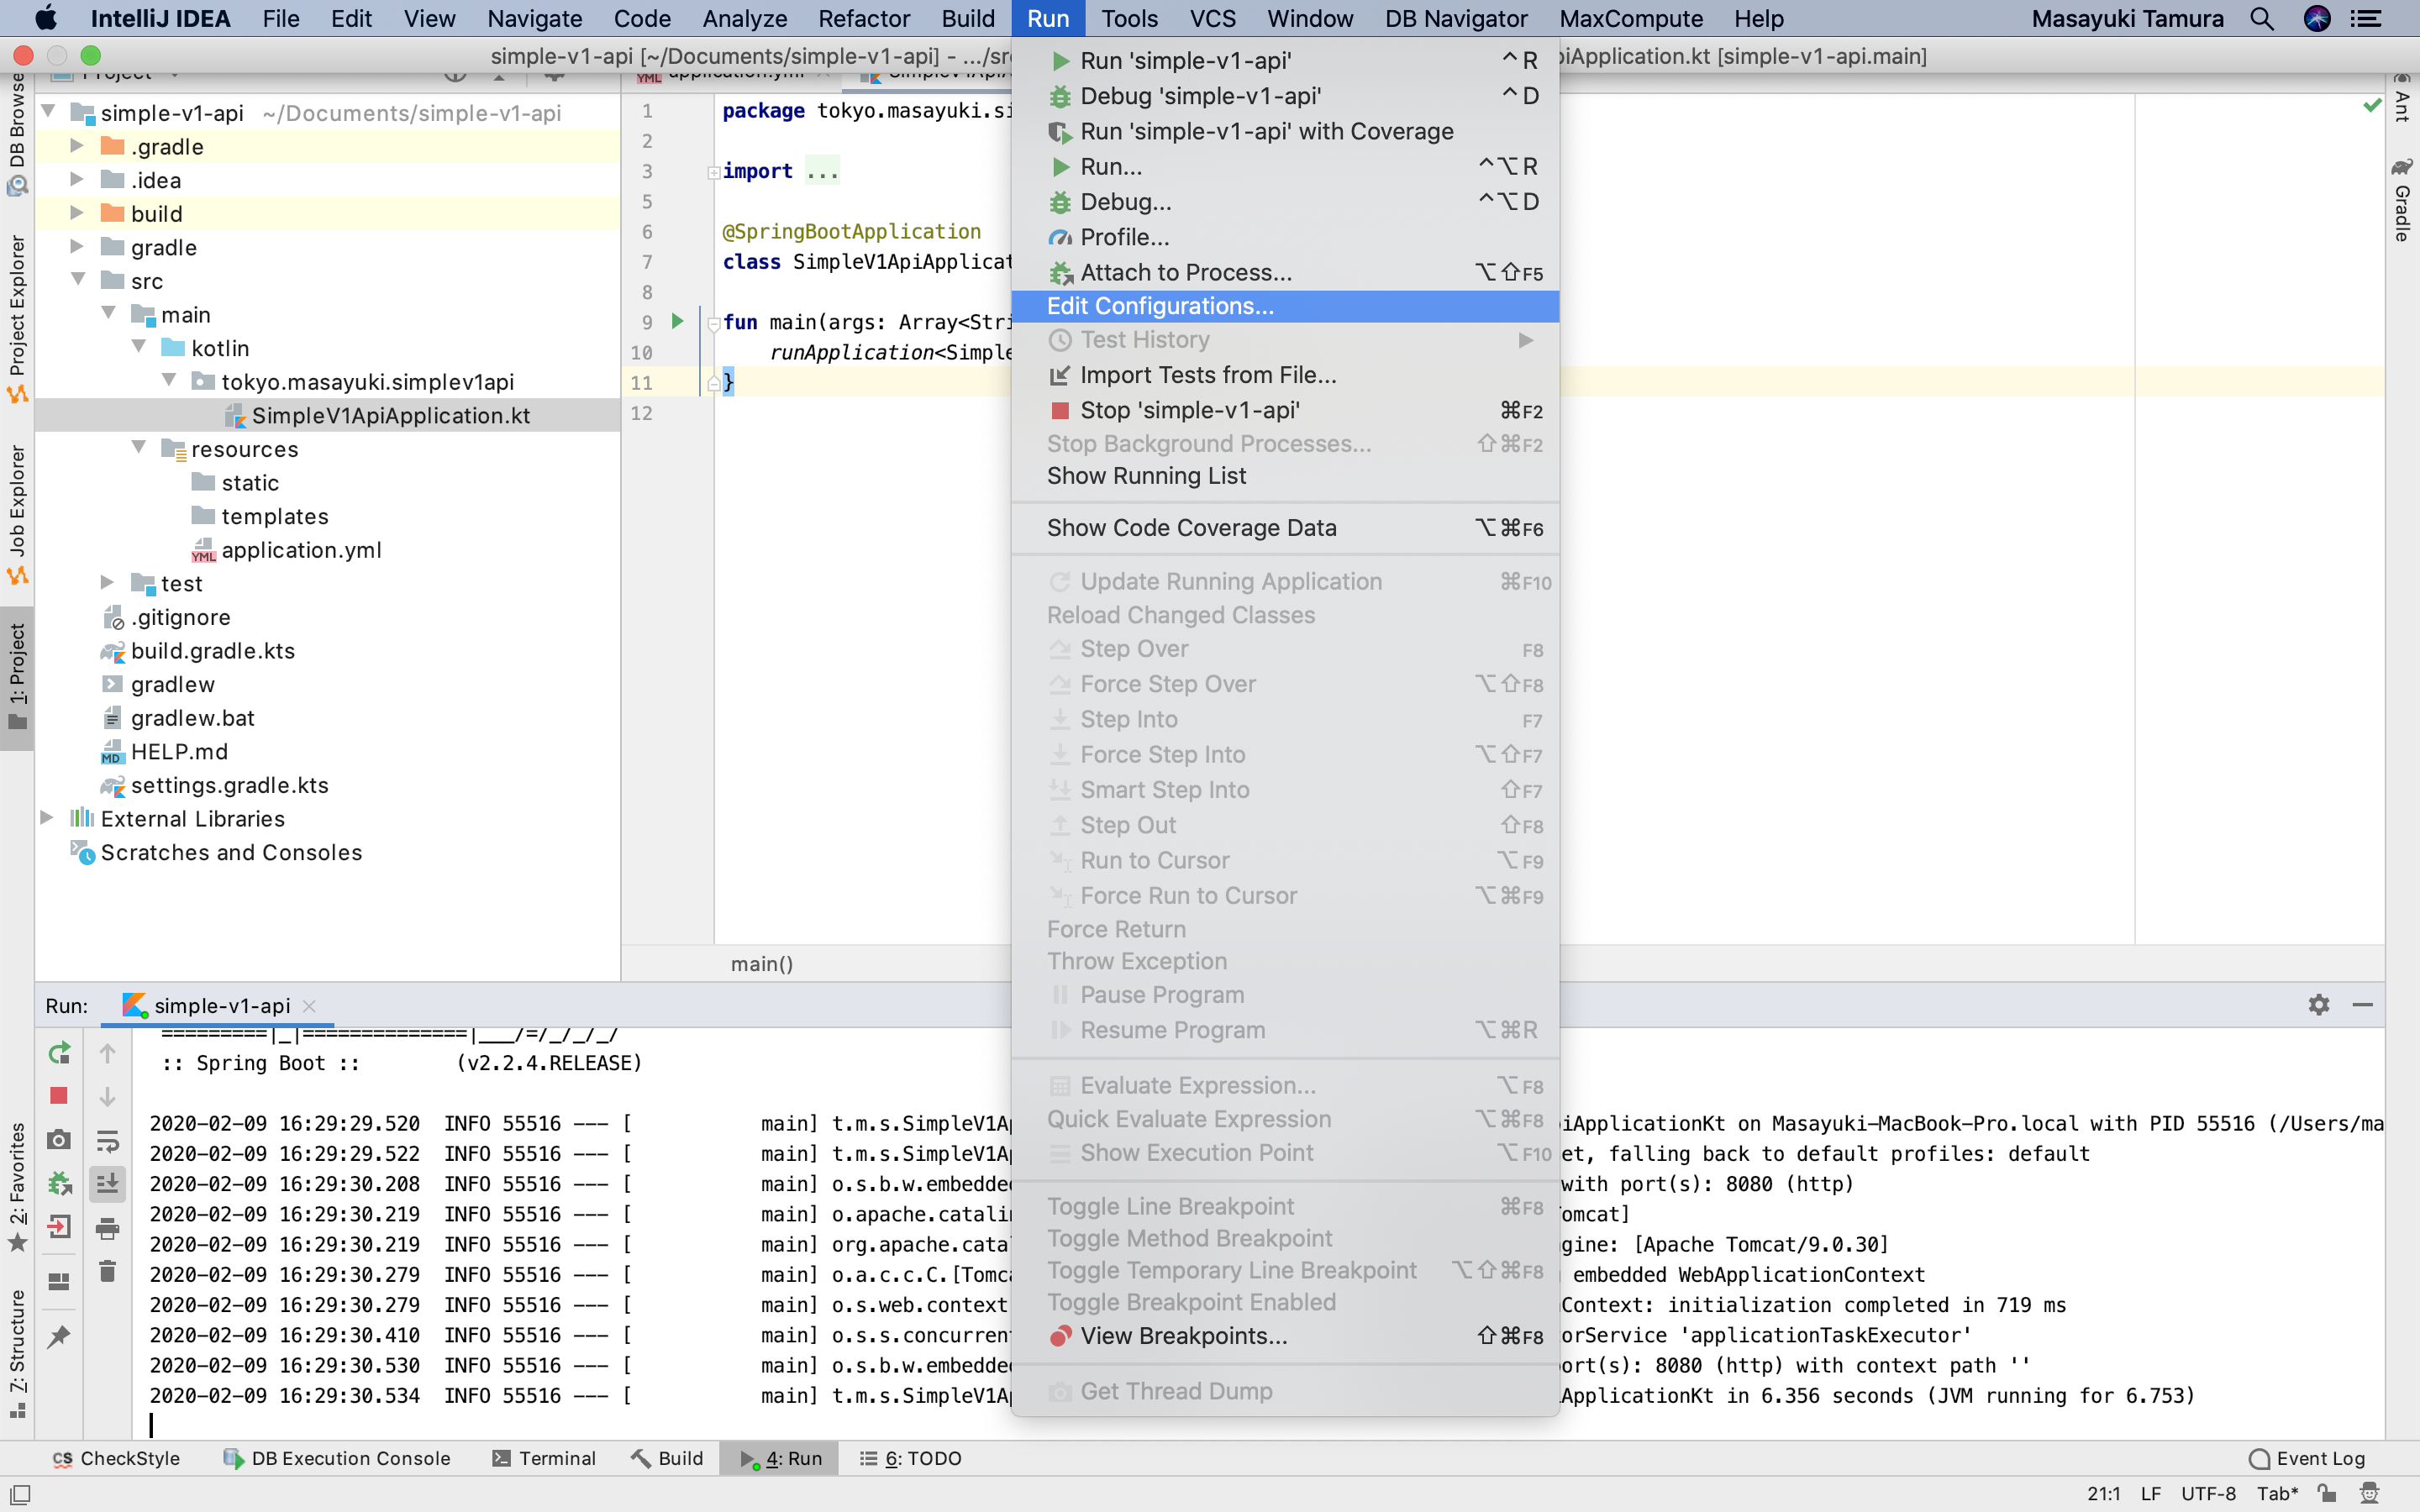
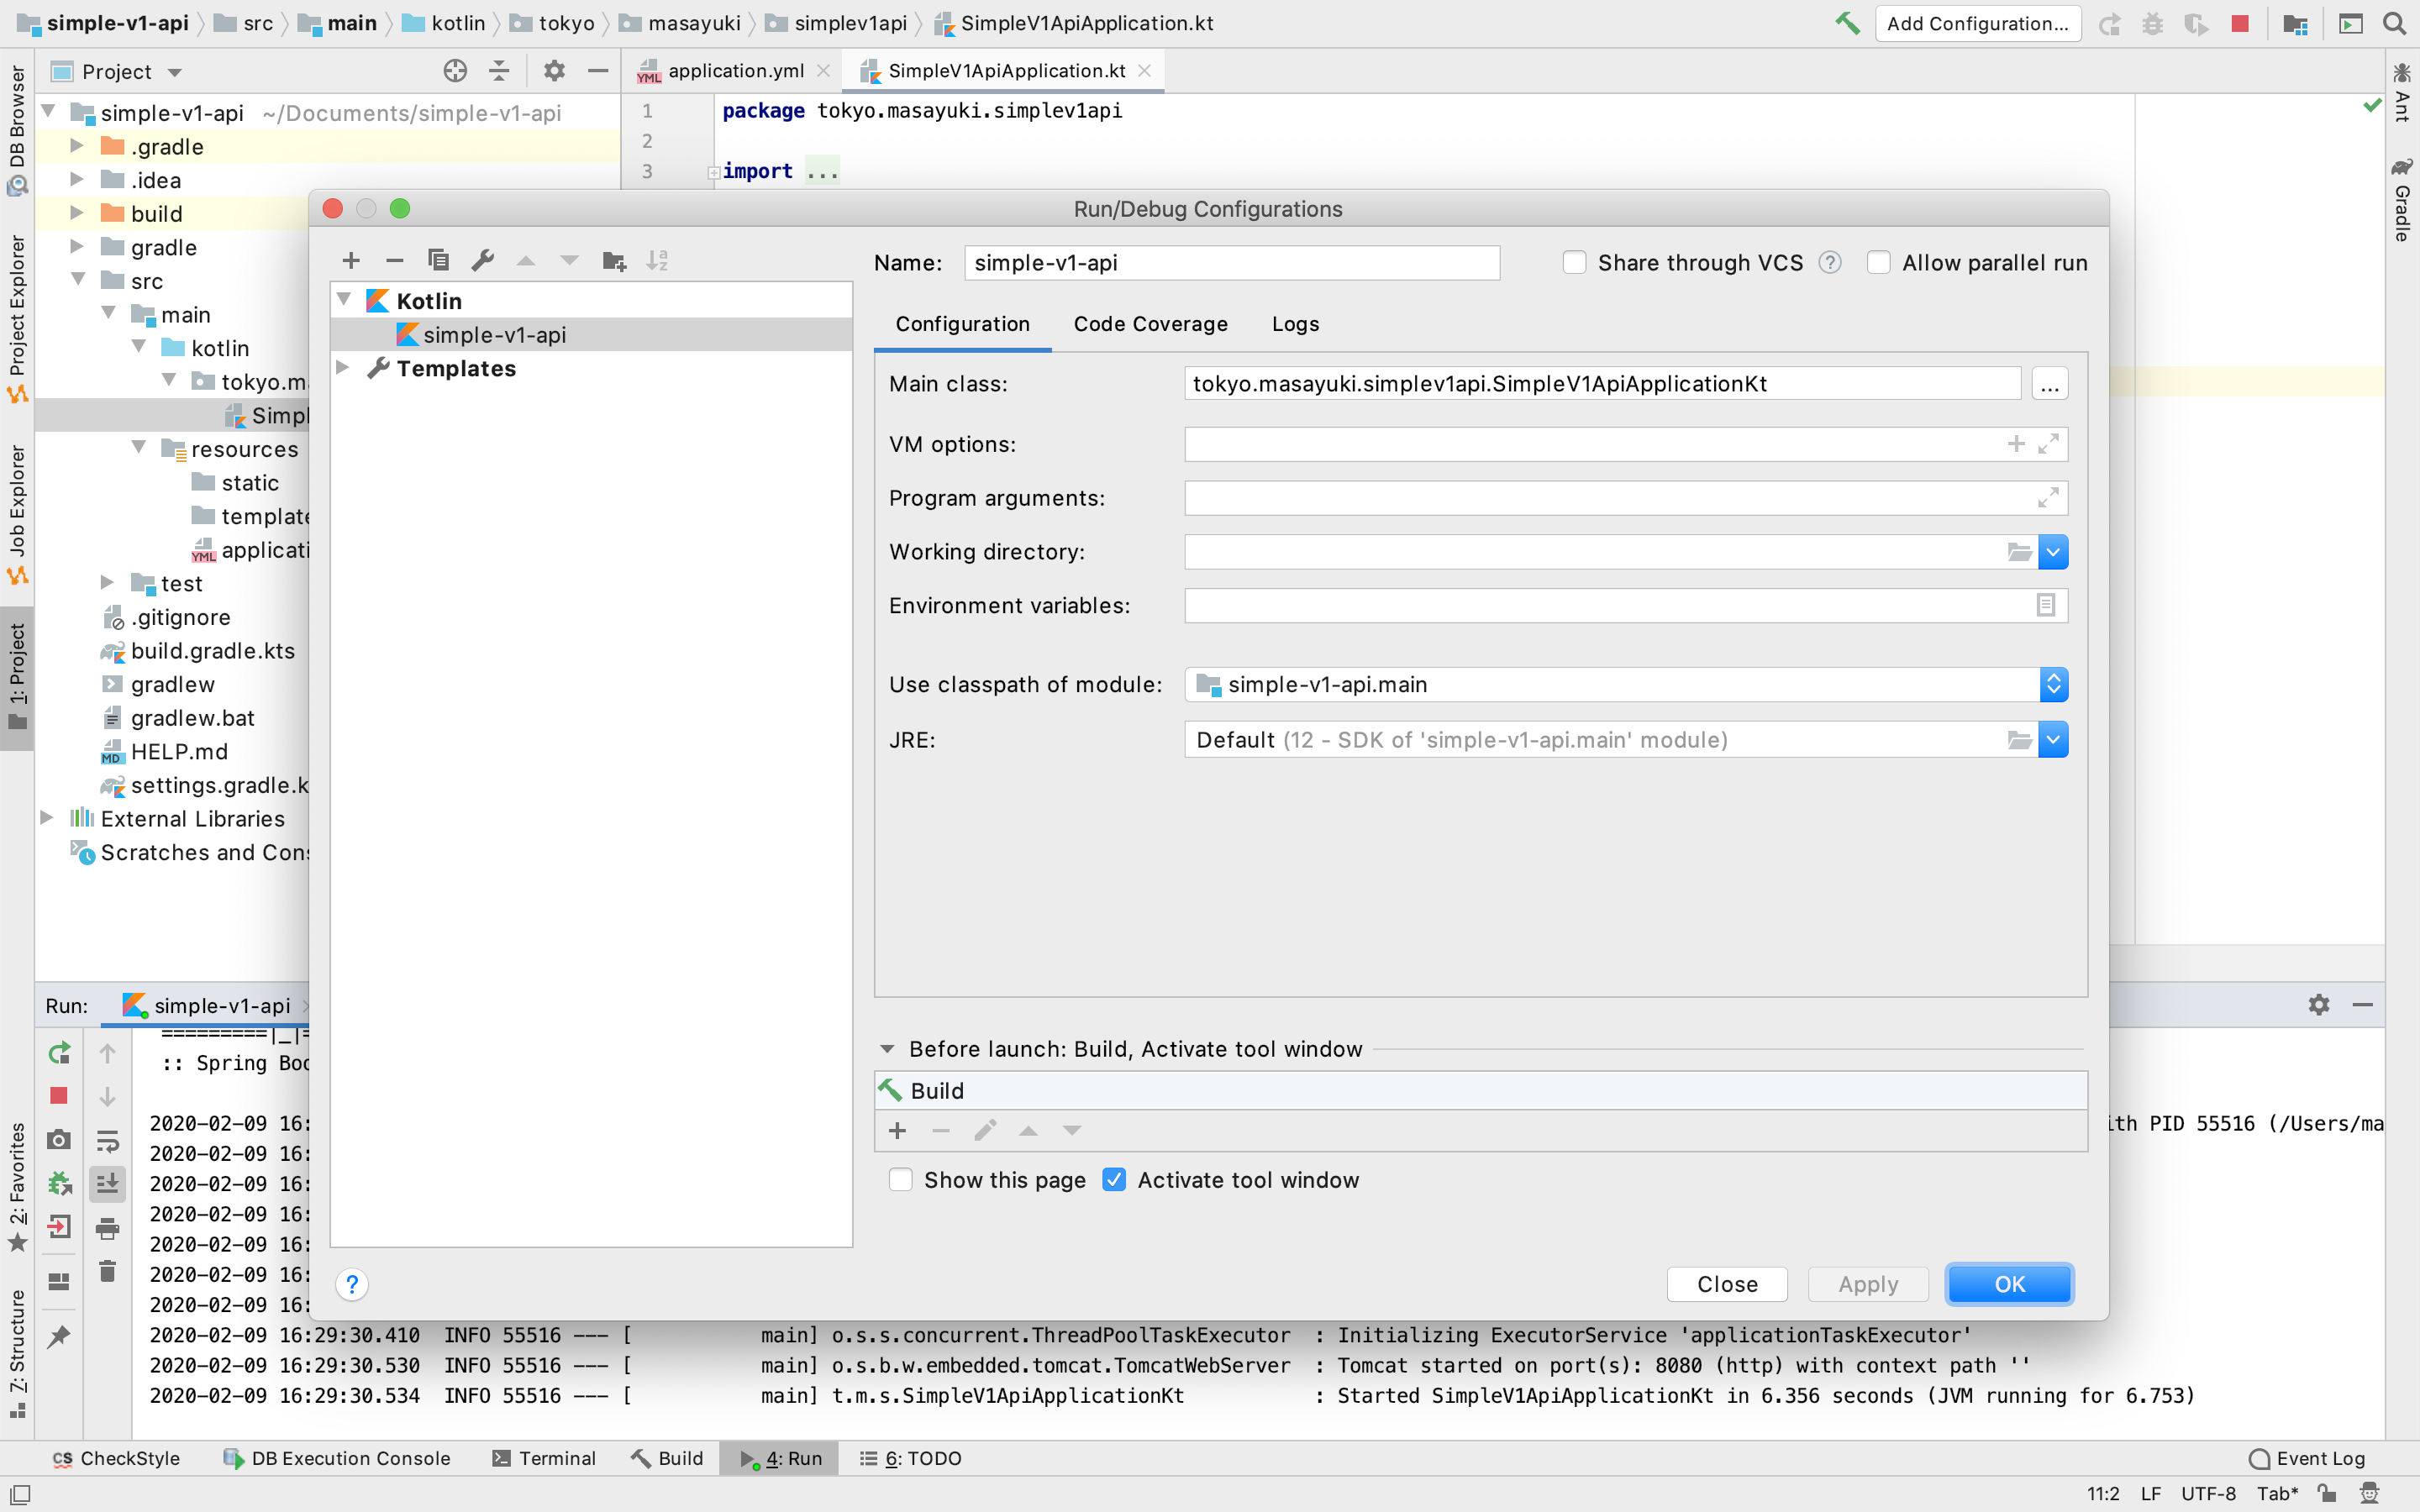
それ以外の方法では、Edit Configurations に Kotlin で実行するための Configuration を以下の様に設定することでも実行出来ます。
(Configurationの設定)
(実行)
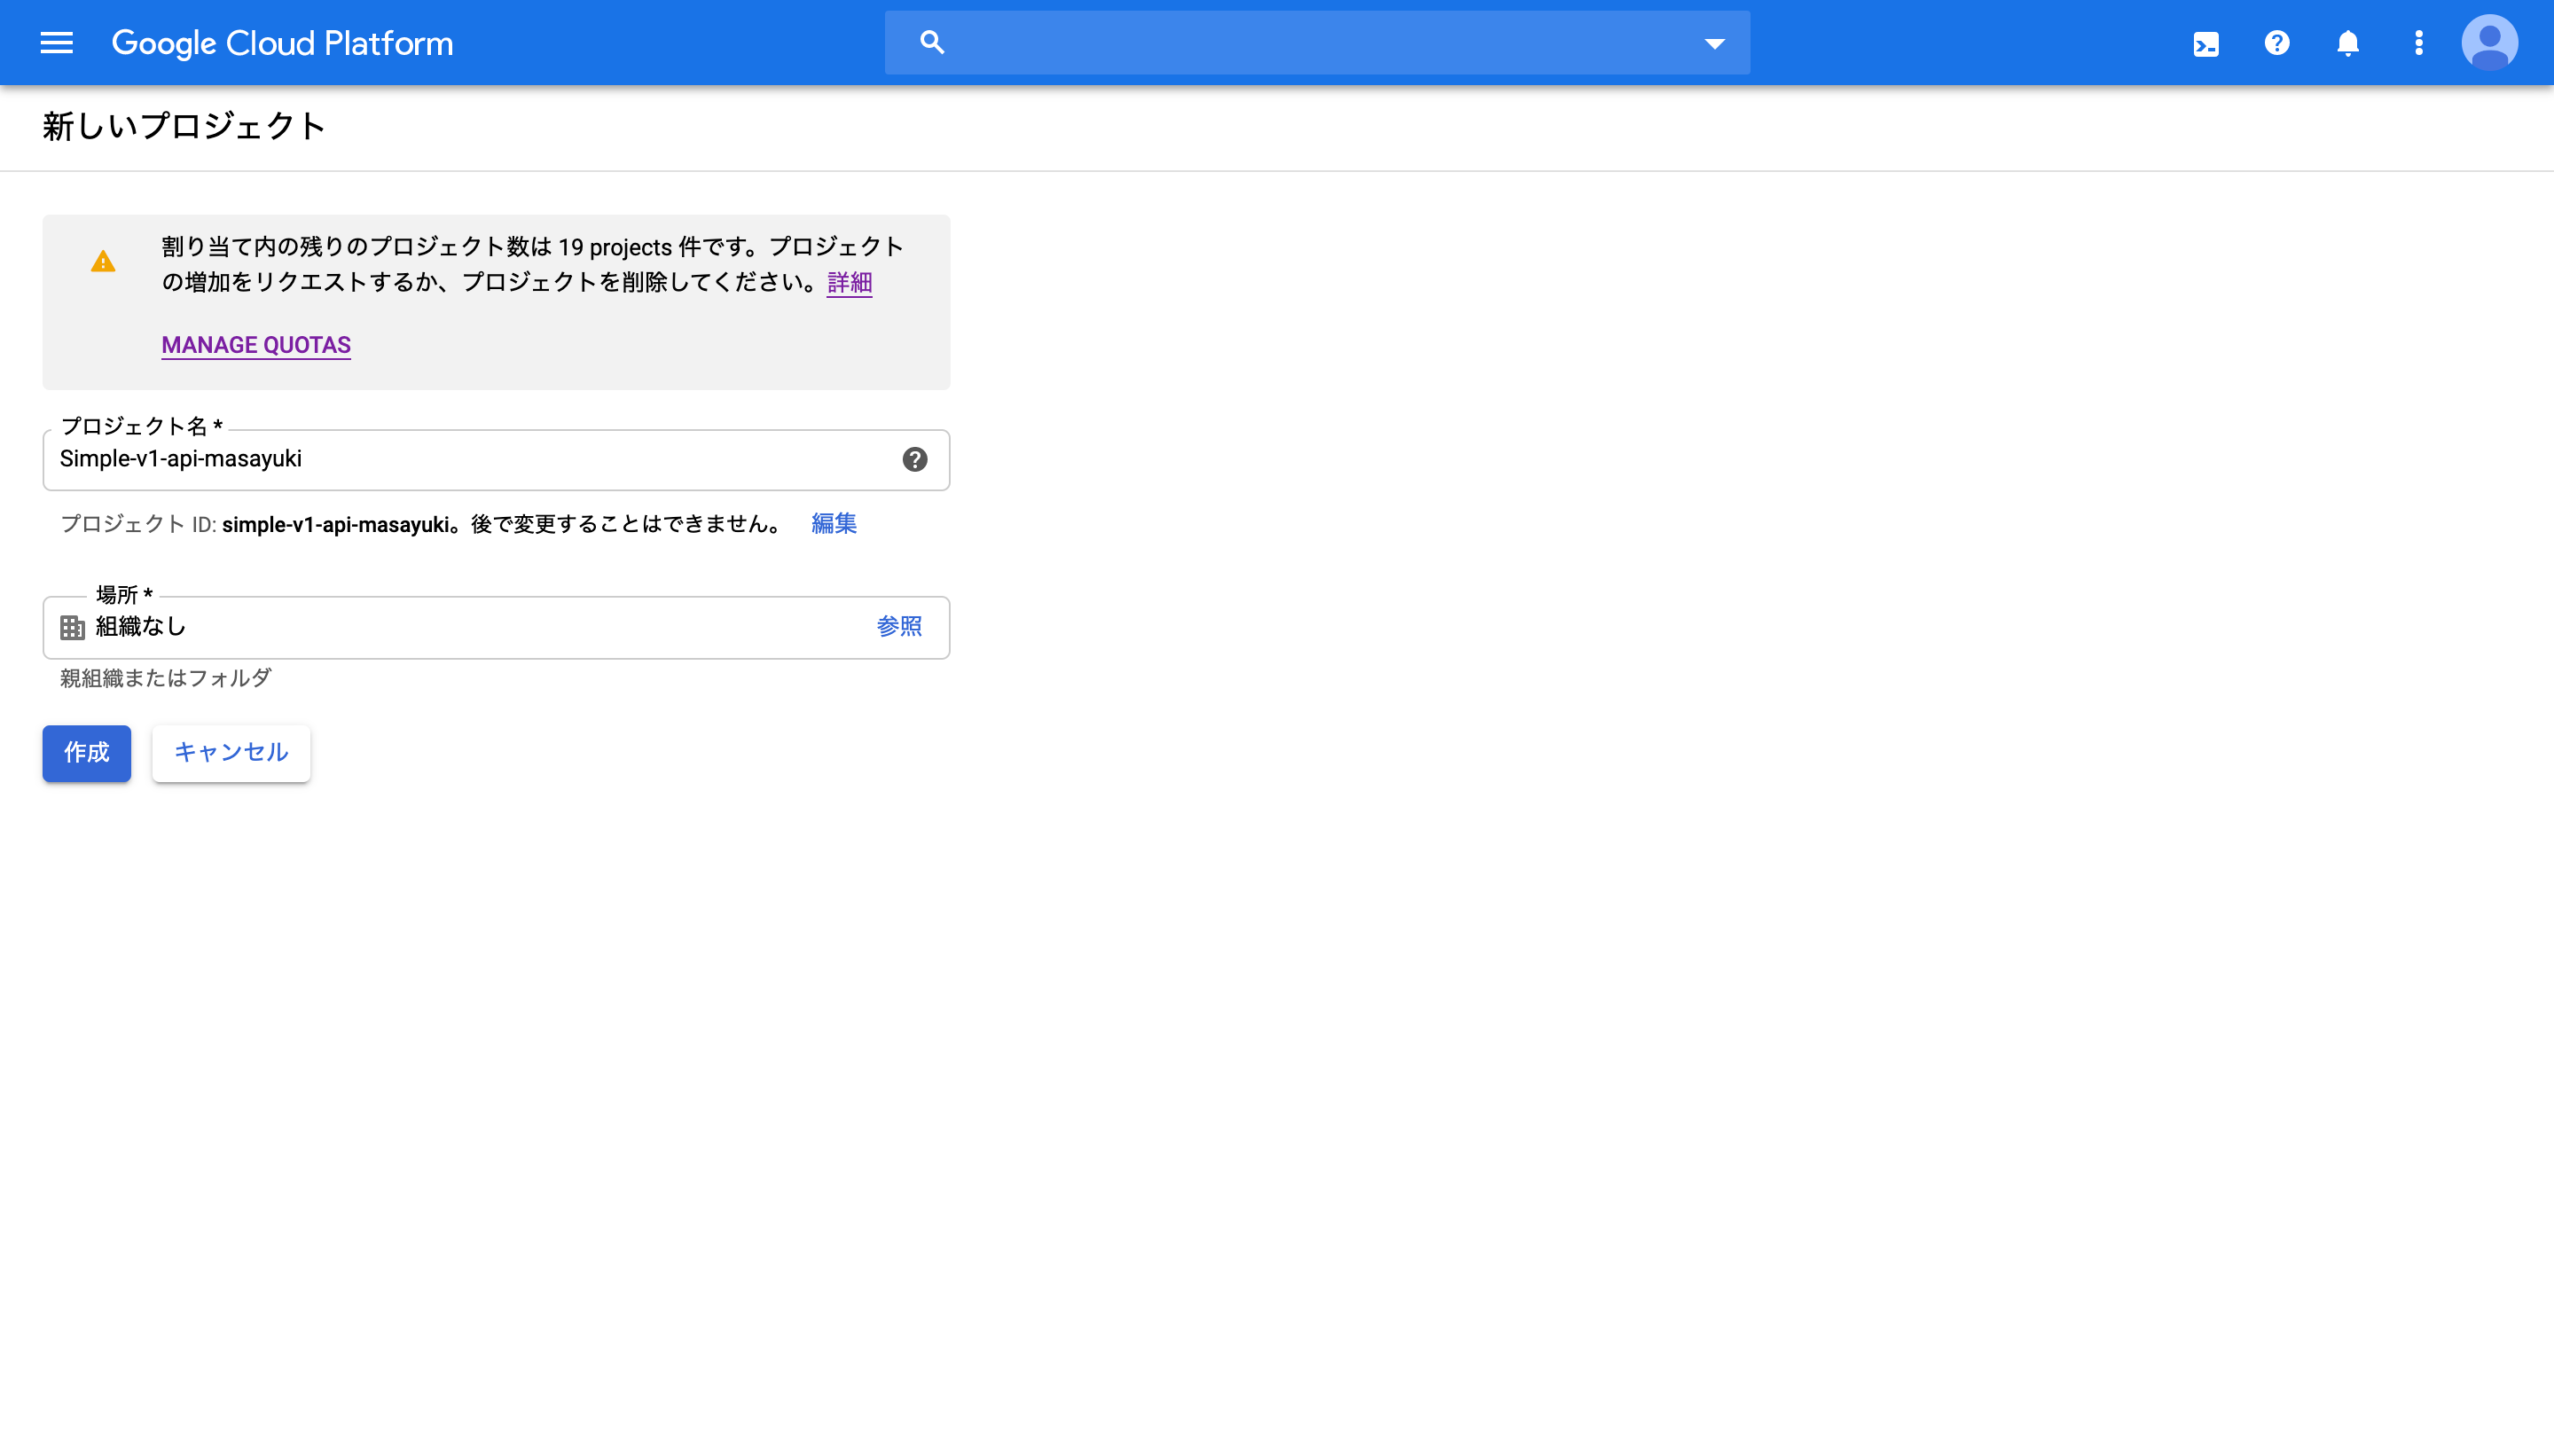
6. Google Cloud Platform のプロジェクトを新規作成
Google App Engine(GAE) は Google Cloud Platform(GCP)のサービスの一つです。そのため、GAE を利用するために、 GCP でプロジェクトを作成します。こちらのリンクからプロジェクトの作成ページにアクセスし、任意のプロジェクト名を入力したらプロジェクトの作成を行って下さい。
7. Google Cloud Platform のプロジェクト設定
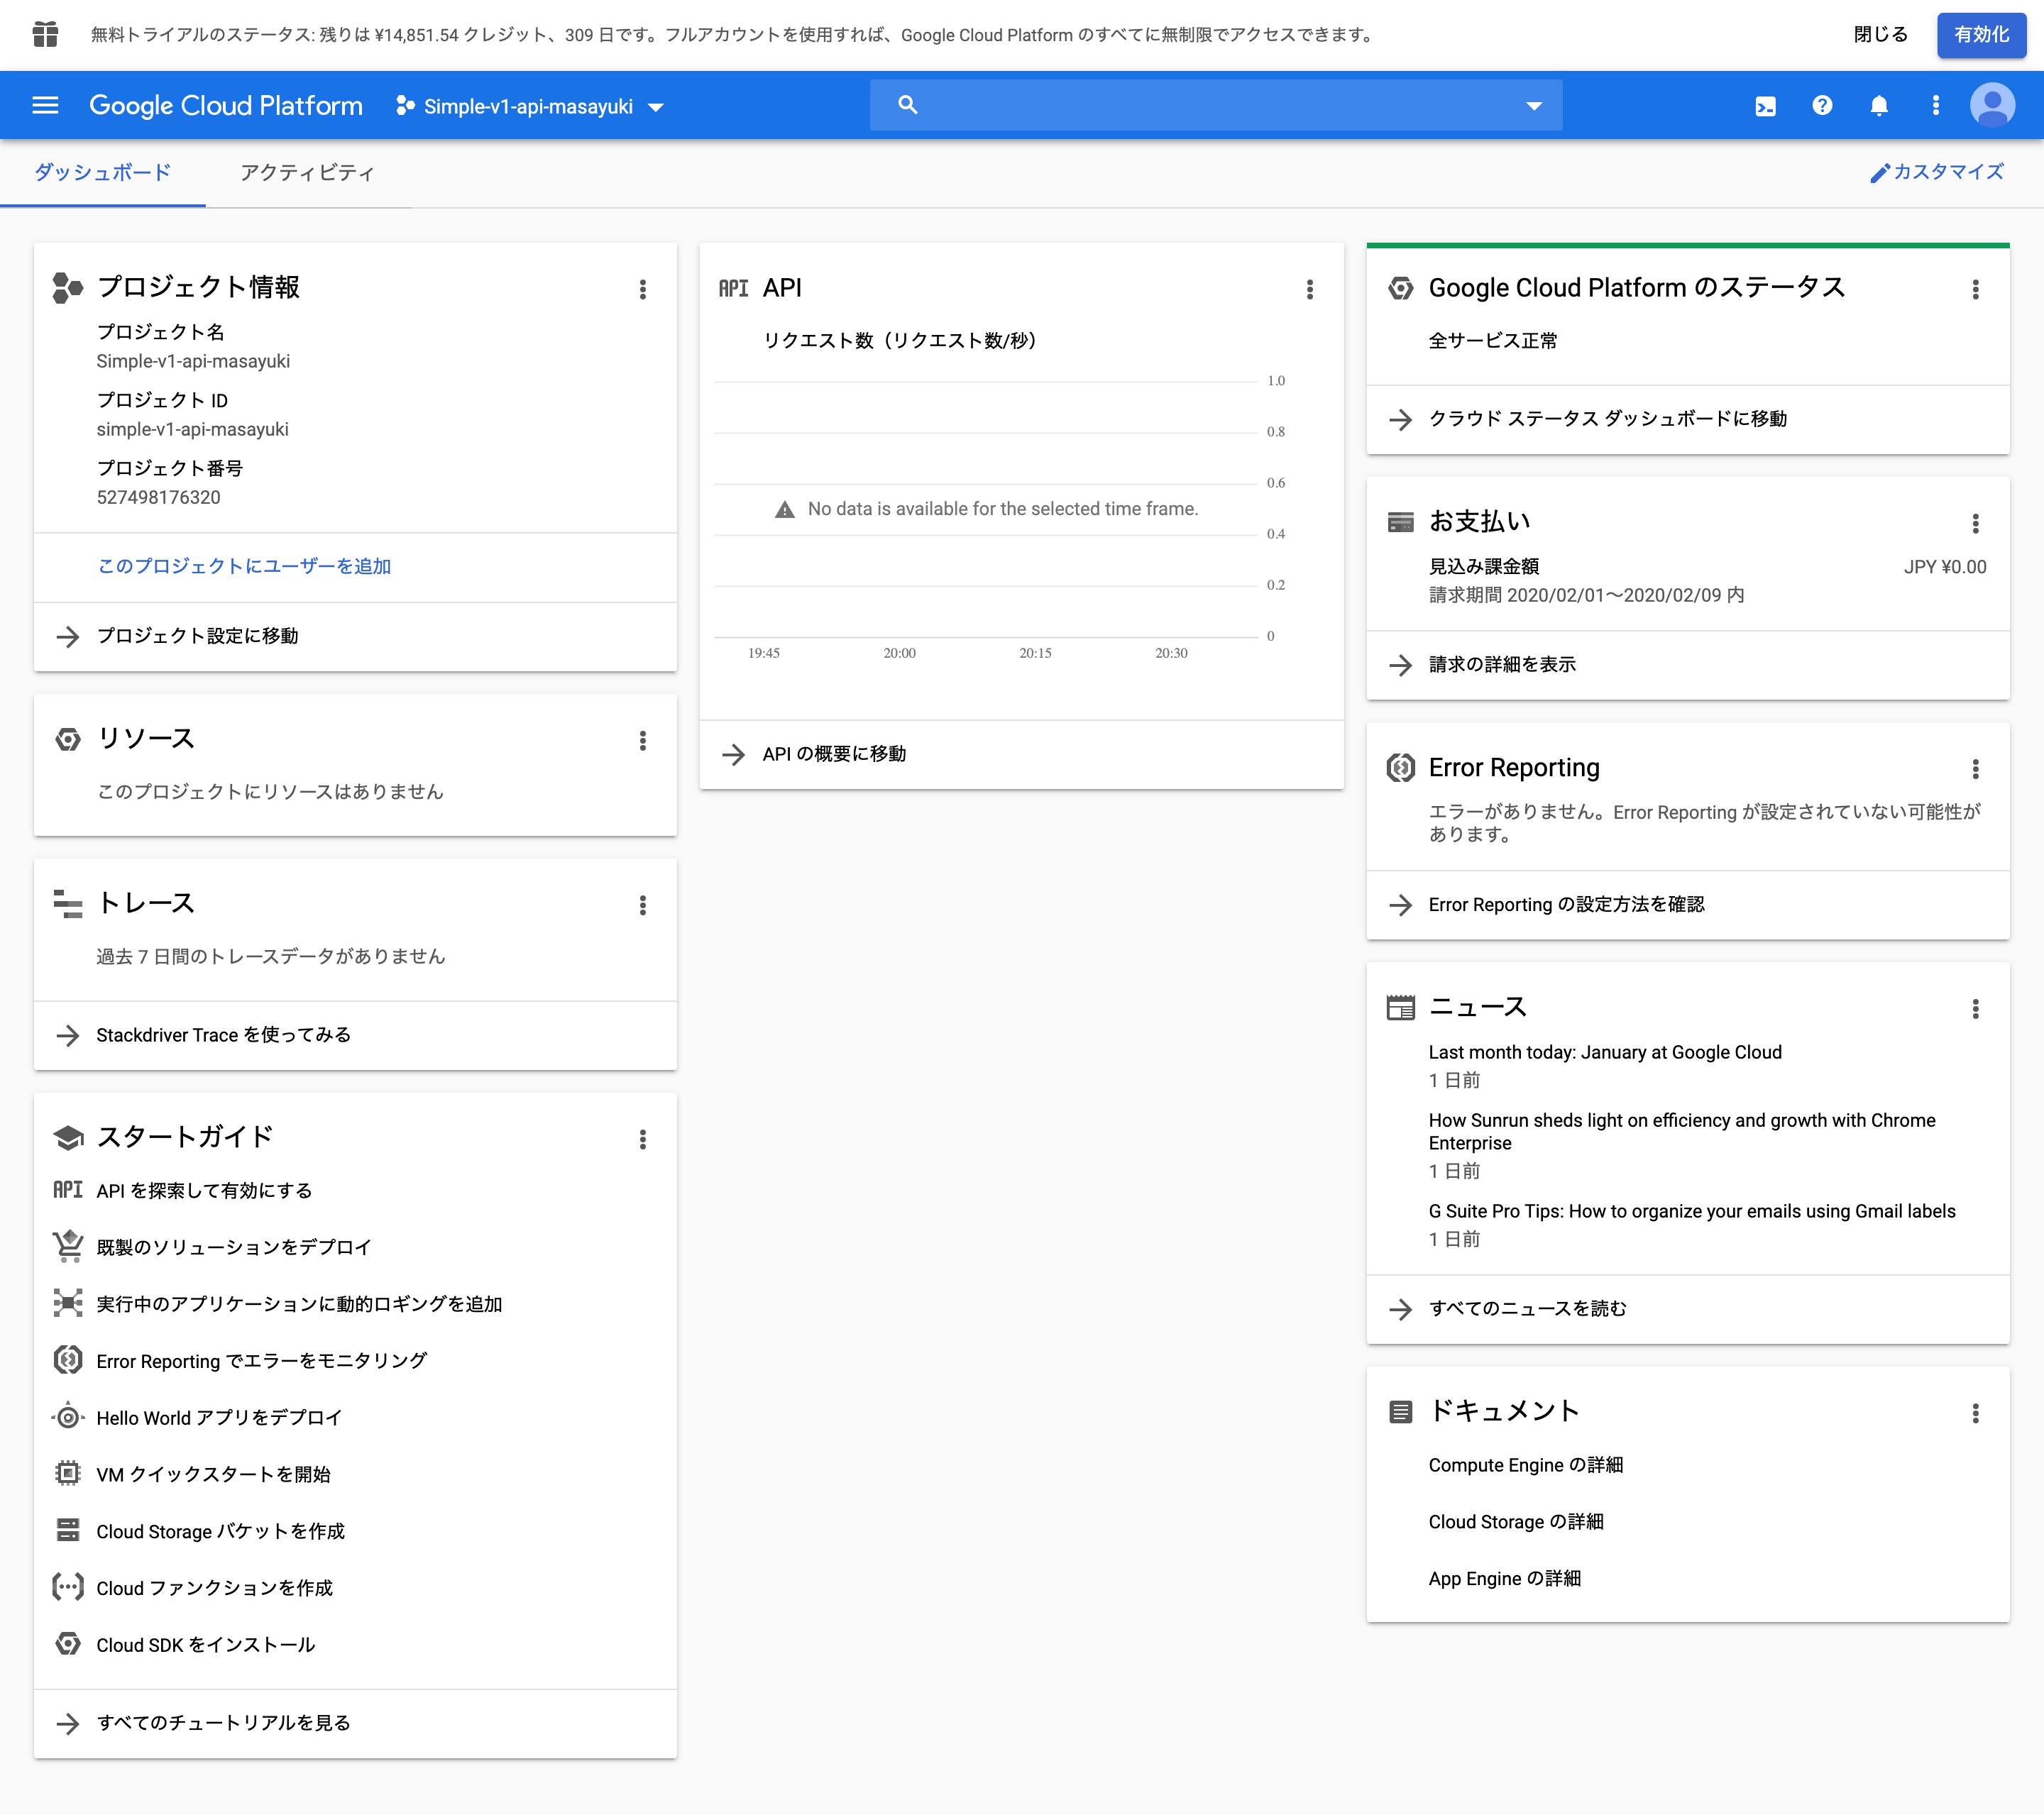
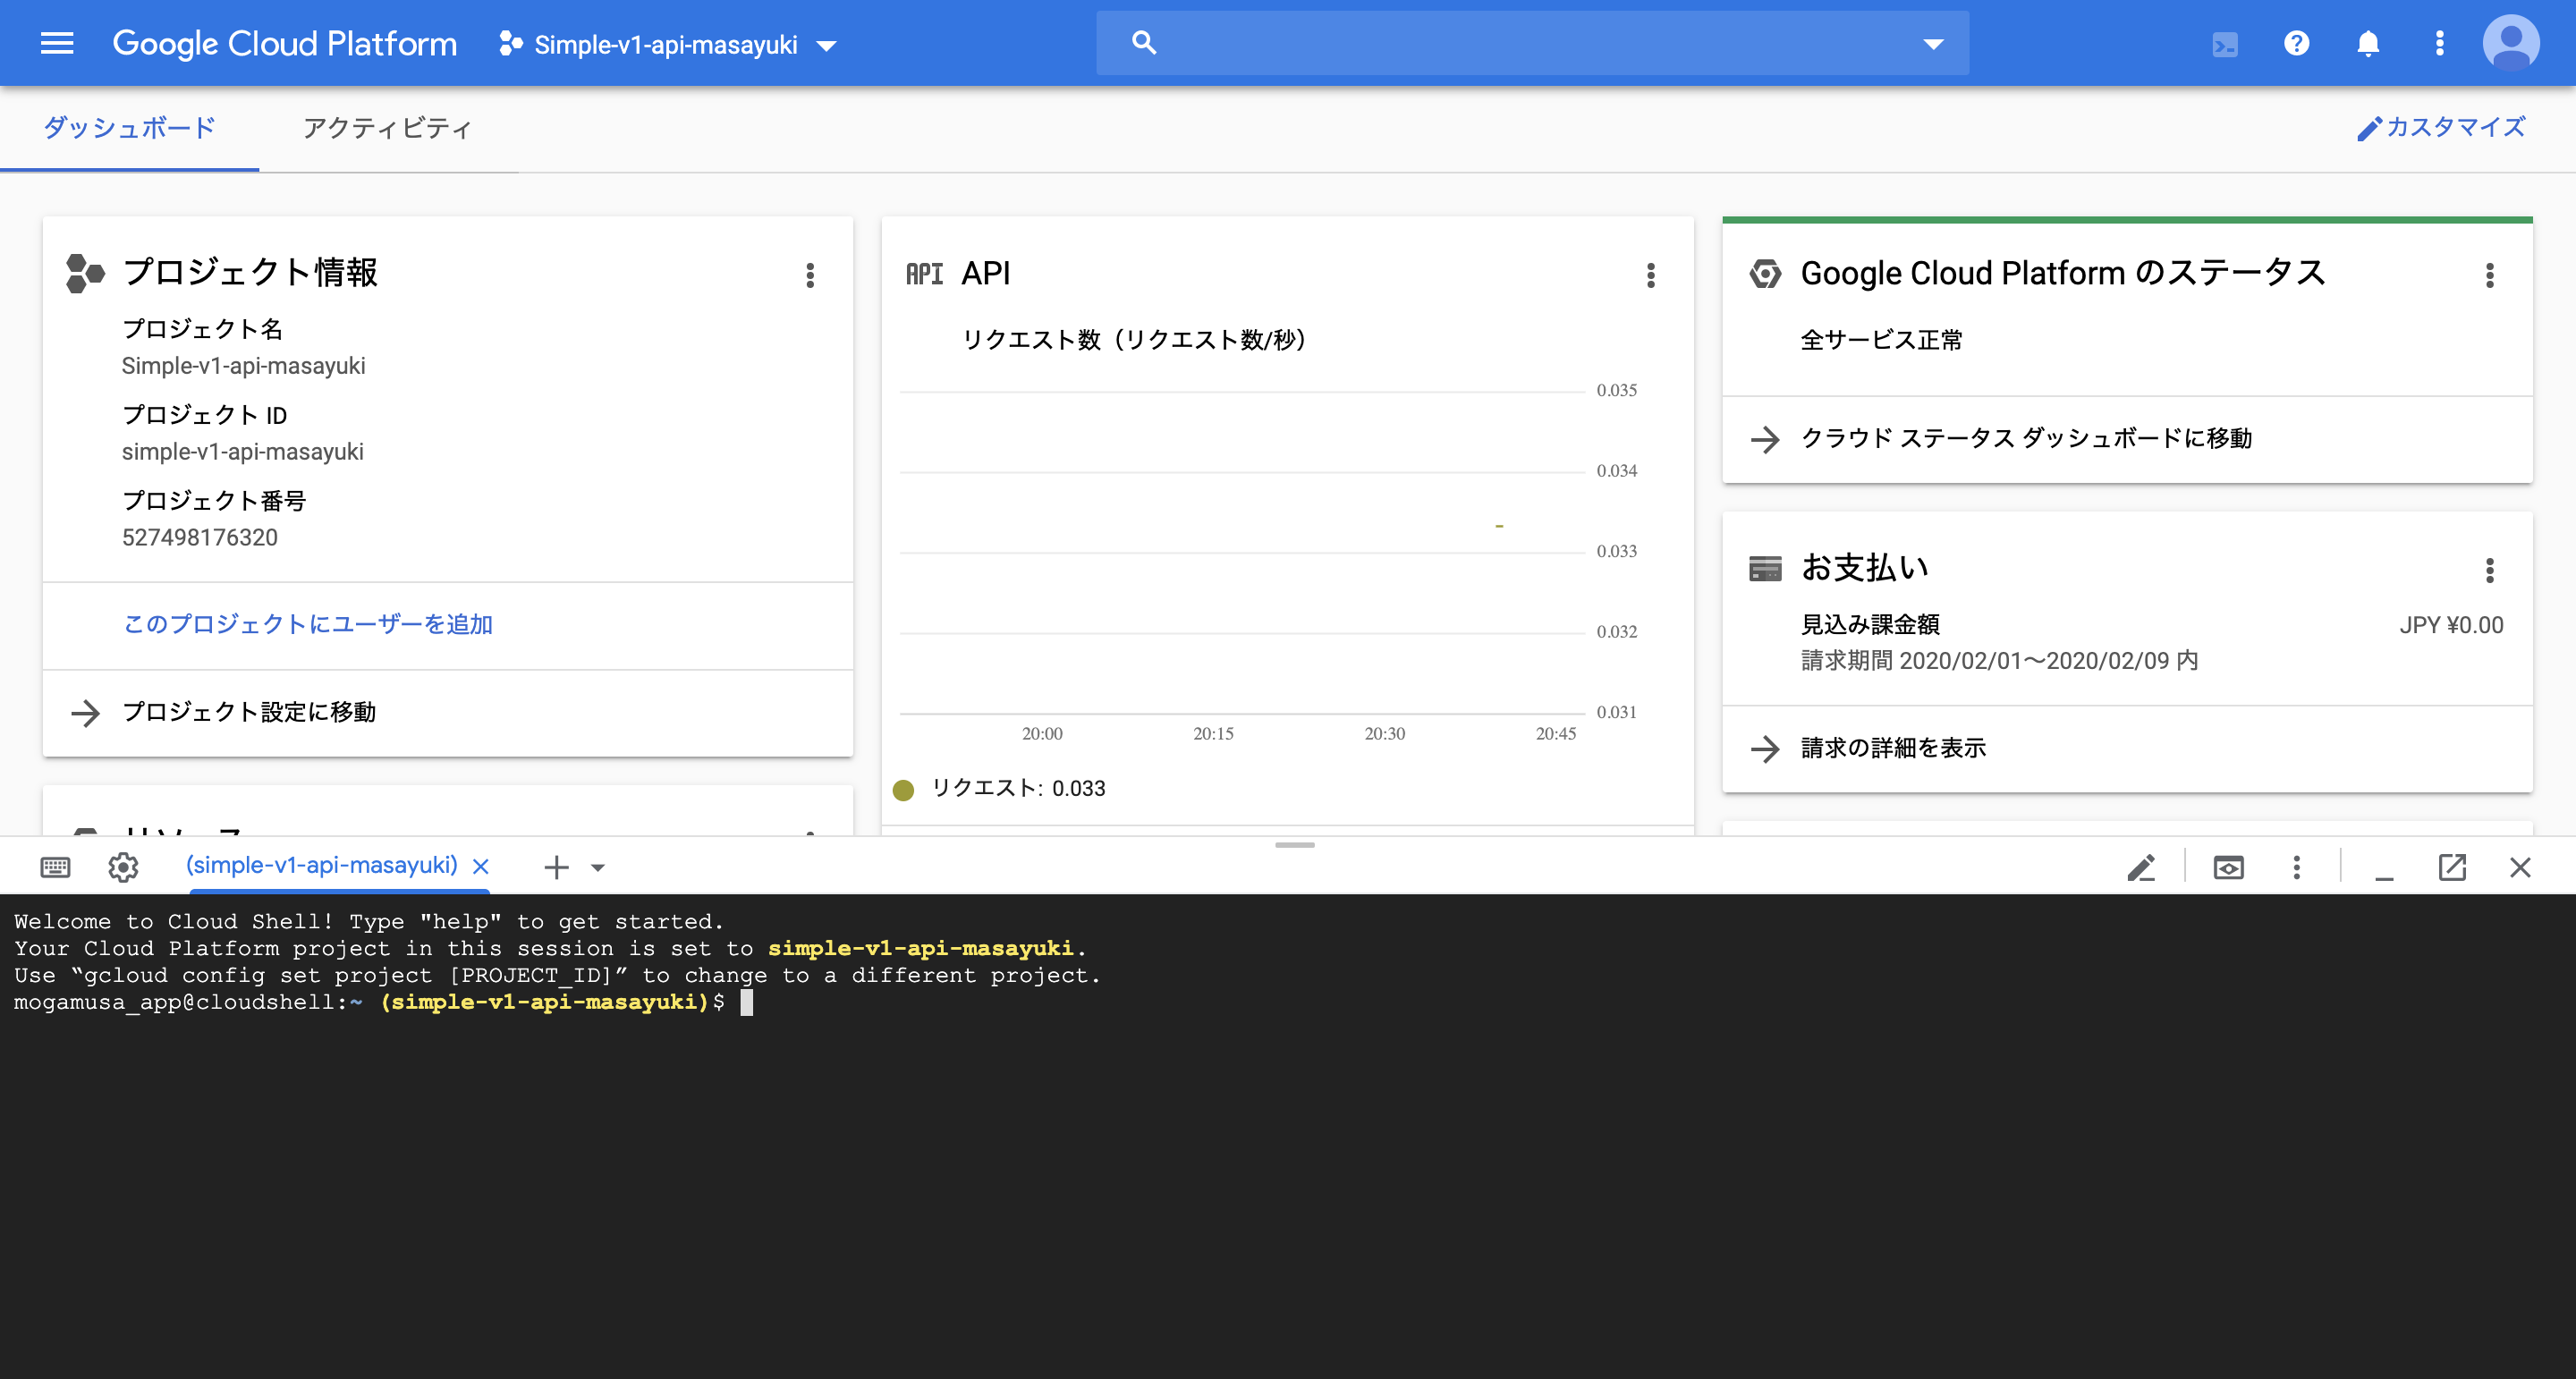
作成ボタンを押してからしばらくすると、【画像 7-1 】の様な作成したプロジェクトのダッシュボート画面に遷移します。ダッシュボード画面の右上のコンソールボタンをクリックして、Google Cloud Shell を起動します。すると【画像 7-2 】の様なコンソールが画面下に表示されます。
【画像 7-1 】
【画像 7-2 】
AppEngine 用の app の作成
起動した Google Cloud Shell で以下のコマンドを実行し、app を作成します。
gcloud app create を実行すると、どこの地域のクラウドサーバーにデプロイするかが確認されます。本記事ではこちらのリンクを参考に、東京を表す( [2] asia-northeast1)を選んでいます。
$ gcloud app create
WARNING: Creating an App Engine application for a project is irreversible and the region
cannot be changed. More information about regions is at
<https://cloud.google.com/appengine/docs/locations>.
Please choose the region where you want your App Engine application
located:
 [1] asia-east2    (supports standard and flexible)
 [2] asia-northeast1 (supports standard and flexible)
 [3] asia-northeast2 (supports standard and flexible)
 [4] asia-south1   (supports standard and flexible)
 [5] australia-southeast1 (supports standard and flexible)
 [6] europe-west   (supports standard and flexible)
 [7] europe-west2  (supports standard and flexible)
 [8] europe-west3  (supports standard and flexible)
 [9] europe-west6  (supports standard and flexible)
 [10] northamerica-northeast1 (supports standard and flexible)
 [11] southamerica-east1 (supports standard and flexible)
 [12] us-central    (supports standard and flexible)
 [13] us-east1      (supports standard and flexible)
 [14] us-east4      (supports standard and flexible)
 [15] us-west2      (supports standard and flexible)
 [16] cancel
8. Spring Boot のプロジェクトに AppEngine 用の設定を追加
GAE に API をデプロイするためには、app.yaml を追加し、build.gradle.kts 、setting.gradle.kts をそれぞれ修正する必要があるので、「// 追加」と書かれている部分を参考に追記して下さい。追記し終わったら各自の Github Repository に Spring Boot プロジェクトをアップロードして下さい。
runtime: java11
instance_class: B1
manual_scaling:
  instances: 1
env_variables:
  JAVA_TOOL_OPTIONS: "-XX:MaxRAM=256m -XX:ActiveProcessorCount=2 -Xmx32m"
import org.jetbrains.kotlin.gradle.tasks.KotlinCompile

plugins {
	id("org.springframework.boot") version "2.2.4.RELEASE"
	id("io.spring.dependency-management") version "1.0.9.RELEASE"
	kotlin("jvm") version "1.3.61"
	kotlin("plugin.spring") version "1.3.61"
	id("com.google.cloud.tools.appengine") version "2.1.0" // 追加
}

group = "tokyo.masayuki"
version = "0.0.1-SNAPSHOT"
java.sourceCompatibility = JavaVersion.VERSION_1_8

repositories {
	mavenCentral()
}

dependencies {
	implementation("org.springframework.boot:spring-boot-starter-web")
	implementation("com.fasterxml.jackson.module:jackson-module-kotlin")
	implementation("org.jetbrains.kotlin:kotlin-reflect")
	implementation("org.jetbrains.kotlin:kotlin-stdlib-jdk8")
	testImplementation("org.springframework.boot:spring-boot-starter-test") {
		exclude(group = "org.junit.vintage", module = "junit-vintage-engine")
	}
	implementation("com.google.appengine:appengine-api-1.0-sdk:+")  // 追加
}

tasks.withType<Test> {
	useJUnitPlatform()
}

tasks.withType<KotlinCompile> {
	kotlinOptions {
		freeCompilerArgs = listOf("-Xjsr305=strict")
		jvmTarget = "1.8"
	}
}

// 追加(projectId は【画像 7-1 】に書かれている projectId に書き換える)
appengine {
	deploy {
		projectId = "your projectId" // example: "simple-v1-api-masayuki"
		version = "v1-0-0"
	}
}
rootProject.name = "simple-v1-api"
// 追加
pluginManagement {
    repositories {
        gradlePluginPortal()
        google()
    }
    resolutionStrategy {
        eachPlugin {
            if (requested.id.id == "com.google.cloud.tools.appengine") {
                useModule("com.google.cloud.tools:appengine-gradle-plugin:${requested.version}")
            }
        }
    }
}
9. Google App Engine に API をデプロイ
Google Cloud Shell を利用して、各自の Github Repository からプロジェクトを git clone し、プロジェクトルートで、./gradlew appengineDeploy のコマンドを実行し、本番環境にデプロイします。
デプロイが成功したら
https://(your projectId).appspot.com/v1/api/testでアクセスができる様になります!
自分の場合は以下のURLです。
https://simple-v1-api-masayuki.appspot.com/v1/api/test
実行手順
(SSH 接続は今回必須ではないので、HTTPS でアクセスします。アクセスすると、Github の username と password の入力を求められるので入力して下さい)
$ git clone https://github.com/mogamusa31/simple-v1-api.git
$ cd simple-v1-api
$ ./gradlew appengineDeploy
10. まとめ
本記事では、Spring Boot プロジェクトを作成し、Google App Engine に API をデプロイするまでの流れを解説させて頂きました。記事に押されたいいねの数が、次の記事を書くモチベーションになるので、少しでも良いと思った方は、是非いいねボタンを押して下さい。よろしくお願いします!
次の記事は、Android アプリ開発についての記事か、Go x GAE のAPI開発入門の記事を書こうかなと思ってます。
PR
趣味で Android アプリの開発を行っていて、直近ではテトリスのアプリを作ったので、是非以下のリンクからダウンロードよろしくお願い致します!
https://play.google.com/store/apps/details?id=tokyo.masayuki.tetris&hl=ja