はじめに
最近、elastic の Github リポジトリに Elastic 環境を一括で作成するレシピが登録されました。
今回はそのレシピを使って 15 分でelastic + filebeat + kibana 環境を作る手順を紹介します。
本エントリーはElastic Cloud on Kubernetes のドキュメント内のQuickstartを元にしています。
本エントリーを実施した後にでも上記ドキュメントを参照いただくと、作成したリソースについて理解が深まると思います。
事前準備
事前準備の内容は次の通りです。
- Linux コマンドを実行できる環境。WSL やCloudShell 等
- k8s 環境。AKS 等
- kubectl コマンドが実行できるようログインを済ませておく
構成

構築
さっそく構築です。
デプロイ
デプロイは次の順序で行います。
- Elastic Cloud on Kubernetes を デプロイします
- elastic のリポジトリからマニフェストファイルを clone して、デプロイします
Elastic Cloud on Kubernetes を デプロイ
次のコマンドを実行します。
kubectl apply -f https://download.elastic.co/downloads/eck/1.1.1/all-in-one.yaml
elastic のリポジトリからマニフェストファイルを clone して、デプロイ
次のコマンドを実行します。
git clone https://github.com/elastic/cloud-on-k8s.git
cd cloud-on-k8s/config/recipes/beats/
kubectl apply -f 0_ns.yaml
kubectl apply -f 1_monitor.yaml
kubectl apply -f 2_filebeat-kubernetes.yaml
kubectl apply -f 3_metricbeat-kubernetes.yaml
結果確認
次のコマンドを実行して Pod が Running になっていることを確認した後、次の手順に進みます。
kubectl get pod  -n beats
kubectl get svc  -n beats
設定変更
Kibana の設定を変更を行います。
ポートフォワードと Kinaba ログインパスワードの確認
次のコマンドを実行して、作業パソコン向けのポートフォワードと Kinaba ログインパスワードの確認を行います。
kubectl port-forward service/monitor-kb-http 5601 -n beats &
kubectl get secret monitor-es-elastic-user -n beats -o=jsonpath='{.data.elastic}' | base64 --decode; echo
Kibanaログイン
作業パソコンから https://localhost:5601/を開きます。※HTTPS なので注意!
ユーザ名「elastic」パスワードは先ほどのコマンドで確認した値を入力します。
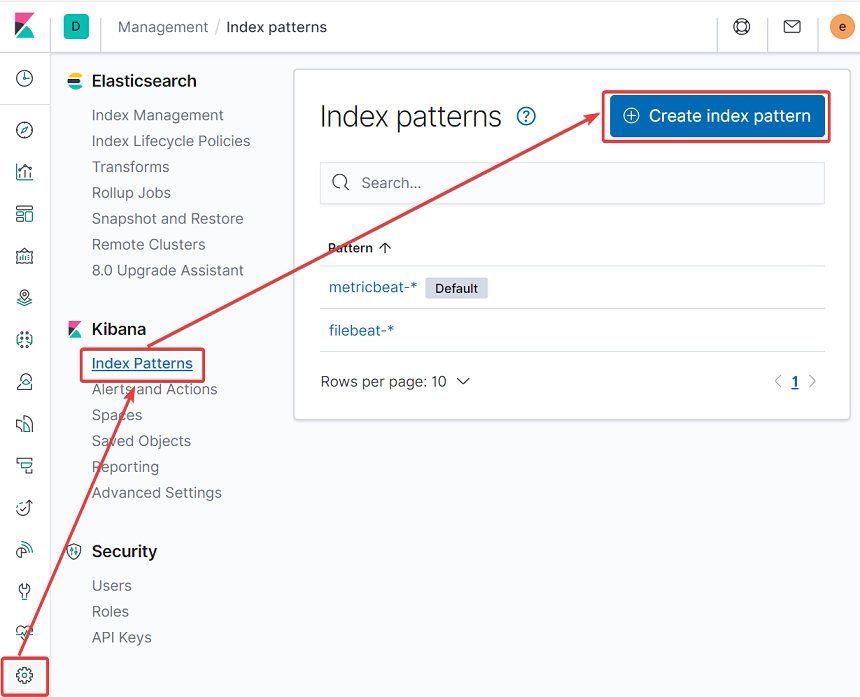
IndexPattern作成
左下のManagementからKibana - Index Patterns の設定を開き、[Create index pattern]をクリックします。
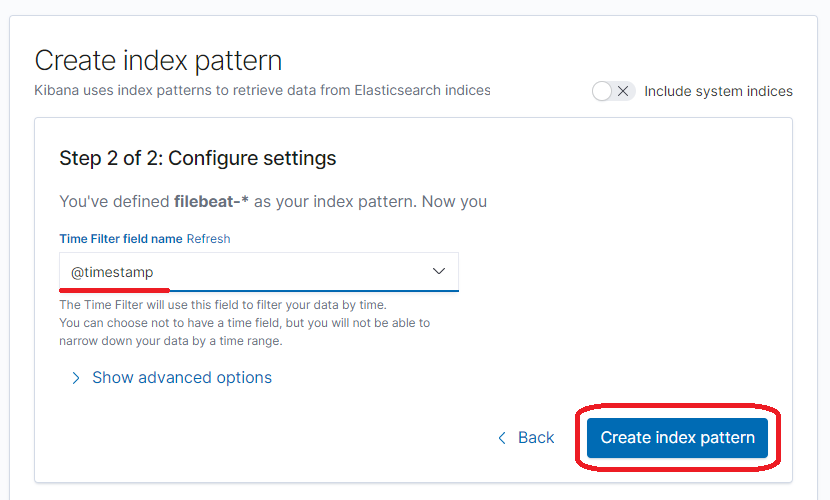
[index pattern]に「filebeat-*」と入力し[ > Next step]をクリックします。

[Time Filter field name Refresh]にて「@timestamp」を選択し、[Create index pattern]をクリックします。
動作確認
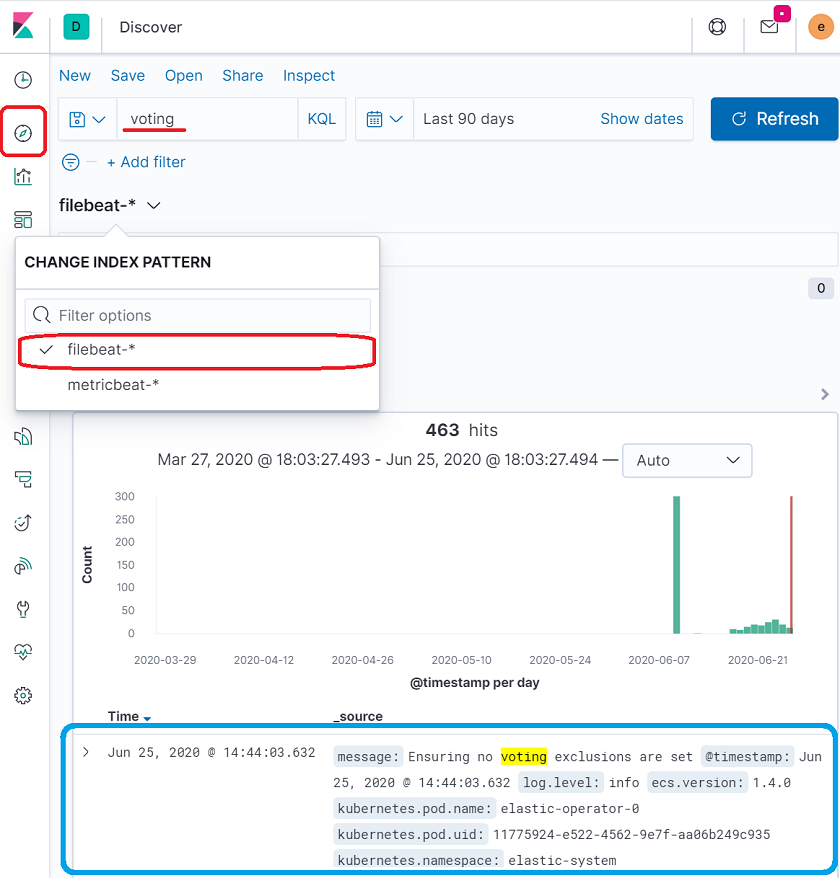
画面左のメニューからコンパスアイコン(Discover)をクリックします。
インデックスパターンでfilebeat-*を選択して、コンテナ名等で検索を行うと、ログが表示されます。
検索キーワードを変更すればNodeのログも確認できます。
参考URL