Rails8系でrails newからデプロイまでを行います
※ Kamalは使いません
※ Solid Queueは使いません
前提条件
Rubyのバージョン
3.3.6
Railsのバージョン
8.0.0
Node.jsのバージョン
v20.18.0
JavaScriptバンドラー
esbuild
CSSフレームワーク
Tailwind
データベース
PostgreSQL
開発環境の構築
Docker・docker composeを使用します
Docker環境の用意
Rails用のディレクトリを作成して移動する
mkdir rails8_sample && cd rails8_sample
Dockerfile.devの作成
rails new時に本番環境用のDockerfileが作成されるため開発環境用のファイルはファイル名を変えておきます
touch Dockerfile.dev
Dockerfile.dev
FROM ruby:3.3.6
ENV LANG C.UTF-8
ENV TZ Asia/Tokyo
RUN apt-get update -qq \
&& apt-get install -y ca-certificates curl gnupg \
&& mkdir -p /etc/apt/keyrings \
&& curl -fsSL https://deb.nodesource.com/gpgkey/nodesource-repo.gpg.key | gpg --dearmor -o /etc/apt/keyrings/nodesource.gpg \
&& NODE_MAJOR=20 \
&& echo "deb [signed-by=/etc/apt/keyrings/nodesource.gpg] https://deb.nodesource.com/node_$NODE_MAJOR.x nodistro main" | tee /etc/apt/sources.list.d/nodesource.list \
&& wget --quiet -O - /tmp/pubkey.gpg https://dl.yarnpkg.com/debian/pubkey.gpg | apt-key add - \
&& echo "deb https://dl.yarnpkg.com/debian/ stable main" | tee /etc/apt/sources.list.d/yarn.list
RUN apt-get update -qq && apt-get install -y build-essential libpq-dev nodejs yarn vim
RUN mkdir /myapp
WORKDIR /myapp
RUN gem install bundler
COPY . /myapp
compose.ymlの作成
touch compose.yml
compose.yml
services:
  db:
    image: postgres
    restart: always
    environment:
      TZ: Asia/Tokyo
      POSTGRES_PASSWORD: password
    volumes:
      - postgresql_data:/var/lib/postgresql
    ports:
      - 5432:5432
    healthcheck:
      test: ["CMD-SHELL", "pg_isready -d myapp_development -U postgres"]
      interval: 10s
      timeout: 5s
      retries: 5
  web:
    build:
      context: .
      dockerfile: Dockerfile.dev
    command: bash -c "bundle install && bundle exec rails db:prepare && rm -f tmp/pids/server.pid && ./bin/dev"
    tty: true
    stdin_open: true
    volumes:
      - .:/myapp
      - bundle_data:/usr/local/bundle:cached
      - node_modules:/myapp/node_modules
    environment:
      TZ: Asia/Tokyo
    ports:
      - "3000:3000"
    depends_on:
      db:
        condition: service_healthy
volumes:
  bundle_data:
  postgresql_data:
  node_modules:
ここまで行うとディレクトリの構成は下記の用のなります
>>>ls
Dockerfile.dev  compose.yml
ビルドとrailsのgemのインストール
docker compose build
docker compose run --rm web gem install rails -v '~> 8.0'
インストールが出来ました!
>>>docker compose run --rm web gem install rails -v '~> 8.0'
[+] Creating 2/2
 ✔ Network rails8_sample_default  Created                                                                                                        0.0s
 ✔ Container rails8_sample-db-1   Created                                                                                                        0.0s
[+] Running 1/1
 ✔ Container rails8_sample-db-1  Started                                                                                                         0.3s
Successfully installed rails-8.0.0
1 gem installed

A new release of RubyGems is available: 3.5.22 → 3.5.23!
Run `gem update --system 3.5.23` to update your installation.
rails new
PostgreSQL・esbuild・Tailwindを指定してrails newを行います
docker compose run --rm web rails new . -d postgresql -j esbuild --css=tailwind --skip-kamal --skip-solid
rails newを行うとディレクトリは下記のようになります
>>>ls
Dockerfile      Gemfile.lock  Rakefile  compose.yml  db   node_modules  script              test    yarn.lock
Dockerfile.dev  Procfile.dev  app       config       lib  package.json  storage             tmp
Gemfile         README.md     bin       config.ru    log  public        tailwind.config.js  vendor
サーバーを立ち上げてみる
Procfile.devの修正
webのところに-b 0.0.0.0 -p 3000を追記します
- web: env RUBY_DEBUG_OPEN=true bin/rails server
+ web: env RUBY_DEBUG_OPEN=true bin/rails server -b 0.0.0.0 -p 3000
Procfile.devは下記のようになります
web: env RUBY_DEBUG_OPEN=true bin/rails server -b 0.0.0.0 -p 3000
js: yarn build --watch
css: yarn build:css --watch
config/database.ymlの修正
Docker環境に合わせてhostとusernameとpasswordを追加します
default: &default
  adapter: postgresql
  encoding: unicode
  # For details on connection pooling, see Rails configuration guide
  # https://guides.rubyonrails.org/configuring.html#database-pooling
  pool: <%= ENV.fetch("RAILS_MAX_THREADS") { 5 } %>
+ host: db
+ username: postgres
+ password: password
config/database.ymlは下記のようになります(コメントアウトは削除してます)
default: &default
  adapter: postgresql
  encoding: unicode
  pool: <%= ENV.fetch("RAILS_MAX_THREADS") { 5 } %>
  host: db
  username: postgres
  password: password

development:
  <<: *default
  database: myapp_development

test:
  <<: *default
  database: myapp_test

production:
  <<: *default
  database: myapp_production
  username: myapp
  password: <%= ENV["MYAPP_DATABASE_PASSWORD"] %>
サーバーを立ち上げる
docker compose up
localhost:3000にアクセスする
確認用の画面を作成する
scaffoldでタスク機能を作成します
※コンテナを立ち上げたまま別タブで実行してください
docker compose exec web bin/rails g scaffold tasks name:string --skip-jbuilder --skip-helper --skip-test-framework
テーブルを追加したのでmigrateします
docker compose exec web bin/rails db:migrate
タスク作成ページの確認
Renderを使ったデプロイをします
※GitHubからコードを取得する方式でデプロイするため事前にGitHubにpublicなリポジトリを作ってpushしておく必要があります
データベースサービスを作成
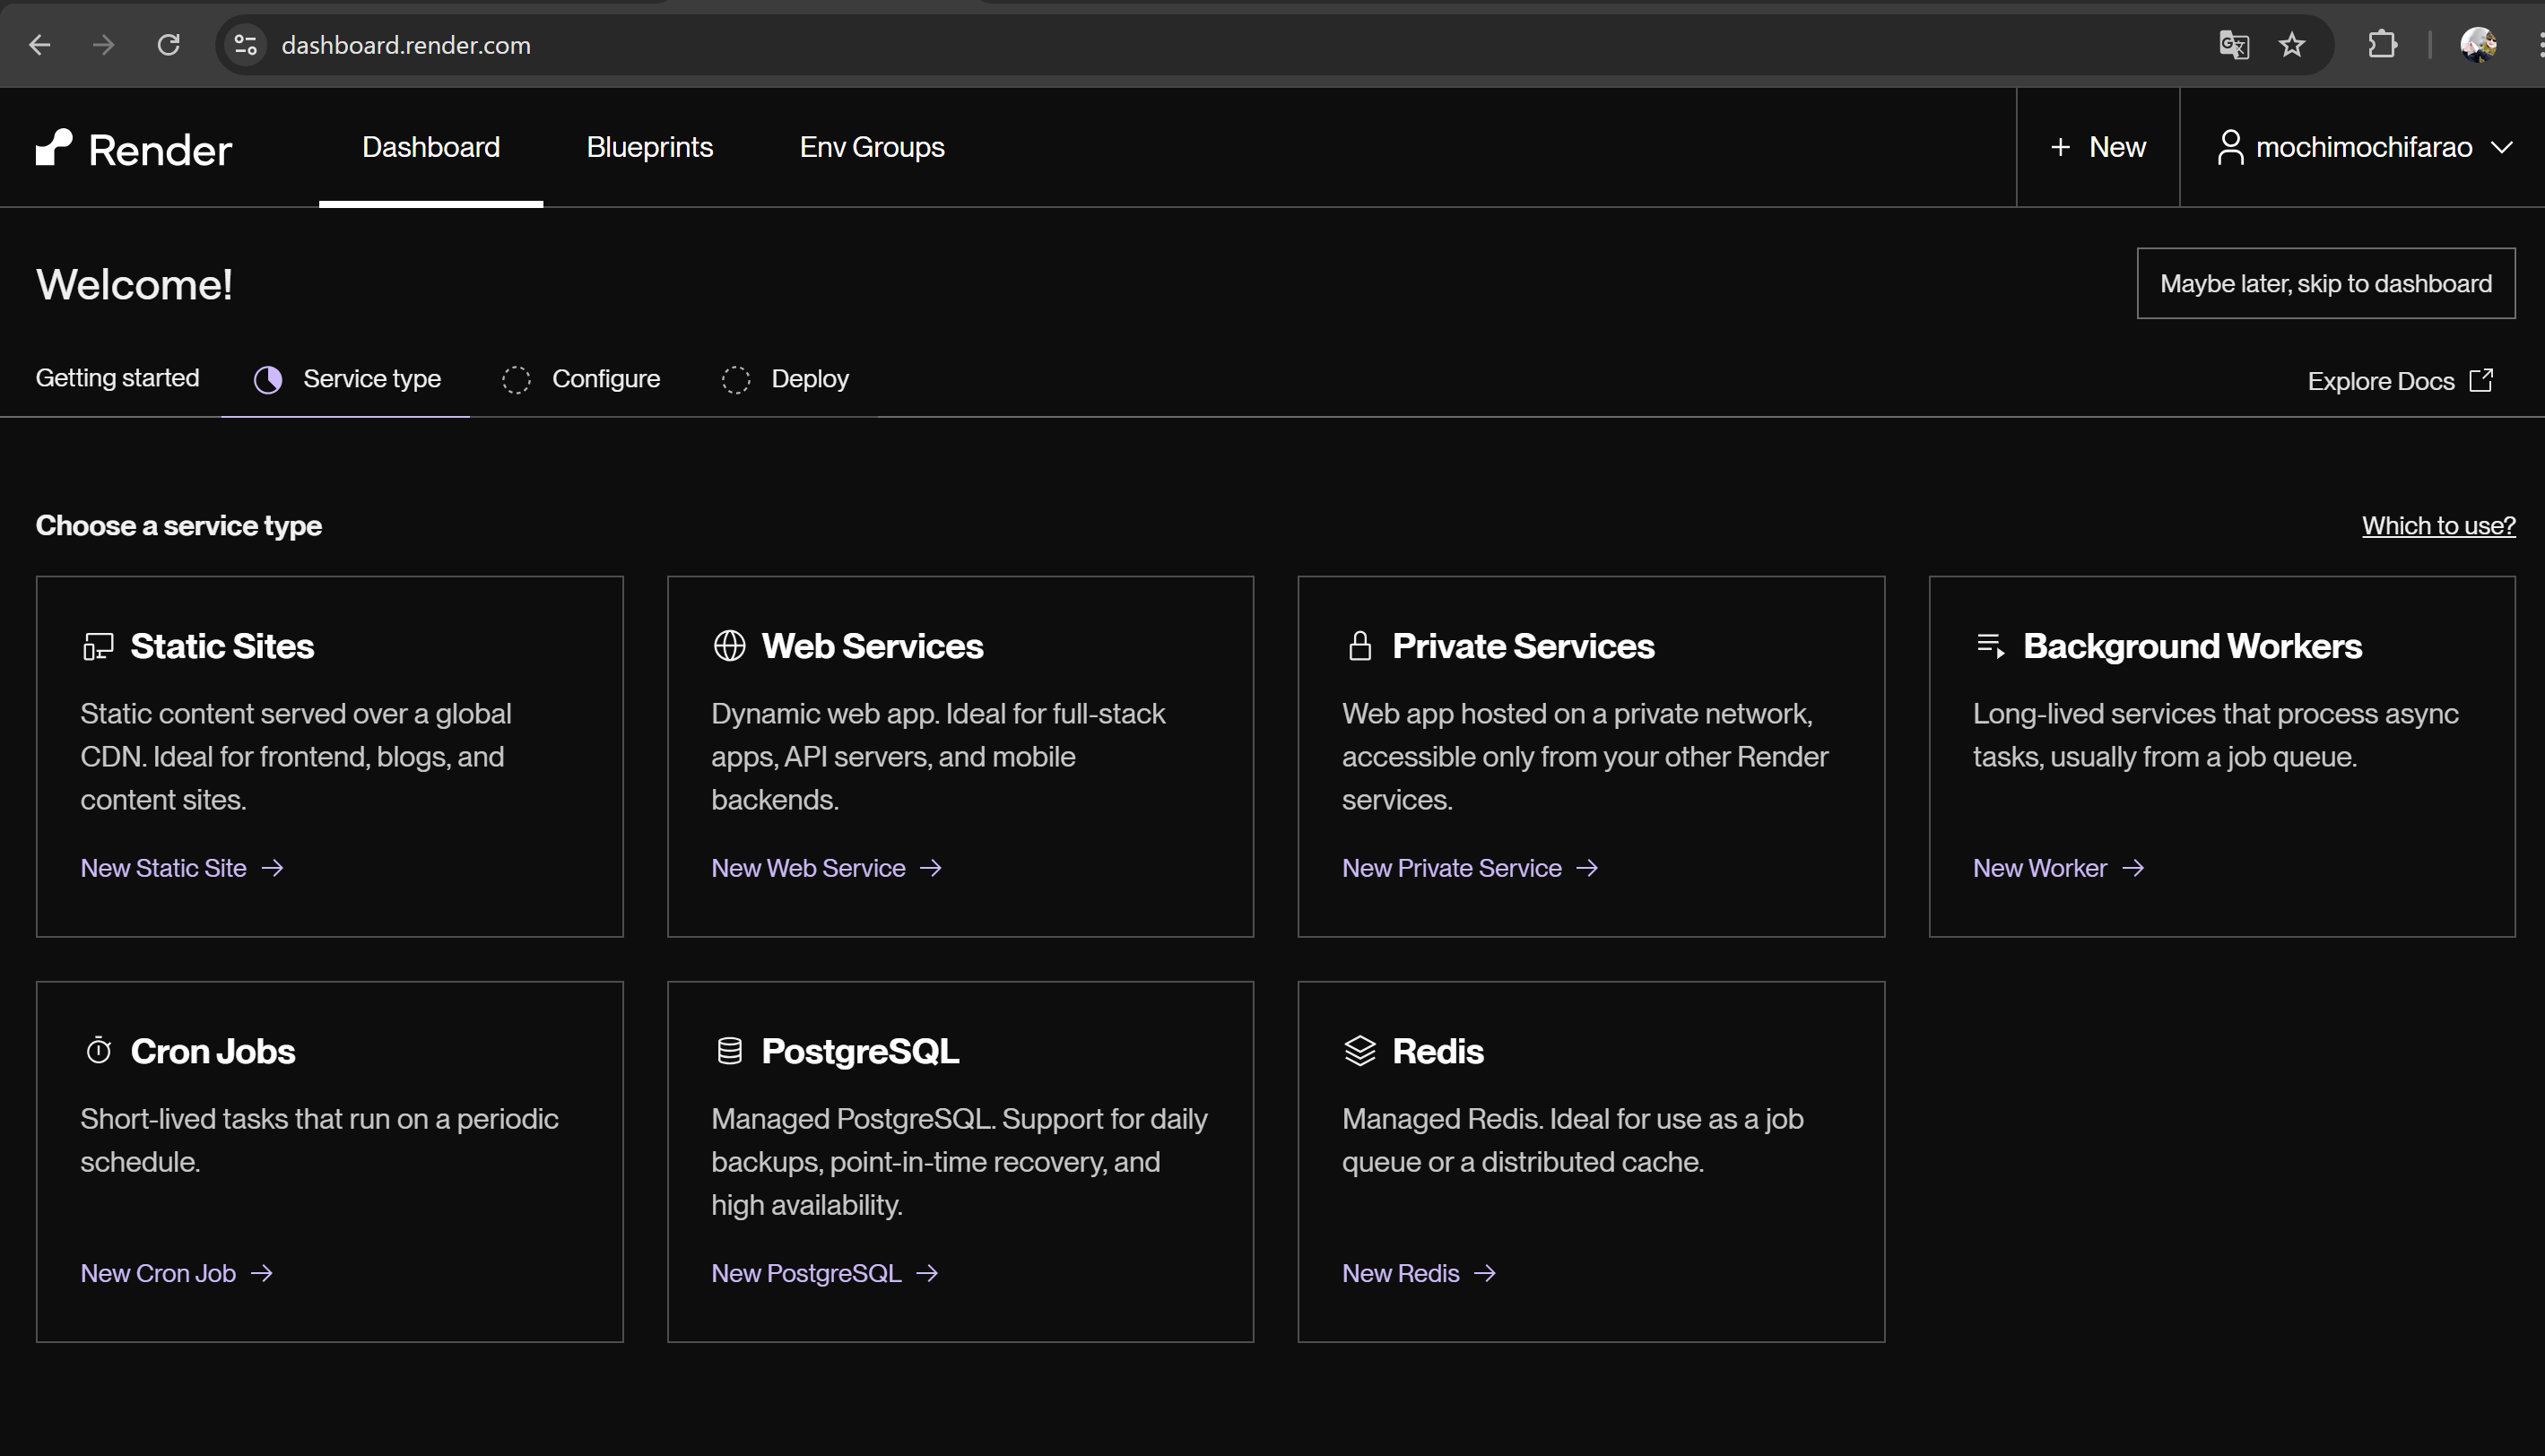
1. PostgreSQLを選択しましょう
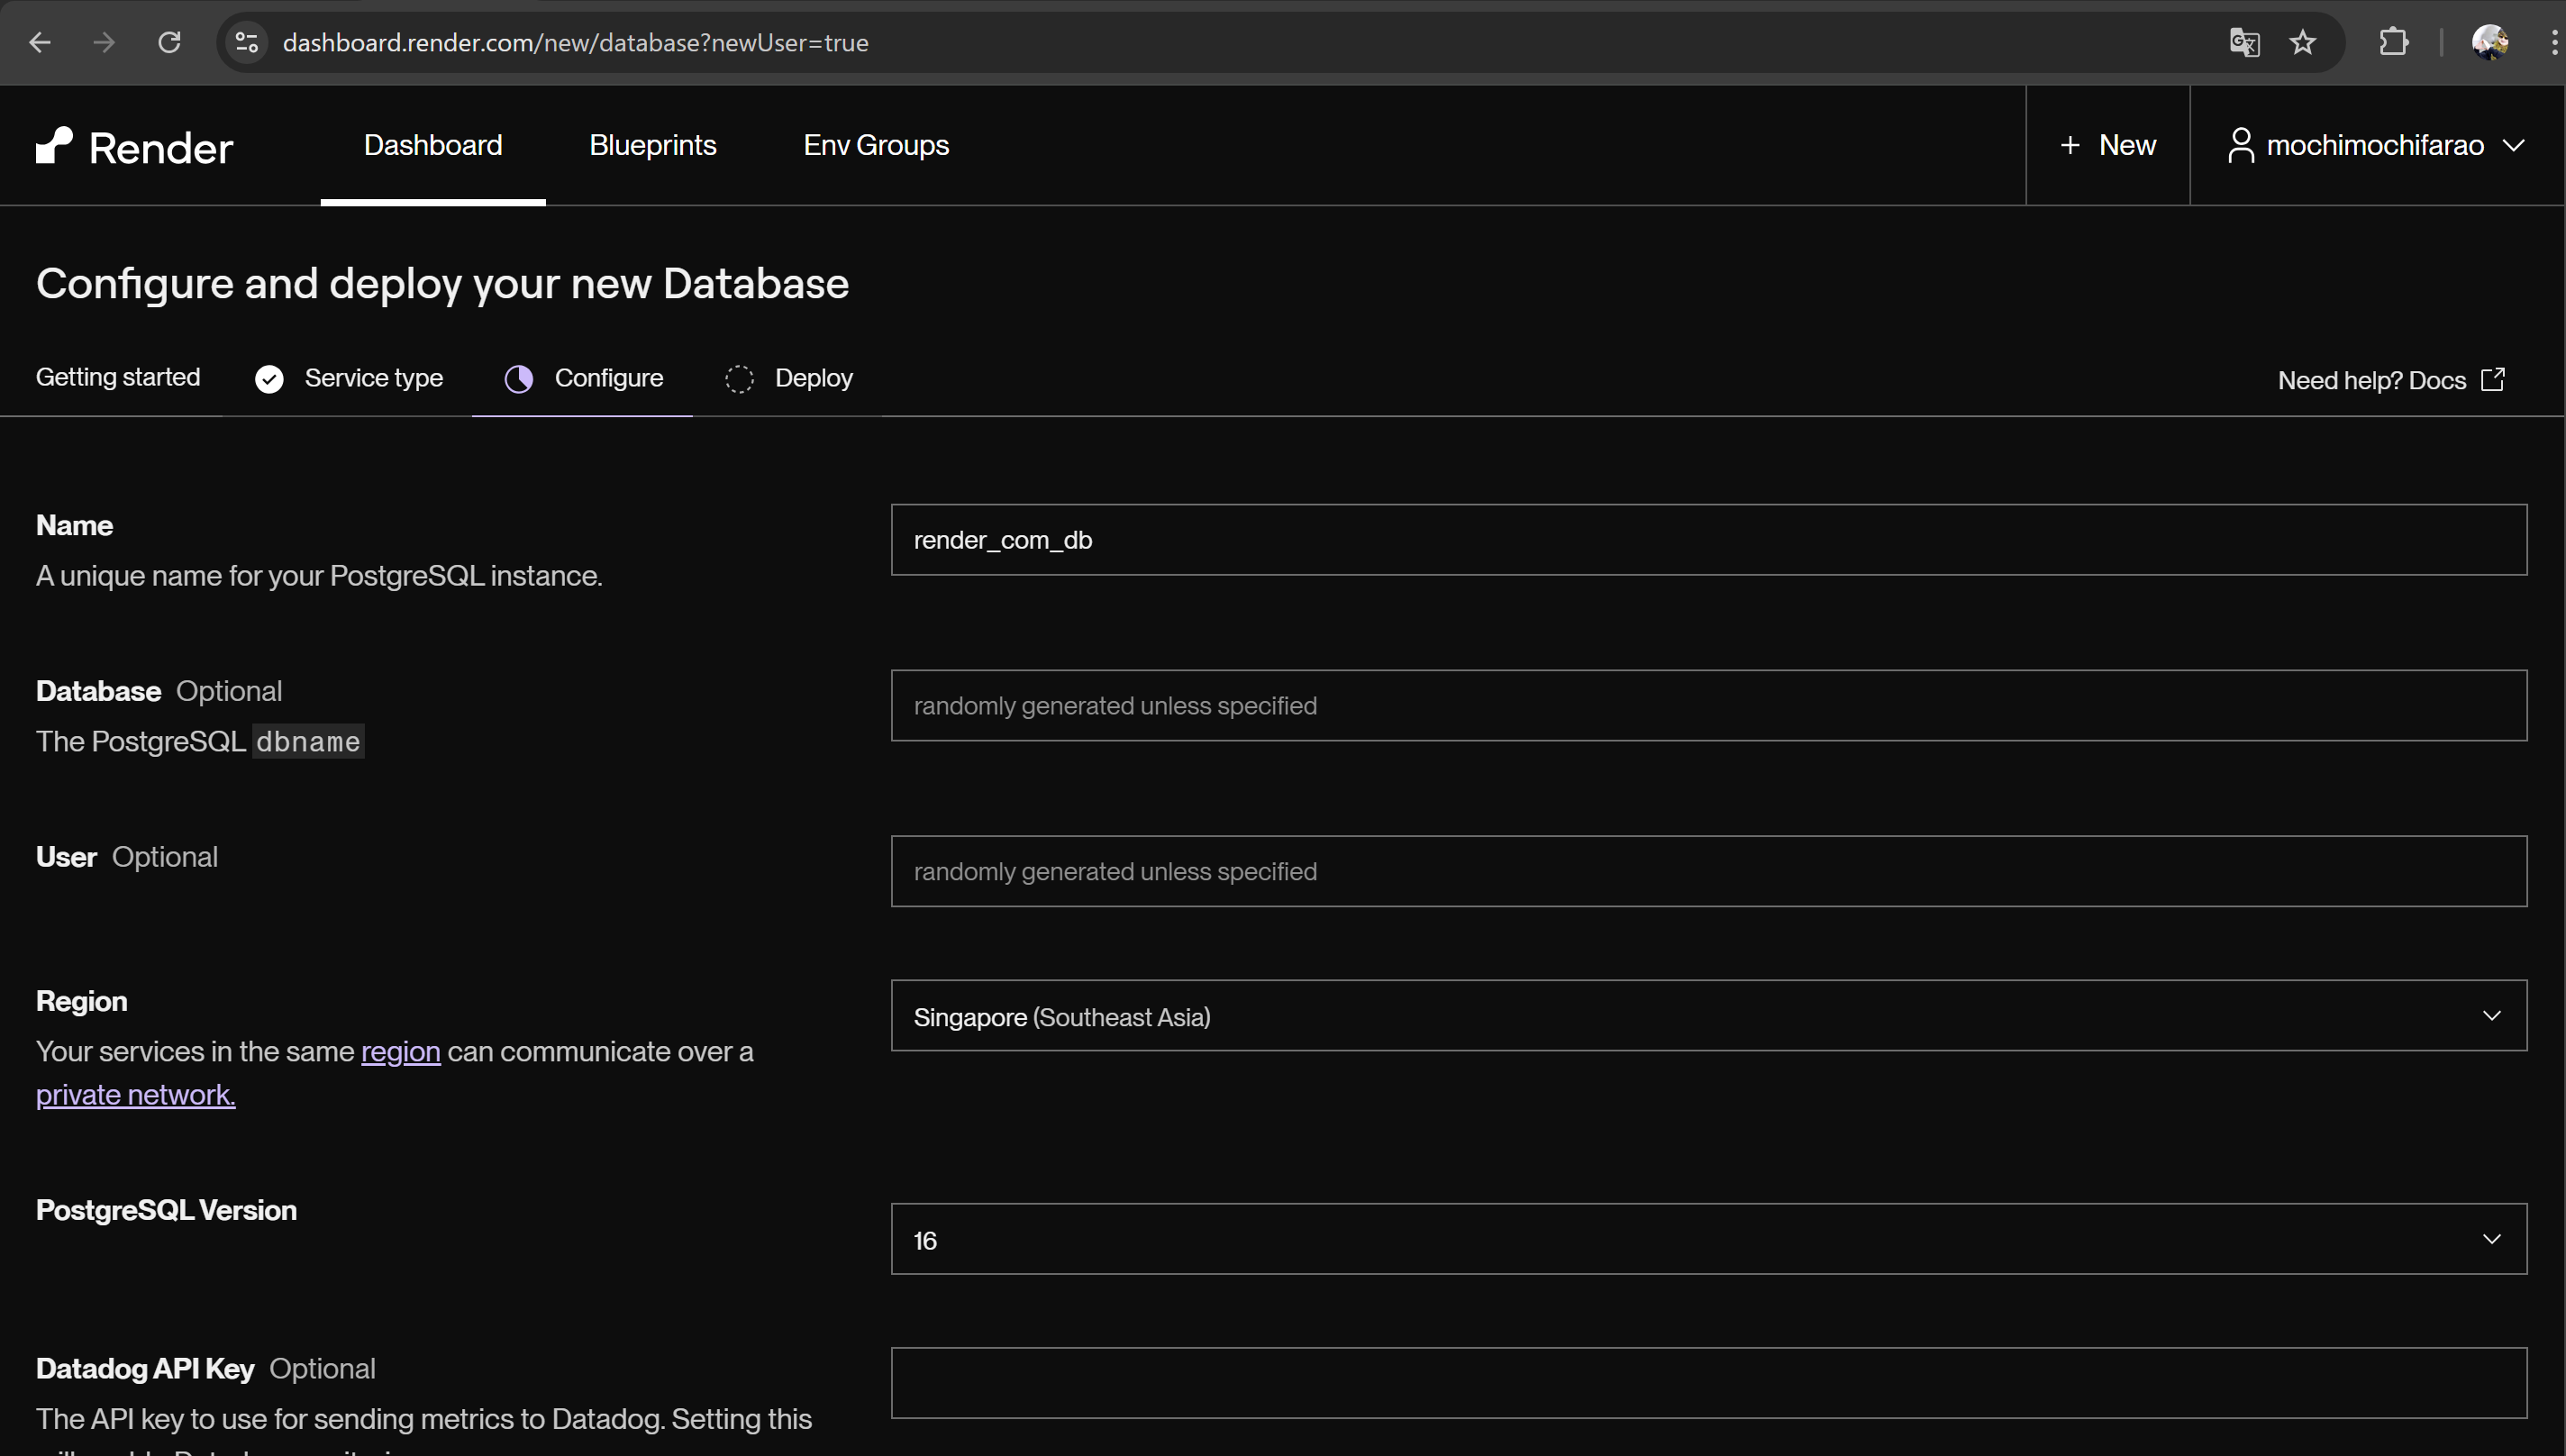
2. Nameの入力とRegionの選択
- Nameには適当な名前を付けましょう
- Regionはシンガポールを選択します
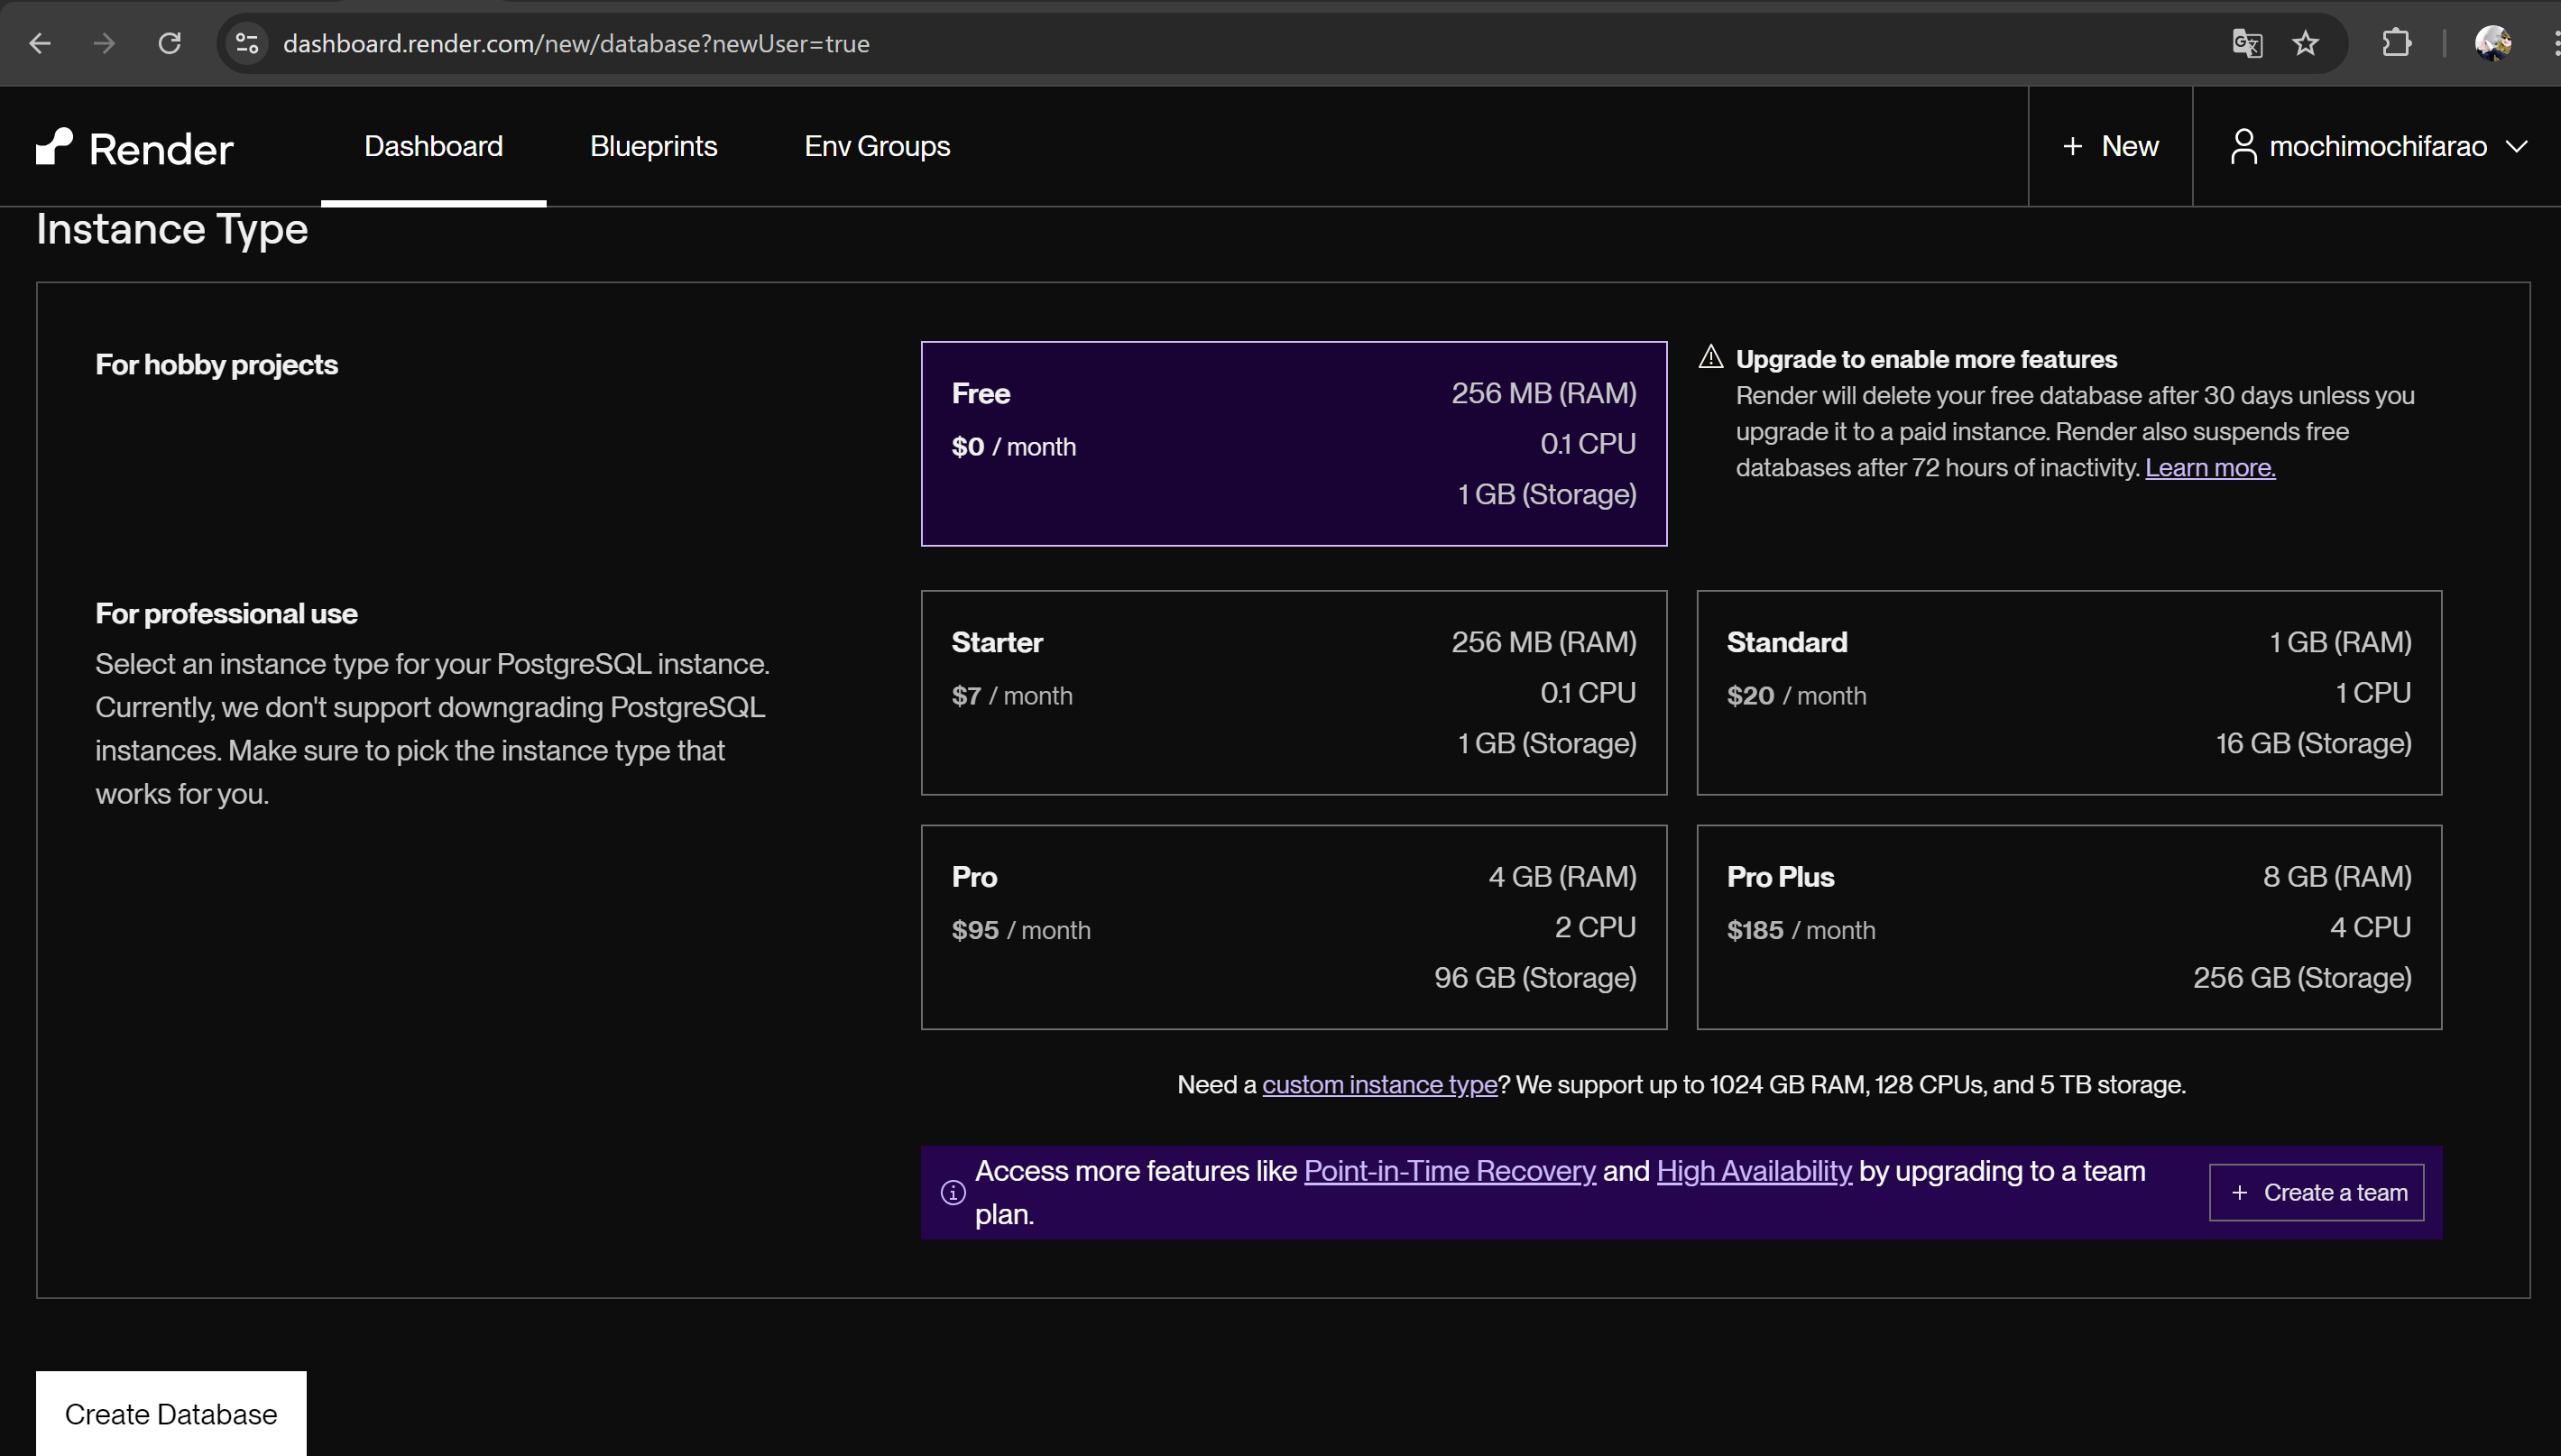
3. Planの選択
今回は無料のものを選択しています
※注意事項は読んでおきましょう
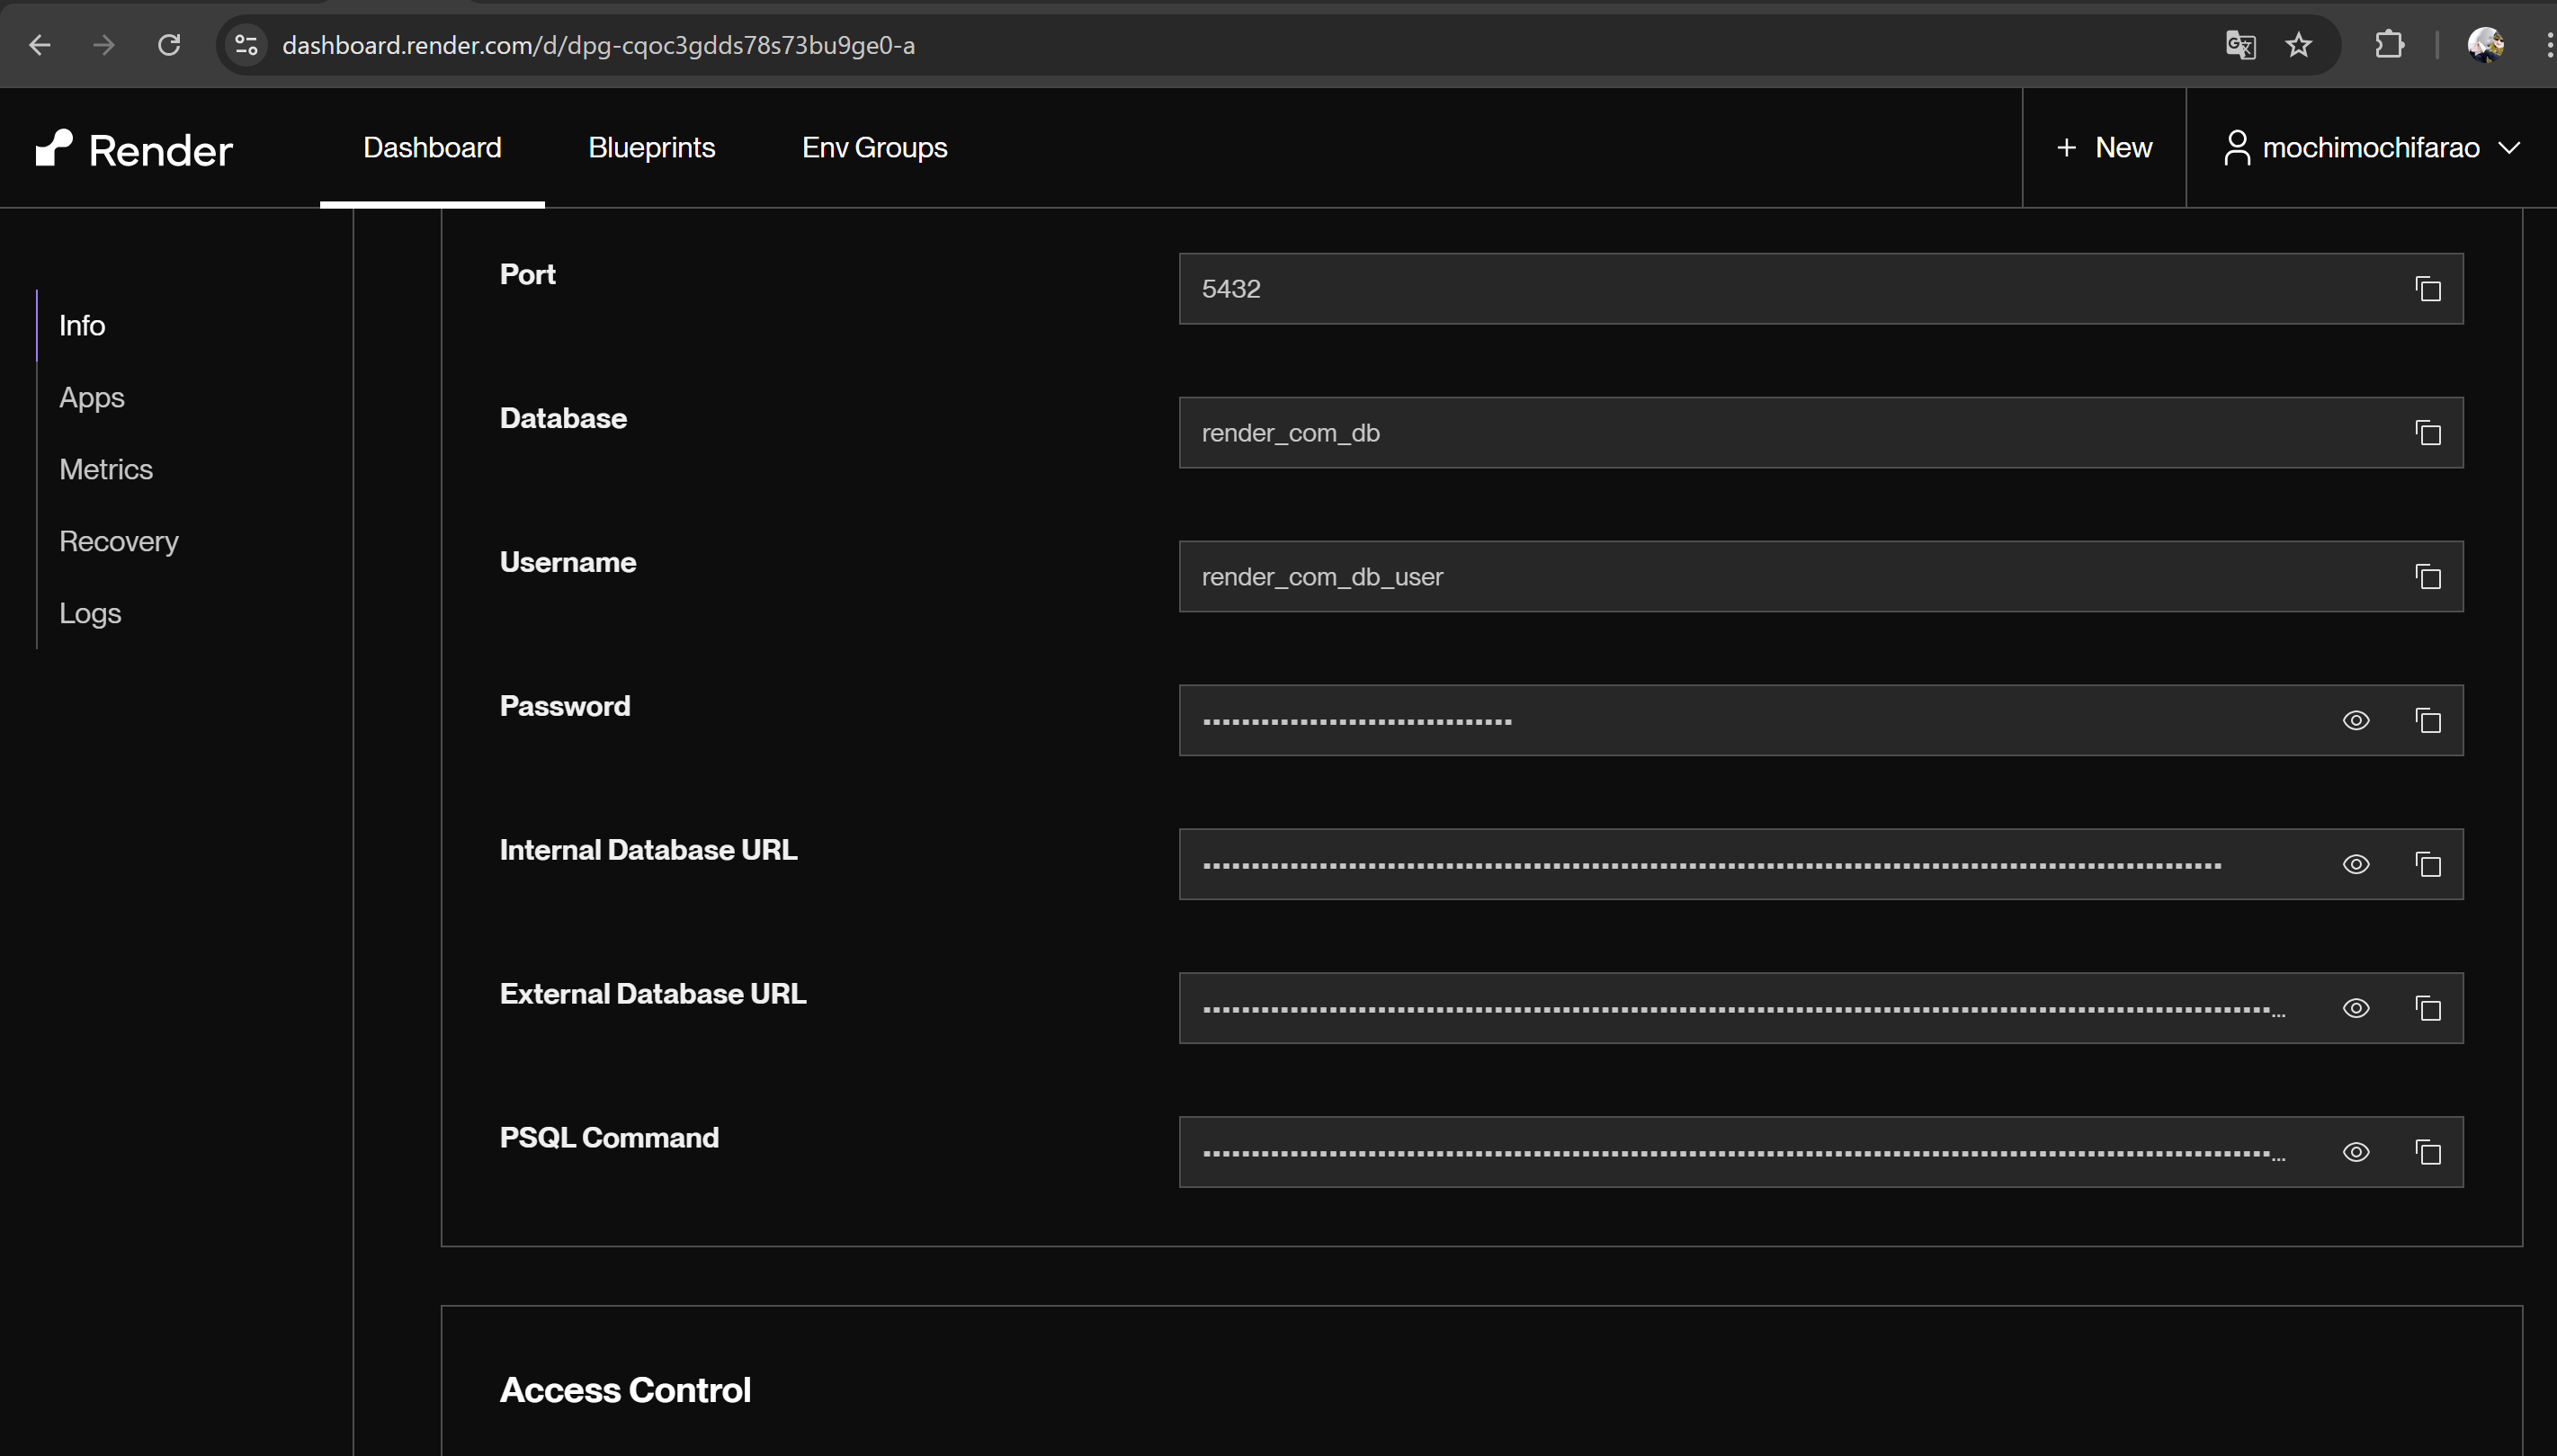
4. Internal Database URL
Web Servicesを作成するときにInternal Database URLの値を環境変数に入れるのでどこで確認できるかを把握しておきましょう
データベースの作成後にDashboardから確認出来ます
Web Servicesを作成
1. Web Servicesを選択
2. Public Git Repositoryにあらかじめ作成しておいたGitHubリポジトリのURLを入力します
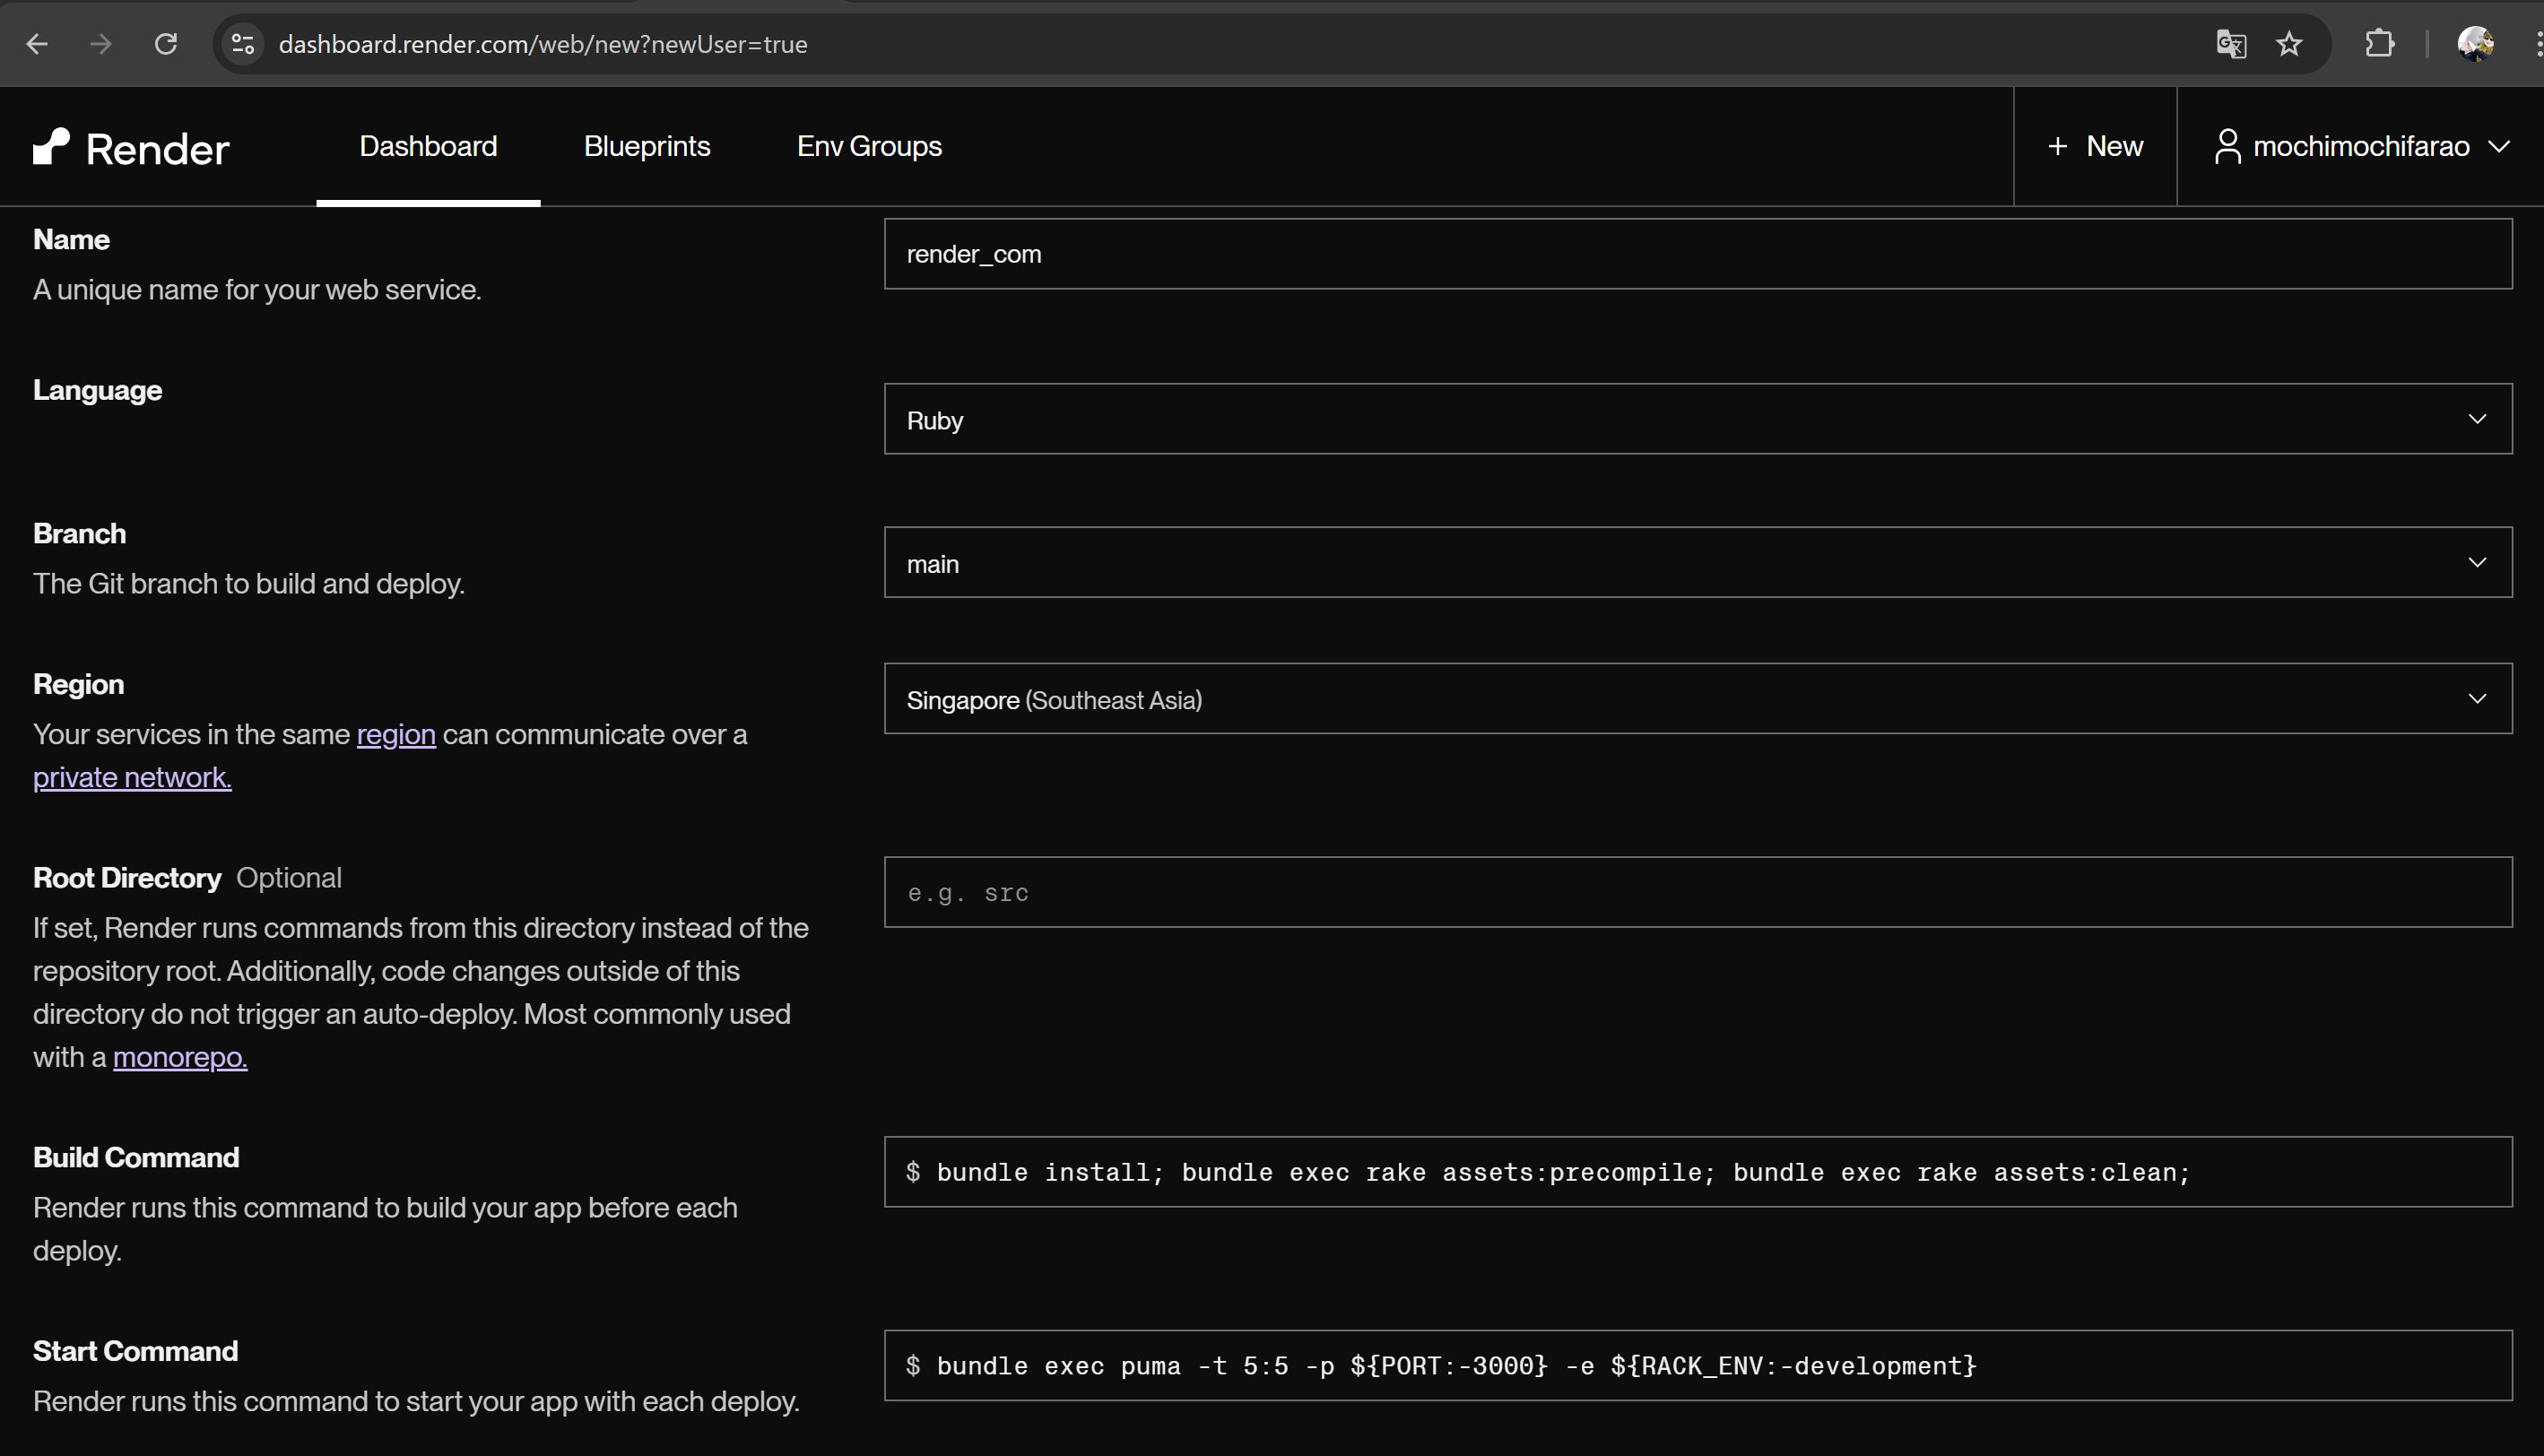
3. Languageの設定
LanguageはDockerではなくRubyを選択しましょう

4. Regionの設定
Regionはデータベースと合わせてシンガポールを選択しましょう
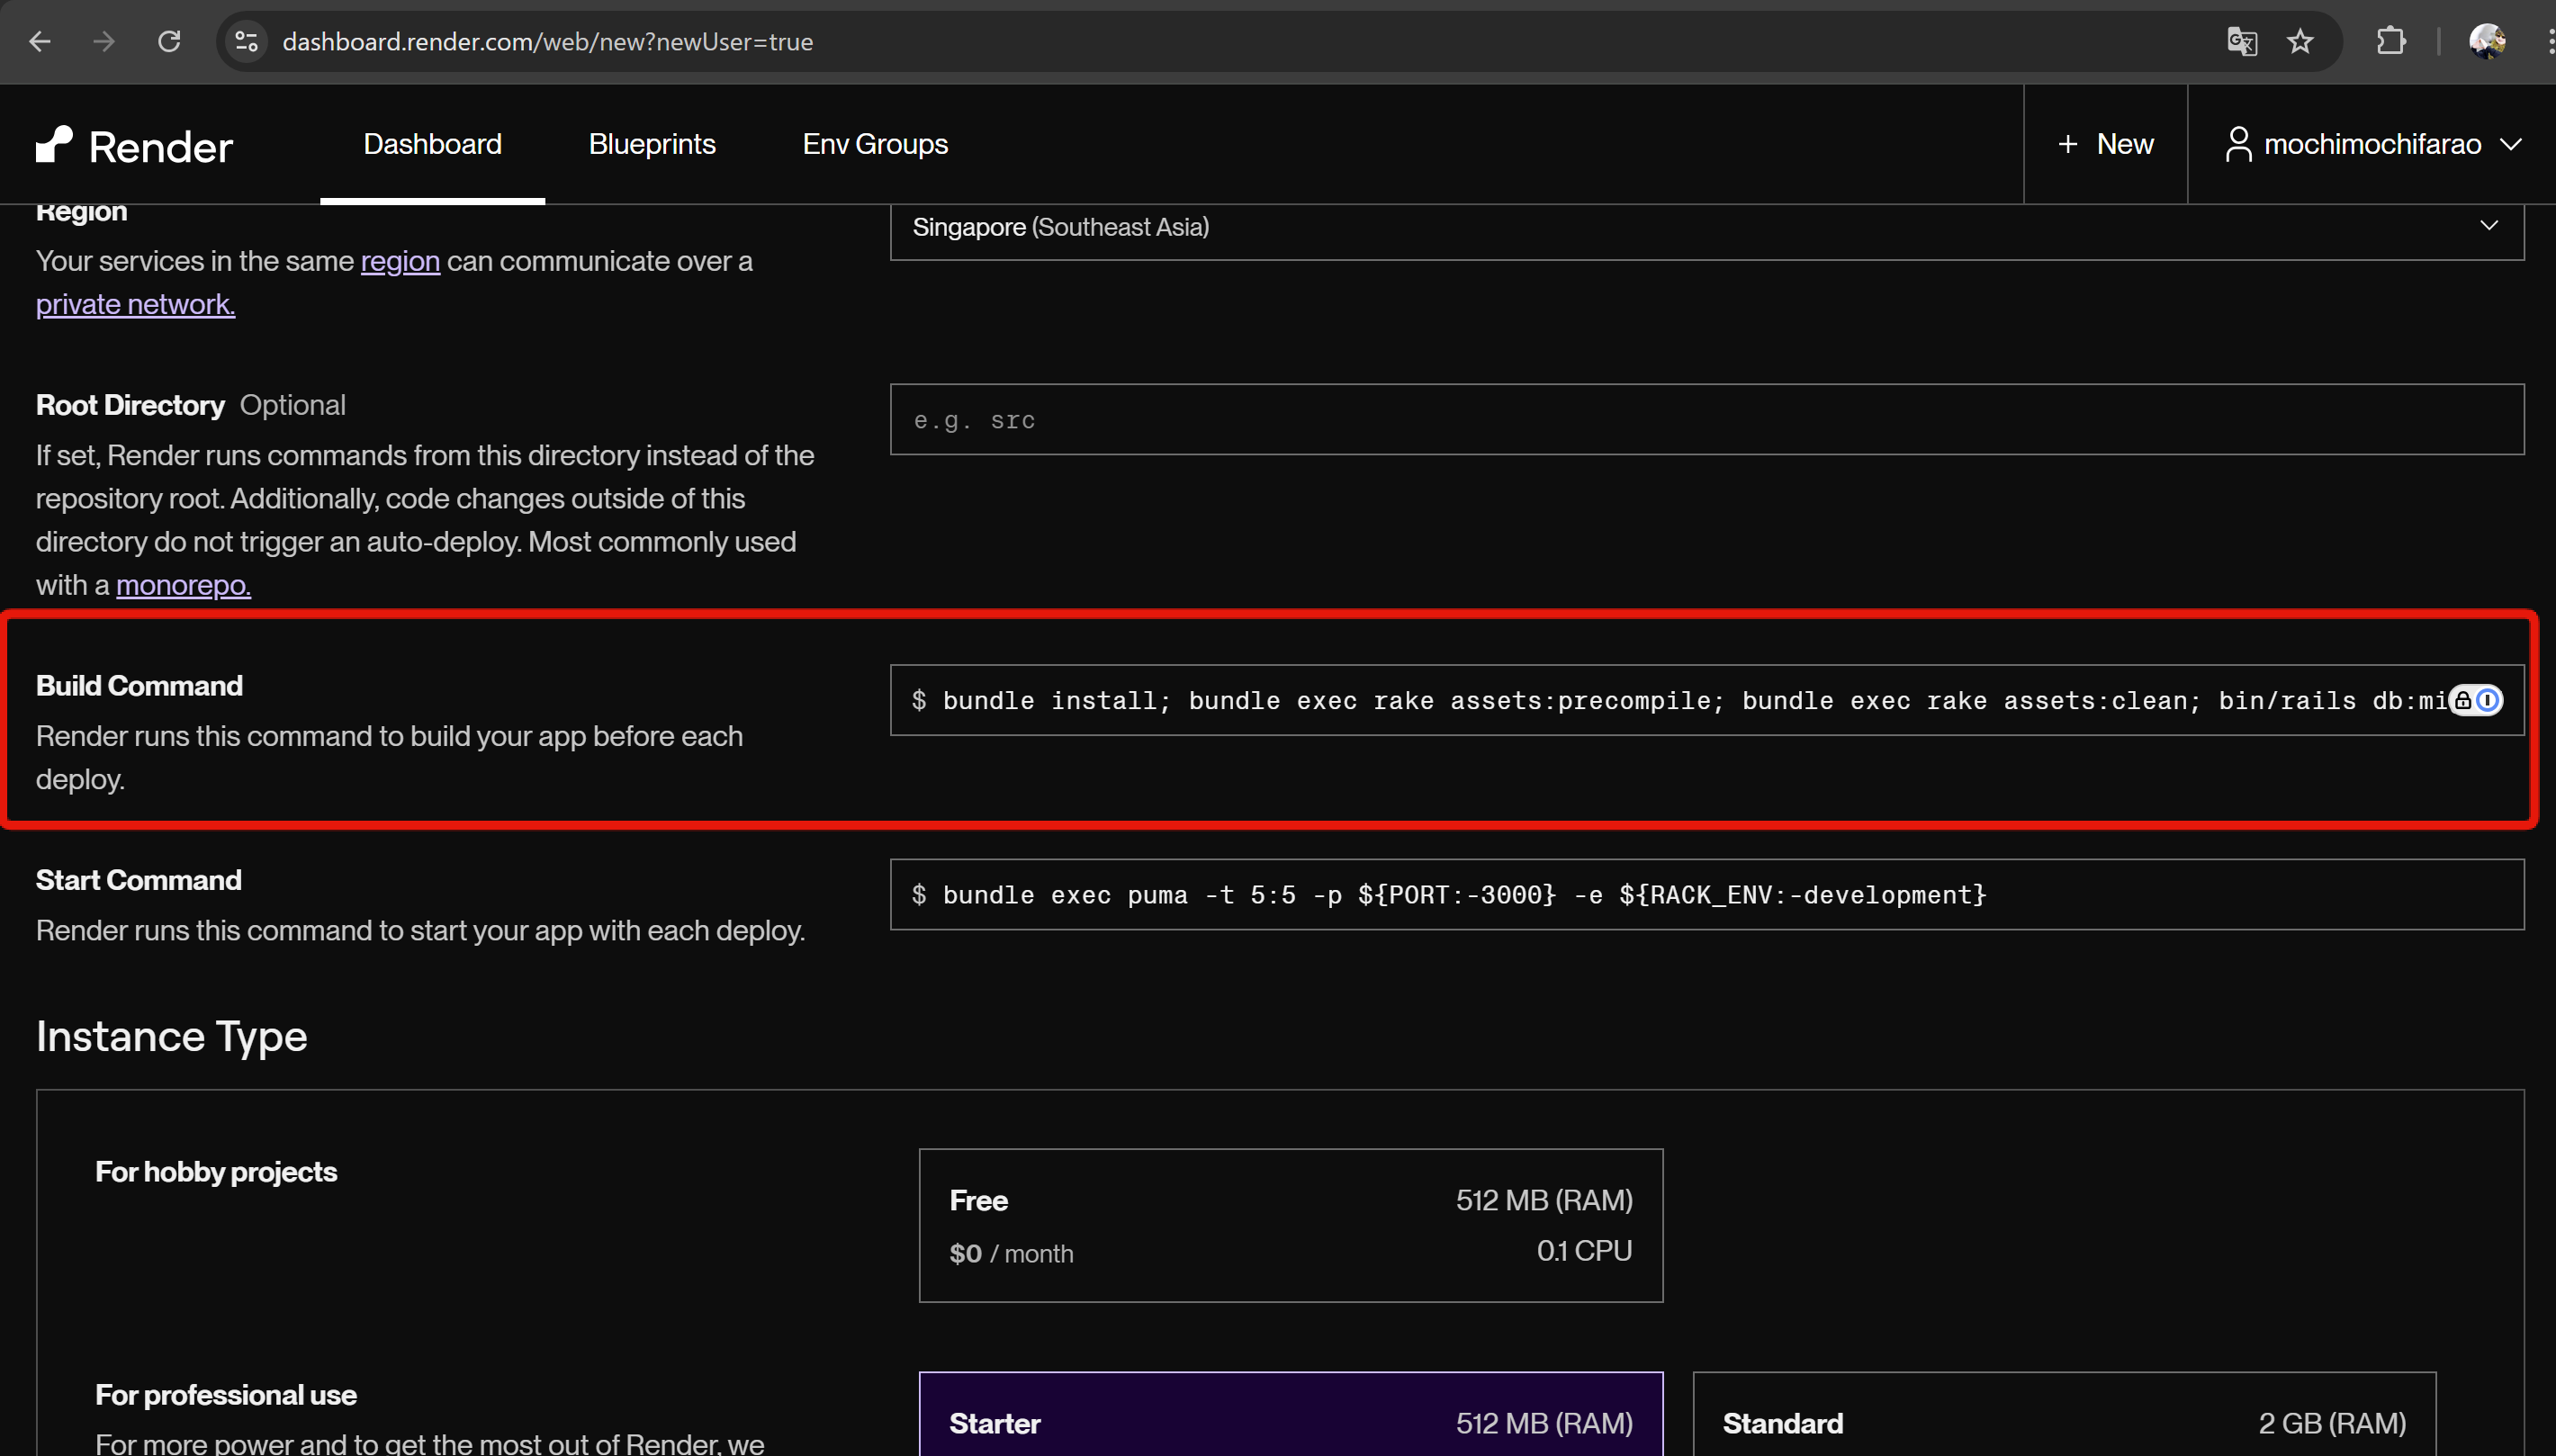
5. Build Commandの設定
Build CommandはRailsサーバーを立ち上げる前に行いたいコマンドを記載します
今回の例は初期設定のコマンドにbin/rails db:migrateを追加してあります
bundle install; bundle exec rake assets:precompile; bundle exec rake assets:clean; bin/rails db:migrate;
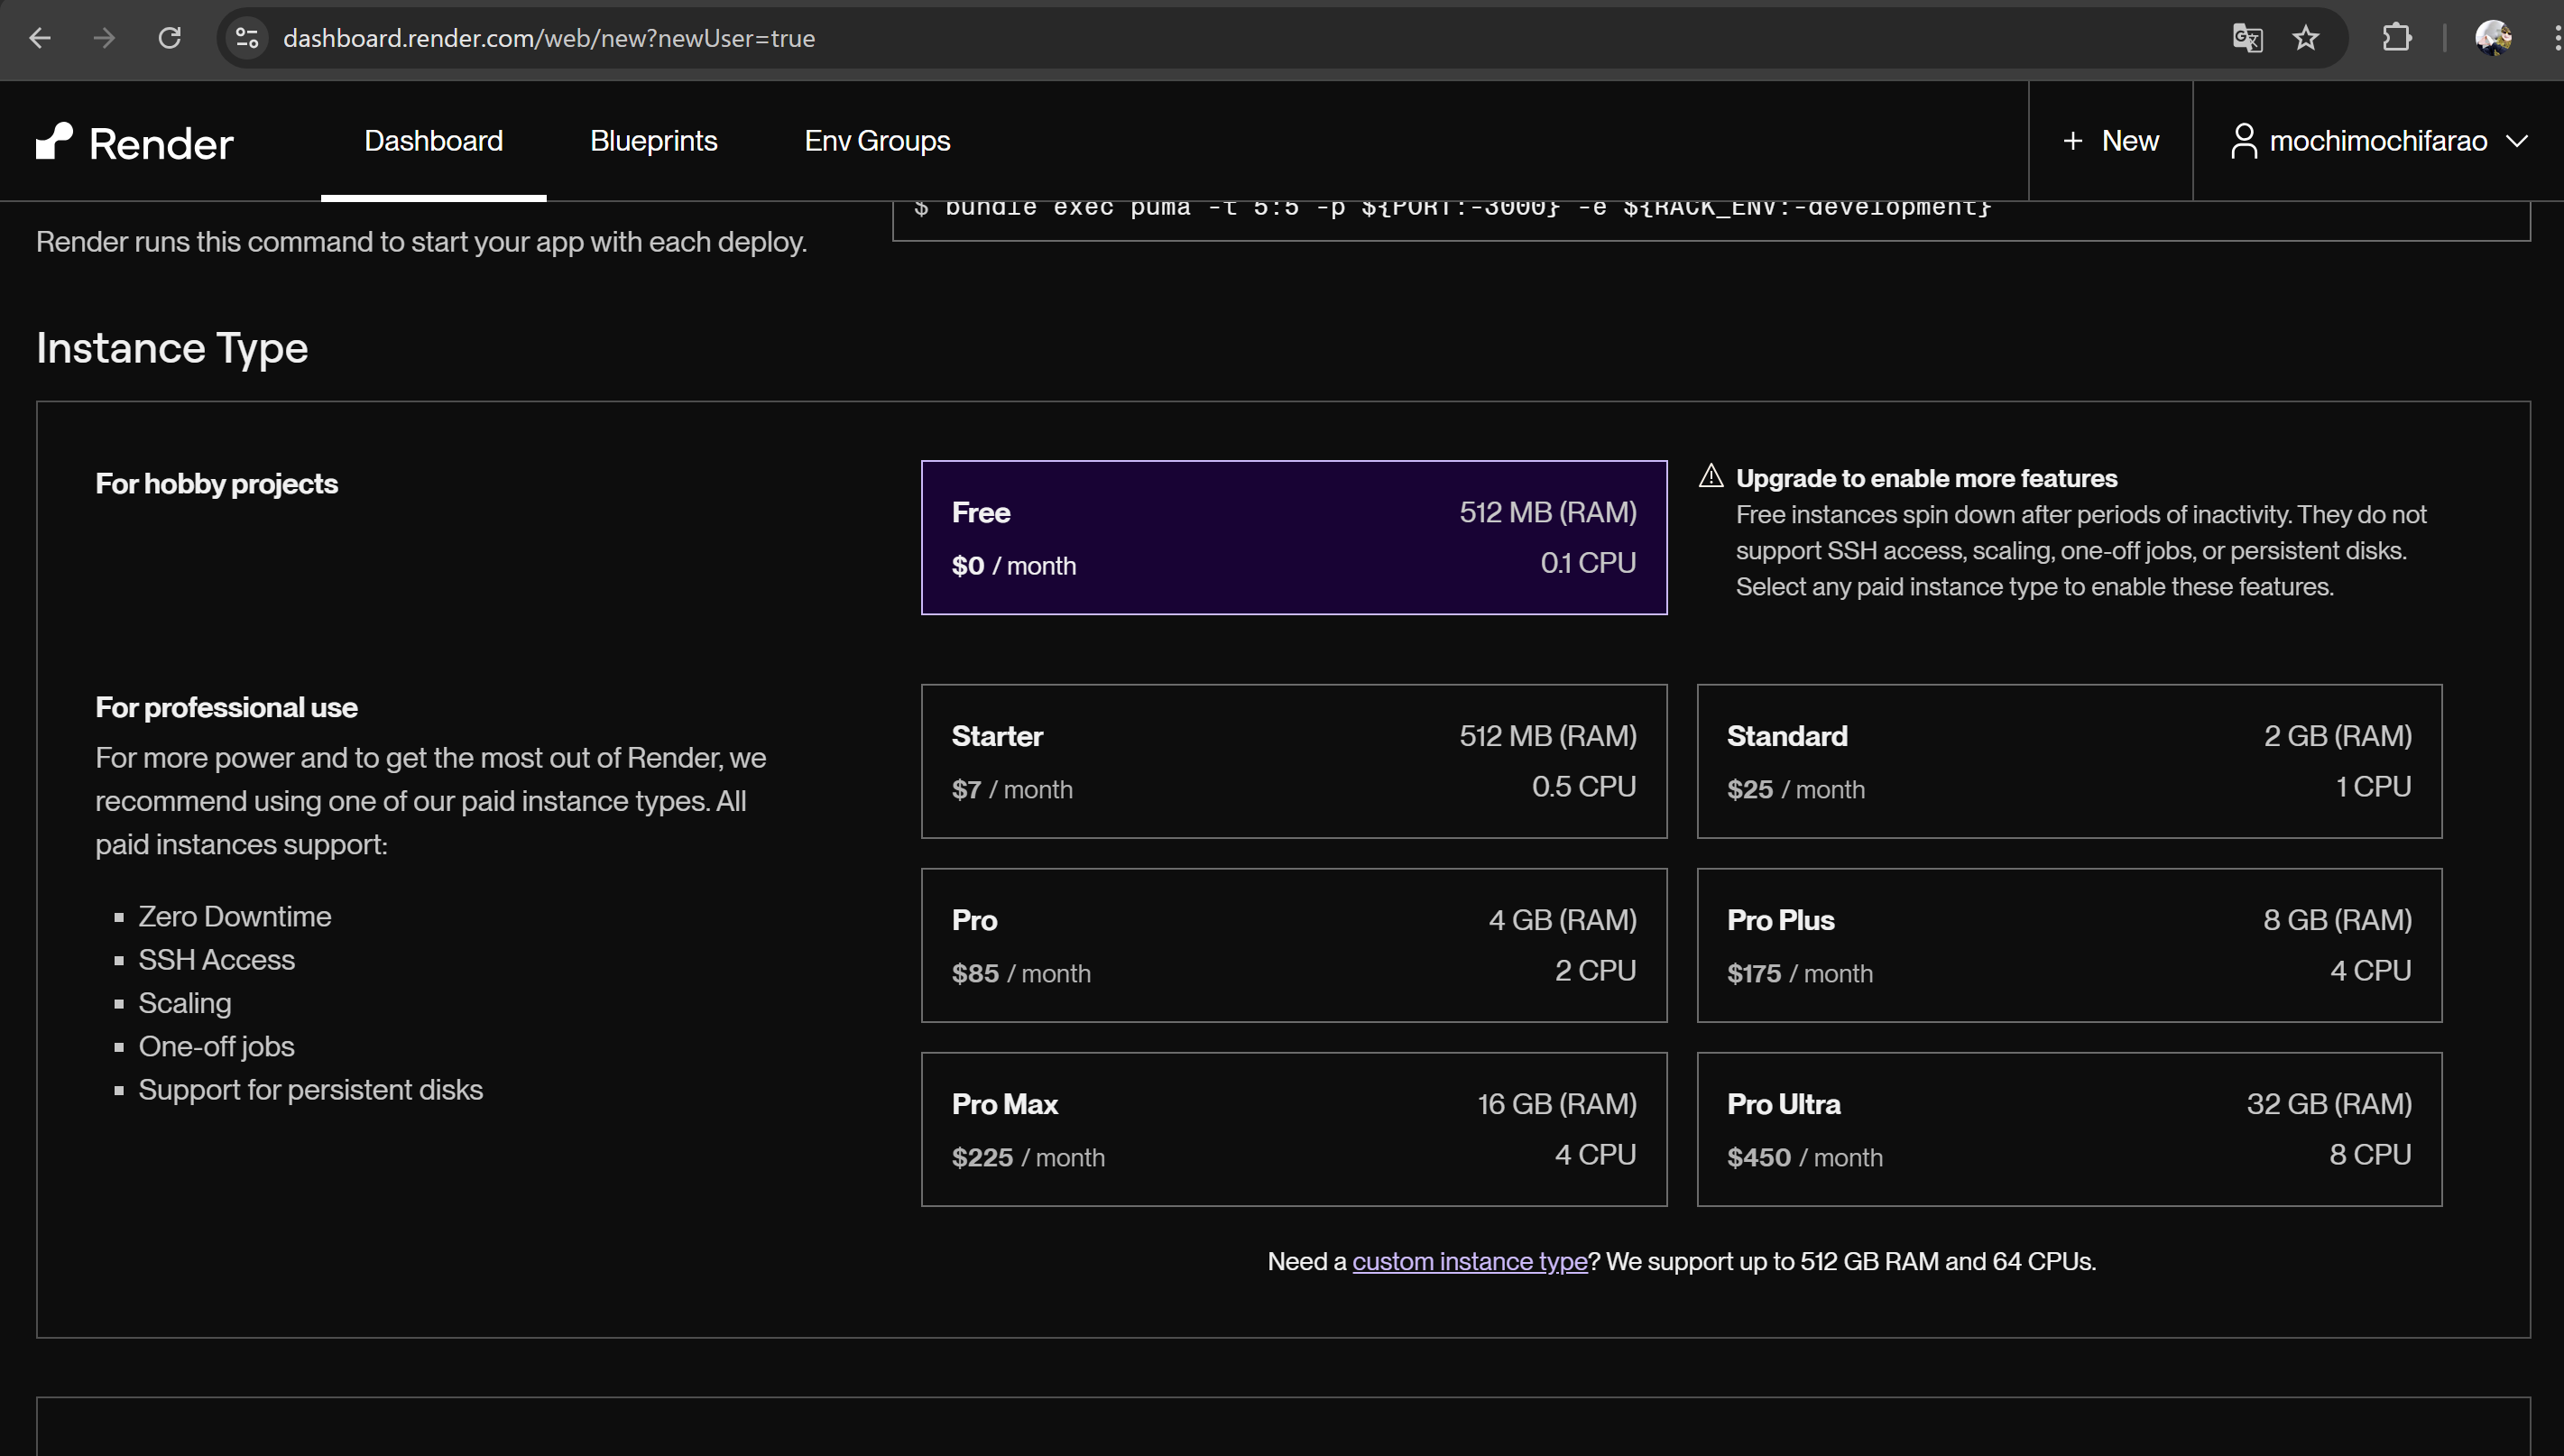
6. Planの選択
今回は無料のものを選択しています
※注意事項は読んでおきましょう
7. 環境変数の登録
初期のものに下記のものを追記しています
- RAILS_MASTER_KEY
- RAILS_ENV
- DATABASE_URL
RAILS_MASTER_KEYにはrails newしたときに出来たconfig/master.keyファイルに記載されている値を入力します
RAILS_ENVにはproductionと入力します
DATABASE_URLには作成したデータベースのInternal Database URLを入力します
Dashboardから作成したデータベース(PostgreSQL)の詳細ページにいって確認しましょう
8. デプロイ
最後にDeploy Web Serviceボタンを押すとデプロイ出来ます
/tasksにアクセスして画面を確認してみましょう
※rootパスは設定していないので/にアクセスしても404になってしまいます
まとめ
Solidを使うとまた変わってくるかもしれませんが、構成によってはすんなりとデプロイすることが出来そうです
余談ですが、HerokuだとGemfileのrubyのバージョンの記述を足さないとrubyのバージョンが合わずにデプロイできませんでした
Gemfileに下記の記述をしてbundle installを行ってからgit push heroku mainを行うと解決出来ると思います
ruby file: ".ruby-version"


