はじめに
iPad上で開発作業ができる環境を整えるために、Visual Studio Codeをブラウザ上で動作させることのできるcode-serverとPythonのコードなどをブラウザ上で実行できるJupyter Notebookをサーバ上に構築します。
できたもの
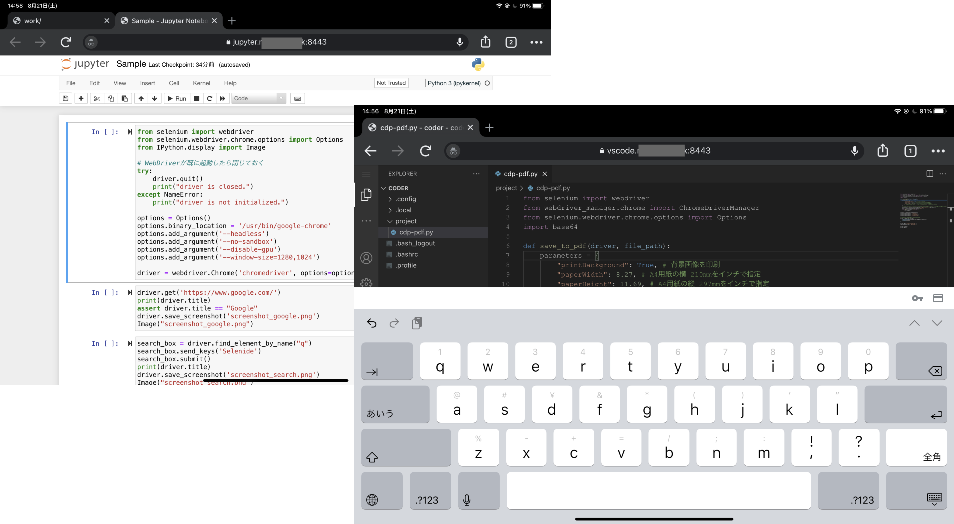
最初に本記事で出来るものの紹介です。iPadのWebブラウザ上で、VSCodeとJupyter Notebookを動作させています。

構成
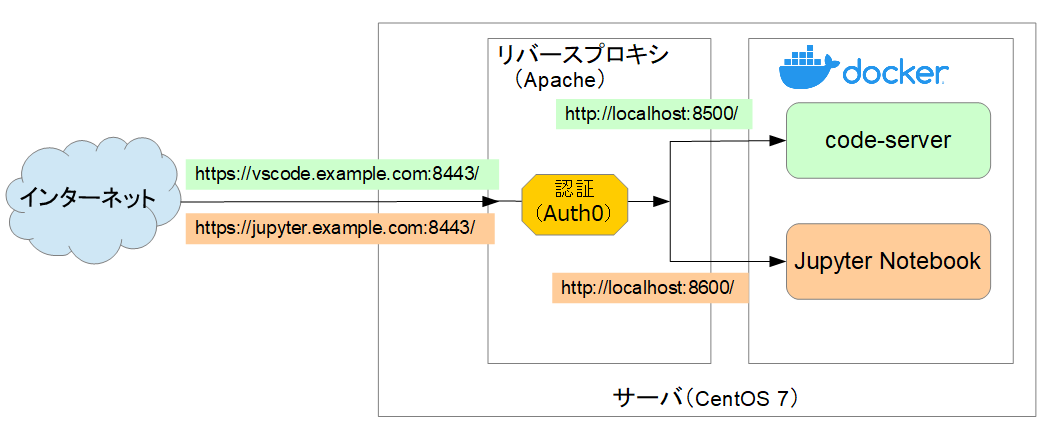
- さくらのVPSのCentOS 7マシンにDocker環境を構築しています。
- 今回は、Docker上にcode-serverとJupyter Notebookのコンテナを立てます。
- Docker上のアプリにアクセスするために、Dockerホストサーバ上にインストールしたApacheをリバースプロキシとして使い、Apache側で認証を行っています。認証に関しては、別記事にしているので以下をご参照ください。
環境
- さくらのVPS
- CentOS 7.9
- Apache 2.4
code-server
まずは、code-serverをDockerコンテナとして導入します。
上のDocker Hubの説明にしたがって、以下のコマンドで、設定ファイル用のフォルダを作成し、code-serverを起動します。
ここでは、ホスト側の8050ポートを割り当てます。VSCodeで作成するファイル保存用にホームディレクトリのcoder-project/というディレクトリをマウントします。
また、認証はAuth0を使って行うため、code-server側は、--auth=noneオプションで無効化します。
mkdir -p ~/.config
mkdir -p ~/coder-project
docker run -d --name code-server -p 127.0.0.1:8500:8080 \
  -v "$HOME/.config:/home/coder/.config" \
  -v "$HOME/coder-project:/home/coder/project" \
  -u "$(id -u):$(id -g)" \
  -e "DOCKER_USER=$USER" \
  codercom/code-server:latest --auth=none
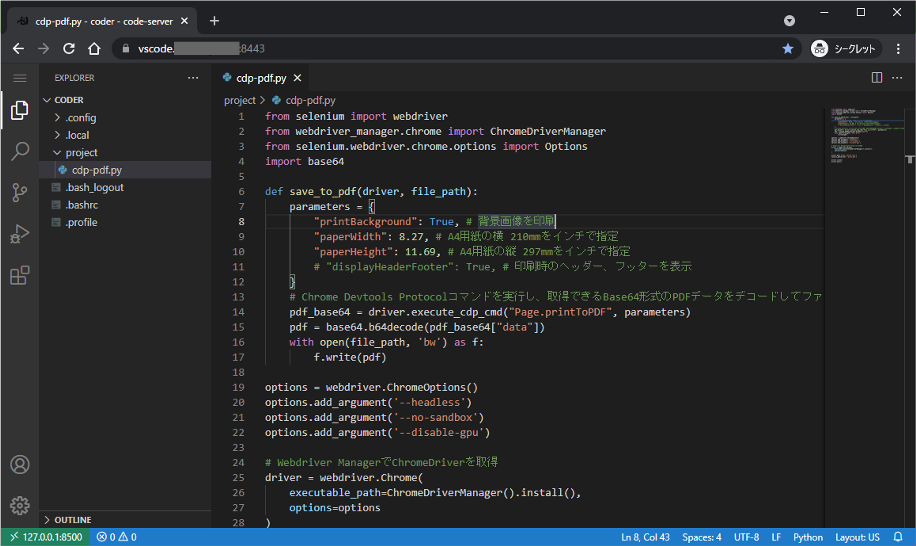
後のApacheの設定後に、PCのChromeで表示すると、ブラウザ上でVSCodeの画面が表示されました。

Jupyter Notebook
次にJupyter NotebookのDockerコンテナを立ち上げます。
上記のページを参考にして、以下のコマンドで起動します。
Jupyter Notebook用には、ホスト側の8600ポートを割り当て、作業用のフォルダとして、ホームディレクトリに作成するjupyter-projectというフォルダをマウントします。
認証トークンを無効化するために、--NotebookApp.token=''を指定しておきます。
mkdir -p ~/jupyter-project
docker run -d -v $HOME/jupyter-project:/home/jovyan/work -p 127.0.0.1:8600:8888 --name jupyter \
  --user root -e CHOWN_HOME=yes -e CHOWN_HOME_OPTS='-R' \
  jupyter/base-notebook start-notebook.sh --NotebookApp.token='' --NotebookApp.allow_origin='*'
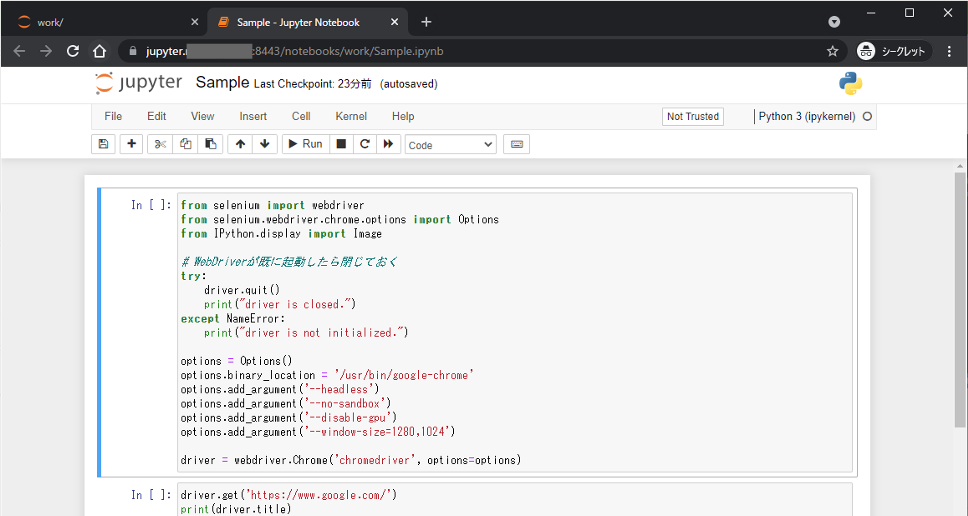
PCのChromeで表示すると、Jupyter Notebookの画面が表示されました。

Apache設定
リバースプロキシとして利用するApache側の設定を編集して、Docker上のcode-serverとJupyter Notebookのコンテナにプロキシするように設定します。
Listen 8443 https
ProxyRequests Off

# code-server用のVirtual Host設定
<VirtualHost *:8443>
    ServerName vscode.example.com

    SSLEngine on
    SSLCertificateFile /etc/letsencrypt/live/example.com/cert.pem
    SSLCertificateKeyFile /etc/letsencrypt/live/example.com/privkey.pem
    SSLCertificateChainFile /etc/letsencrypt/live/example.com/chain.pem

    # Auth0の設定
    OIDCProviderMetadataURL https://dev-xxxxxx.jp.auth0.com/.well-known/openid-configuration
    OIDCClientID 9FIXXXXXXXXXXXXXXXX1HK
    OIDCClientSecret ylPyxxxxxxxxxxxxxxxxxxxxxxxym

    OIDCScope "openid name email"
    OIDCRedirectURI https://vscode.example.com:8443/redirect_uri/
    OIDCCryptoPassphrase xxxxxxxxxx

    # WebSocketの通信をプロキシするための設定
    RewriteEngine on
    RewriteCond %{HTTP:Upgrade} websocket [NC]
    RewriteCond %{HTTP:Connection} upgrade [NC]
    RewriteRule ^/?(.*) "ws://127.0.0.1:8500/$1" [P,L]

    <Location />
        AuthType openid-connect
        Require valid-user
        LogLevel debug

        ProxyPass http://127.0.0.1:8500/
        ProxyPassReverse http://127.0.0.1:8500/
    </Location>
</VirtualHost>


# Jupyter Notebook用のVirtual Host設定
<VirtualHost *:8443>
    ServerName jupyter.example.com

    SSLEngine on
    SSLCertificateFile /etc/letsencrypt/live/example.com/cert.pem
    SSLCertificateKeyFile /etc/letsencrypt/live/example.com/privkey.pem
    SSLCertificateChainFile /etc/letsencrypt/live/example.com/chain.pem

    # Auth0の設定
    OIDCProviderMetadataURL https://dev-xxxxxx.jp.auth0.com/.well-known/openid-configuration
    OIDCClientID 9FIXXXXXXXXXXXXXXXX1HK
    OIDCClientSecret ylPyxxxxxxxxxxxxxxxxxxxxxxxym

    OIDCScope "openid name email"
    OIDCRedirectURI https://jupyter.example.com:8443/redirect_uri/
    OIDCCryptoPassphrase xxxxxxxxxx

    # WebSocketの通信をプロキシするための設定
    RewriteEngine On
    RewriteCond %{HTTP:Connection} Upgrade [NC]
    RewriteCond %{HTTP:Upgrade} websocket [NC]
    RewriteRule /(.*) ws://127.0.0.1:8600/$1 [P,L]

    <Location />
        AuthType openid-connect
        Require valid-user
        LogLevel debug

        ProxyPreserveHost on
        ProxyPass  http://127.0.0.1:8600/
        ProxyPassReverse  http://127.0.0.1:8600/
    </Location>

</VirtualHost>
- 外部向けには、
8443ポートを公開しています。 - 名前ベースのバーチャルホストを使って、
vscode.example.comへの通信をローカルホストの8500ポートのcode-serverのコンテナに、jupyter.example.comへの通信をローカルホストの8600ポートのJupyter Notebookのコンテナにプロキシしています。 - code-server、Jupyter Notebookともに、WebSocketを利用していたためWebSocketの通信をプロキシするための設定を行っています。
参考
本記事の作成にあたり、以下の記事を参考にさせていただきました。
