Grimoire.jsのプラグインをサクッと作ります。
そもそもプラグインとは?
一言で言えば、ただのnpmパッケージです。
npmで他のGrimoire.jsプラグインを利用したり、ビルドして htmlにスクリプトタグで読み込むことができます。
Grimoire.jsの機能は**GOMLタグで構成されるので、プラグイン開発は主に新しいタグを追加する**作業になります。
必要環境
Typescript
推奨です。書きましょう。
Node.js
npmなので。
ローカルwebサーバ
建てられるとデバッグで便利です。というかないとデバッグできない
プロジェクト作成
Grimoire.jsプラグインは、一応仕様のようなものがあるのでゼロから作ってもいいのですが、さすがに辛いので **grimoirejs-cauldron**というたいへん便利なツールを使います。
grimoirejs-cauldron
パッケージ生成、コンポーネントファイル生成、ビルド環境などが全部入ってます。
公式のパッケージもすべてこれを使ってます。
インストール
$ npm install -g grimoirejs-cauldron
パッケージテンプレート生成
空のフォルダで
$ cauldron init -n <パッケージ名>
やってることは、ts-boilerplateをクローンしてきて名前とかを書き換えてるだけです。
ts-boilerplateを直接クローンしてもOKです。
プロジェクトのビルド
クローンしただけでは依存関係はインストールされないので、
$ npm install
して入れます。
ビルドは、
$ npm run build
です。 ただし、デフォルトではNode環境向けビルドなので、htmlでスクリプトタグで読み込みたい場合は、
$ npm run build -- --env.browser
とします。ちなみに、
$ npm run start -- --env.browser
でwatchできます。(ファイル変更を監視して自動でビルドしてくれる。)
プロジェクトを使う。
ビルドすると、 registerフォルダの中に<パッケージ名>.jsとindex.jsがあると思います。
index.jsはノード環境向けです。
htmlからは、<パッケージ名>.jsのほうを使います。
<html>
  <head>
    <script src="https://unpkg.com/grimoirejs-preset-basic/register/grimoire-preset-basic.min.js" charset="utf-8"></script>
    <script src="/path/to/proj/register/<パッケージ名>.js" charset="utf-8"></script>
  </head>
ブラウザで開くと、コンソールに
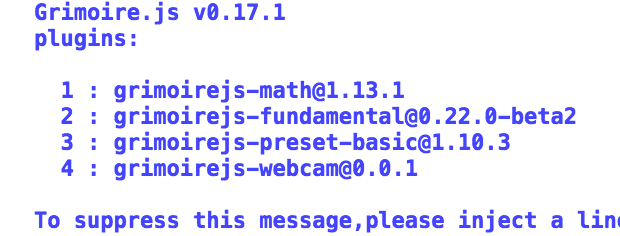
という感じで表示されます。Plugins:の最後に自分のパッケージが表示されていたら成功です!
プラグイン実装
コンポーネントの中身をつくります
まずは、テンプレートを生成
ファイルテンプレート
$ cauldron scaffold -n <コンポーネント名> -t component
$ cauldron scaffold -n <コンバータ名> -t converter
たとえば、 cauldron scaffold -n Rotate -t componentでRotateコンポーネントを作ってみます。src/Componentsの中に、RotateComponent.tsが作られるはずです。
import Component from "grimoirejs/ref/Node/Component";
import IAttributeDeclaration from "grimoirejs/ref/Node/IAttributeDeclaration";

export default class RotateComponent extends Component {

      public static componentName:string = "Rotate";

      public static attributes: { [key: string]: IAttributeDeclaration } = {
        // Specify the attributes user can intaract
      };
}
こんな感じで生成されます。とりあえず、ノードをくるくる回す機能を実装してみます。
(〜略)
      public static attributes: { [key: string]: IAttributeDeclaration } = {
        // Specify the attributes user can intaract
        speed:{
          converter:"Number",
          default: 0.2
        }
      };

      private _r=0;

      public $update(){
        this._r+=this.getAttribute("speed");
        this.node.setAttribute("rotation",[0,this._r,0]);
      }

(略〜)
speed属性を作って、それを_rに足していって、ノードのrotation属性に設定しています。
属性とか$updateってそもそも何?という方は公式ガイドが詳しいです。
これだけでは、まだ作っただけなので、main.tsで本体に登録する処理を書く必要があります。
import gr from "grimoirejs";
import Rotate from "./Components/RotateComponent";

export default ()=>{
  gr.register(async ()=>{
    gr.registerComponent(Rotate);
  });
};
もともとテンプレがあるので、gr.registerComponent(Rotate);を一行追加するだけです。
追記)
古いバージョンでは、
gr.registerComponent("Rotate",Rotate);
となっていましたが、最近のバージョン(0.19.3?)で登録するオブジェクトのcomponentNameを参照するように変更になりました。古い書き方も使えますが非推奨です。
プラグイン使う
コンポーネントを作ったので、GOMLでそれをつかってみます
<goml>
  <scene>
    <camera/>
      <mesh>
        <mesh.components>
          <Rotate/>
        </mesh.components>
      </mesh>
  </scene>
</goml>
完成!
おまけ:よくあるミス
- ビルドしてない
-
main.tsに登録処理がない - htmlにプラグインのスクリプトタグを書いてない
-
setAttributeしてる属性のスペルミス。