Custom widget
Widgets provide powerful features in Magento 2, that is used to add dynamic or static content to store’s pages.
Create a new widget
Create a new widget step:
- Declaring the widget
- Adding widget parameters
- Check the widget
- Create the block
- Create the template
- Check the Frontend
Declaring the widget
now create a file named etc/widget.xml that define basic information about the widget such as Name, description, Block Class.
<widgets xmlns:xsi="http://www.w3.org/2001/XMLSchema-instance"
         xsi:noNamespaceSchemaLocation="urn:magento:module:Magento_Widget:etc/widget.xsd">
    <widget class="Karabiner\Widget\Block\Widget\Test" id="karabiner_test_widget">
        <label>New Widget</label>
        <description>This is a New Widget</description>
        <parameters>
            ...
        </parameters>
        <containers>
            ...
        </containers>
    </widget>
</widgets>
We need to also add a dependency to Magento_Widget in the module.xml file.
...
<sequence>
    <module name="Magento_Widget" />
</sequence>
...
Adding widget parameters
As a parameter, we are able to use any of these field types:
text
select
multiselect
block
Add a text and a select field:
<widgets xmlns:xsi="http://www.w3.org/2001/XMLSchema-instance"
         xsi:noNamespaceSchemaLocation="urn:magento:module:Magento_Widget:etc/widget.xsd">
    <widget class="Karabiner\Widget\Block\Widget\Test" id="karabiner_test_widget">
        ...
        <parameters>
            <parameter name="title" xsi:type="text" required="true" visible="true" sort_order="10">
                <label>Label</label>
            </parameter>
            <parameter name="size" xsi:type="select" visible="true" required="true" sort_order="20">
                <label translate="true">Size</label>
                <options>
                    <option name="s" value="S">
                        <label>S</label>
                    </option>
                    <option name="m" value="M" selected="true">
                        <label>M</label>
                    </option>
                    <option name="l" value="L">
                        <label>L</label>
                    </option>
                </options>
            </parameter>
        </parameters>
    </widget>
</widgets>
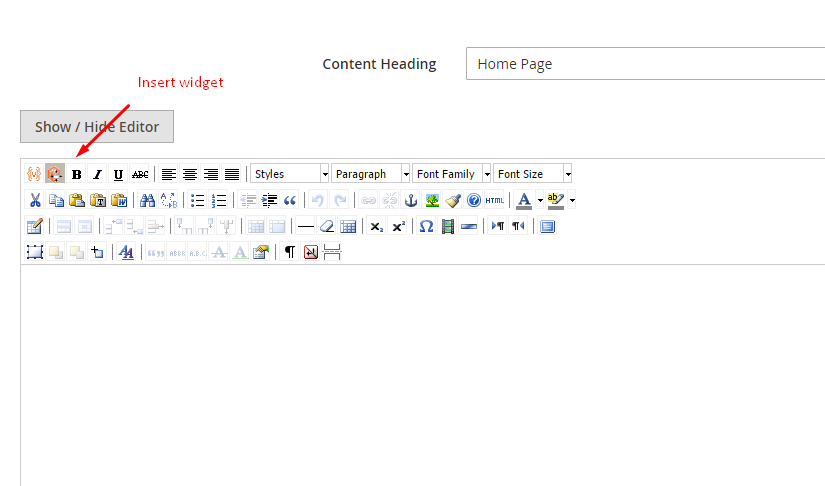
Check the widget
after run cache clear comand php bin/magento cache:flush
go to Admin panel > Content > Pages > Homepage(or any page) > Edit
In the Content tab, click on Insert Widget icon.

Create the block
Create the block class that we provided on the widget’s initialization, responsible for rendering it on the frontend.
namespace Karabiner\Widget\Block\Widget;

use Magento\Framework\View\Element\Template;
use Magento\Widget\Block\BlockInterface;

class Test extends Template implements BlockInterface
{
    protected $_template = "widget/test.phtml";
}
Create the template
And finally, create the template that will be used for showing the widget’s data on the frontend.
<?php
/** \Karabiner\Widget\Block\Widget\Test $block */
?>
<h3><?= $block->escapeHtml($block->getData('title')) ?></h3>
<h3><?= $block->escapeHtml(__('Size:')) ?> <?= $block->escapeHtml($block->getData('size')) ?></h3>
Check the Frontend
Clean the Magento cache with the following command:
php bin/magento cache:flush
The widget is now shown on the frontend.
