モジュールの目的
モジュールの目的は、新しい機能を実装するか、他のモジュールの機能を拡張することにより、特定の製品機能を提供することです。 各モジュールは独立して機能するように設計されているため、特定のモジュールの包含または除外が他のモジュールの機能に影響を与えることは通常ありません。
Magento2モジュール用のモジュールフォルダーを作成
モジュール名には2つの部分があります。
1.ベンダー名:会社名[Karabiner]または個人名[Moaaz]です。
2.モジュール名:通常、[Shipping]のようなモジュール目的を表す名前です。
ベンダー名とモジュール名は大文字のキャメルケースにする必要があります
VENDOR_NAME はKarabiner、MODULE_NAME はHelloMagneto2にしました。
カスタムモジュールのディレクトリ[MAGENTO_DIRECTORY]/app/code/[VENDOR_NAME]/[MODULE_NAME]になります。
フォルダー名は [MAGENTO_FOLDER]/app/code/Karabiner/HelloMagneto2です。
*MAGENTO_DIRECTORY:環境にあるmagento2のディレクトリです。
module.xmlを作成
Magento 2 will use it to recognize the module’s name and module’s version
モジュールのetcディレクトリにmodule.xmlファイルを作成します。Magento2はこれを使用して、モジュールの名前とモジュールのバージョンを認識します。
app/code/[VENDOR_NAME]/[MODULE_NAME]/etc/module.xml
モジュール名・バージョンを設定するために、以下のコードを追加します。
モジュール名:HelloMangento2
バージョン:0.0.1
<?xml version="1.0"?>
<config xmlns:xsi="http://www.w3.org/2001/XMLSchema-instance"
xsi:noNamespaceSchemaLocation="urn:magento:framework:Module/etc/module.xsd">
    <module name="Karabiner_HelloMagento2" setup_version="0.0.1" />
</config>
モジュールが別のモジュールに依存している場合<sequence>タグを使用してコンポーネントのmodule.xmlファイルで読み込み順序を指定し、モジュールの読み込み時に他のモジュールから必要なファイルが既に読み込まれていることを確認できます。
<?xml version="1.0"?>
<config xmlns:xsi="http://www.w3.org/2001/XMLSchema-instance"
xsi:noNamespaceSchemaLocation="urn:magento:framework:Module/etc/module.xsd">
    <module name="Karabiner_HelloMagento2" setup_version="0.0.1" >
       <sequence>
            <!-- Karabiner_HelloMagento2 is dependent on Vendor_ModuleA: -->
            <module name="Vendor_ModuleA" />
            <!-- you can add more than one module-->
        </sequence>
    </module>
</config>
registration.phpでモジュールを登録
各モジュールのルートディレクトリにregistration.phpというファイルが必要です。 registration.phpはモジュールのエントリポイントです。
<?php
use Magento\Framework\Component\ComponentRegistrar;
$registrar = new ComponentRegistrar();

if ($registrar->getPath(ComponentRegistrar::MODULE, "Karabiner_HelloMagento2") === null) {
    ComponentRegistrar::register(ComponentRegistrar::MODULE, "Karabiner_HelloMagento2", __DIR__);
}
モジュールフォルダーの構造は次のようになります。
└── HelloMagento2
    ├── etc
    │   └── module.xml
    └── registration.php
モジュールを有効にし、インストールします
コマンドラインからモジュールをインストールできます。
ターミナルを開いて、これらのコマンドを使用してください。
無効なモジュールを表示します:
cd [MAGENTO_DIRECTORY]
php bin/magento module:status
==========output==========
List of enabled modules:
....
List of disabled modules:
Karabiner_HelloMagento2 <- not enable yet
モジュールを有効にします:
cd [MAGENTO_DIRECTORY]
php bin/magento module:enable Karabiner_HelloMagento2
==========output==========
The following modules have been enabled:
- Karabiner_HelloMagento2
モジュールを設定します:
モジュールを有効にしたら、次に設定する必要があります。
cd [MAGENTO_DIRECTORY]
php bin/magento setup:upgrade
モジュールを無効にします:
cd [MAGENTO_DIRECTORY]
php bin/magento module:disable Karabiner_HelloMagento2
==========output==========
The following modules have been disabled:
- Karabiner_HelloMagento2
Cache cleared successfully.
モジュールのルートを作成
Magento 2は次の形式のURLを使用します。
http:// [magento_url] / [frontName] / [controller_name] / [action_name]
なので、routers.xmlファイルを以下のように作成します。
app / code / Karabiner / HelloMagento2 / etc / frontend / routes.xml
次に、以下のコードを追加します。
<?xml version="1.0" encoding="UTF-8"?>
<config xmlns:xsi="http://www.w3.org/2001/XMLSchema-instance"
xsi:noNamespaceSchemaLocation="urn:magento:framework:App/etc/routes.xsd">
<router id="standard"> <!-- standard or admin -->
    <route id="HelloMagento2" frontName="custom_router_name">
        <module name="Karabiner_HelloMagento2" />
    </route>
</router>
</config>
routes.xmlの構成を説明します。
-
routerタグ
idstandardこのルーターがフロントエンドルーターに追加されることを意味します。
adminこのルーターが管理ルーターに追加されることを意味します。 -
routeタグ-
frontName 名前はURLの後ろになります.
frontNameはcustom_router_nameの場合、URLはhttp://<magento_url>/custom_router_name/のようにになります。 - id Magentoでこのルートの唯一のノードIDを指定します。これは、関連するlayoutのXMLファイル名の最初の部分でもあります。 (routeId_controller_action.xml)
-
frontName 名前はURLの後ろになります.
例: http:///custom_router_name/index/index
そのため、将来コントローラーとアクションを作成する前に、モジュールのルーター名を設定する必要があります。
コントローラーとアクションを作成
ブラウザに表示するためのURLを作成します。
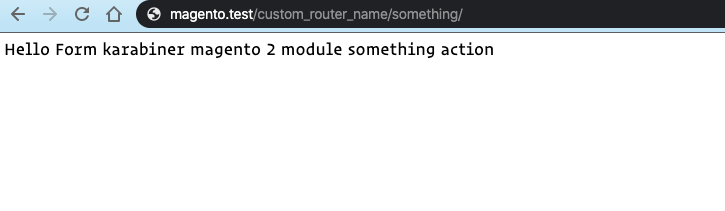
“Hello From karabiner Magento 2 module something action”.
アクションファイルを作成します。
app/code/Karabiner/HelloMagento2/Controller/Something/Index.php
コードを追加します。
namespaceは次のようになります。
/VENDOR_NAME/MODULE_NAME\Controller\[Controller_Class]
/Karabiner/HelloMagento2\Controller\Something
<?php
namespace /Karabiner/HelloMagento2\Controller\Something;

class Index extends \Magento\Framework\App\Action\Action
{
  public function __construct(
\Magento\Framework\App\Action\Context $context)
  {
    return parent::__construct($context);
  }

  public function execute()
  {
    echo 'Hello Form karabiner magento 2 module something action';
    exit;
  }
}
app/code/Karabiner/
└── HelloMagento2
    ├── Controller
    │   ├── Index #http://<magento_url>/custom_router_name/index
    │   │   ├── Index.php #http://<magento_url>/custom_router_name/index/index
    │   │   └── View.php #http://<magento_url>/custom_router_name/index/view
    │   └── Something
    │       └── Index.php #http://<magento_url>/custom_router_name/somethhing/index
    ├── etc
    │   ├── frontend
    │   │   └── routes.xml
    │   └── module.xml
    └── registration.php
After adding new route we should clear cache
bin/magento cache:clean
==========output==========
Cleaned cache types:
config
layout
block_html
collections
reflection
db_ddl
compiled_config
eav
customer_notification
config_integration
config_integration_api
google_product
full_page
config_webservice
translate
vertex