背景と目的
監視アラート通知には、昔からメールで送る方法が暗黙の了解で、他の通知方法を試す機会がなかったので、メールと SMS と Azure アプリへのプッシュ通知の 3 種類を試してみました。
SMS 通知は有料で 1 回数円かかるので、試し過ぎにご注意ください。また、5 分ごとに SMS メッセージ 1 件以下というレート制限もあります。
前提条件
コマンドの実施環境は、Azure Cloud Shell + Azure CLI です。
bash
$ az version
{
  "azure-cli": "2.32.0",
  "azure-cli-core": "2.32.0",
  "azure-cli-telemetry": "1.0.6",
  "extensions": {
    "ai-examples": "0.2.5",
    "ssh": "1.0.0"
  }
}
検証用仮想マシン作成
bash
# 環境変数をセットします
region=japaneast
prefix=mnralert

# リソースグループを作成します
az group create \
  --name ${prefix}-rg \
  --location $region

# SSH キーペアをファイル名を指定して作成します
ssh-keygen -m PEM -t rsa -b 4096 \
  -f ${prefix}

# 仮想マシンを作成します
az vm create \
  --resource-group ${prefix}-rg \
  --name ${prefix}-vm \
  --os-disk-name ${prefix}-vmOSDisk \
  --image UbuntuLTS \
  --admin-username azureuser \
  --ssh-key-value ${prefix}.pub \
  --size Standard_B1ls \
  --nsg-rule NONE \
  --public-ip-address-dns-name ${prefix} \
  --storage-sku Standard_LRS

# NSG に自分の IP アドレスから SSH 接続出来るようにします
az network nsg rule create \
  --resource-group ${prefix}-rg \
  --name Allow-SSH \
  --nsg-name ${prefix}-vmNSG \
  --priority 100 \
  --source-address-prefixes $(curl -s inet-ip.info) \
  --destination-port-ranges 22 \
  --access Allow \
  --protocol Tcp

# SSH 秘密キーを使用して SSH 接続します
ssh -i ${prefix} azureuser@${prefix}.$region.cloudapp.azure.com

# 一旦仮想マシンから抜けます
exit
監視アラート作成
# 検証用仮想マシンを監視スコープに設定します
scope=$(az vm show \
  --resource-group ${prefix}-rg \
  --name ${prefix}-vm \
  --query id \
  --output tsv)
echo $scope

# 監視アラート通知を 3 種類設定します(通知先のメールアドレスや SMS の番号は適宜変更してください)
action=$(az monitor action-group create \
  --resource-group ${prefix}-rg \
  --name ${prefix}-action \
  --short-name ${prefix} \
  --action email ${prefix}-email test@example.com \
  --action sms ${prefix}-sms 81 9000000000 \
  --action azureapppush ${prefix}-app test@example.com \
  --query id \
  --output tsv)
echo $action

# 検証用仮想マシンの監視メトリクスを調べます
az monitor metrics list-definitions \
  --resource $scope \
  --output table

# 監視メトリクスを Percentage CPU が 5 分平均で 90% 以上に設定したアラートルールの式を作成します
condition=$(az monitor metrics alert condition create \
  --aggregation Average \
  --metric "Percentage CPU" \
  --operator GreaterThan \
  --type static \
  --threshold 90 \
  --output tsv)
echo $condition

# アラートルールを作成します
az monitor metrics alert create \
  --name ${prefix}-alert \
  --resource-group ${prefix}-rg \
  --scopes $scope \
  --action $action \
  --condition $condition \
  --description "Test High CPU"
負荷テストを実施します
# SSH 秘密キーを使用して SSH 接続します
ssh -i ${prefix} azureuser@${prefix}.$region.cloudapp.azure.com

# stress ツールをインストールします
sudo apt-get update && sudo apt-get install stress -y

# vCPU が 1 つなので下記のパラメーターで CPU に負荷をかけます
stress --cpu 1

# 監視アラート通知が飛んで来たら Ctrl+C で stress を停止します
[Ctrl] + [C]

# 仮想マシンから抜けます
exit
実施結果のスクリーンショット
CPU 使用率の例
メール通知の例
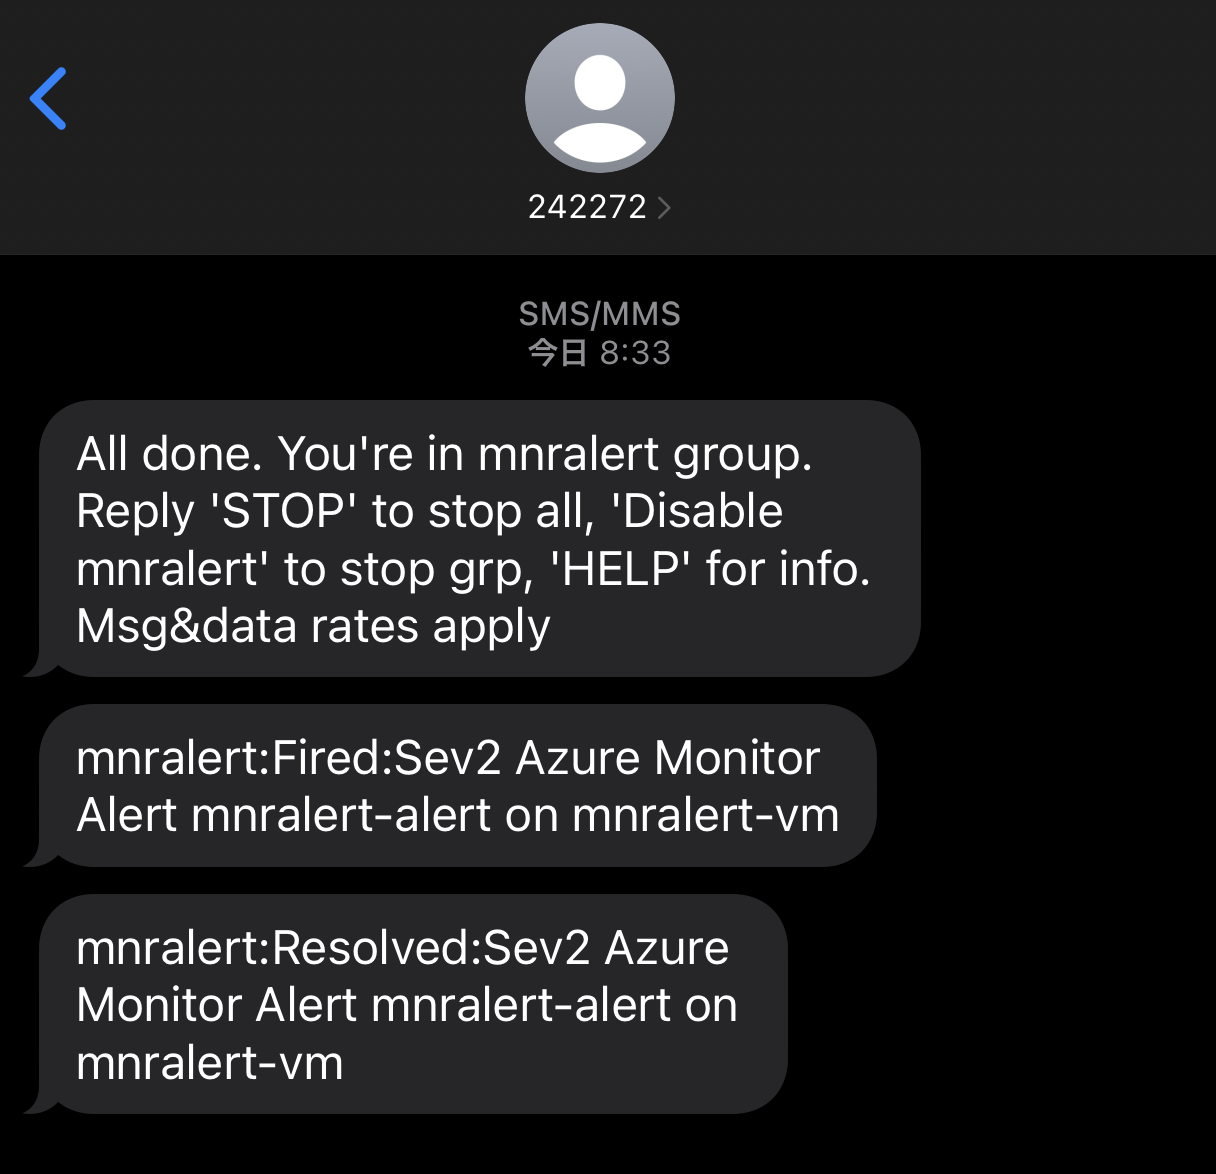
SMS 通知の例

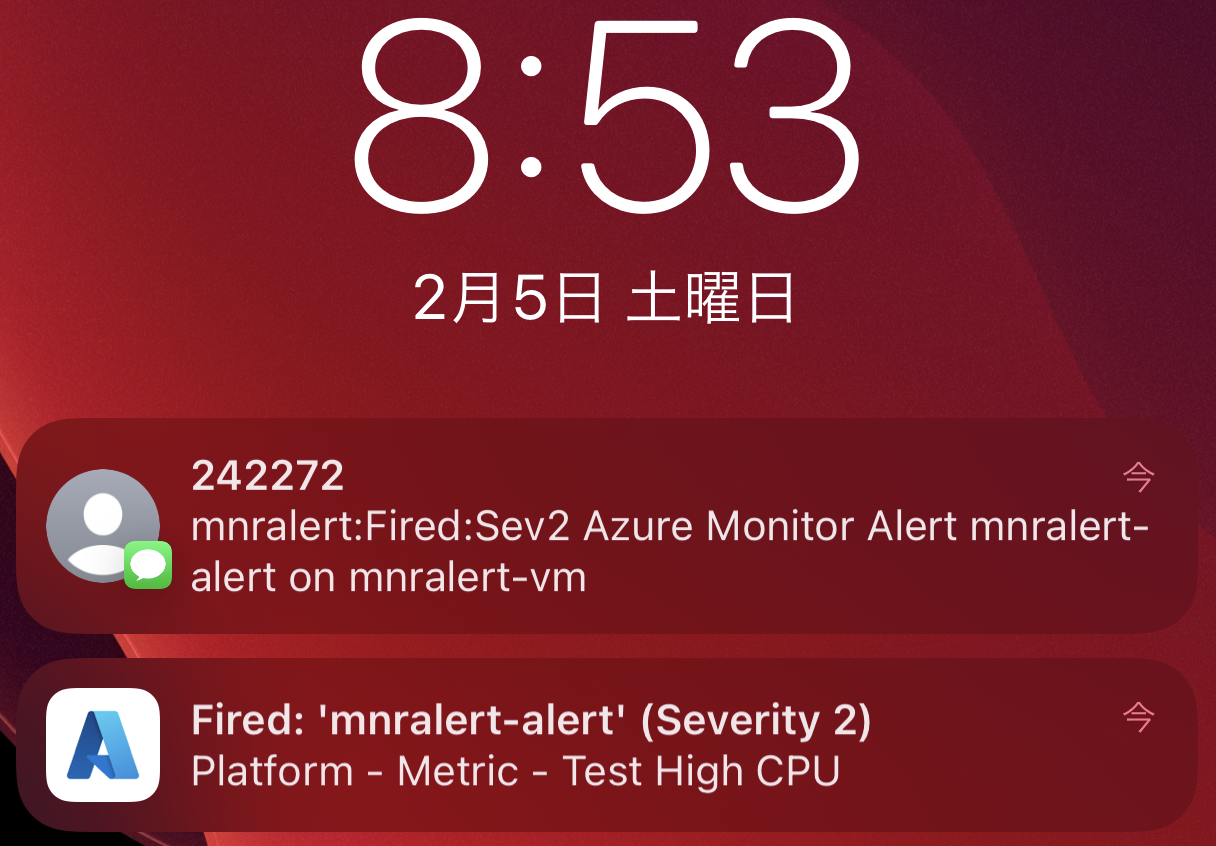
アラート発生時のプッシュ通知の例

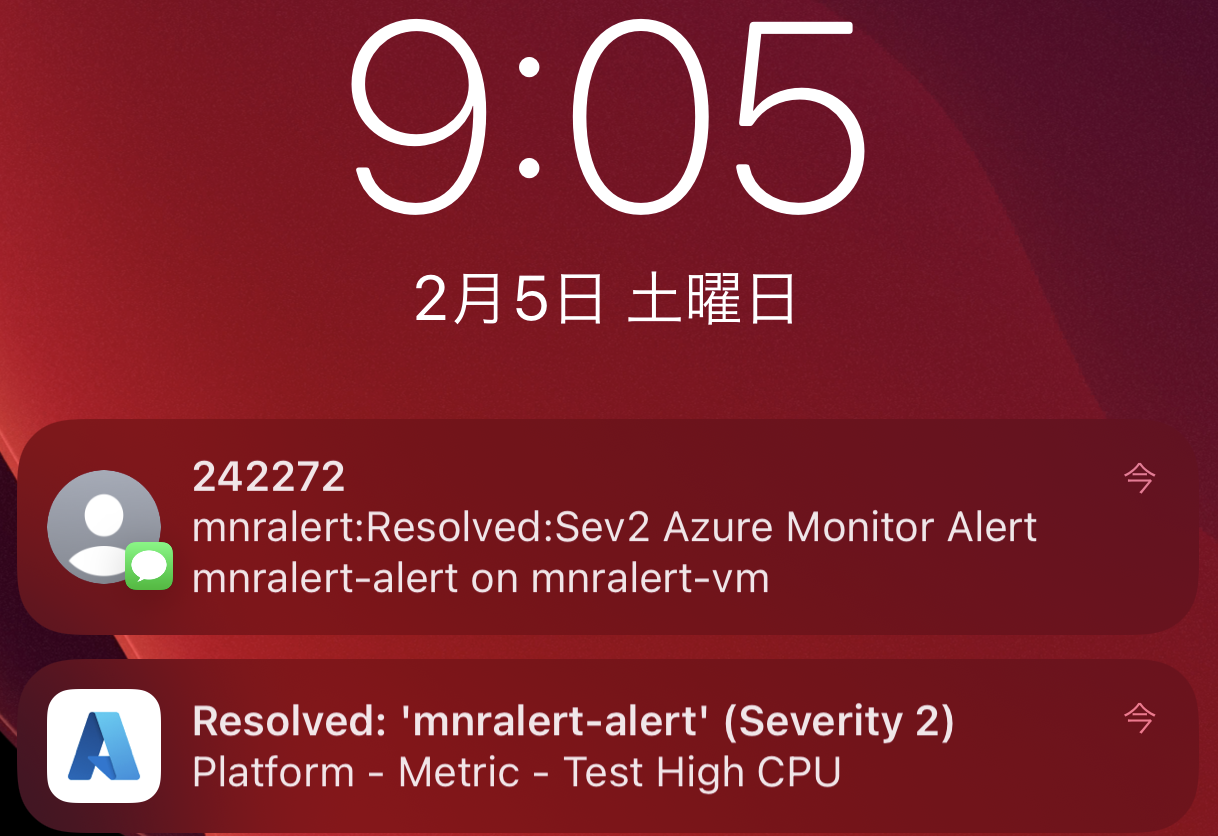
アラート回復時のプッシュ通知の例

参考
bash
# リソースグループを削除します
az group delete \
  --name ${prefix}-rg

# 作成した SSH キーペアを削除します
rm ${prefix}*
下記は、参考サイトです。
https://docs.microsoft.com/ja-jp/azure/azure-monitor/alerts/action-groups
https://docs.microsoft.com/ja-jp/azure/azure-monitor/azure-cli-metrics-alert-sample#create-an-alert

